
Making a backing plate
Depending on how your waterblock’s original clamping system worked you may wish to make a backing plate. Backing plates are designed to spread the pressure from the mounting holes, and support the motherboard behind the CPU socket. This stops the board bowing, but also requires physical contact with the motherboard, which means you need to take care of causing a short circuit.When cooler manufacturers make backing plates they usually put a sheet of foam or plastic between the backing plate and the motherboard. This is essential to prevent the tiny resistors on the back of the board from being crushed or short-circuited. If you decide to copy this part of the manufacturer’s design it’s absolutely essential that you use some form of insulation or padding to protect the motherboard or you’ll destroy your board, CPU, and who knows what else.
As long as you take precautions to stop this damage then there’s no reason not to use a backing plate. However, the support it provides is limited, and you may find it difficult to get your home made backing plate sandwiched between the motherboard and the motherboard tray.
If you can’t get it to fit then ditch the entire plate assembly and use the more simple method involving bolts and plastic washers. Under no circumstances install the backing plate without insulation, it will not work.
Designing the plate
The most important part of making your clamping plate is to get the correct material. The best candidate is a small offcut of sheet steel. Ideally you want a plate that’s 2 or 3mm thick. You can go thicker, but it will be more difficult to work with, and won’t provide you with any benefit. Don’t go any thinner than 2mm as then you’ll be in danger of the plate bending under pressure and losing its clamping force.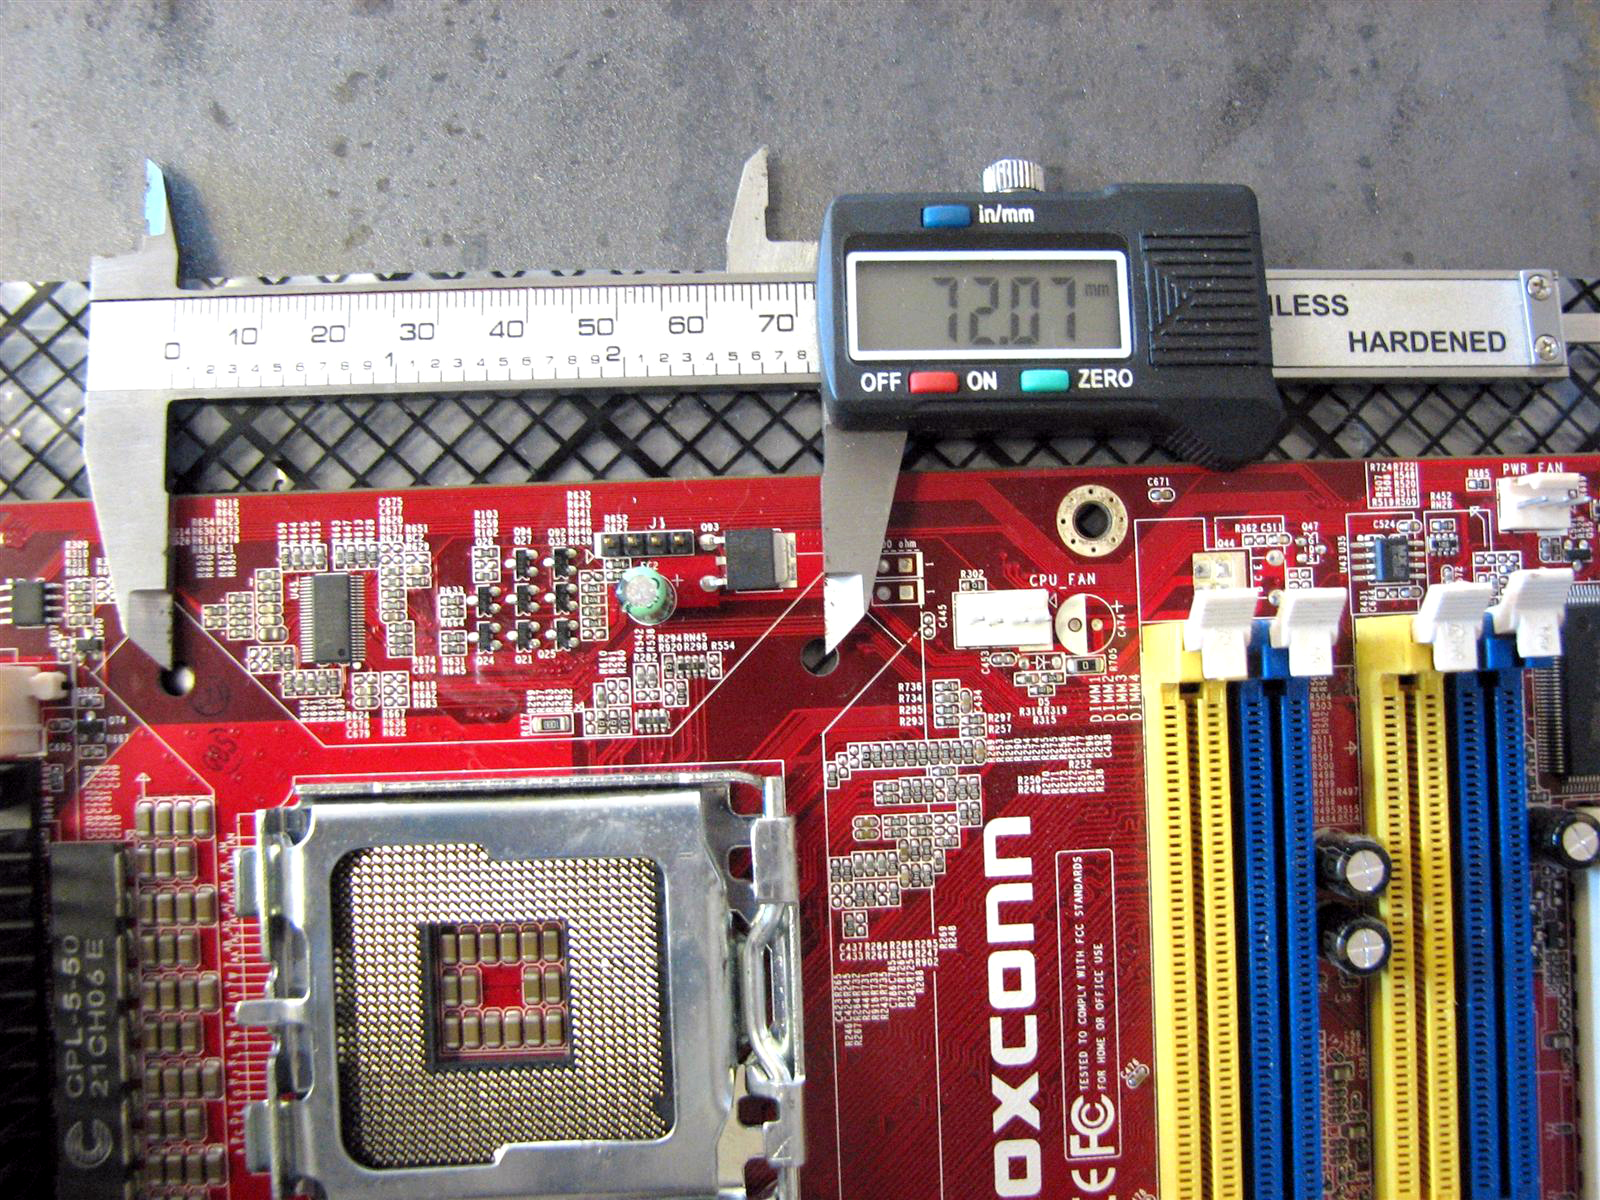
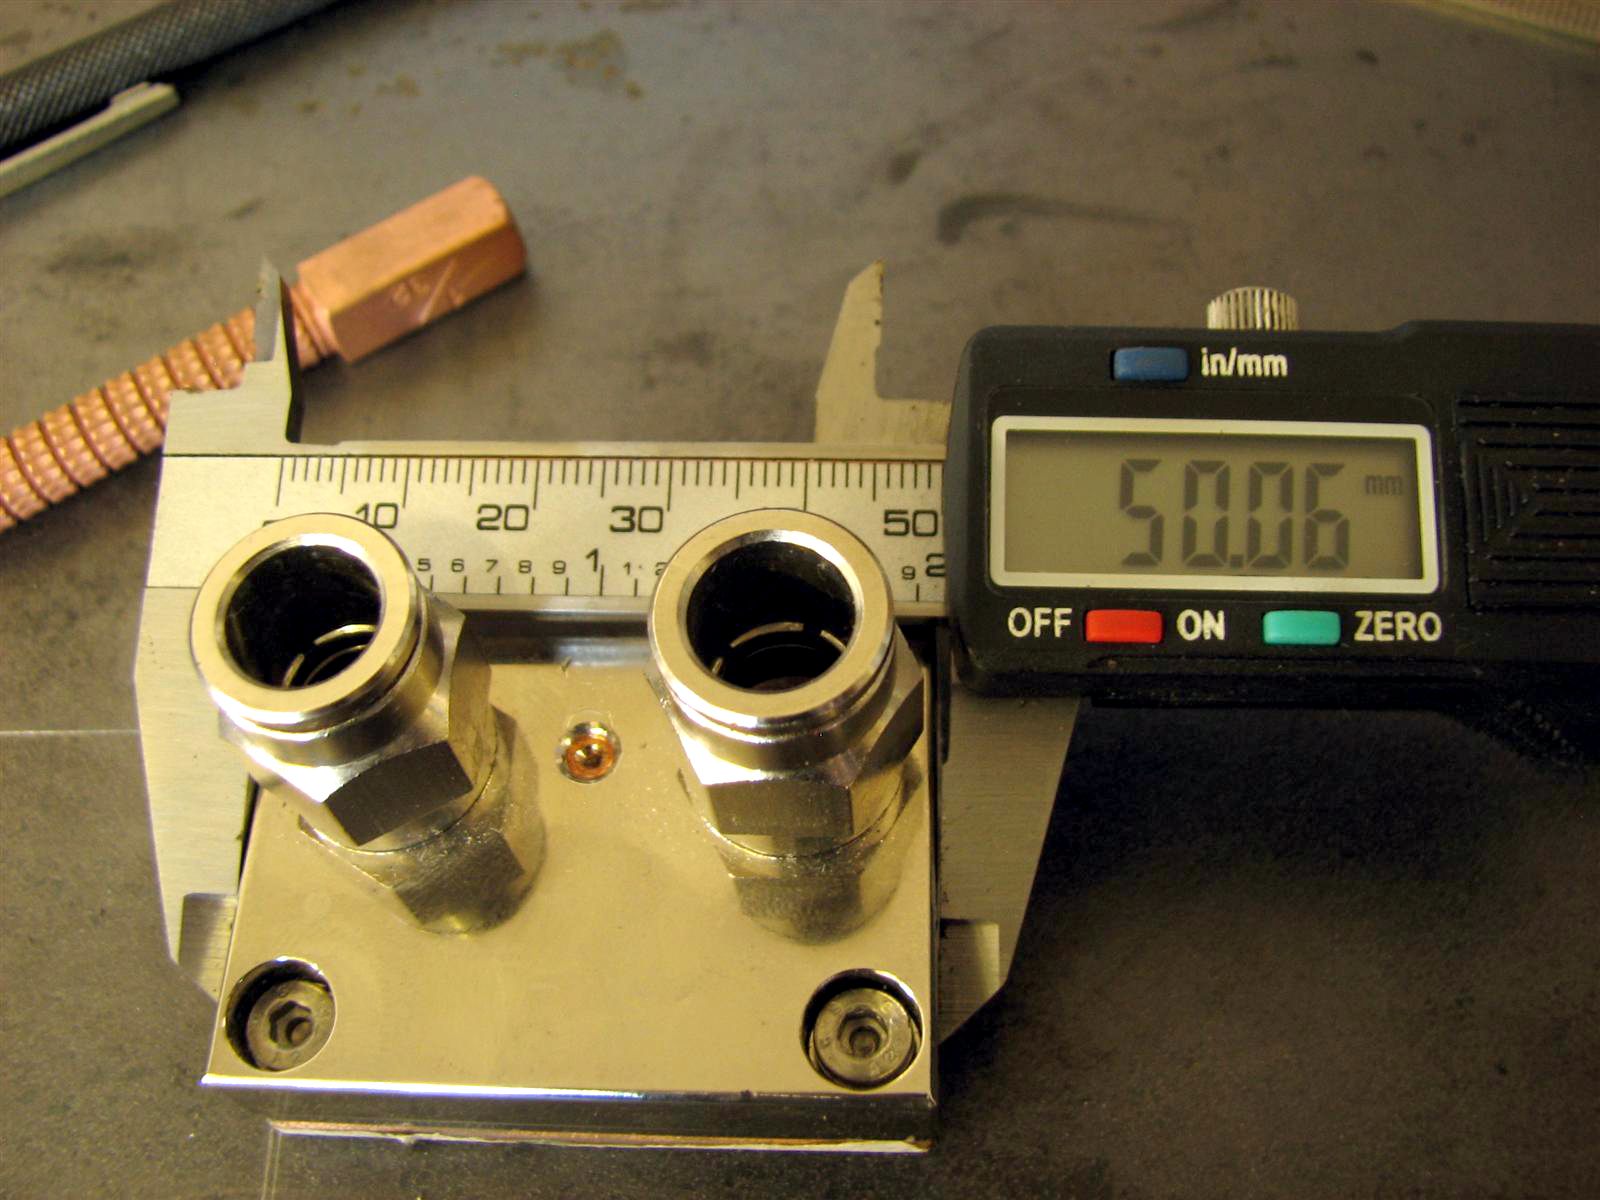
Measure both the board and the waterblock as accurately as you can so that the finished clamp fits perfectly
To make your plate you only need a small selection of tools. A drill with a 3 or 4mm bit and a metal cutting saw are essential. Other tools that may come in handy would be a scribe, square, and metal rule to mark out your pattern, a centre punch to get your holes drilled in the correct position, a file to smooth the edges and a sanding and polishing kit to shine up your finished pieces.
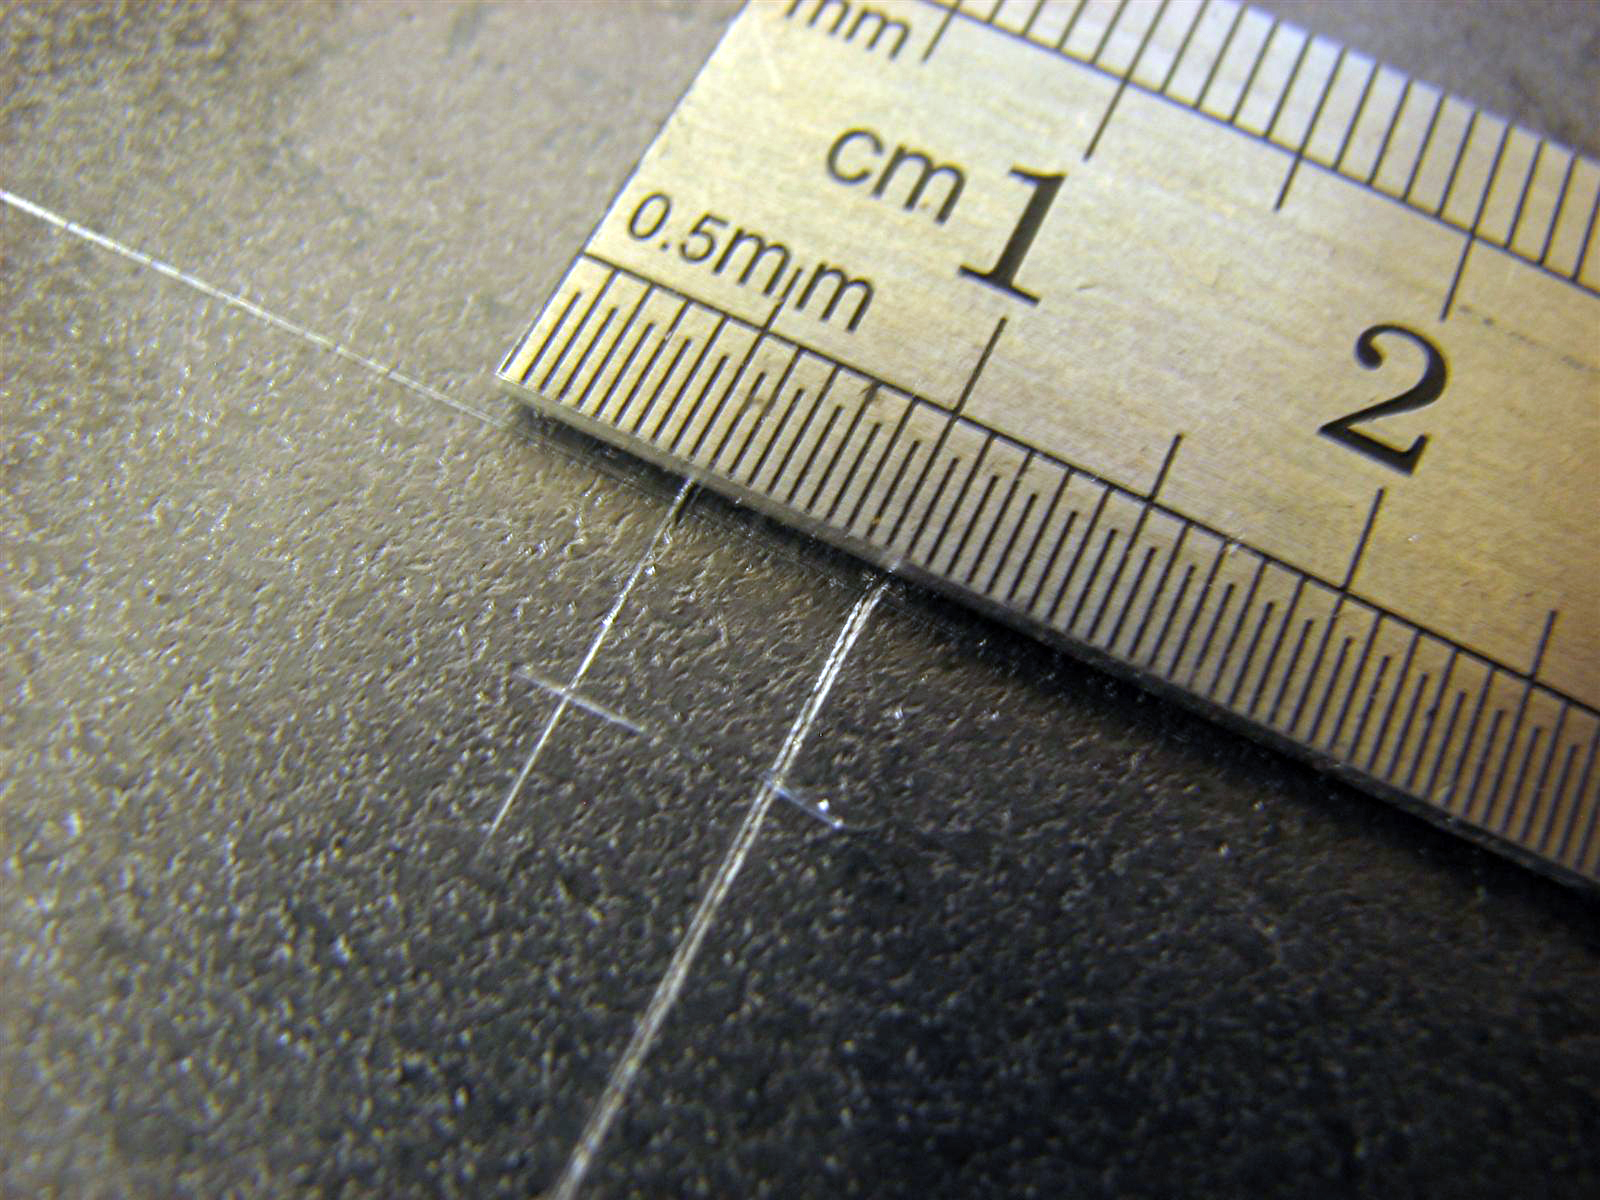
You need to take three sets of measurements, and they all need to be as close to exact as you can possibly manage. The first set of measurements is how far apart the mounting holes on your motherboard are. These will define the size of the clamping plate. Take the distance between all four and add 10mm to the vertical and horizontal measurements. This is the size of the plate you need. Inscribe these dimensions into your plate, making sure that the corners are all 90 degrees. Then mark out lines 5mm in from each edge, centre punch the intersections and drill all four out with a 3mm drill.
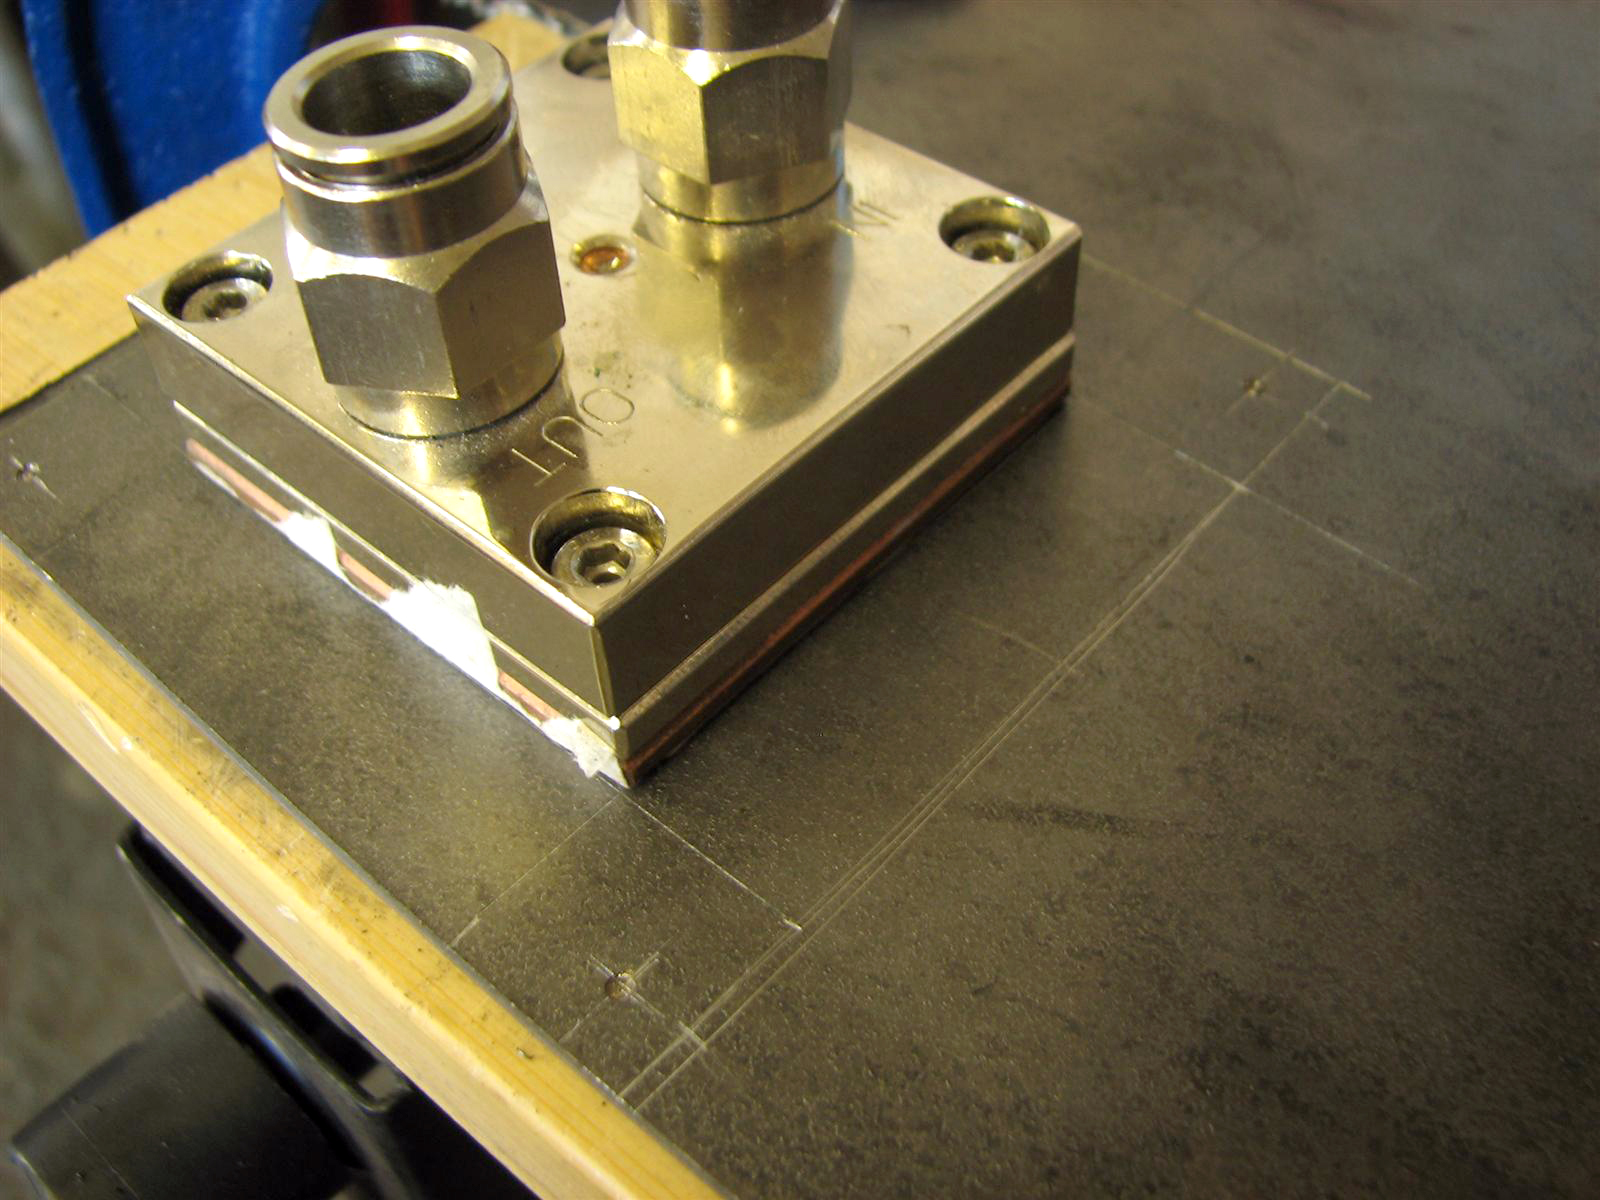
Left: leave yourself enough space between the bolt holes and the edge of the clamp plate; Right: Check your measurements against the block, but be careful not to scratch it


Left: using a centre punch will help you to drill your holes cleanly and precisely; Right: Our simple clamp plate is marked off on the steel sheet and ready to cut
RELATED ARTICLES


MSI MPG Velox 100R Chassis Review
October 14 2021 | 15:04

Want to comment? Please log in.