
Joe told me I needed a lot of teaching, so he didn't just show me one thing, he showed me two. Thanks, Joe, I think...
I have seen a lot of Joe's projects, and quite often, they feature custom reservoirs and distro plates with tapped G1/4 threads. This allows him to use fittings straight into the custom part. Now, I know how to tap metals, but I have never tapped acrylic, so I thought it would be good to see if there is anything different in the technique.
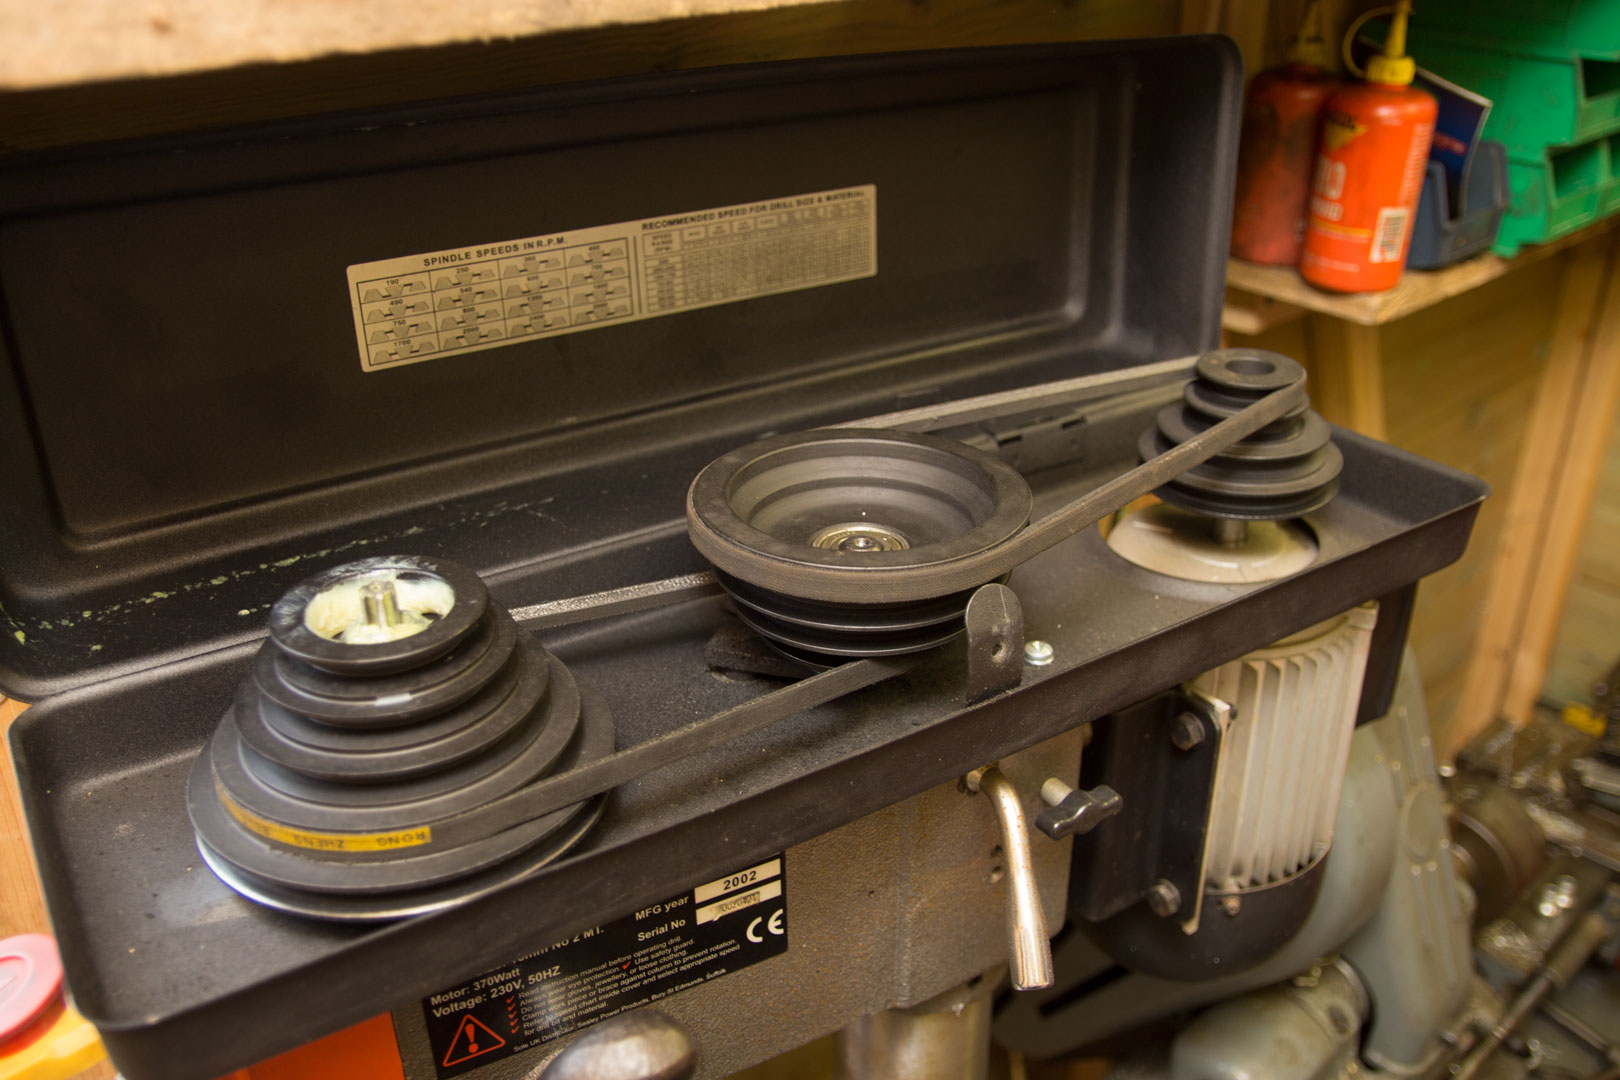
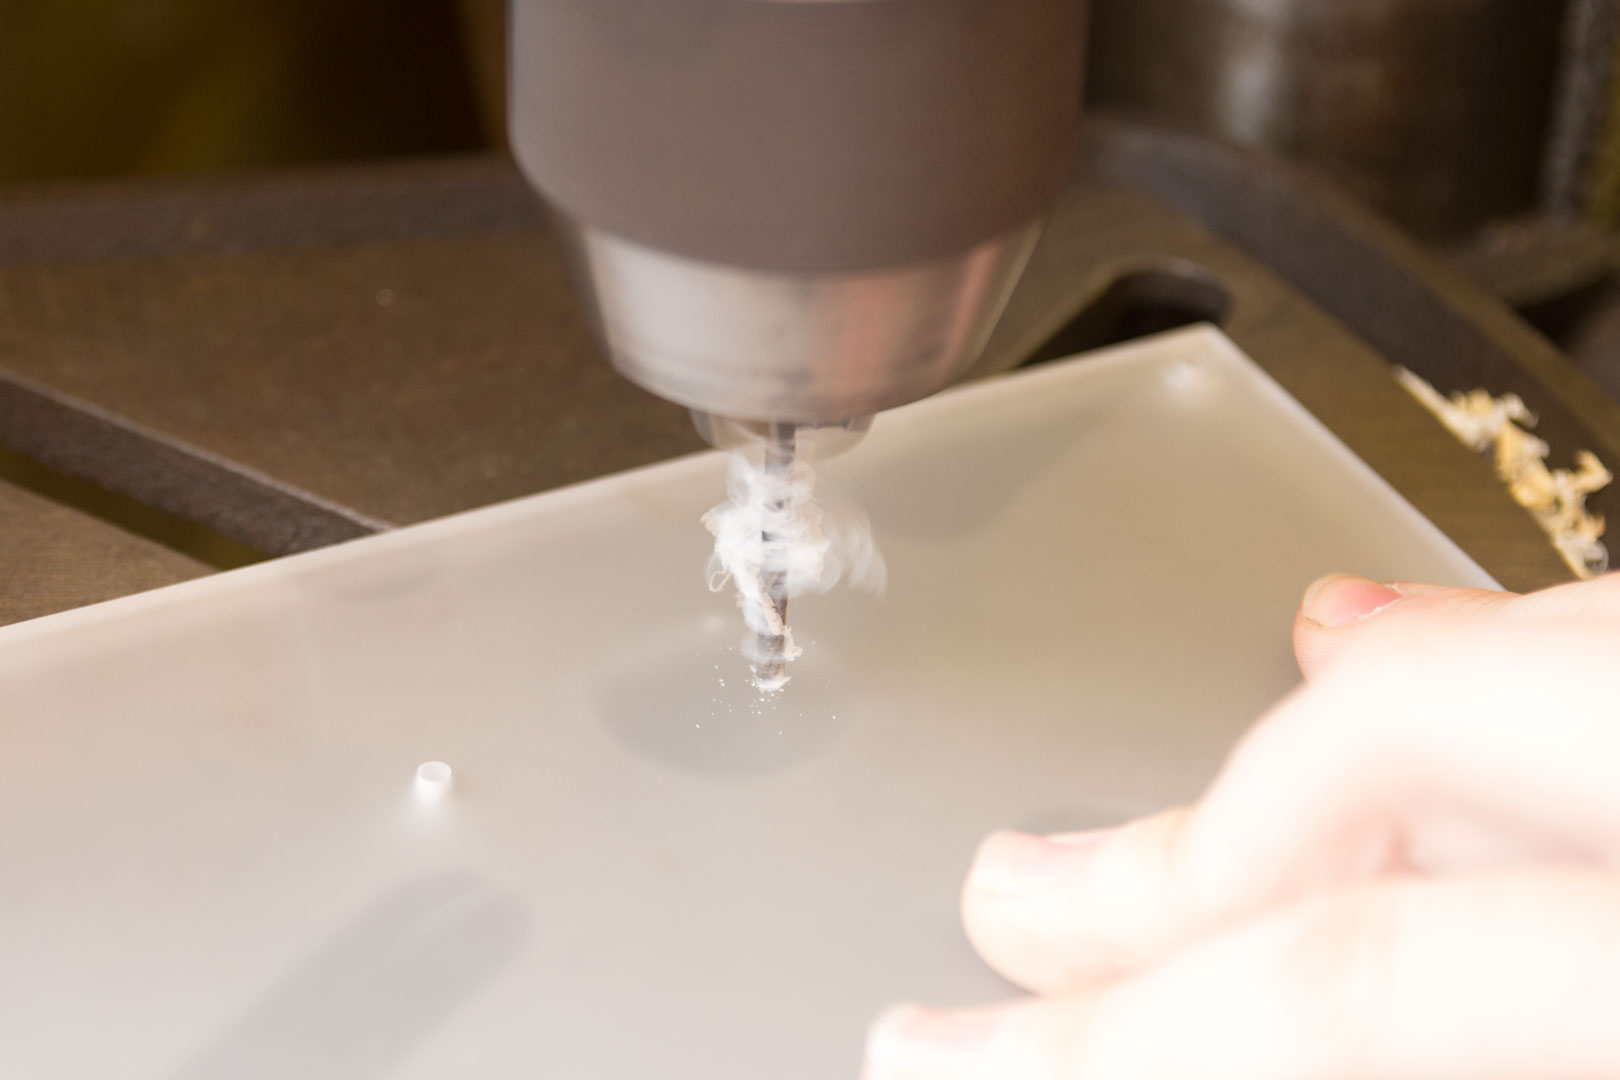
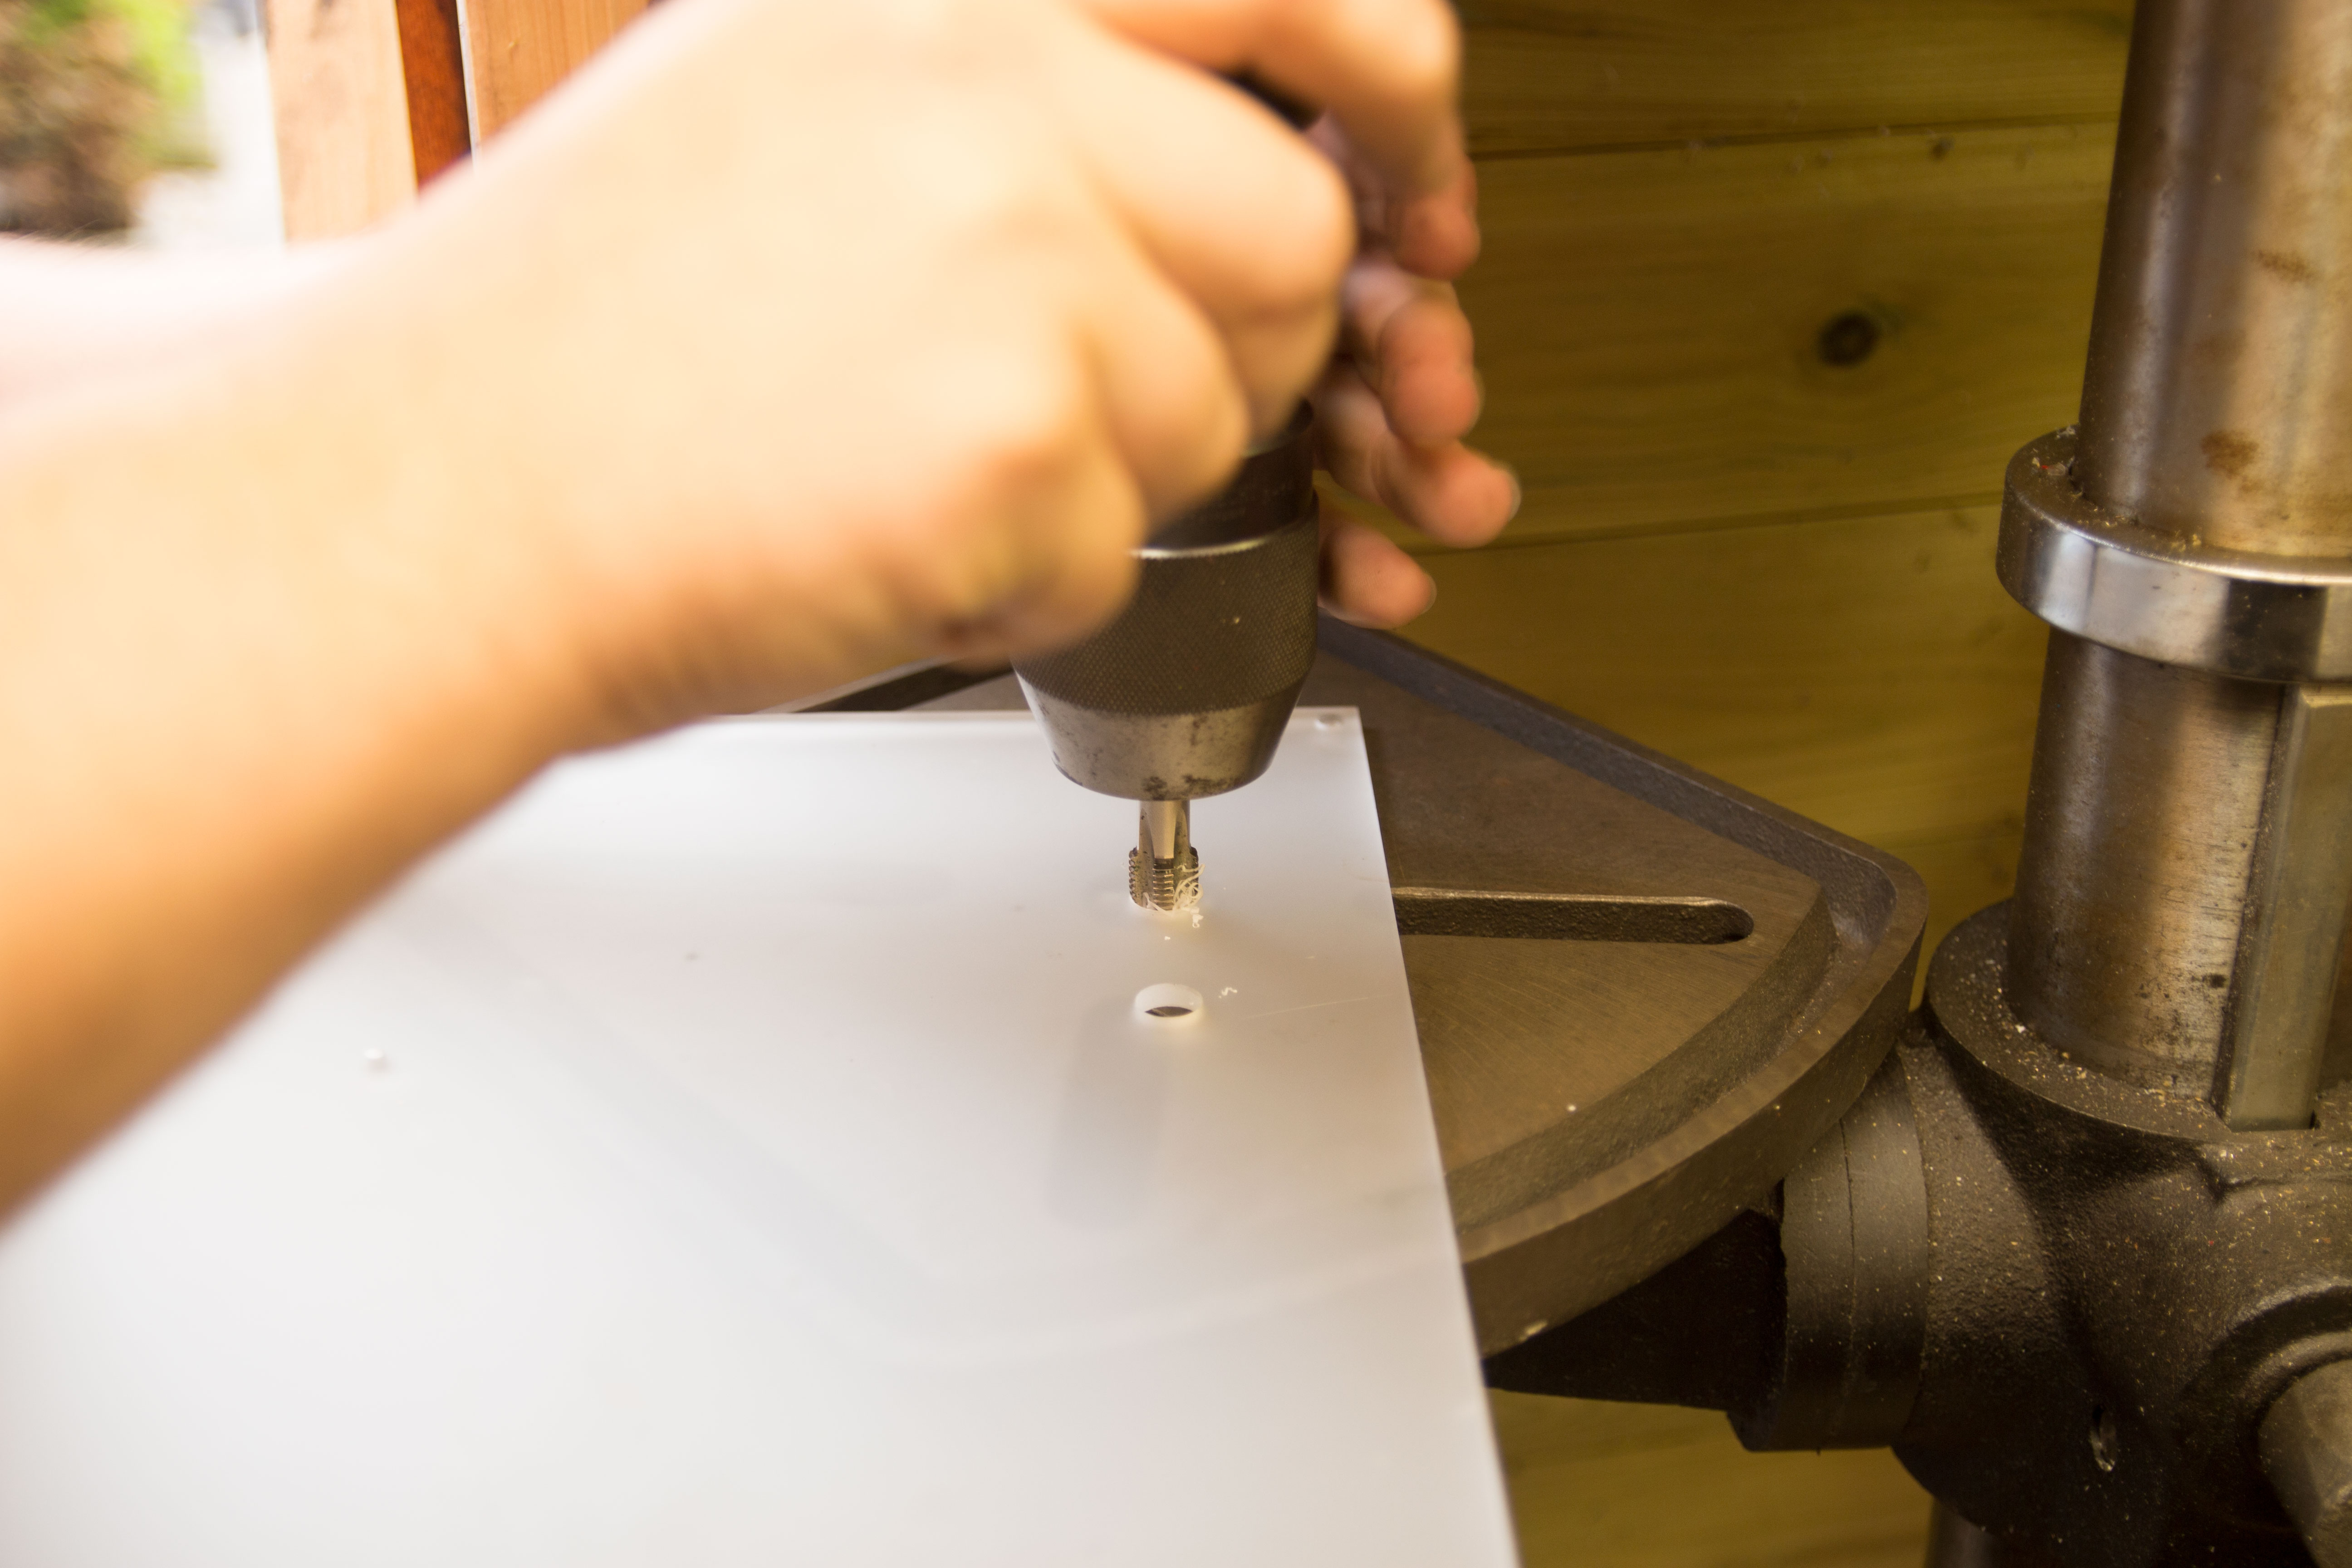
The first job was to drill the holes where we wanted the fittings to go. In this instance, we were just using some scrap acrylic, so it didn't really matter where the holes were, but if we were doing this correctly, we would have been measuring where we needed the holes first. We were using a pillar drill for this job, and Joe mentioned that it is always worth drilling acrylic at a slower speed to stop it cracking. With the pillar drill we used, there is a series of bands that can be placed on different rungs to increase or decrease the speed.
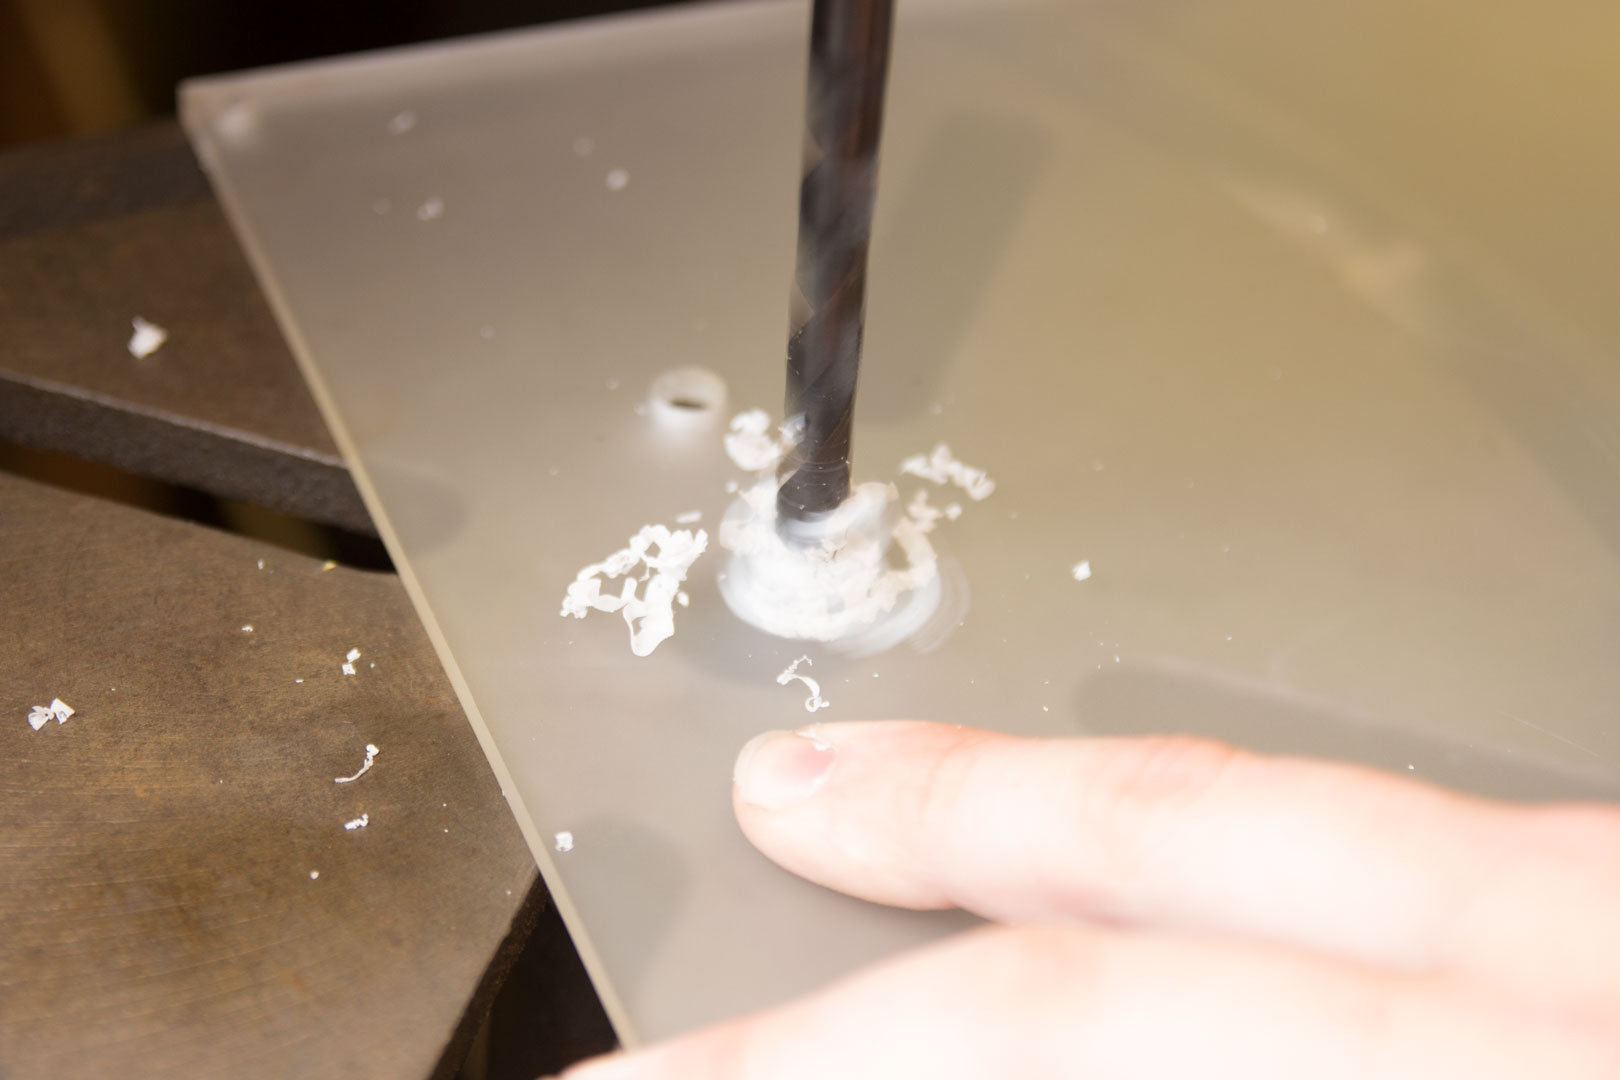
We started off with a small drill bit and increased in size to make sure that we didn't crack the acrylic. We increased the size to 11.8mm which is a decent size for a G1/ 4 tap.
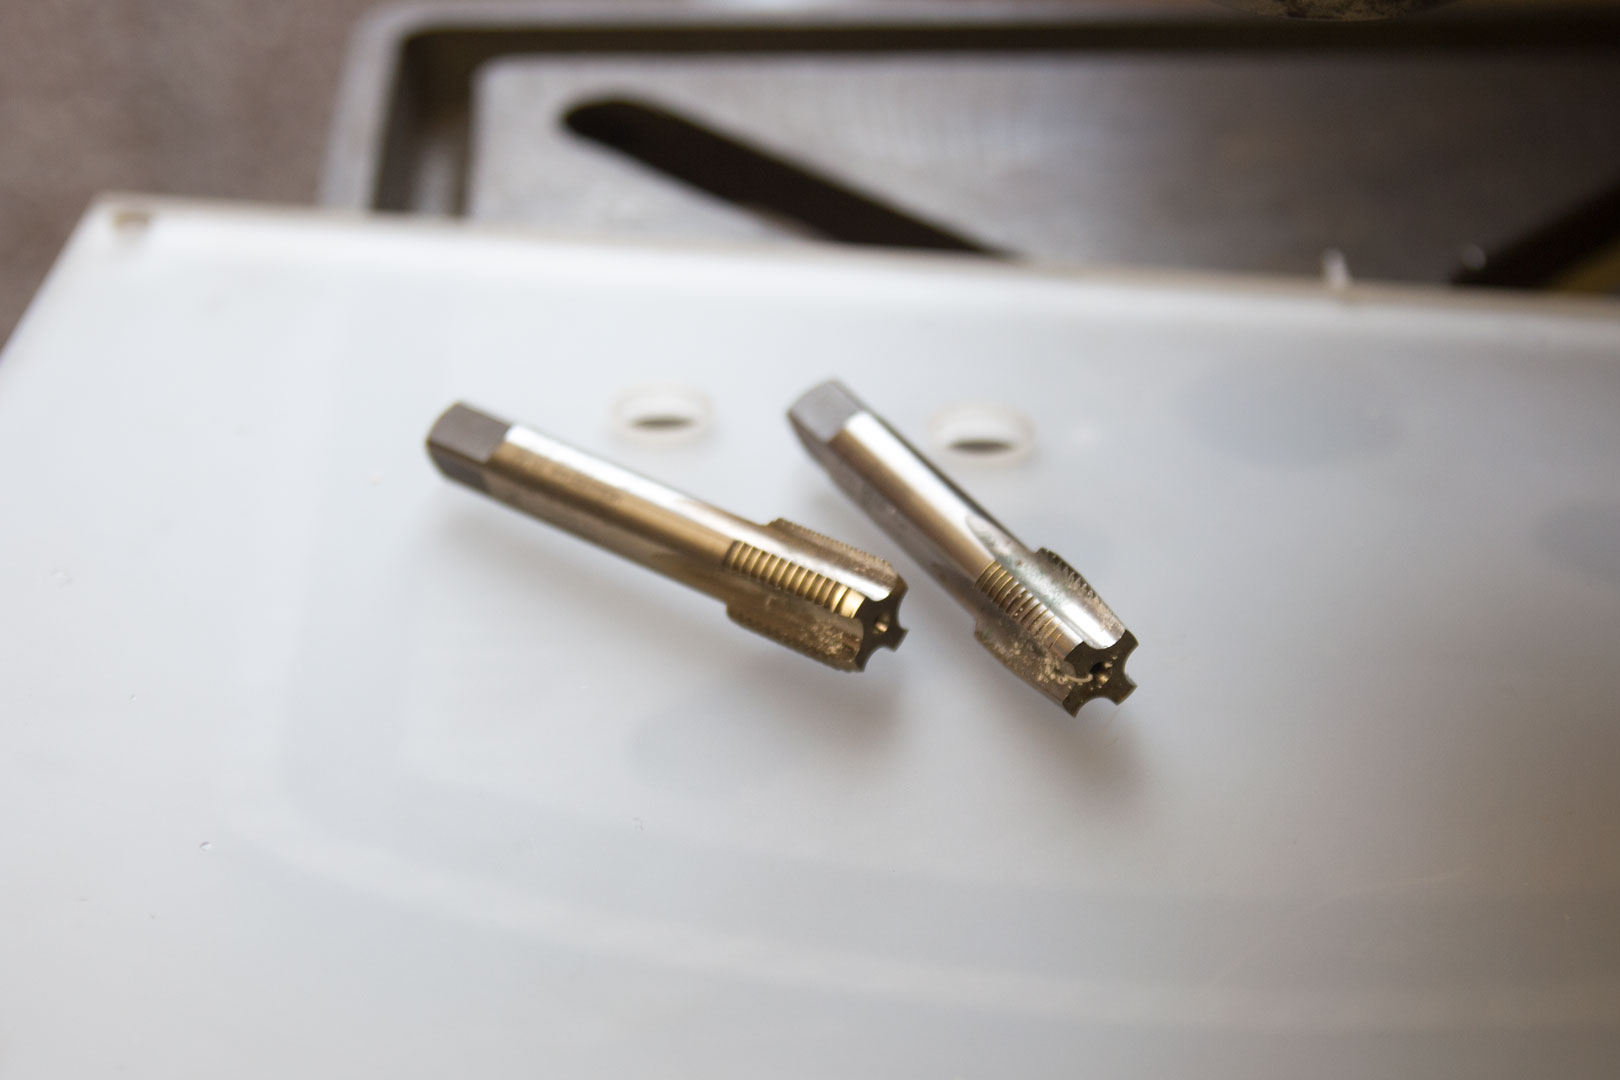
We are going to be using two different G1/4 taps. The first is tapered to help create the thread. We put the tap into the pillar drill and turned the drill by hand so we had full control over the tap.
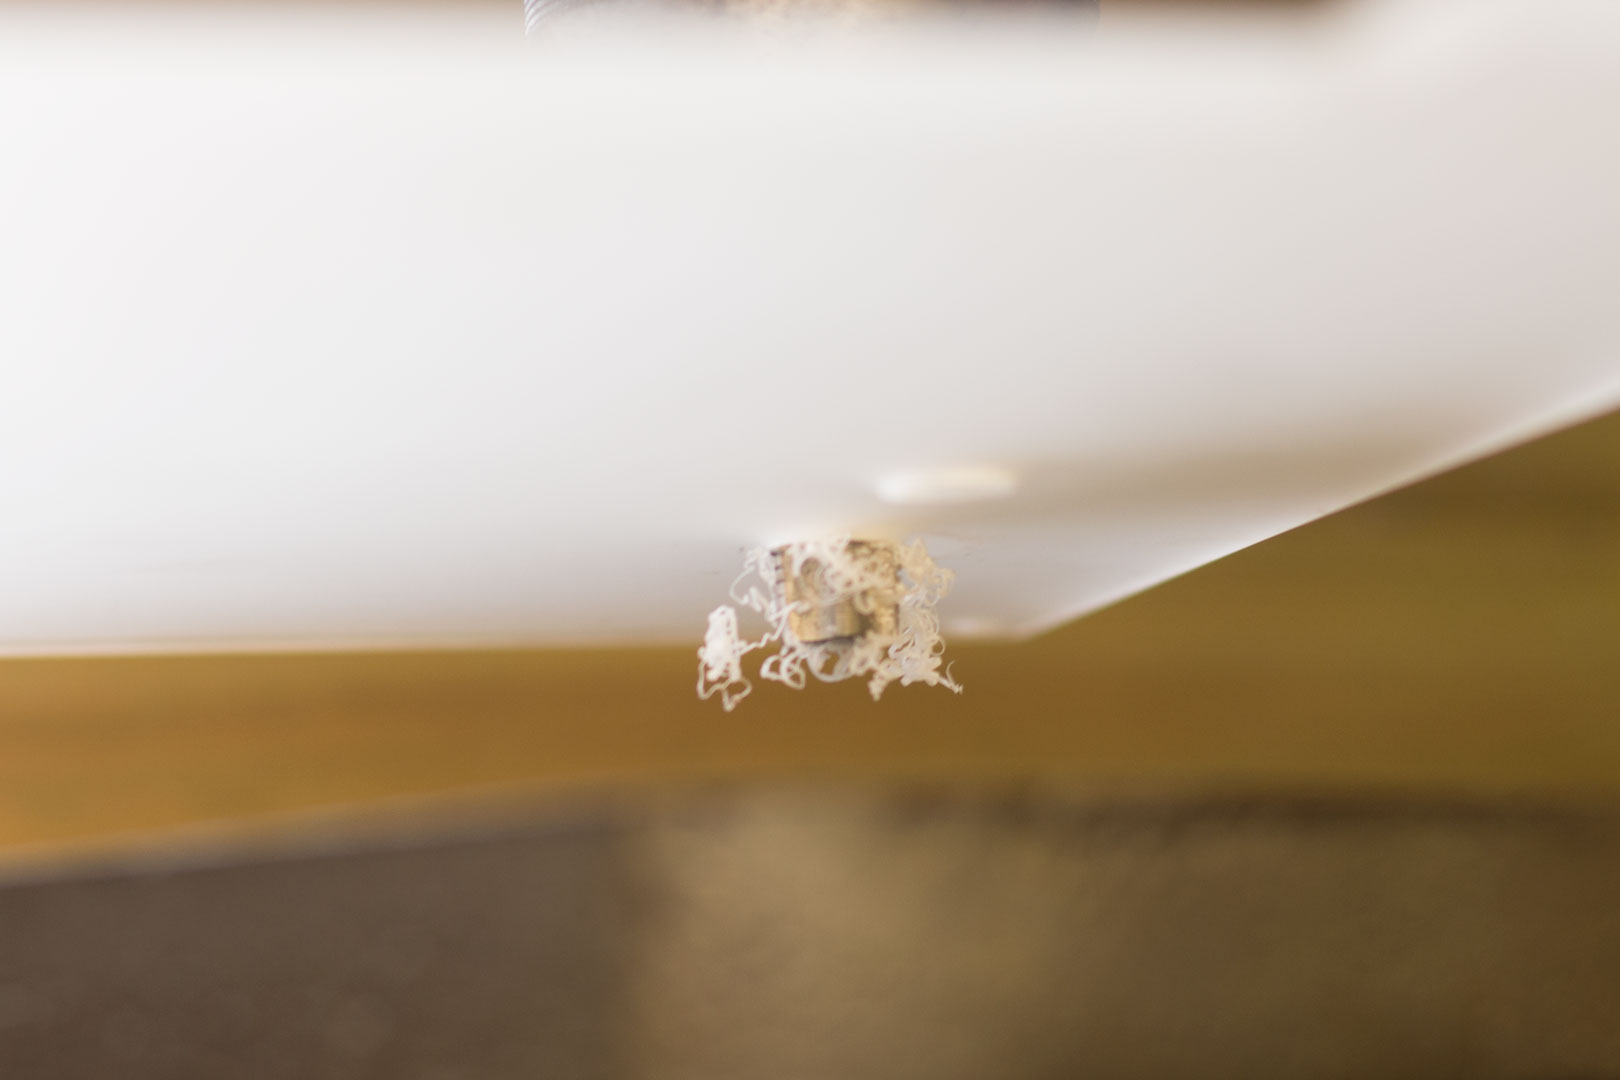
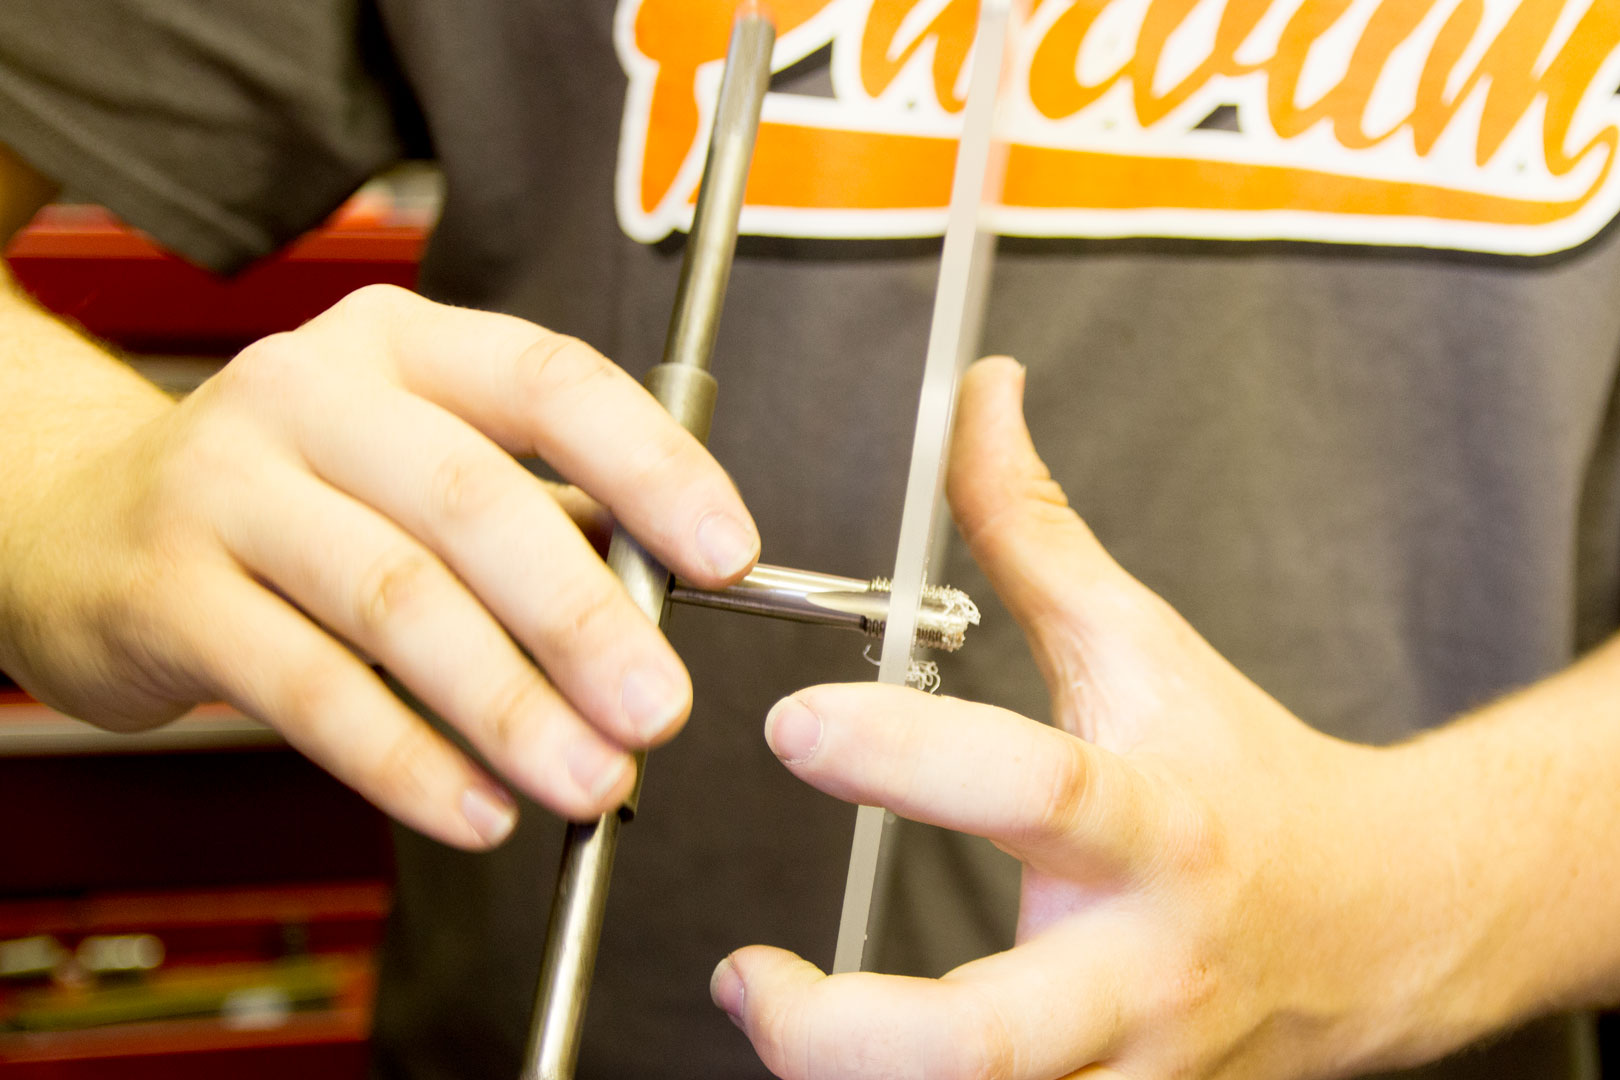
Once the tapered tap had gone through the acrylic, we backed it off and then used the straight tap to clean the thread up properly. We did this by hand to get even more control.
Joe did the first tap and then told me to do one. I learn best from doing, so I was happy to have a crack at it. As with a lot of things, it's easy when you know how, and it was done rather quickly!
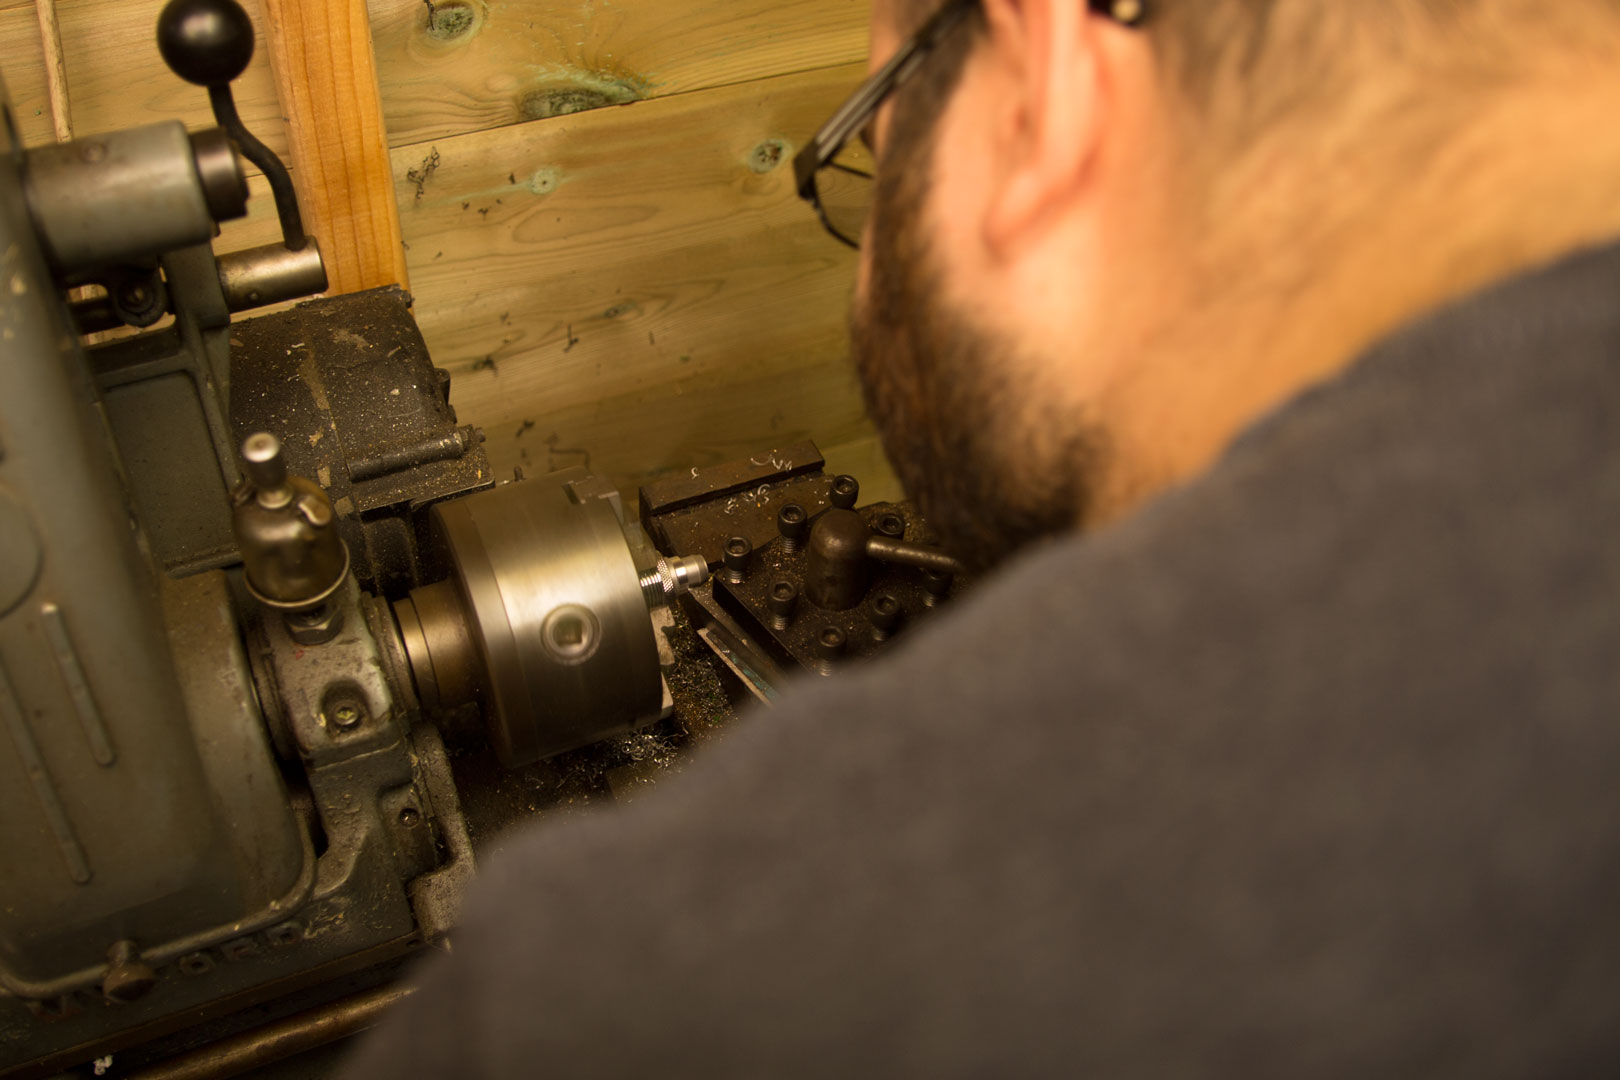
Next, Joe had been sent some rather nice goodies from EKWB. EK recently released aluminium liquid-cooling kits, and Joe had a couple to play with. The kits come with compression fittings that are used with soft tubing. Joe wanted to try to make them look a little more streamlined to get the look that he wanted for one of his builds. He also just so happens to have a lathe, so he can do jobs like this really easily. I have only ever used lathes on things that really don't matter, so this would be interesting!
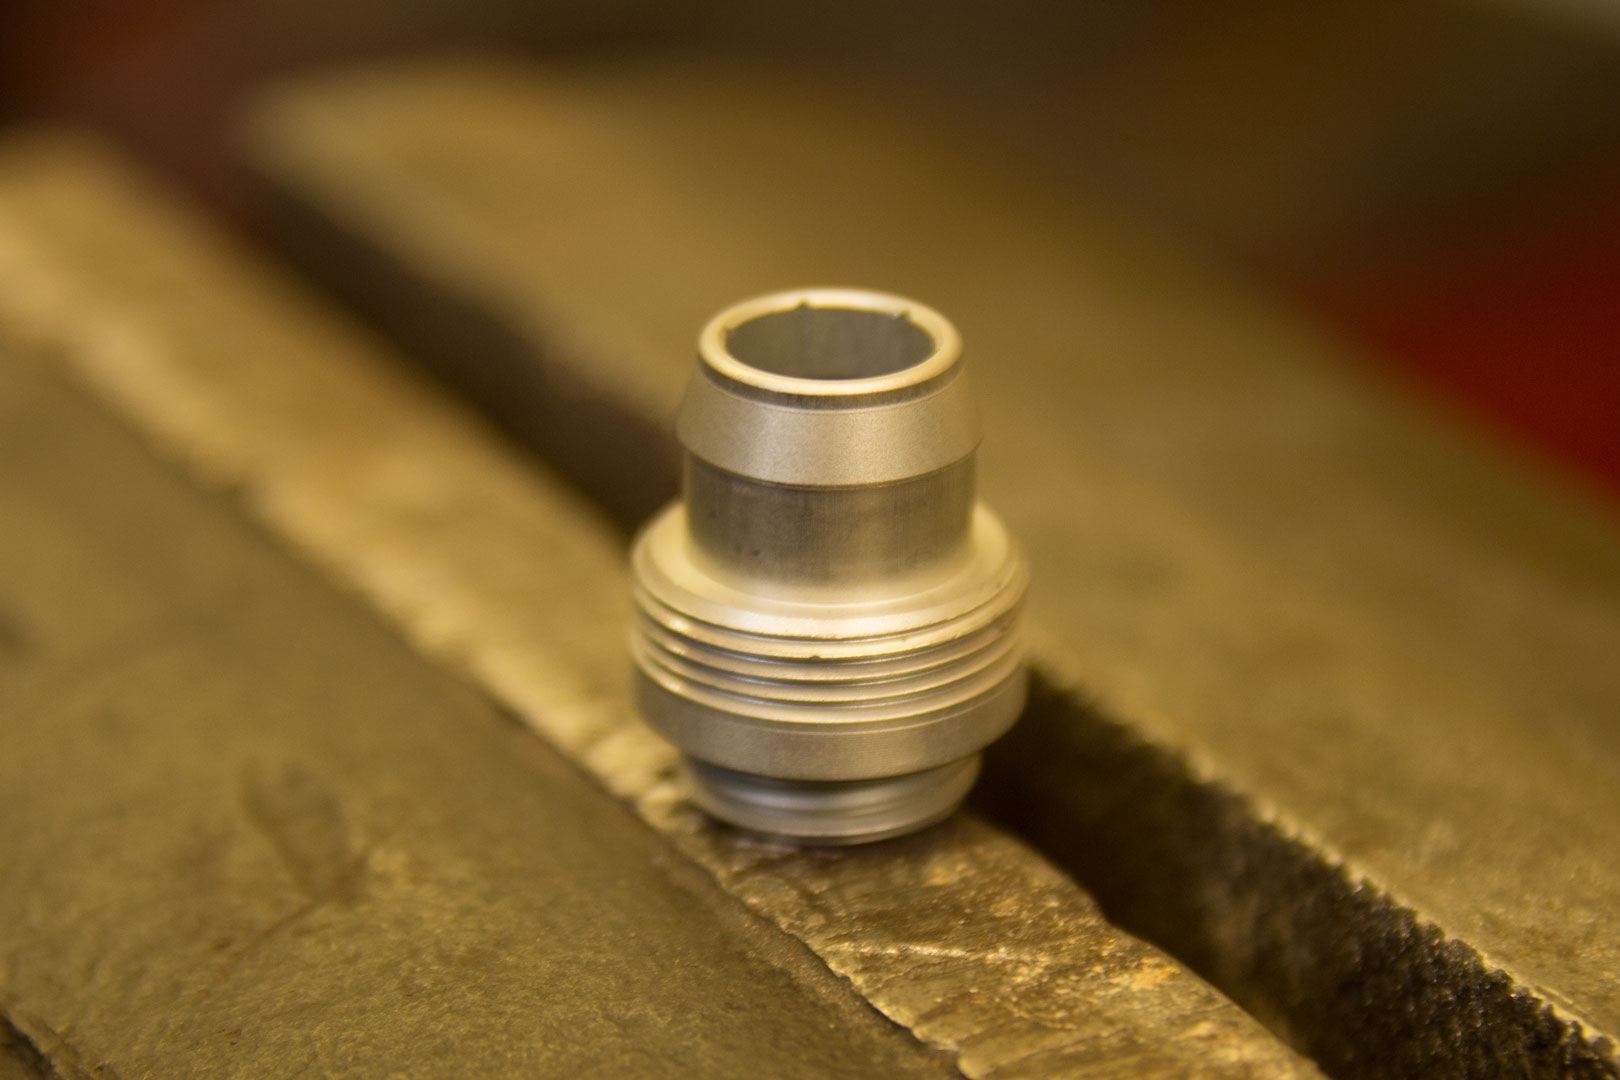
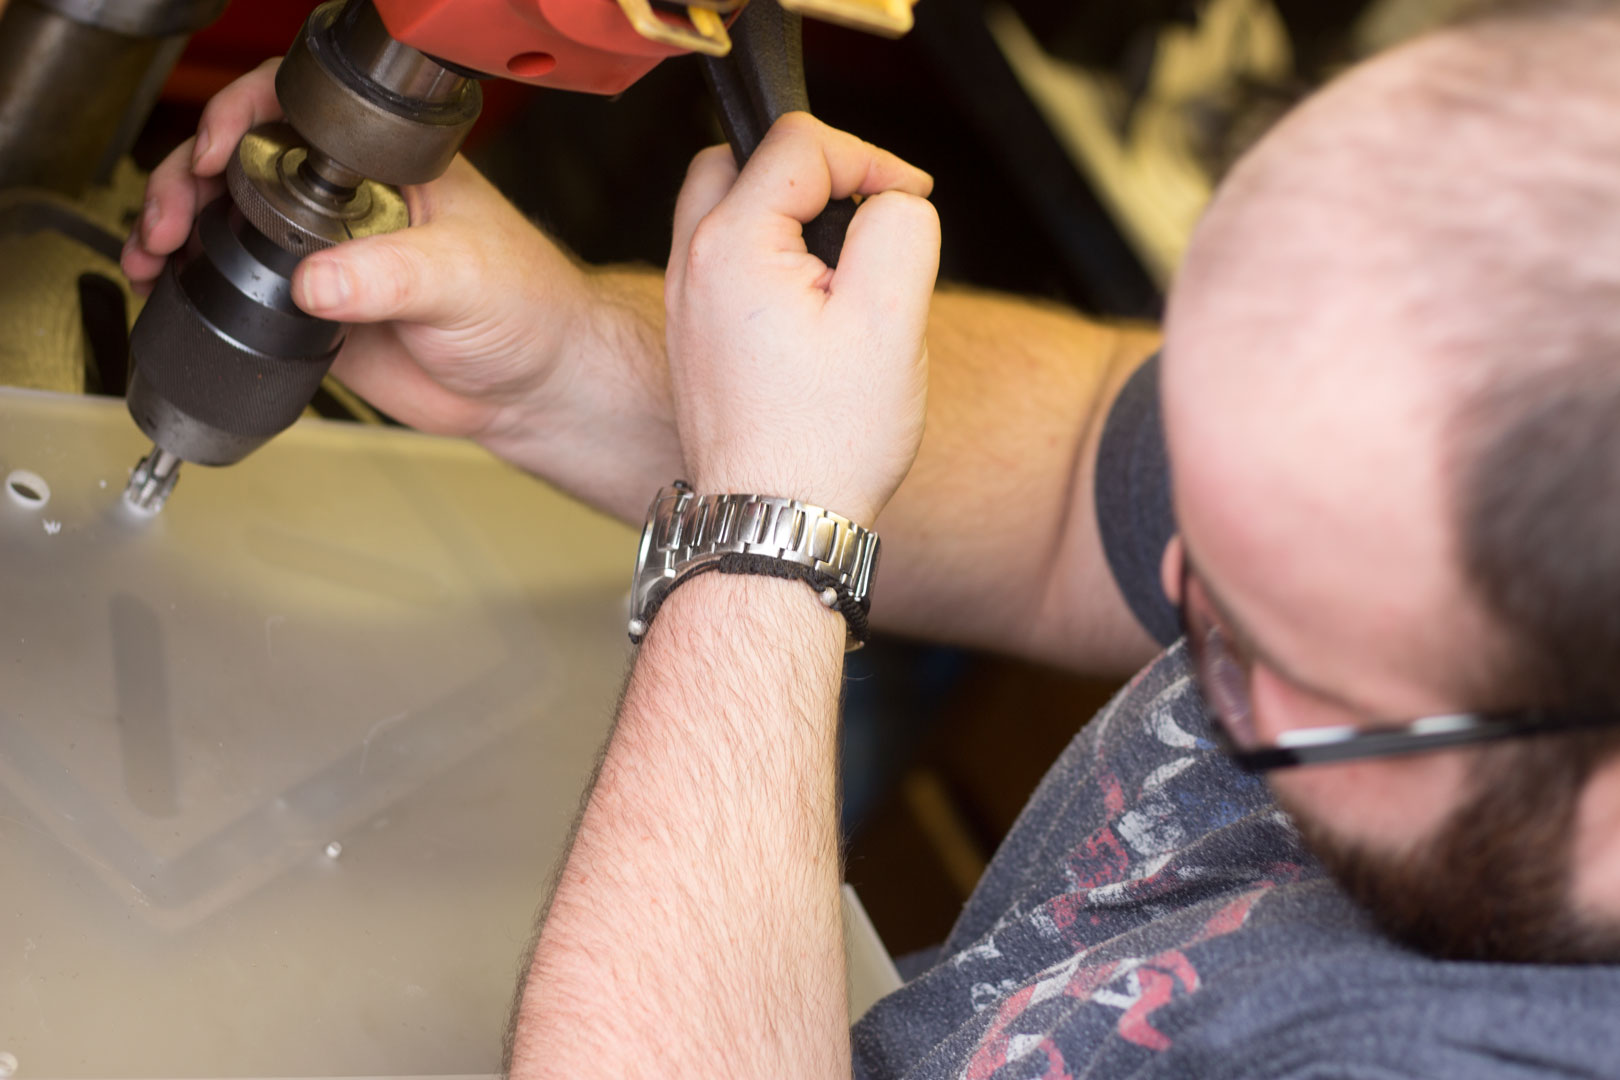
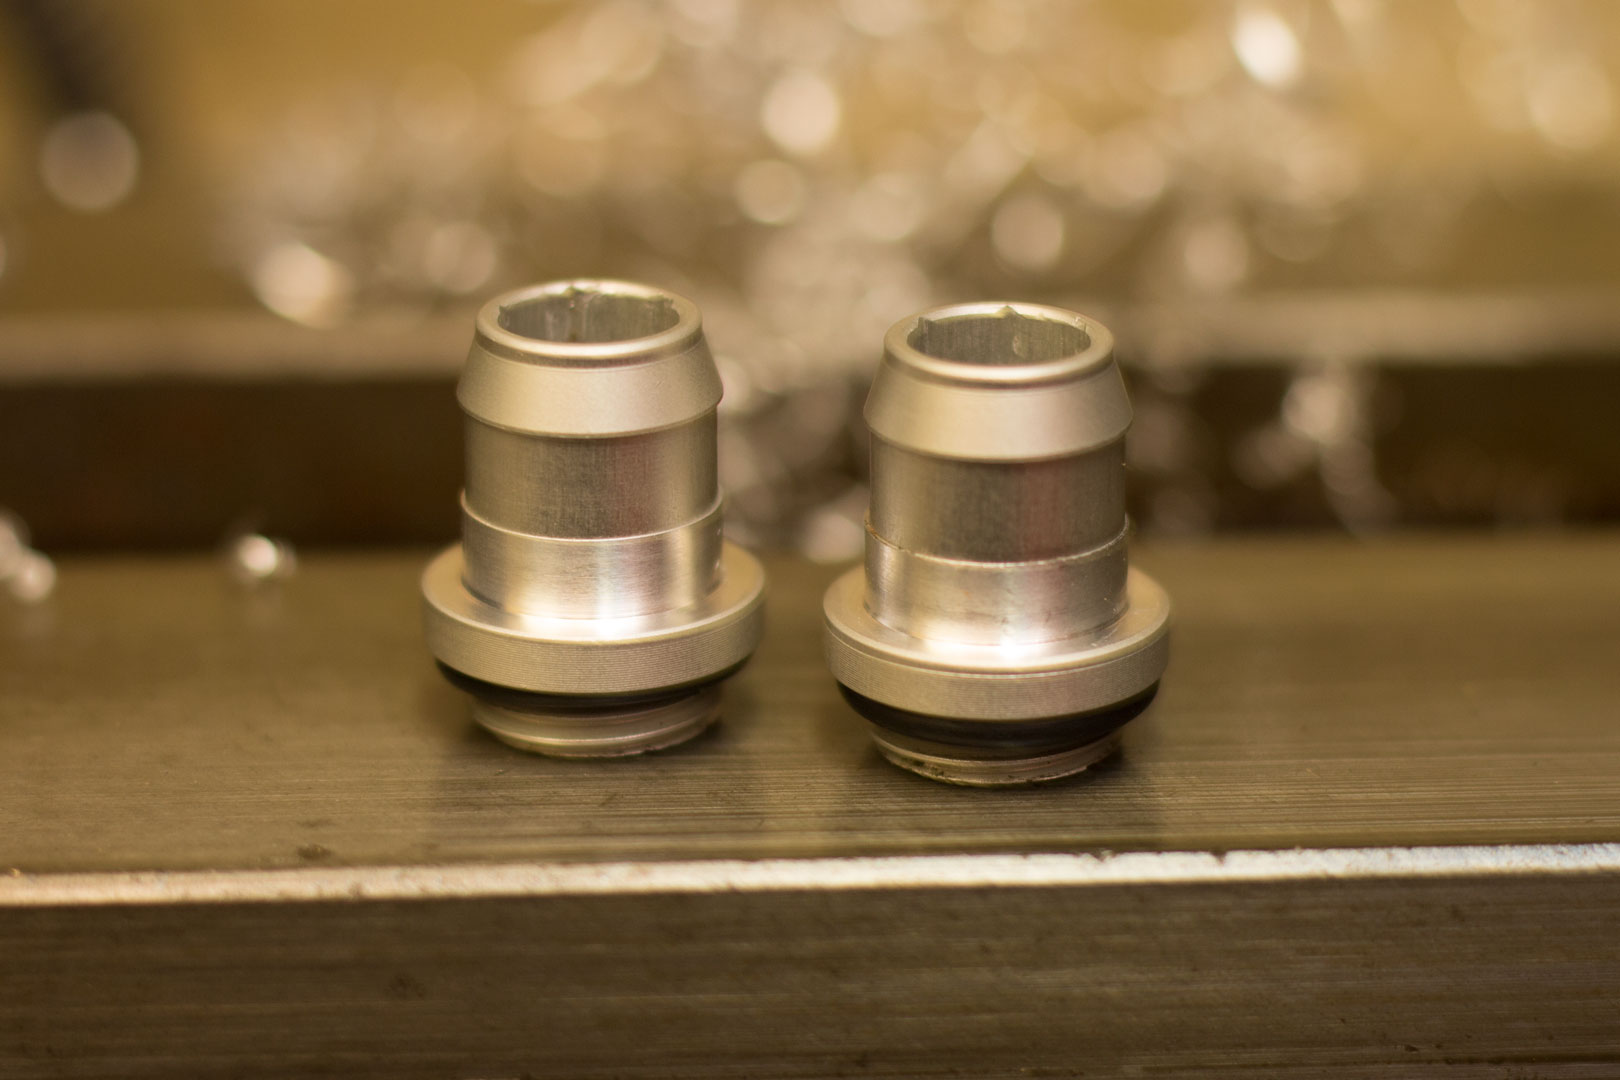
This is one of the fittings that is going to be attacked. Basically, we are going to be using the lathe to take off the outside thread. This will mean these are no longer compression fittings and are just barbs, but that isn't a problem; they will be slightly wider than usual so that the tubing holds strong. The first job is to put the fitting on the lathe. Joe used an old pass-through fitting to hold it so that the lathe doesn't damage anything.
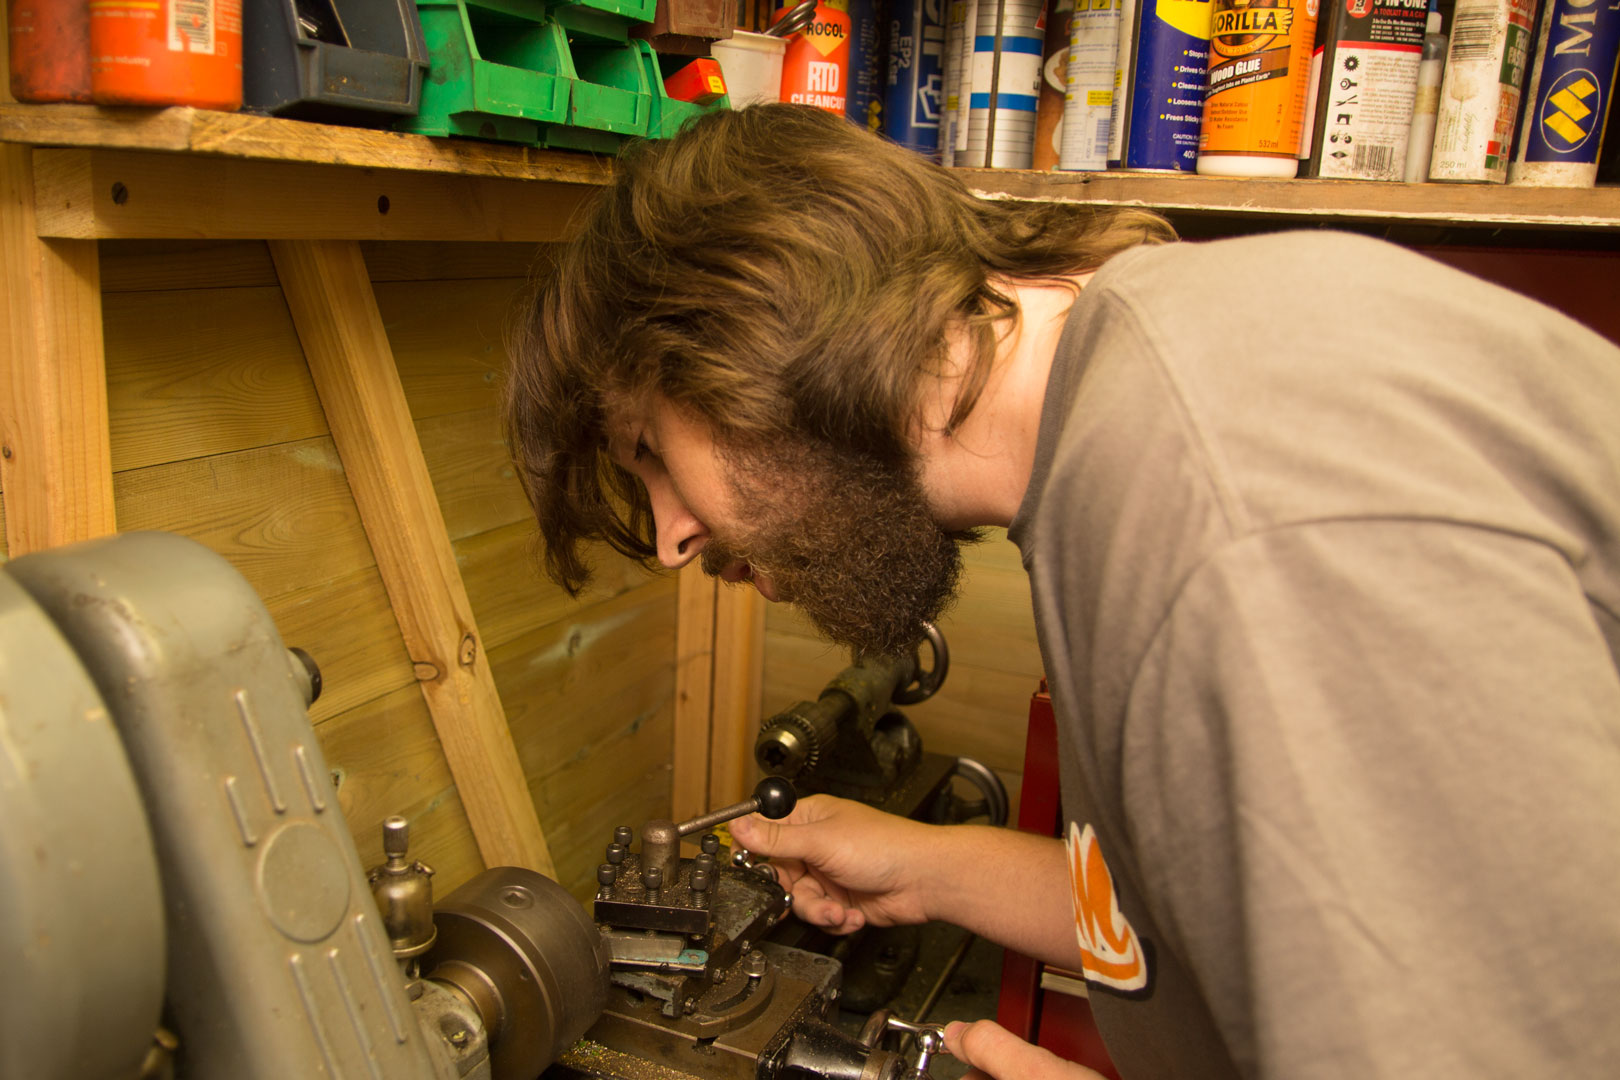
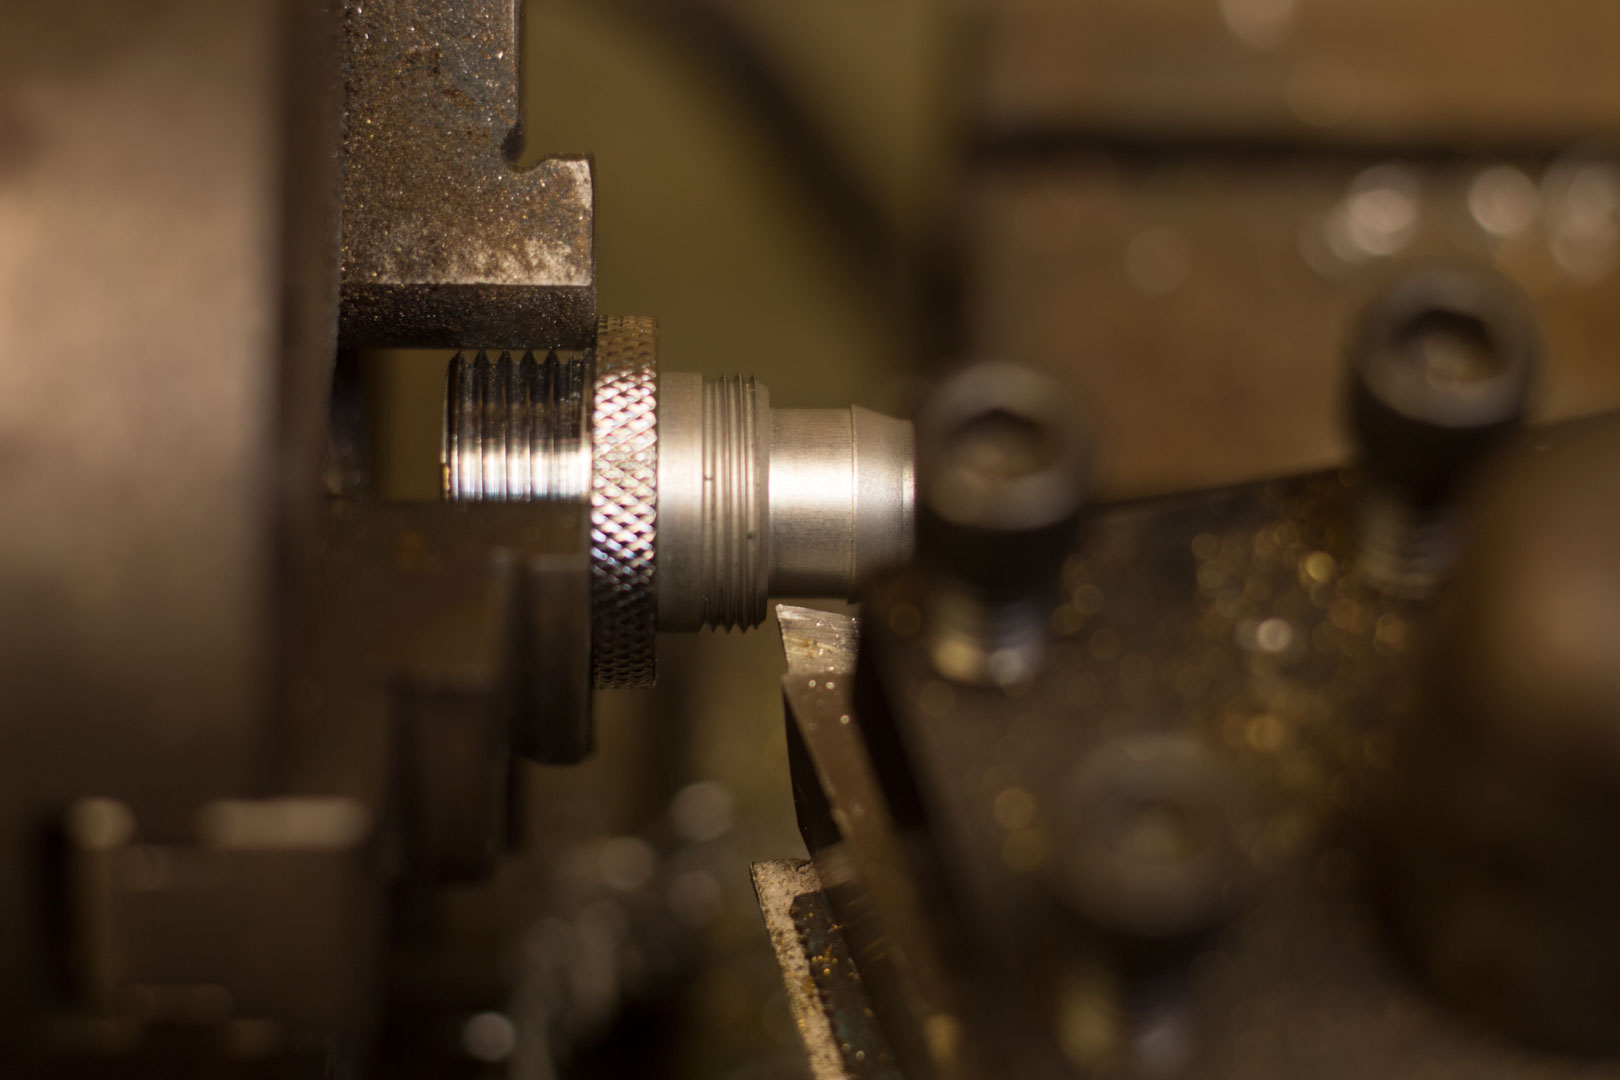

Joe then used the lathe to remove the thread. You don't go crazy here, you make multiple passes and let the lathe do all the work. It does take a little while, as you want to ensure that everything is clean and concise. I was surprised at how accurate you could be with the lathe; you can literally take hundredths of a millimetre away if you want.

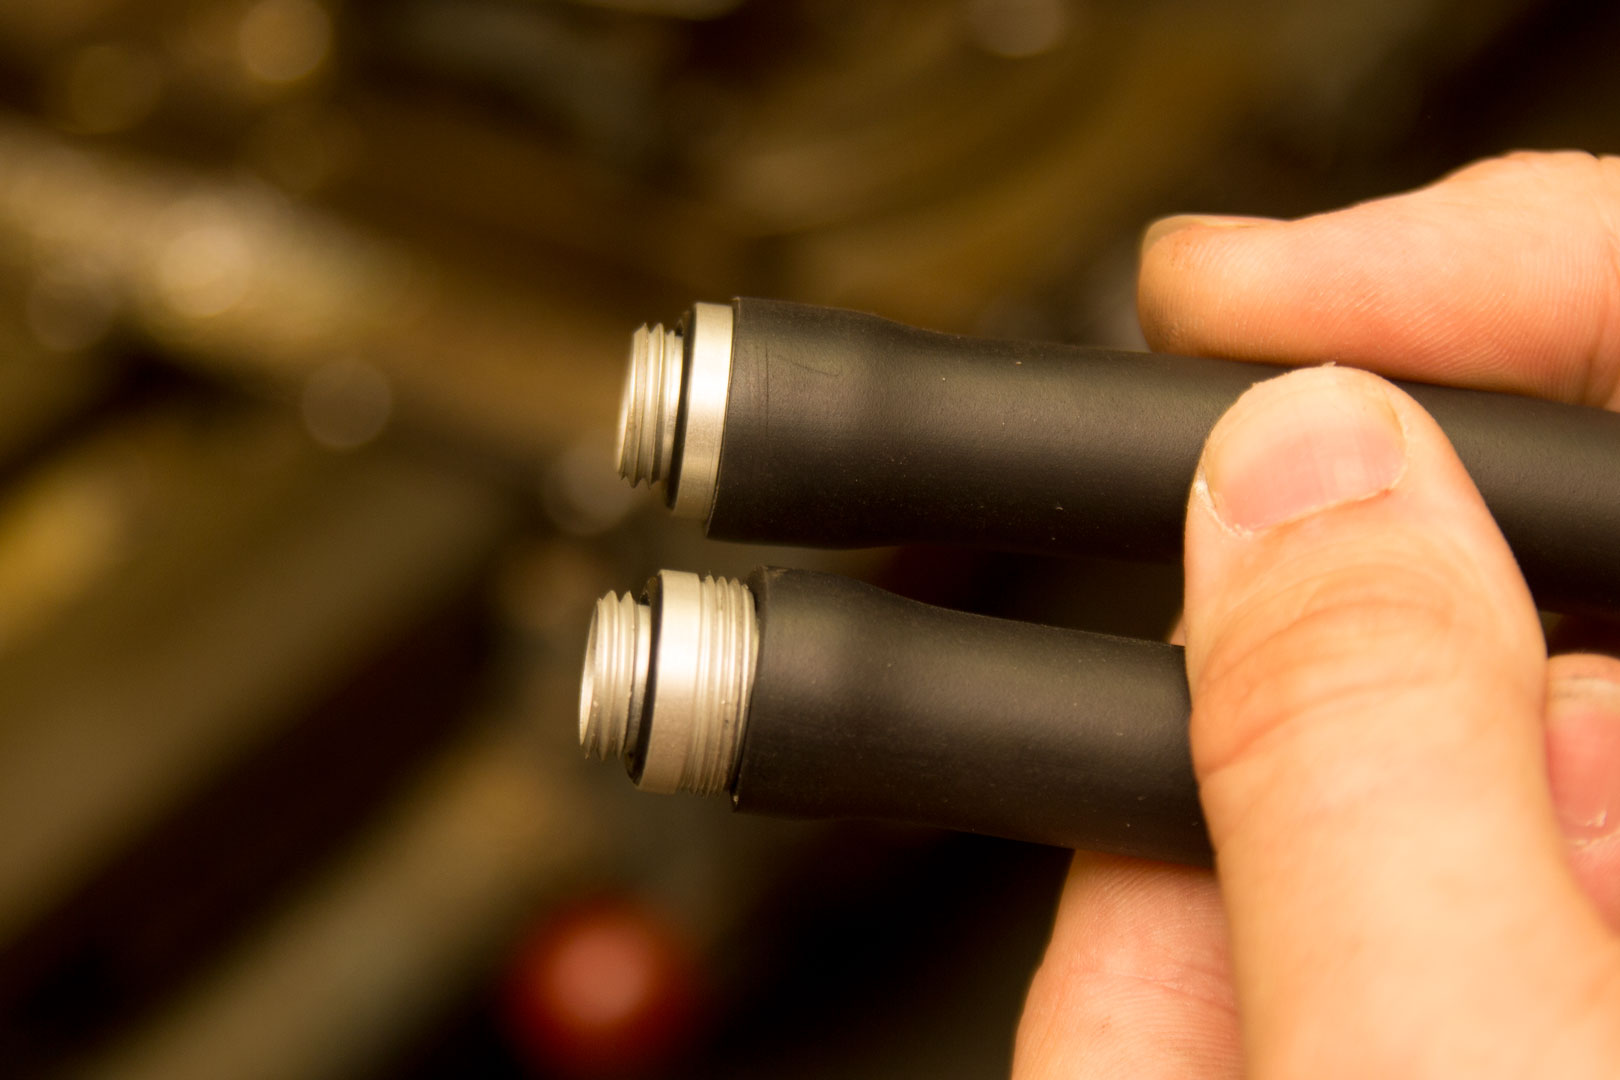
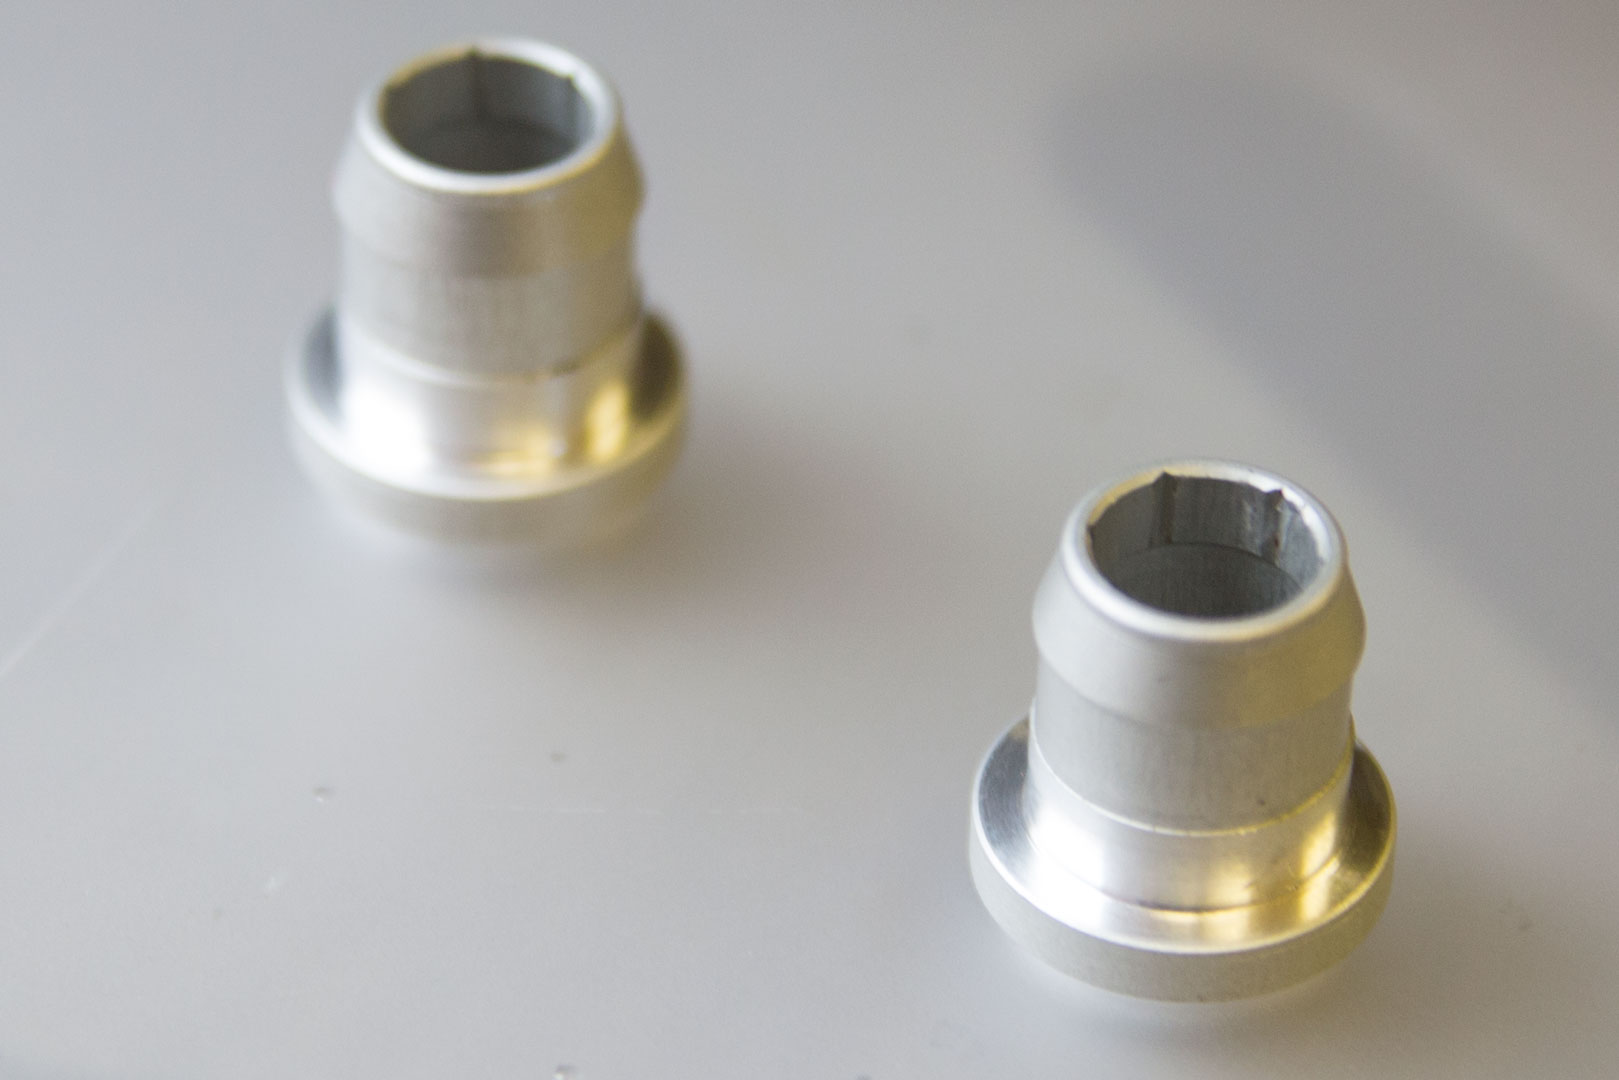
The finished product looked great, and you can see the difference from the starting fitting to the end result as well as what they will look like inside the tubing. Once again, Joe wanted me to have a go. I was a bit worried about this, as this was actually for one of Joe's projects that he is currently working on. I really didn't want to mess it up!
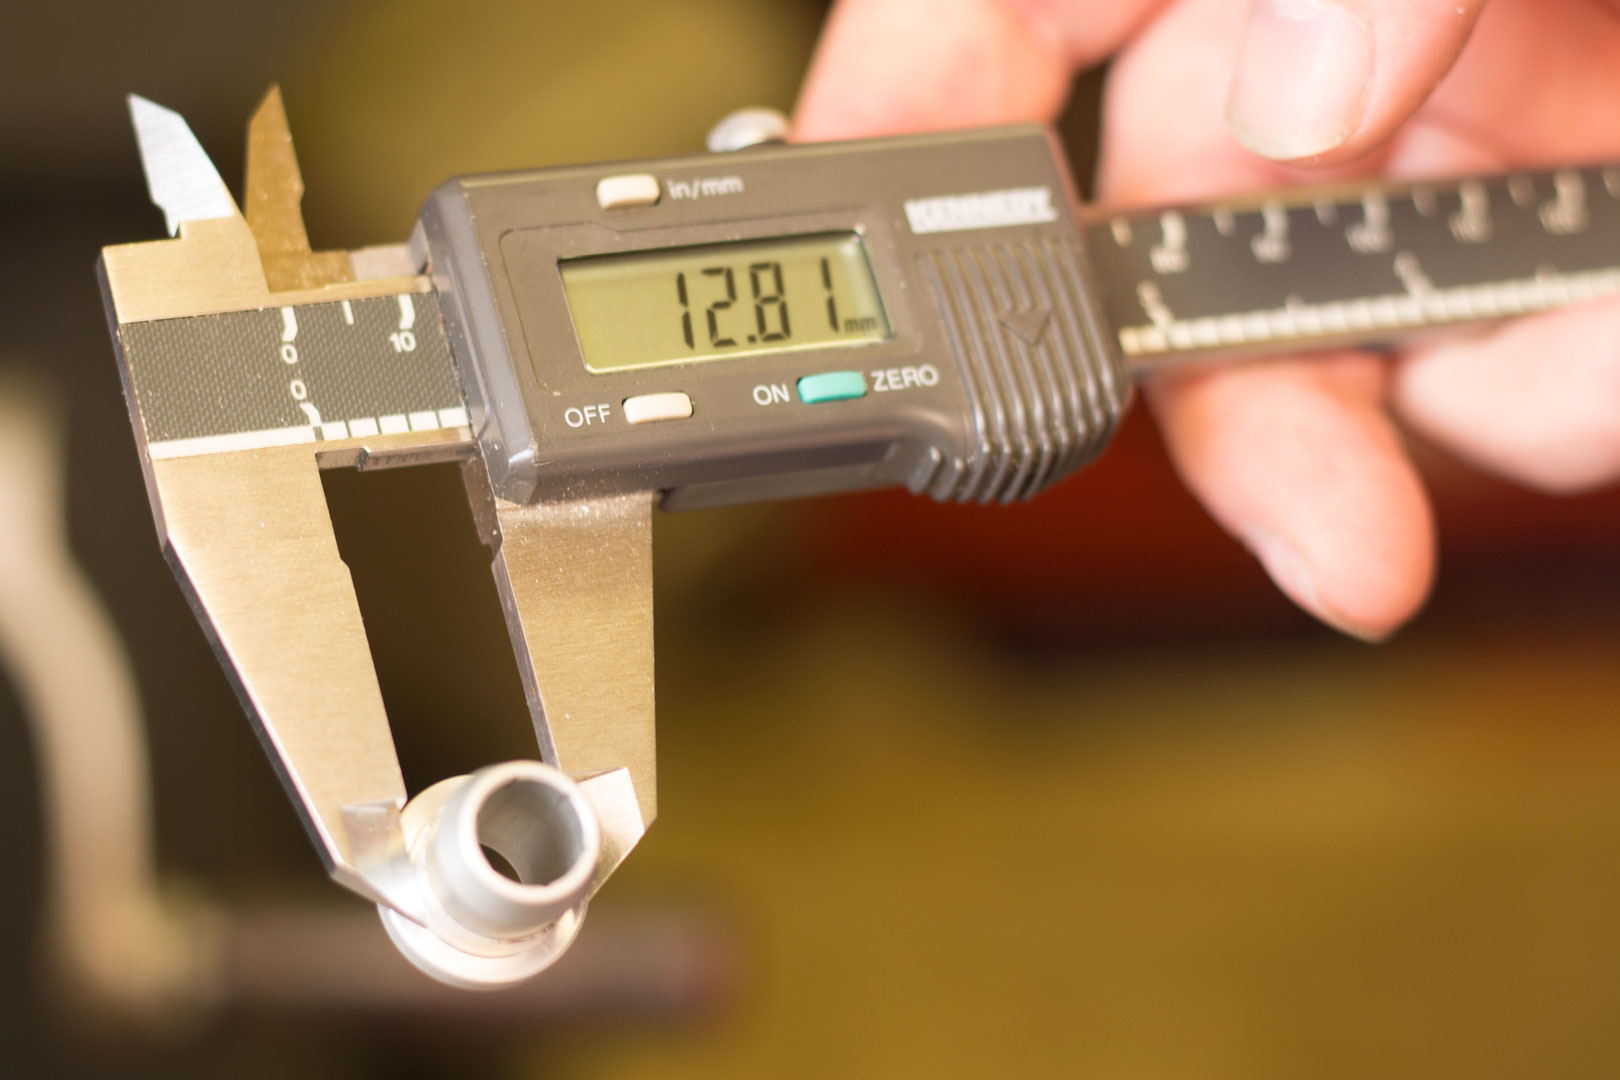
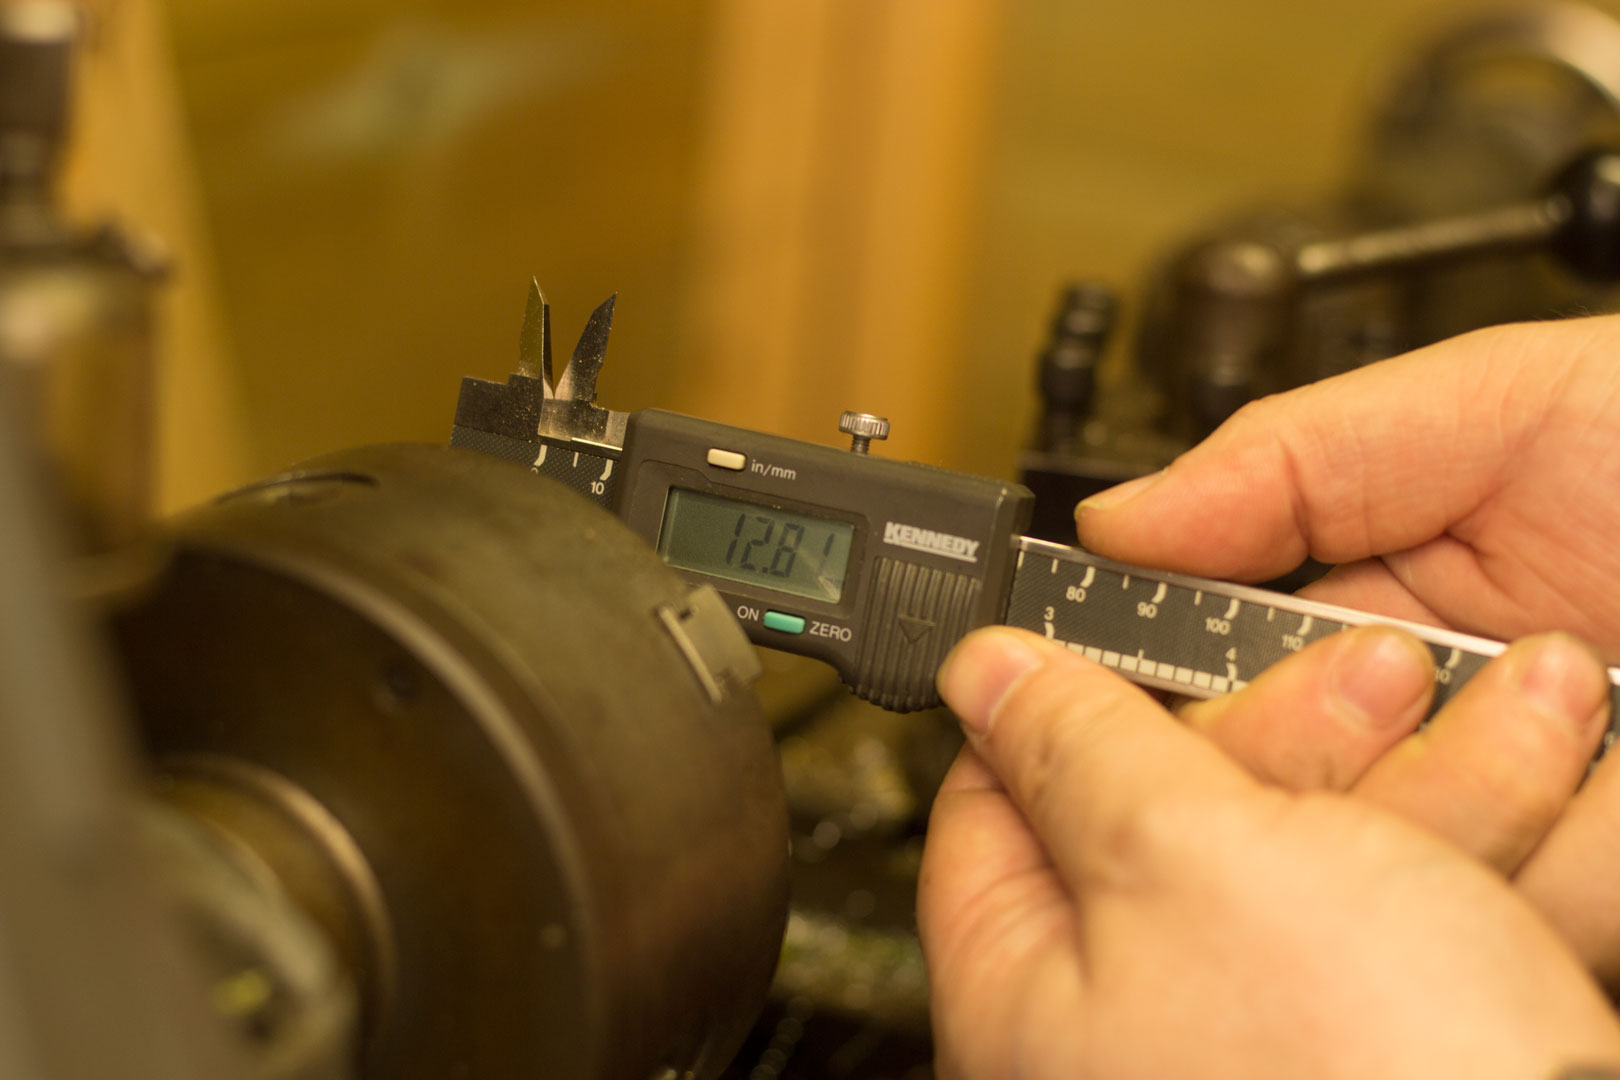
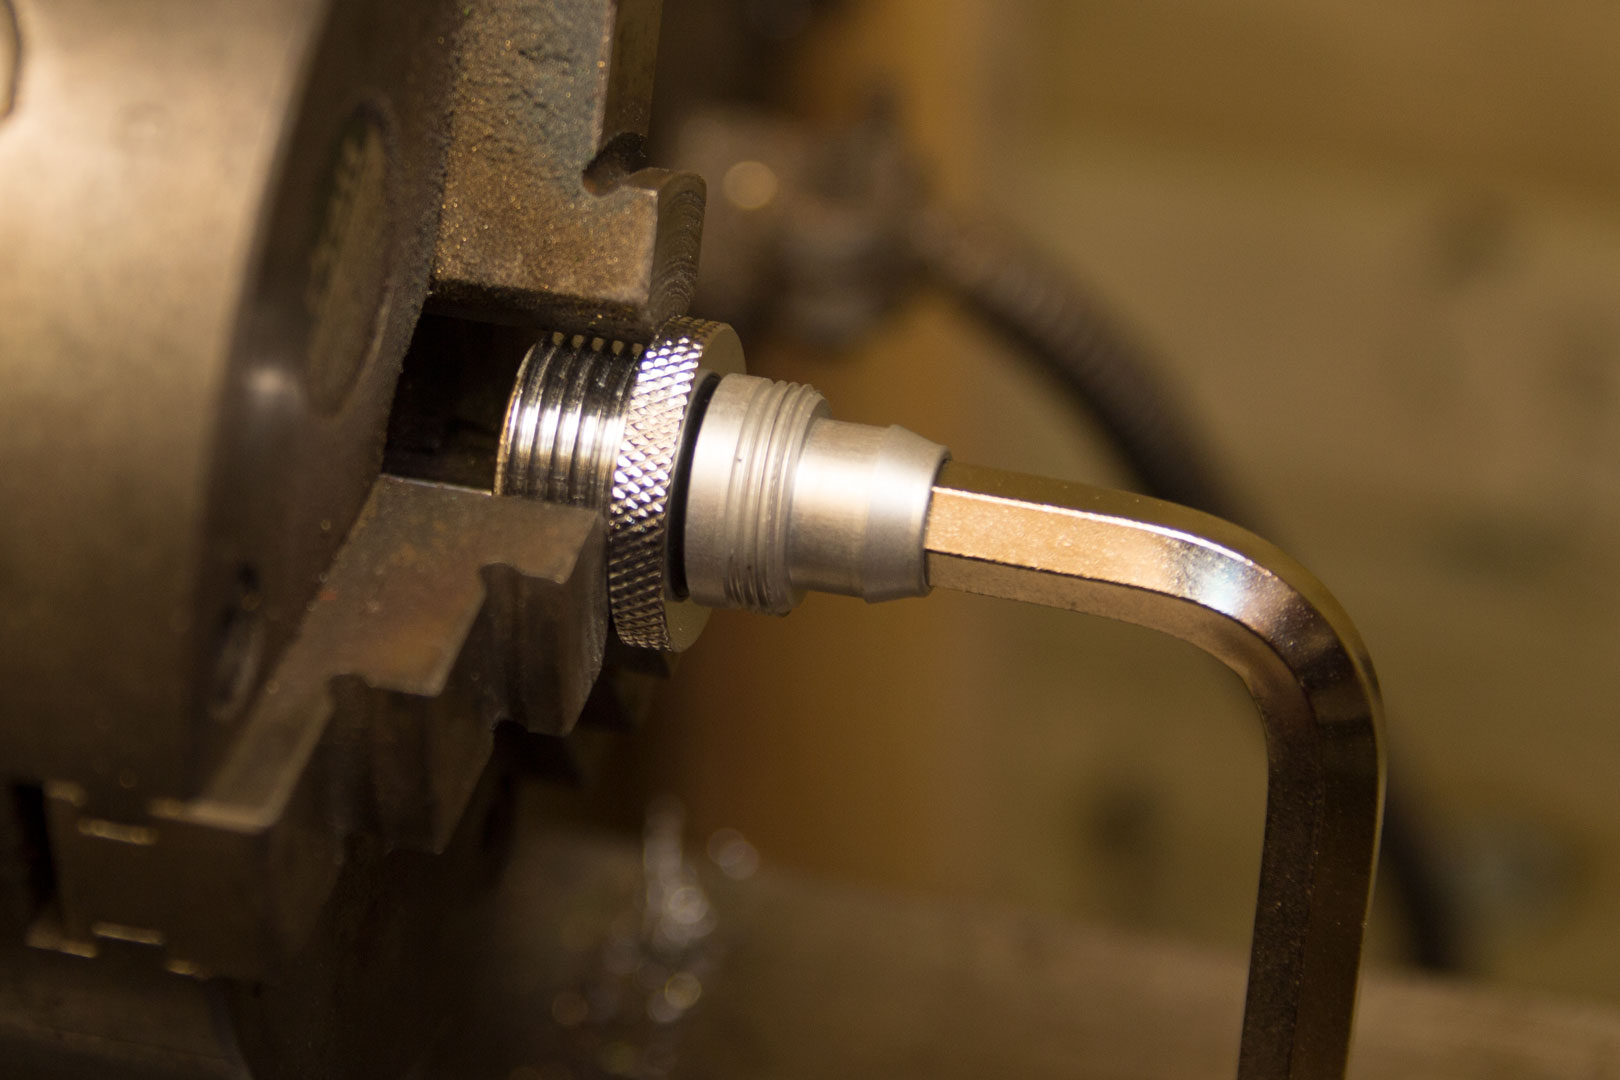
Joe took his fitting down to 12.81mm. Now, this figure wasn't planned or anything, it was just the size it was when Joe decided he had done enough turning on the lathe, and it looked like what he wanted it to look like. I wanted to do the same size. I found using the lathe was quite easy, but you do have to remember which hand does what. You can go forwards, backwards, left, and right on the lathe, and if you overthink what you are doing, you start to mess up. I found that just taking it slow worked the best. It took me a long time to get it right, as I didn't want to take too much off the fitting, but after 10 minutes or so, I managed to get 12.81mm! That is how precise you can be with a lathe - crazy! The final result really impressed me, so much so that I really want a new workshop with a lathe in it.
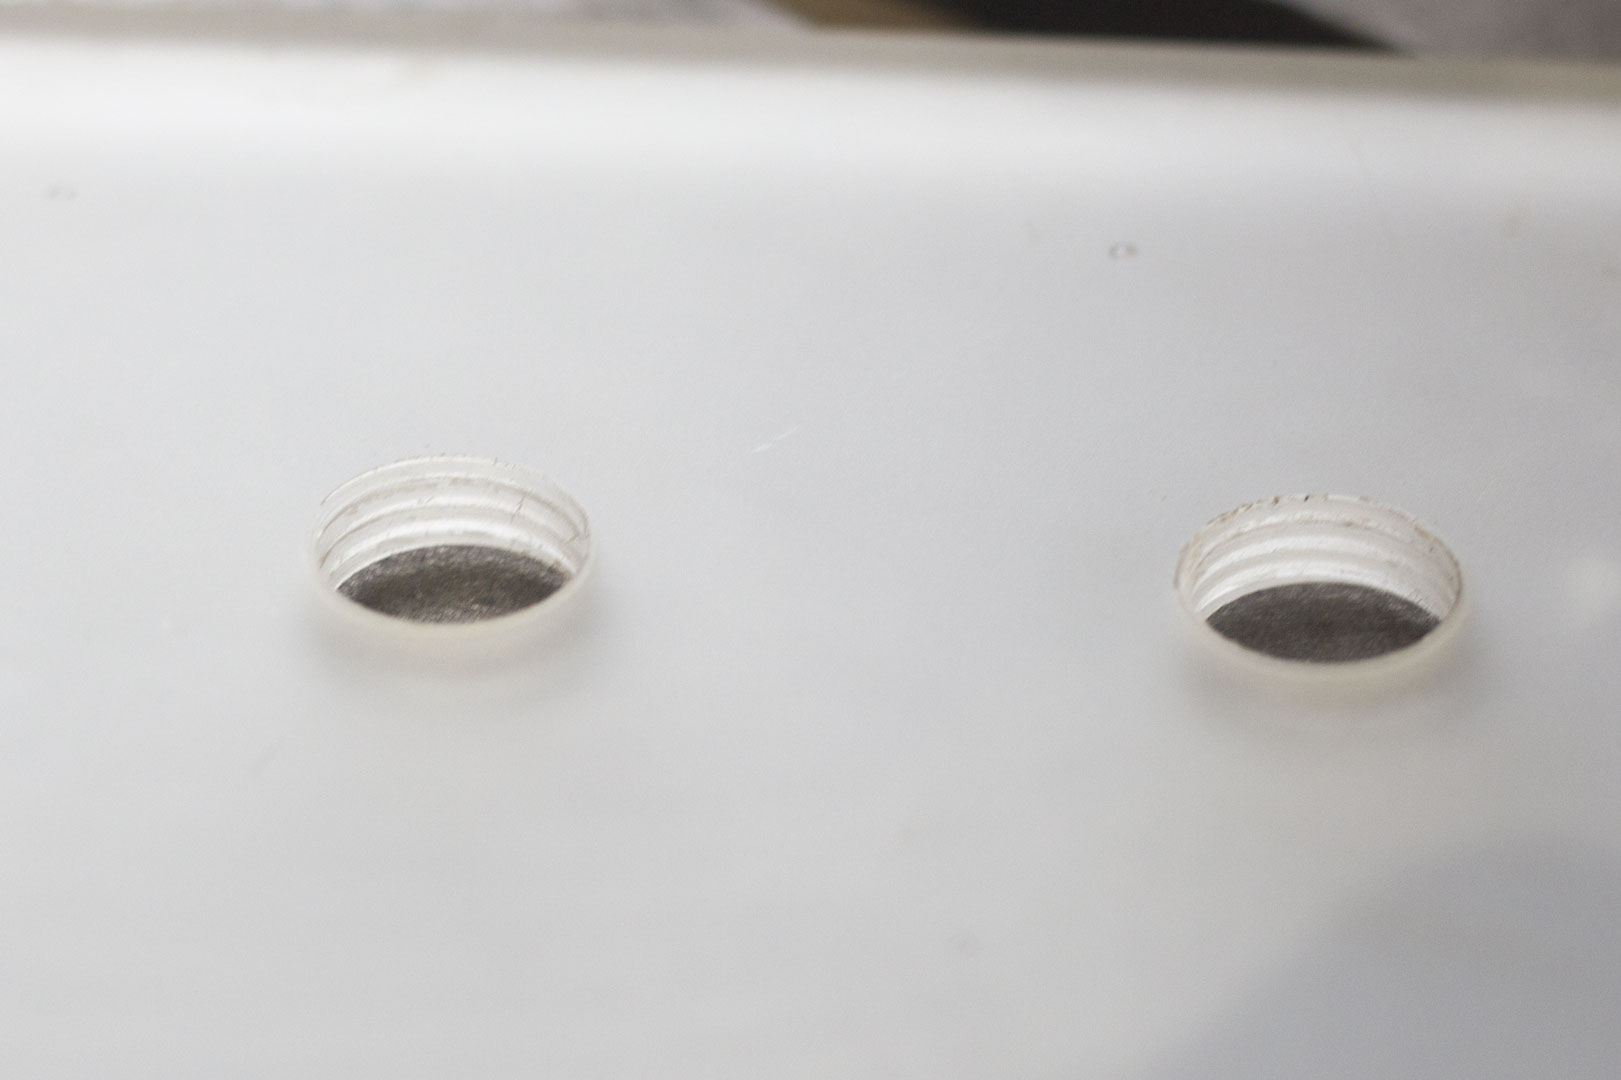
 Now the fittings were finished, and the acrylic was tapped, we could put the two together. They look pretty good, don't they?! Make sure you keep on checking what Joe is doing on the forums, as I can see this project looking pretty tidy. Now we have done a little bit of 'work', let's have a nosey around Joe's house!
RELATED ARTICLES


MSI MPG Velox 100R Chassis Review
October 14 2021 | 15:04


Want to comment? Please log in.