LDLC Modding Trophy 2018 - Let's Build it!
January 23, 2019 | 19:00
Companies: #be-quiet #ekwb #epic-games #ldlc #thermaltake
Final Assembly
With a project like this, it really all comes together very close to the end. With the structural parts installed into the chassis, it was time to add the last parts and get the rig going.
First on the list was adding the reservoir and distro plate. The distro was a very simple affair; in the 3D model I had added two aluminium brackets, and these were cut alongside the pump bracket and allowed the plate to attach to the front fan mounts from behind. This was a simple method and also allowed for significant adjustments to be made should things not line up quite as intended. The front reservoir was a bit more challenging.
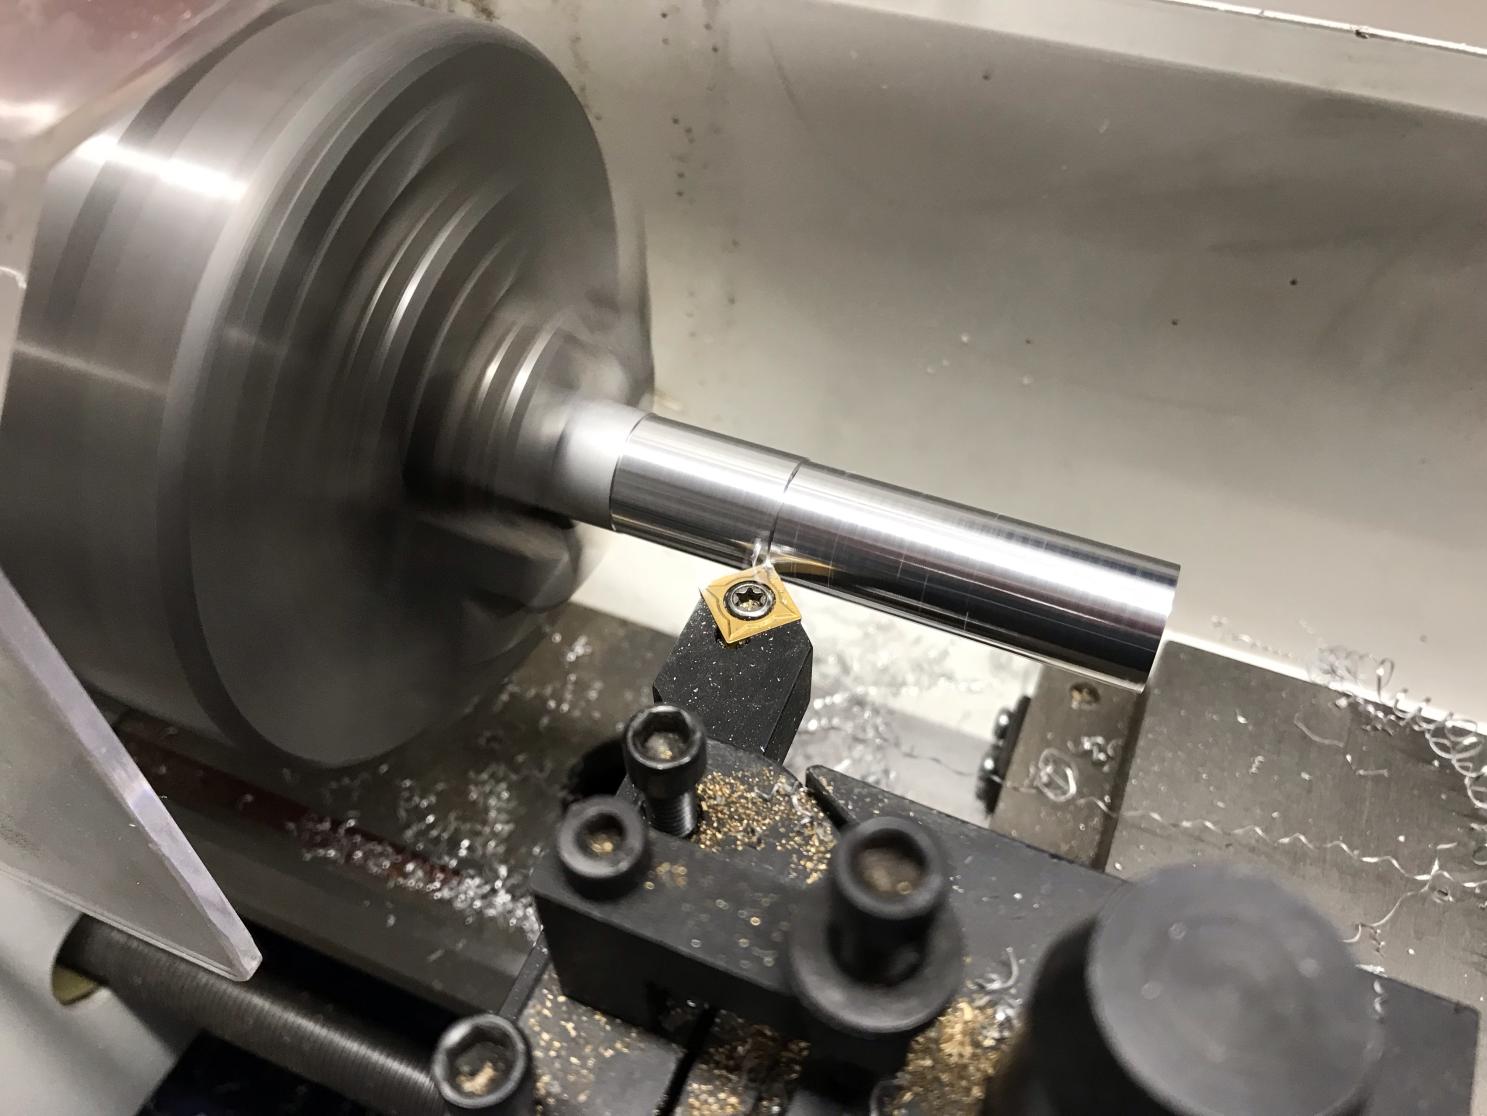
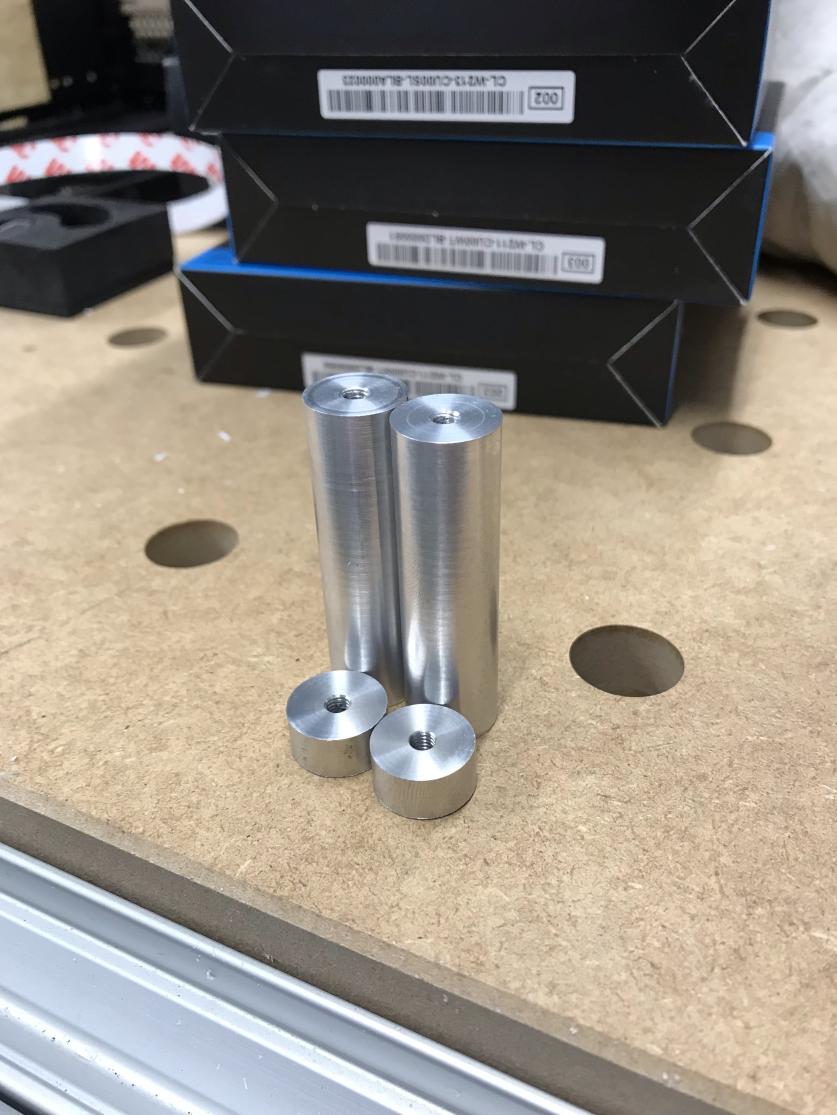
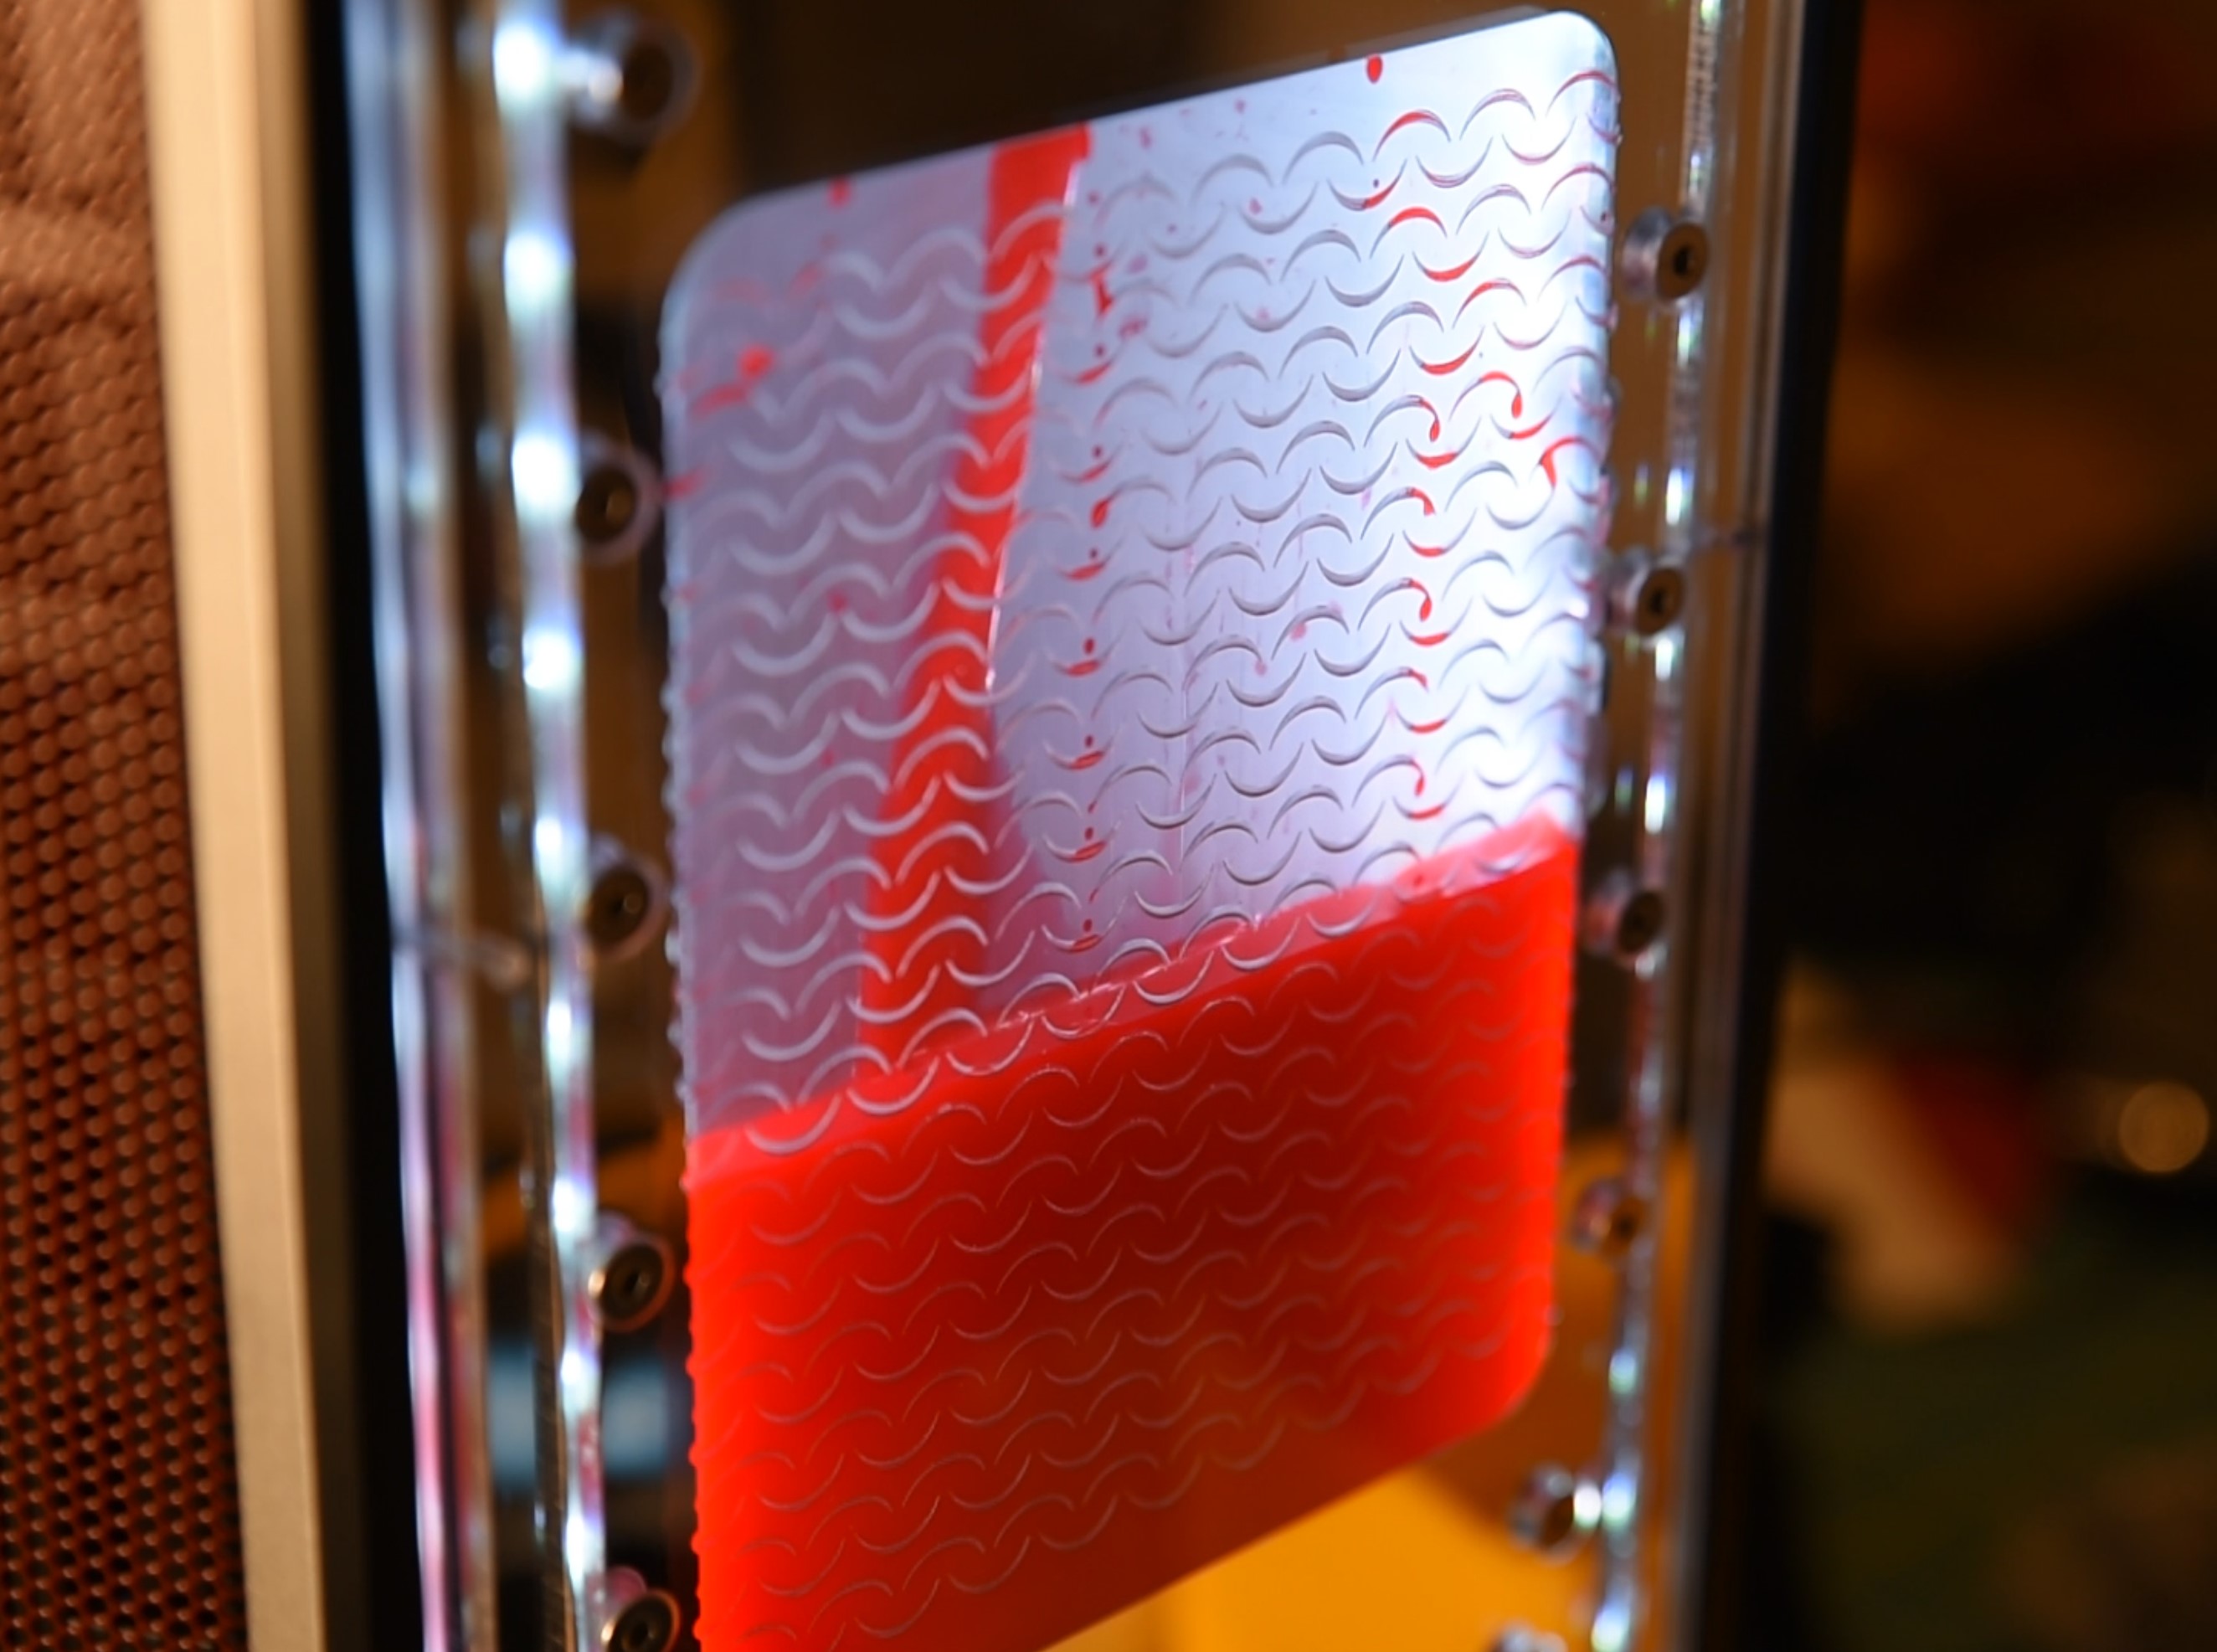
The stock case has a front door that covers the optical drive bay and the front fans. I removed this along with the mounting hinges. The issue, though, was that due to the internal shape behind the door, there weren't any mounting points available. To overcome this I turned two sets of aluminium spacers on the lathe; one set could be attached to the fan mounts from inside, the other would mount onto the plastic front panel frame. This allowed the reservoir to sit flush with the front panel framework, and it also maintained easy access to the ports on the inside as well as the lighting channels for the LEDs.
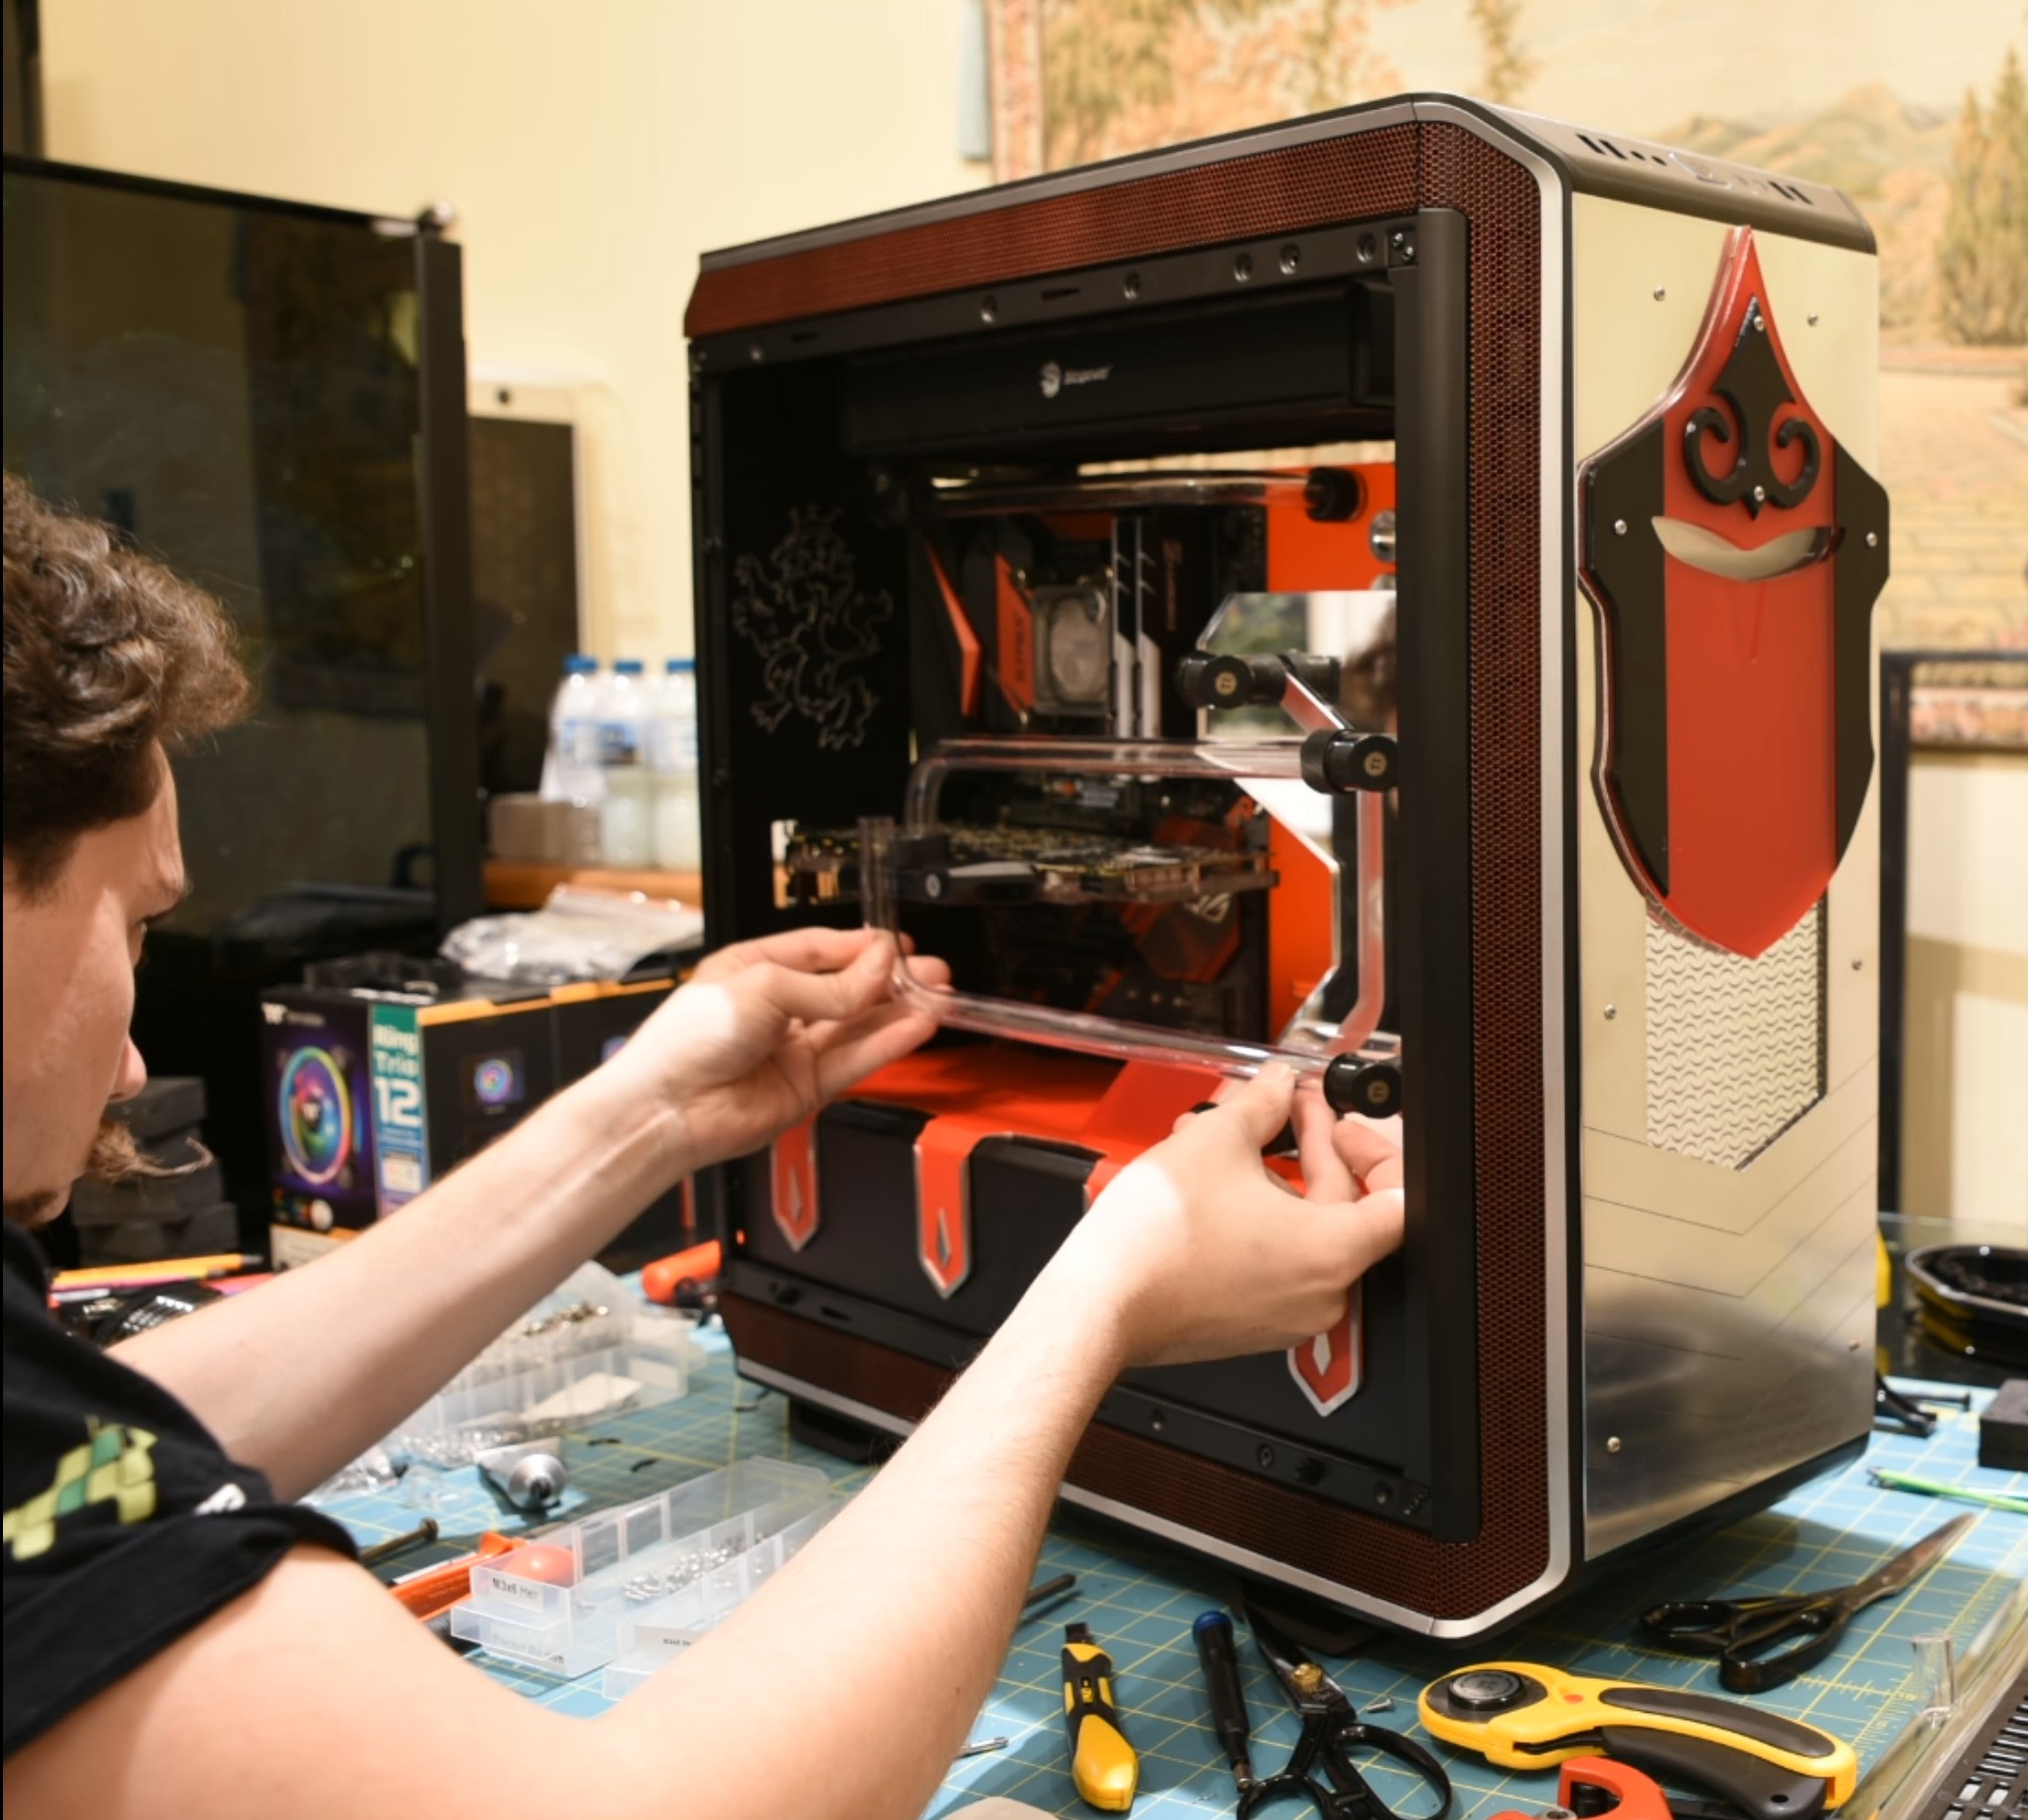
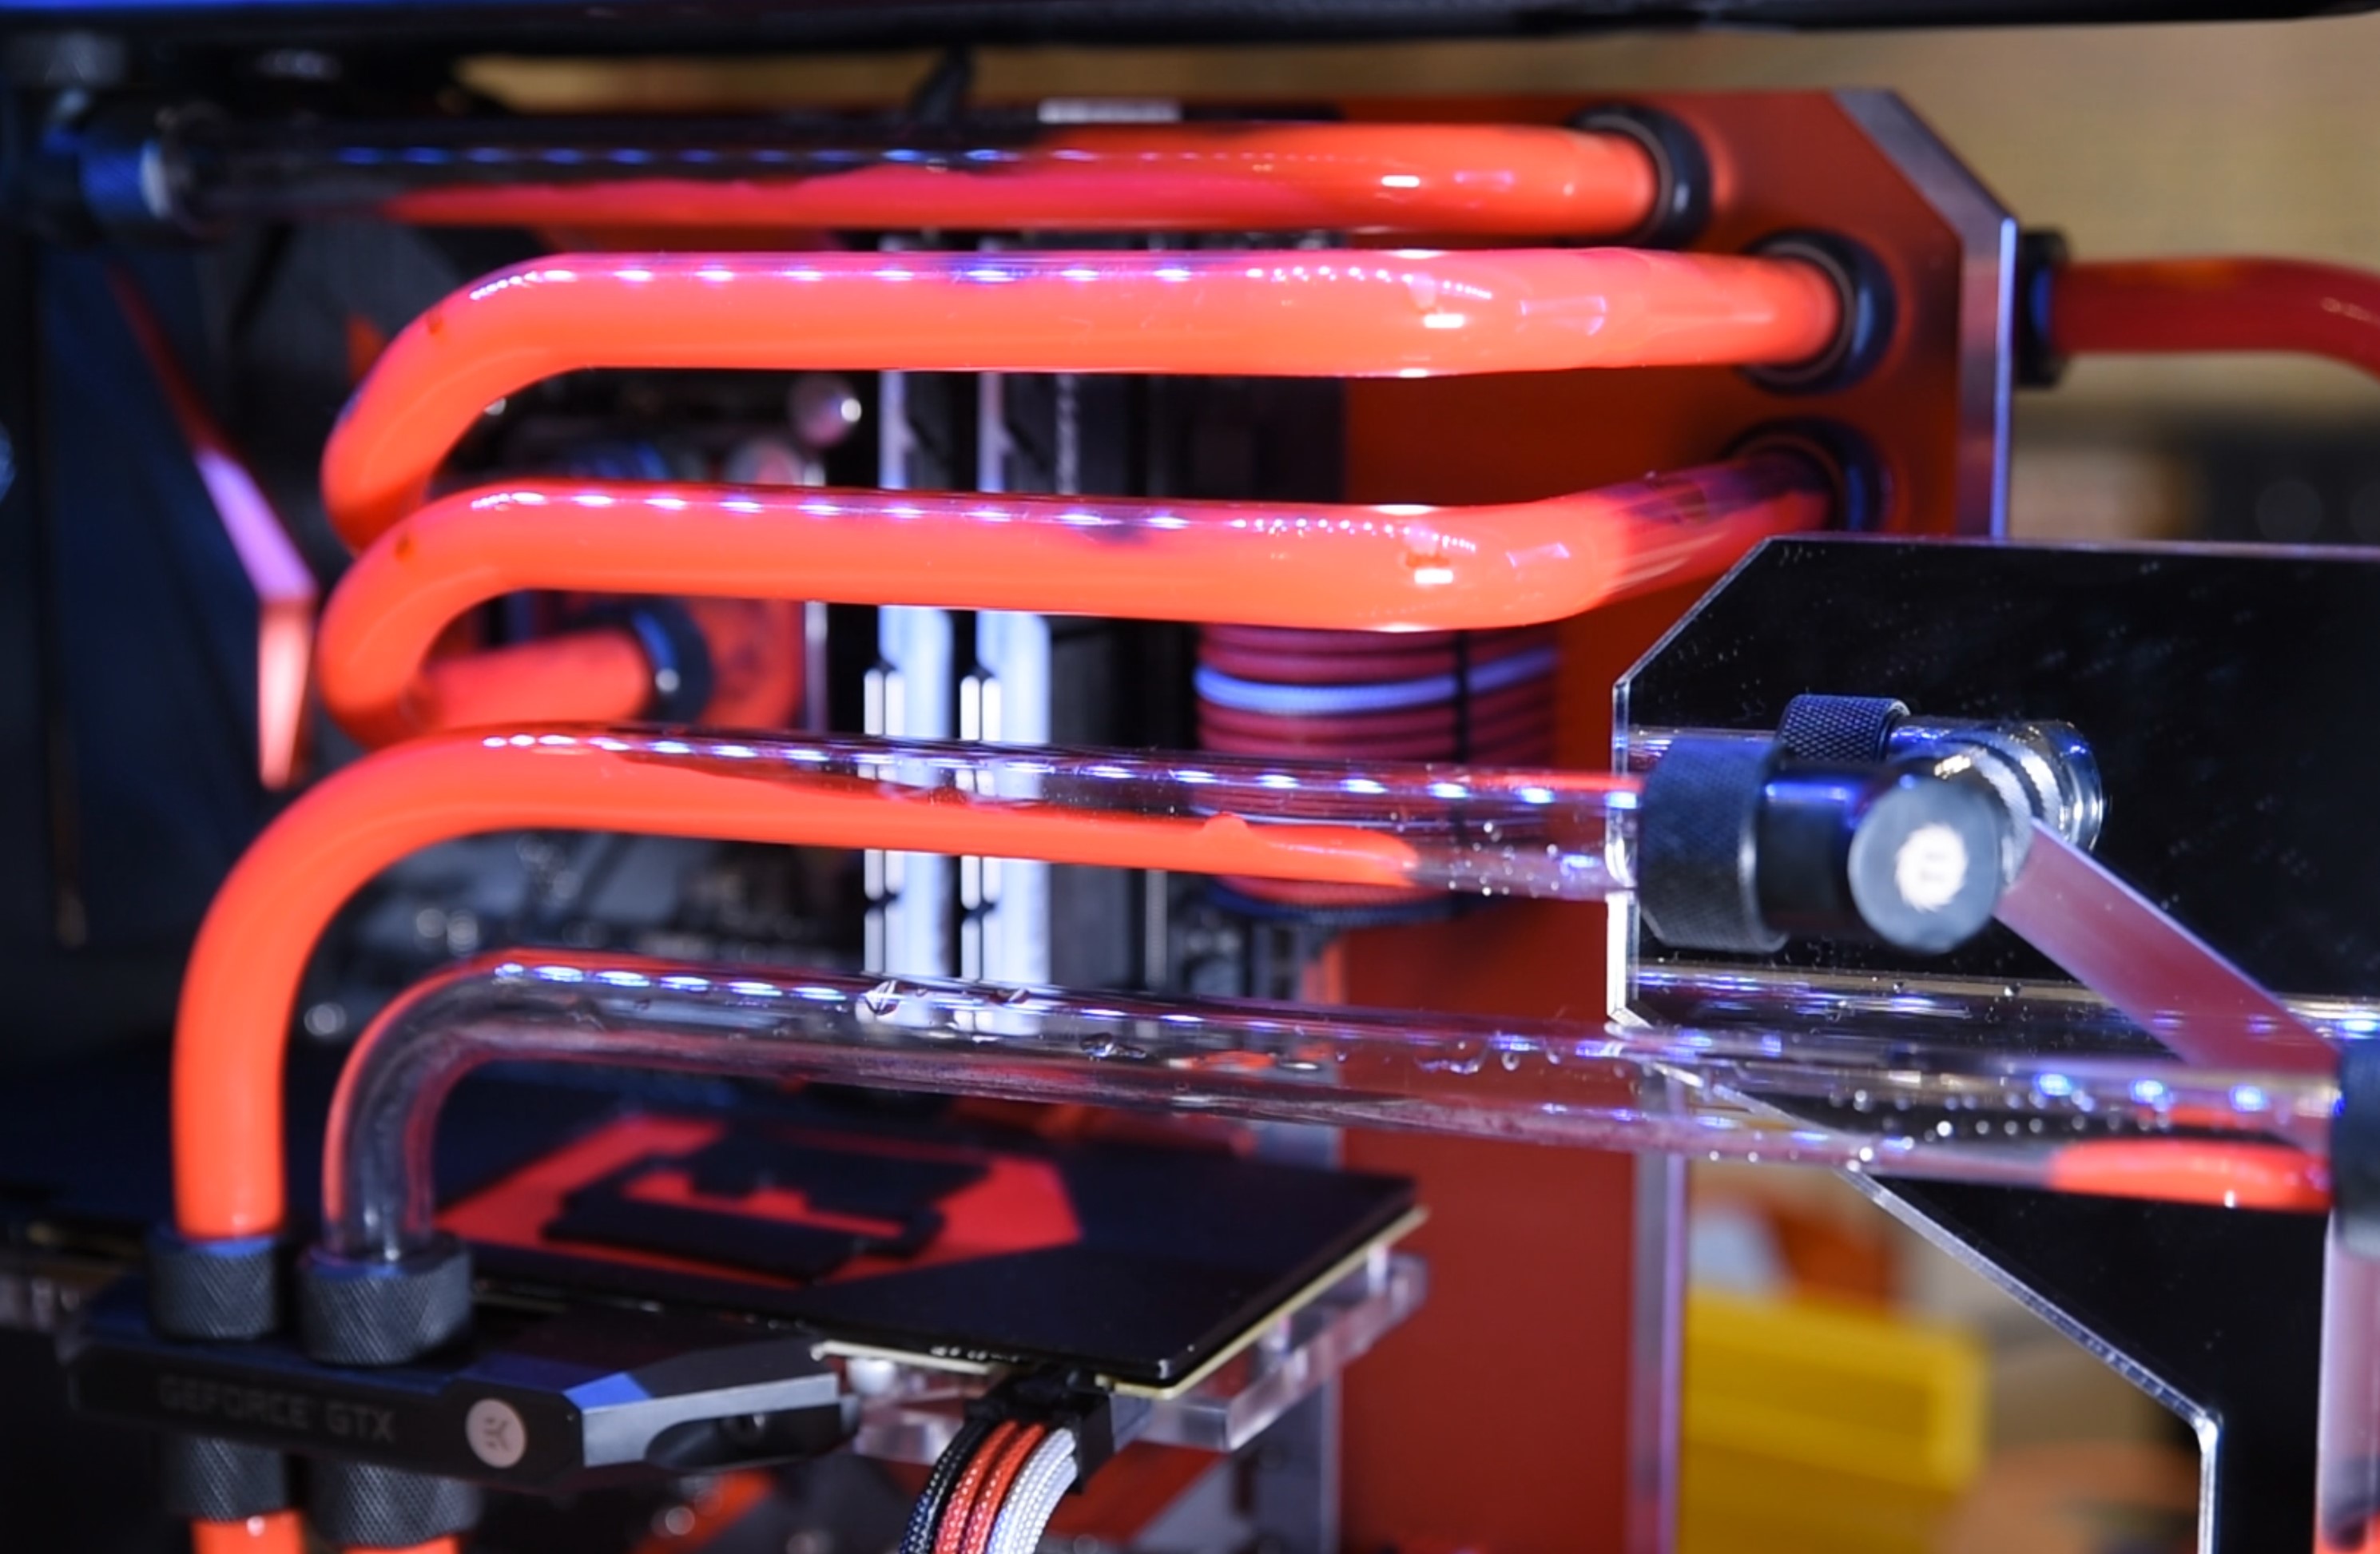
With the reservoirs fitted, it was time to add the hardware and do the plumbing. Since the tubing was going to play a large part in the aesthetic, I went with 16mm OD PETG. I would have chosen acrylic, but I had a surplus of PETG, so it made sense to just use it up. For fittings I was originally going to use EK's red collar HDC compressions, however a last minute design change meant I hadn't ordered enough, so instead I switched to black Thermaltake C-Pros instead. With hindsight this was a good decision, as it made adjusting the tubing lengths for some of the runs much easier. Most of the bends follow the trusty 'ol 'One Bend Rule' that I mentioned in our Loop Planning Guide, although a handful had multiple bends. I tried using the Eiskoffer kit here to help out, but if I'm honest I found it just got in the way with the CPU bends, so I ended up going freehand. Similarly, the GPU bends didn't look right when using a single bend radius, so for the outer tubes I aligned it by hand so that the tubes would remain more parallel throughout the curve.
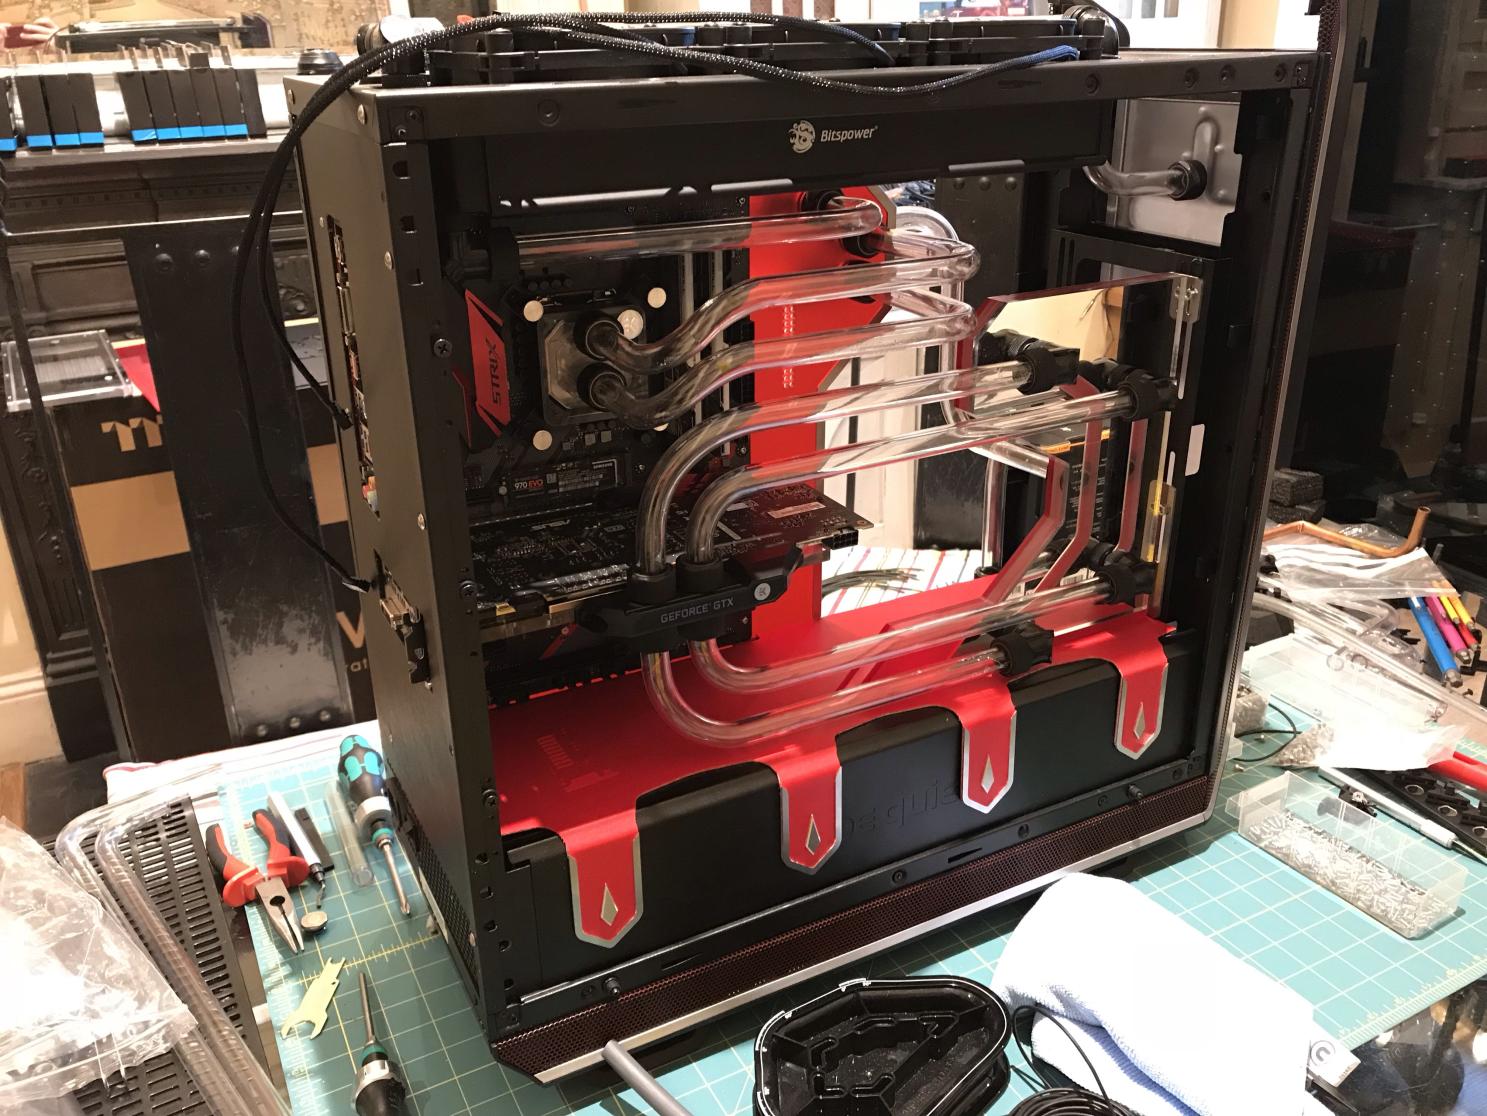
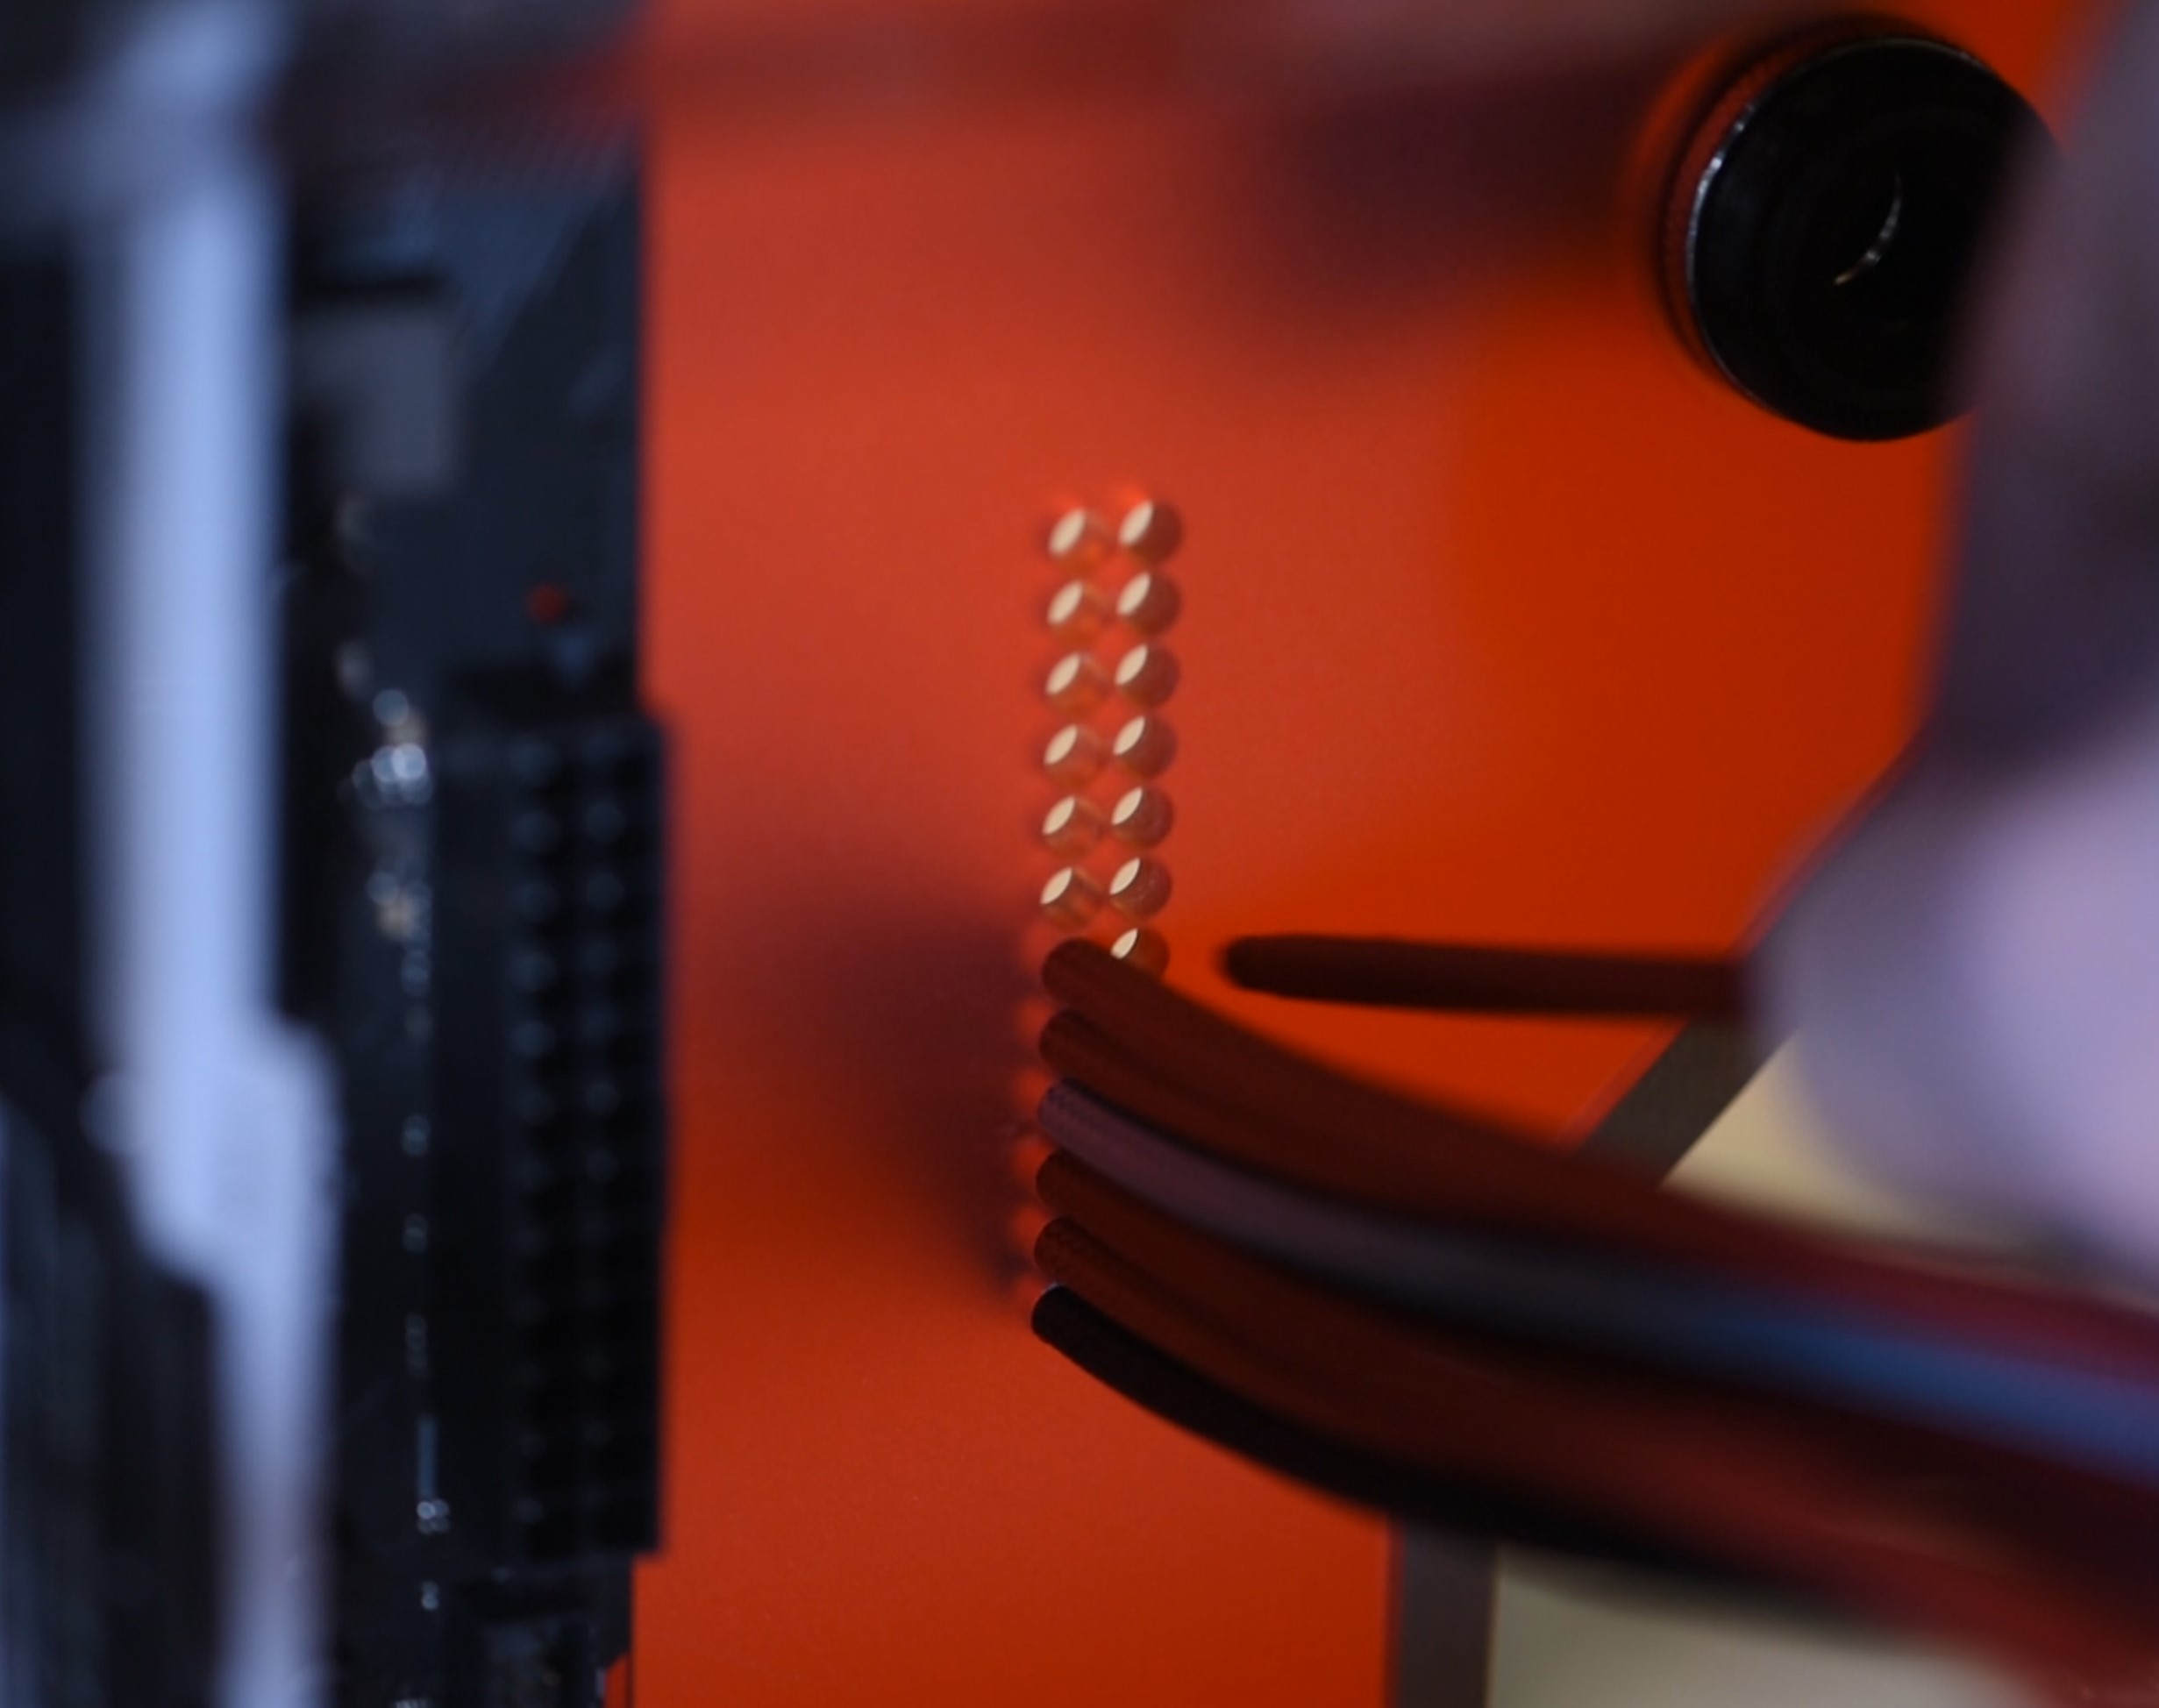
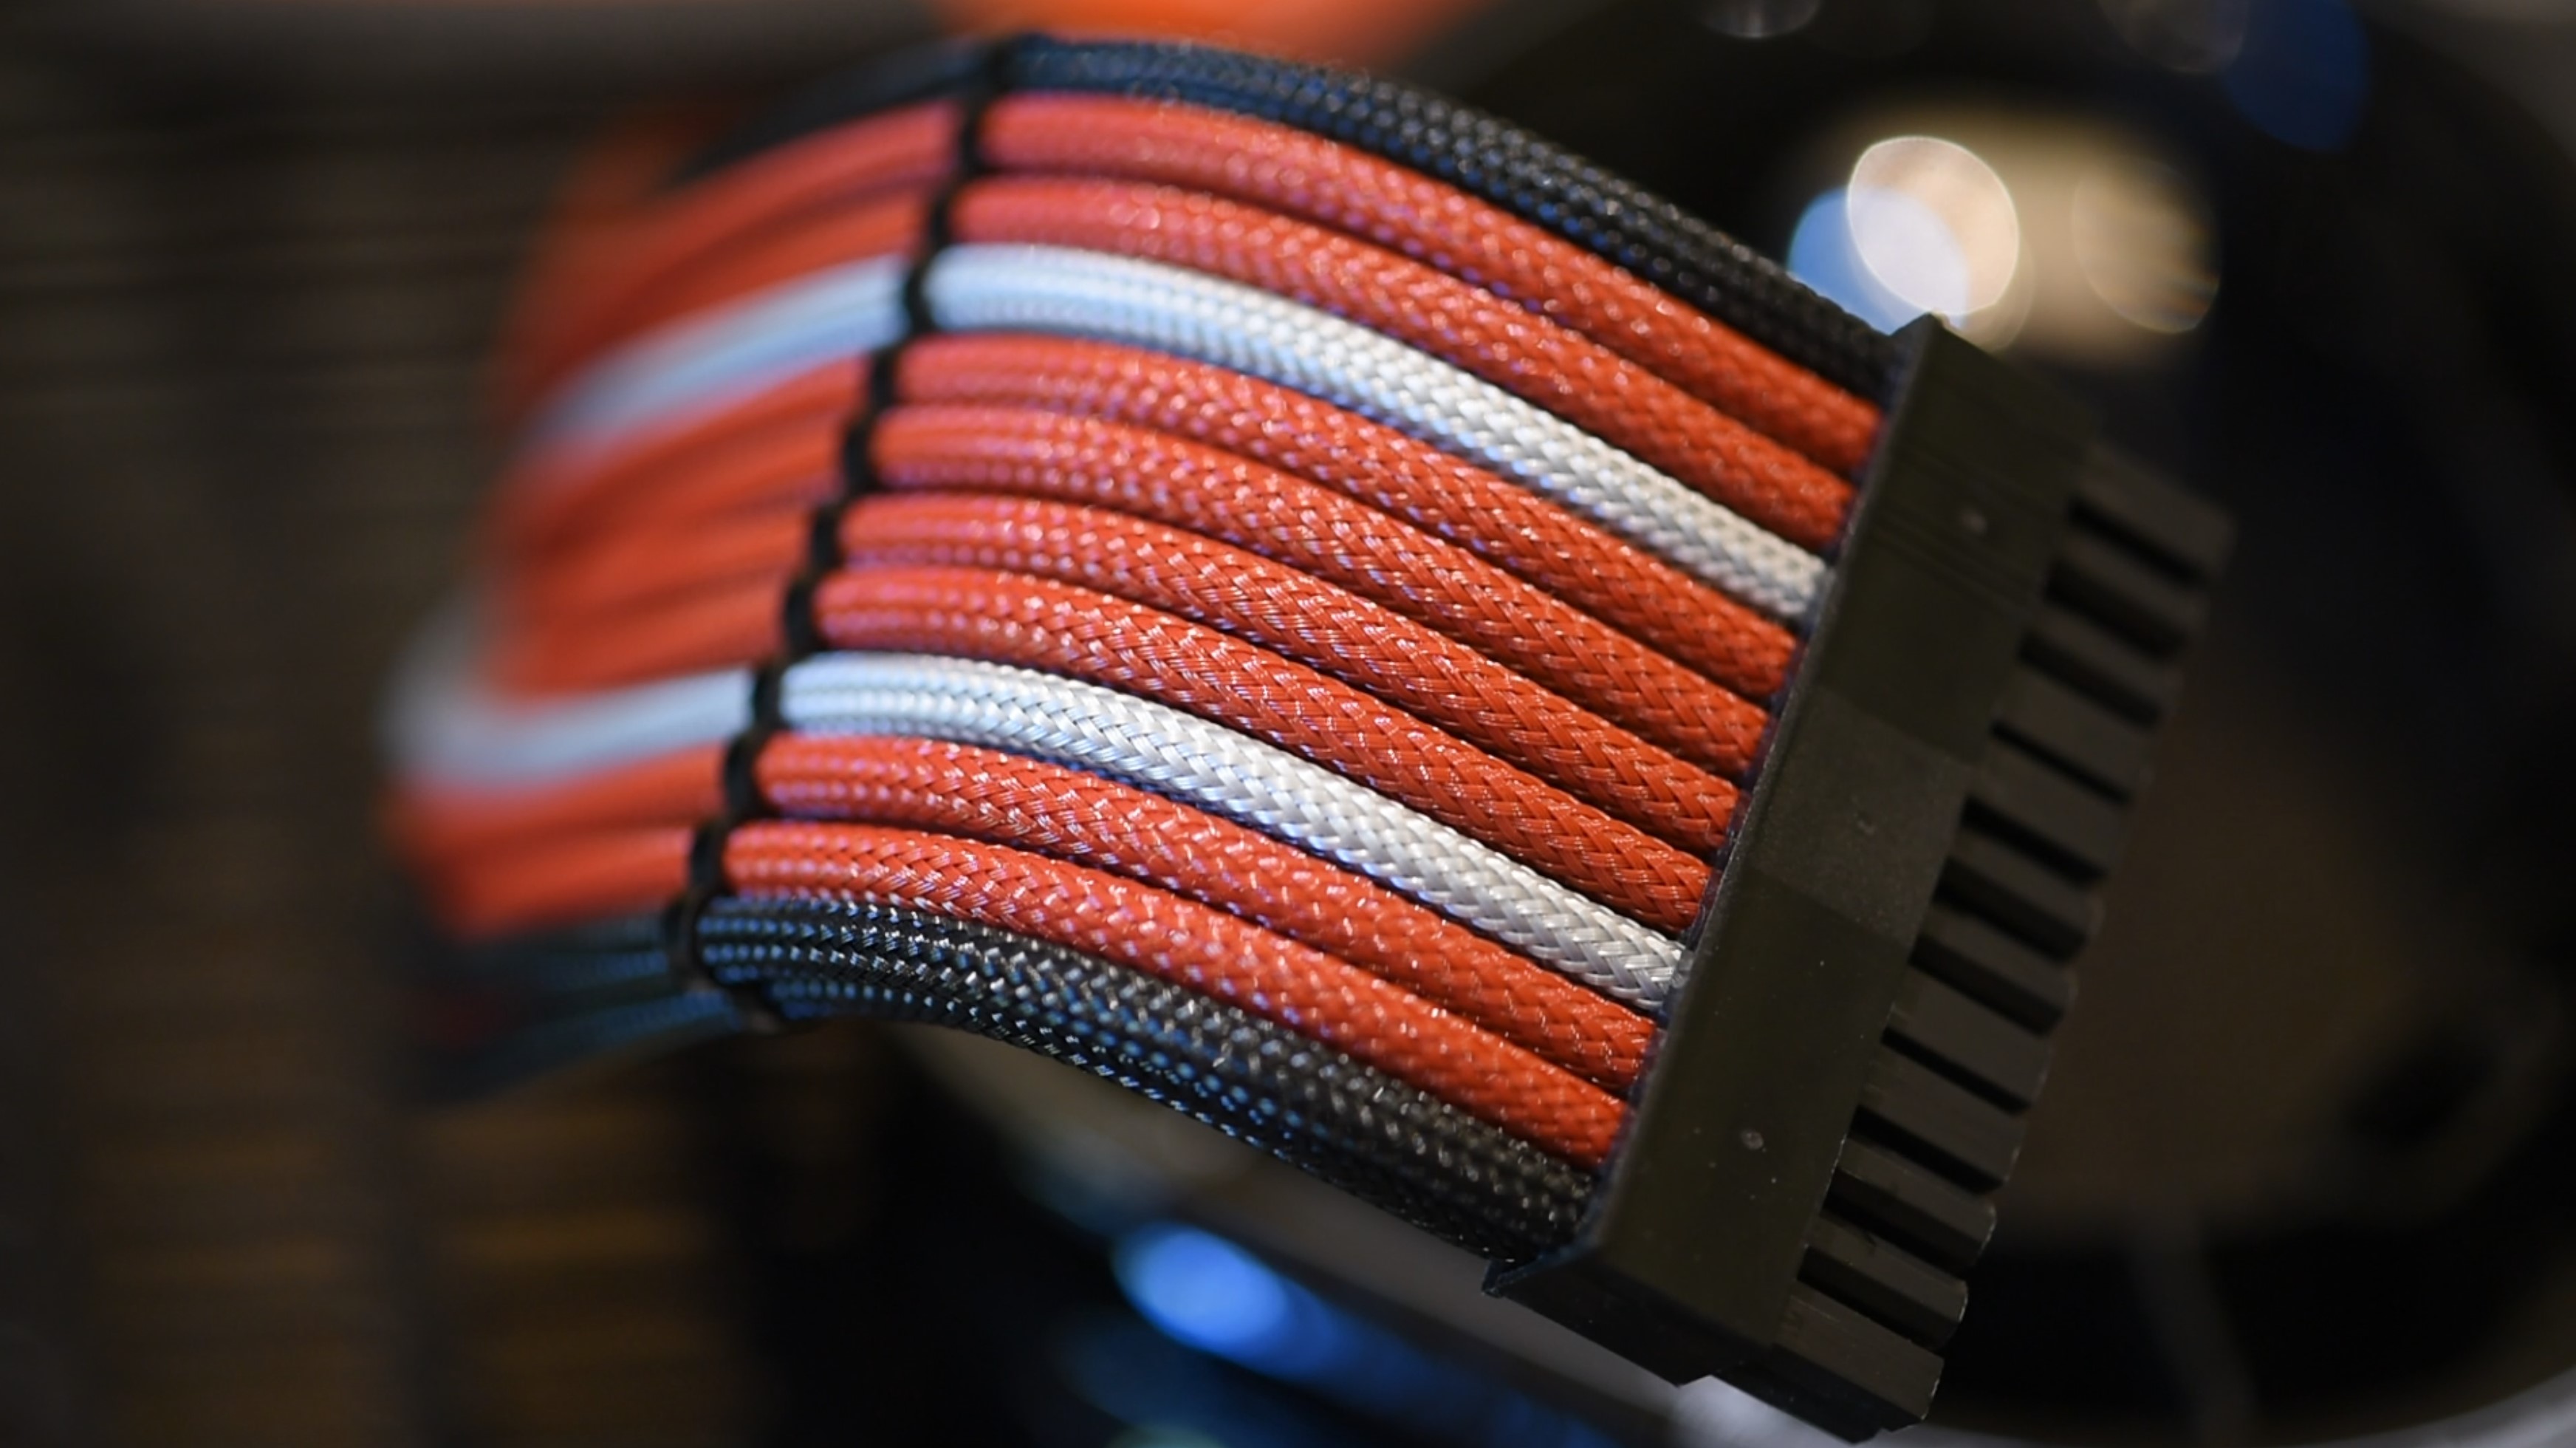
With the tubes done, I removed them and got to work doing the cabling. I always prefer to make the cables from scratch if I can, since it provides the most flexibility with cable management. For this it was quite simple: a new 24-pin cable, eight-pin CPU, and eight-pin GPU, along with wires for the fans and lighting. Opting for dark red, black, and silver sleeving, it was just a matter of cutting the cables to length and installing within the case through the already-cut cable holes.
The Home Stretch
The last parts involved wiring up all the fans, the pump, and the LED strips. I chose to go with a set of remote control addressable strips from Barrow for this, and they just use a standard RF remote and can cycle through a number of effects. For home use I probably would have gone with a USB-controllable solution, but since this would be at a show and not connected up to a monitor it made more sense to be able to control everything using the most basic setup possible.
For the fans I went with the simple setup used in the Mini-Mods Fan Tutorial, basically shortening the wires and making new splitters from scratch. There are only four fans in this rig, so doing it this way was simple and meant there would only be one header to deal with. I did the same trick with the LED strips too, meaning there weren't straggly wires strewn all over the place.
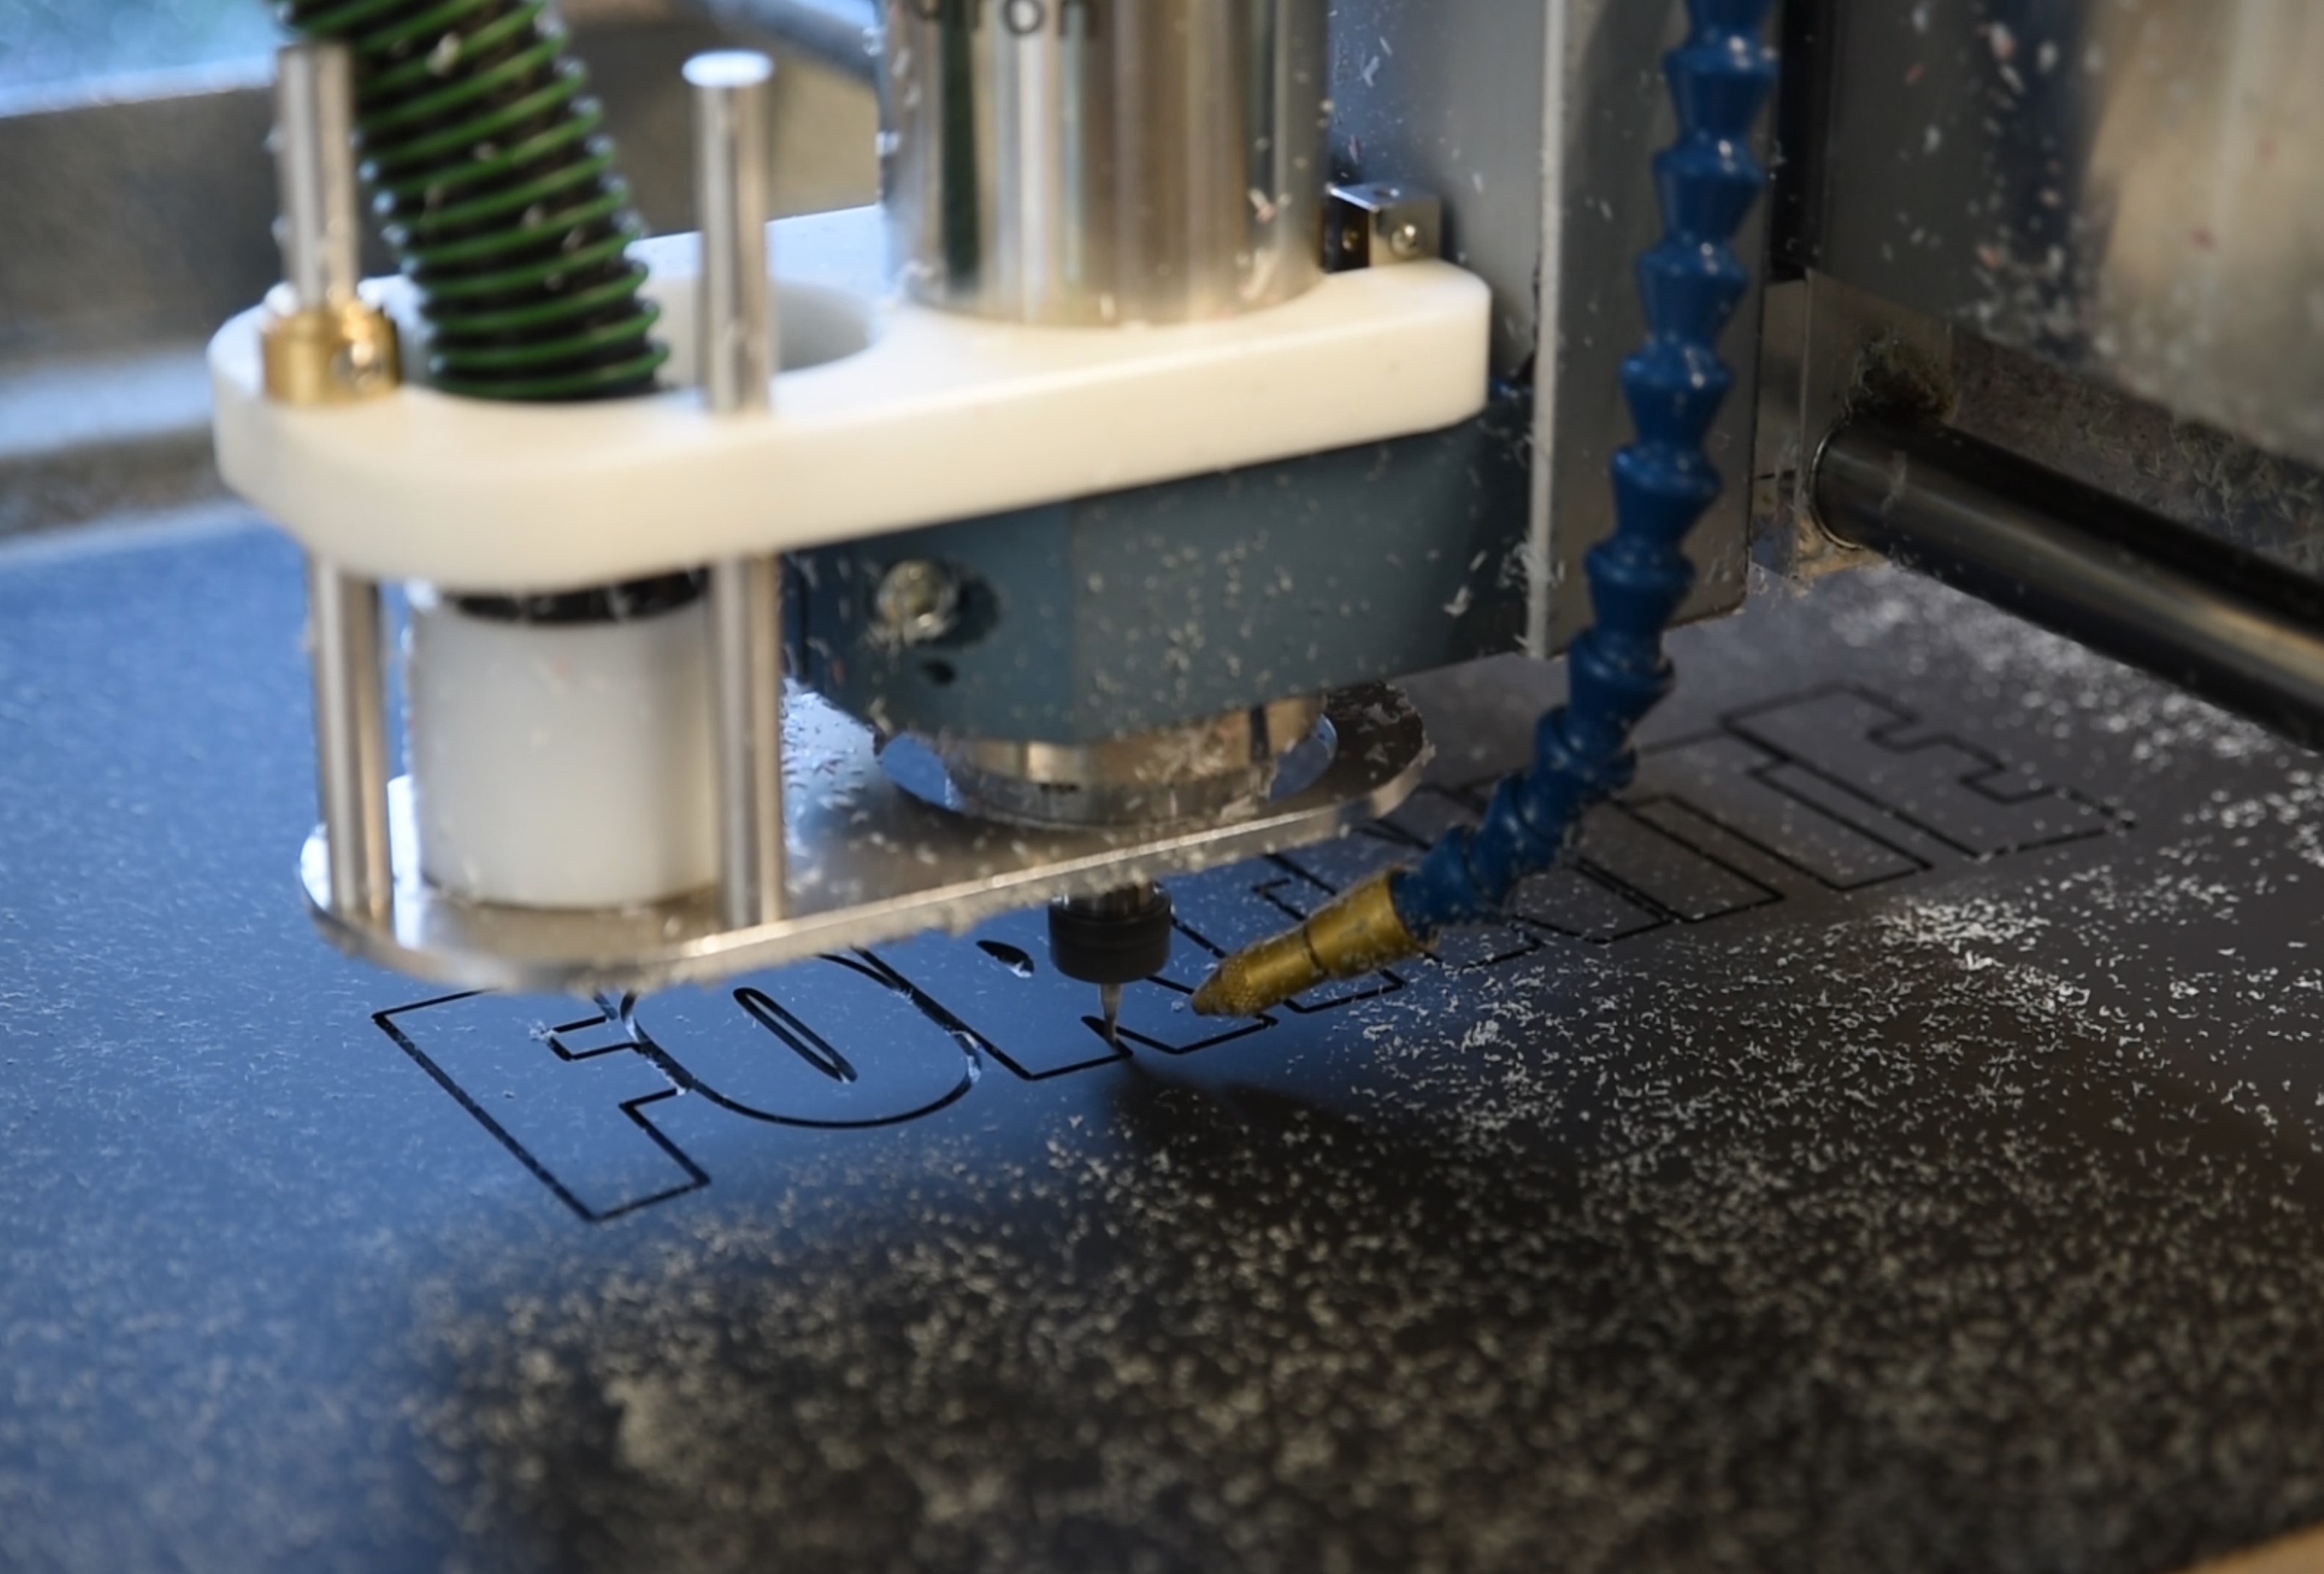
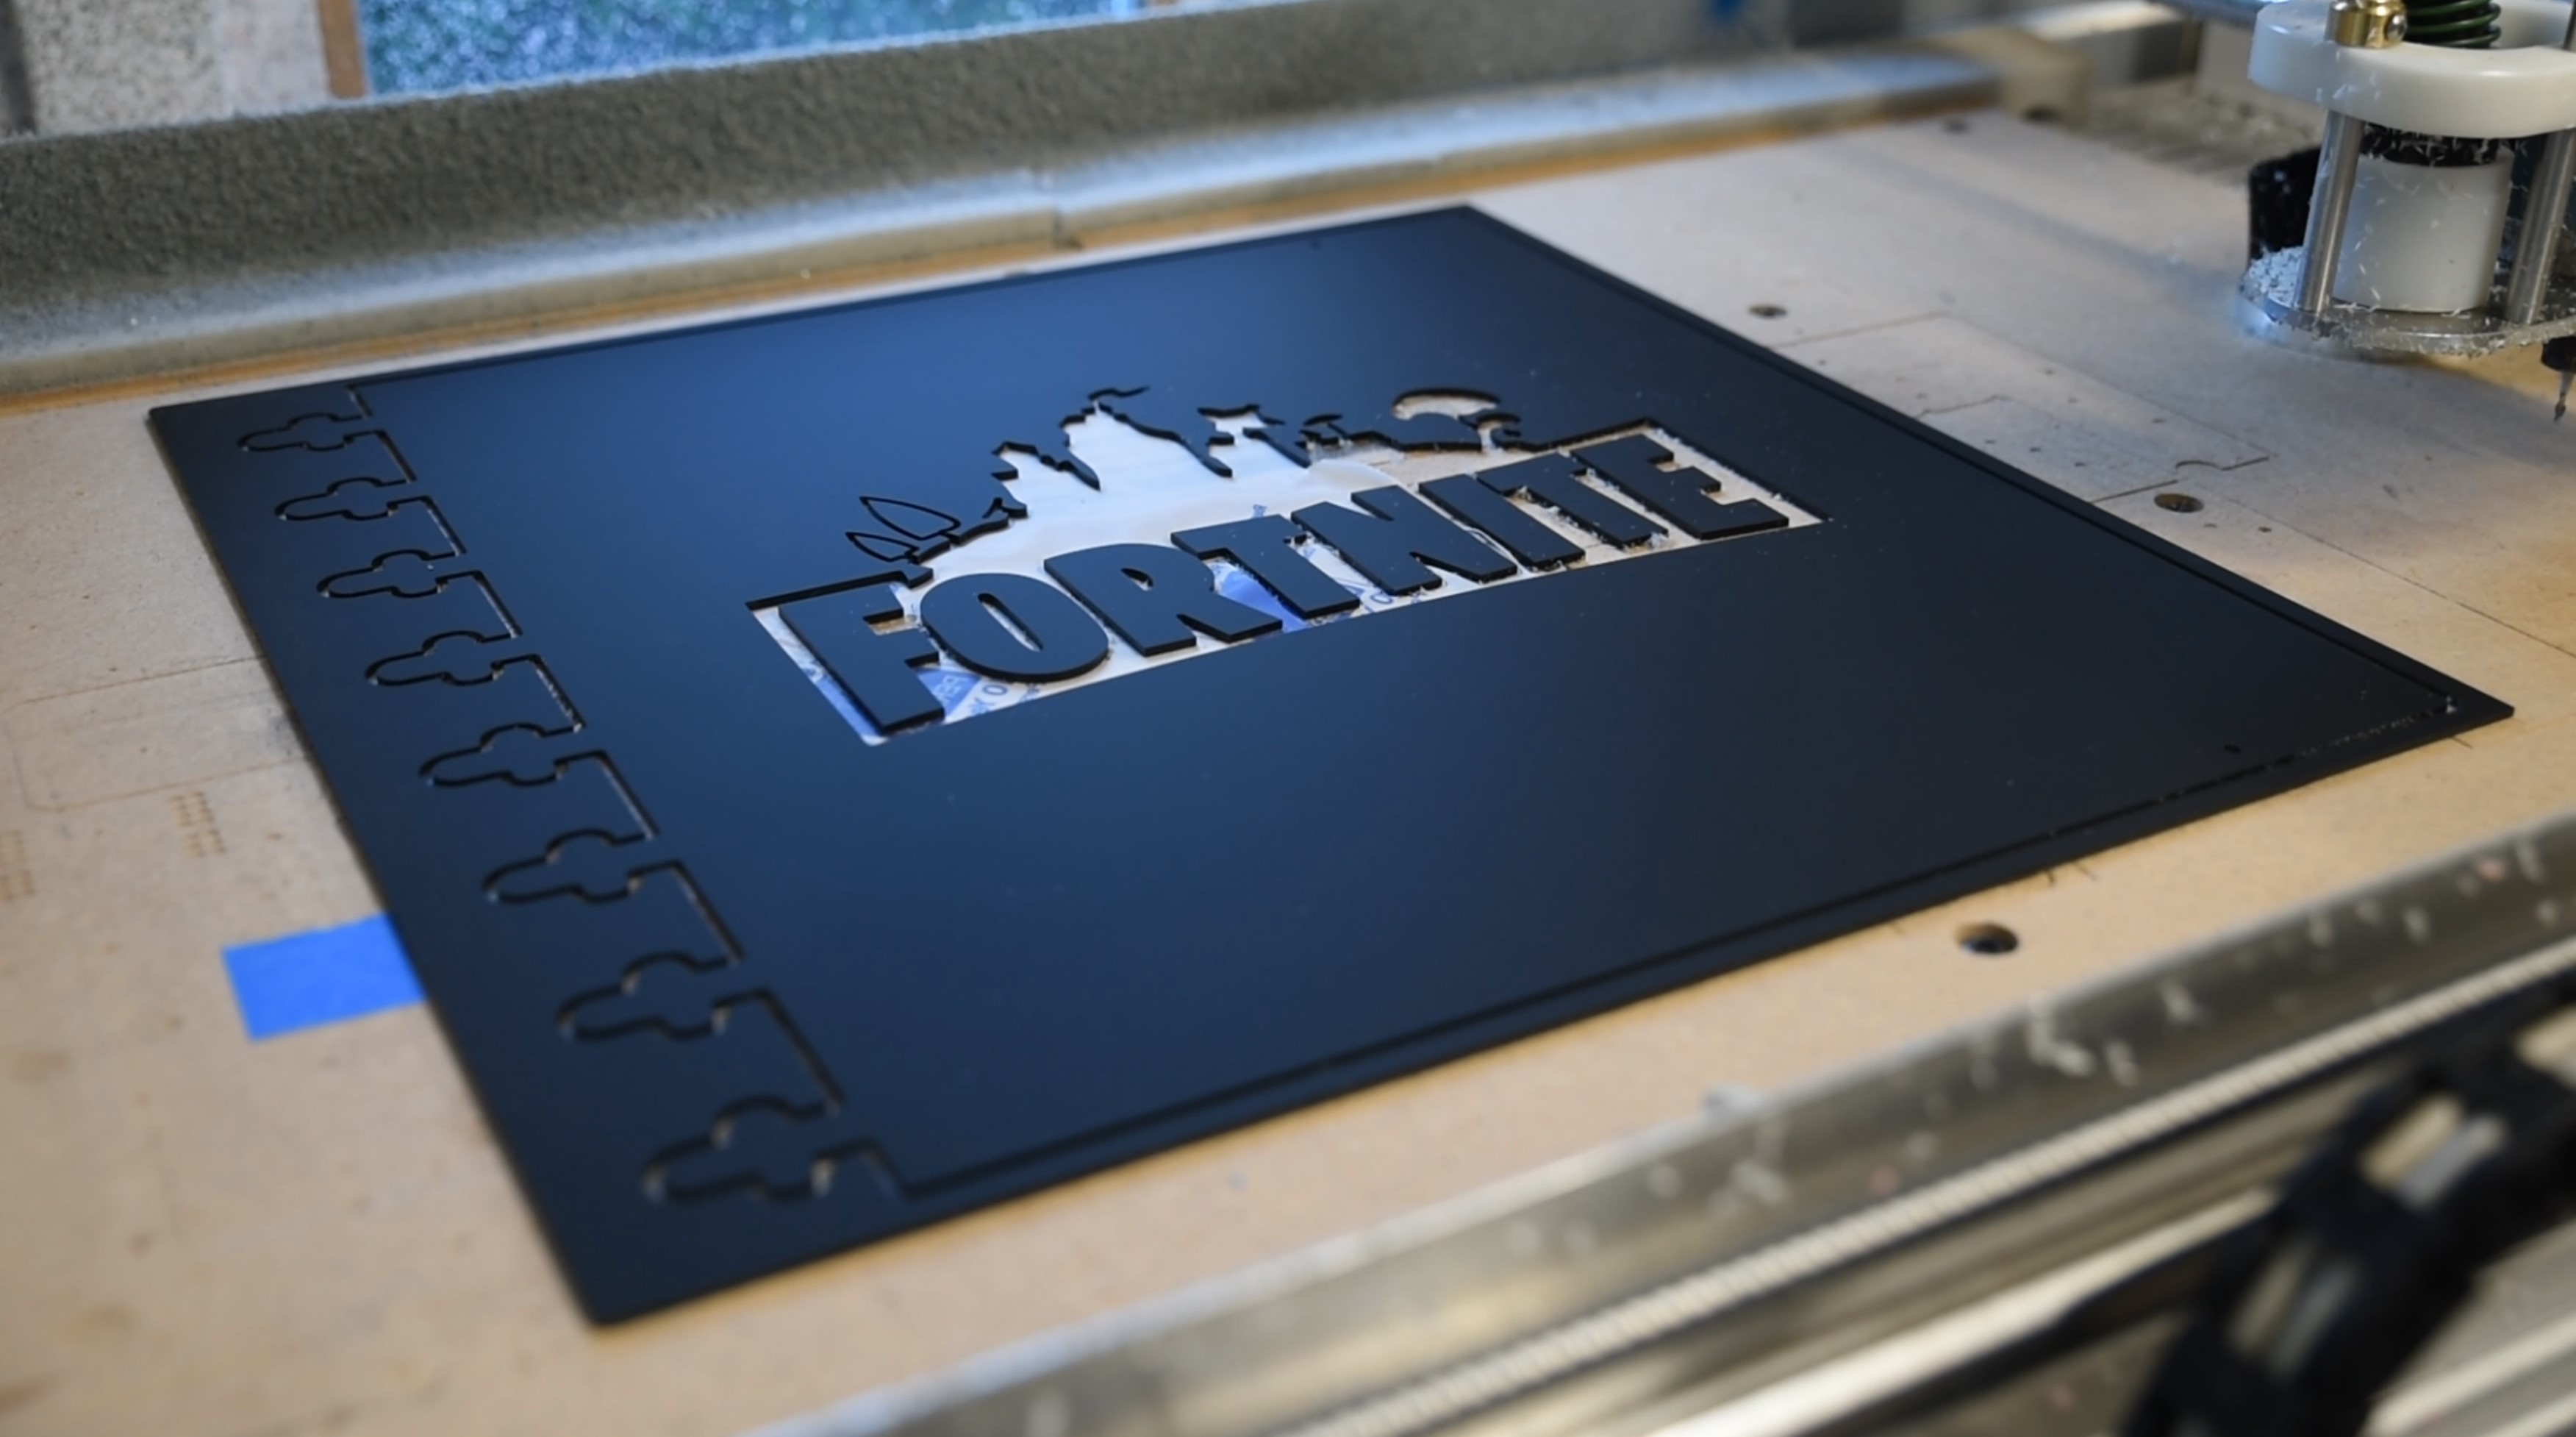
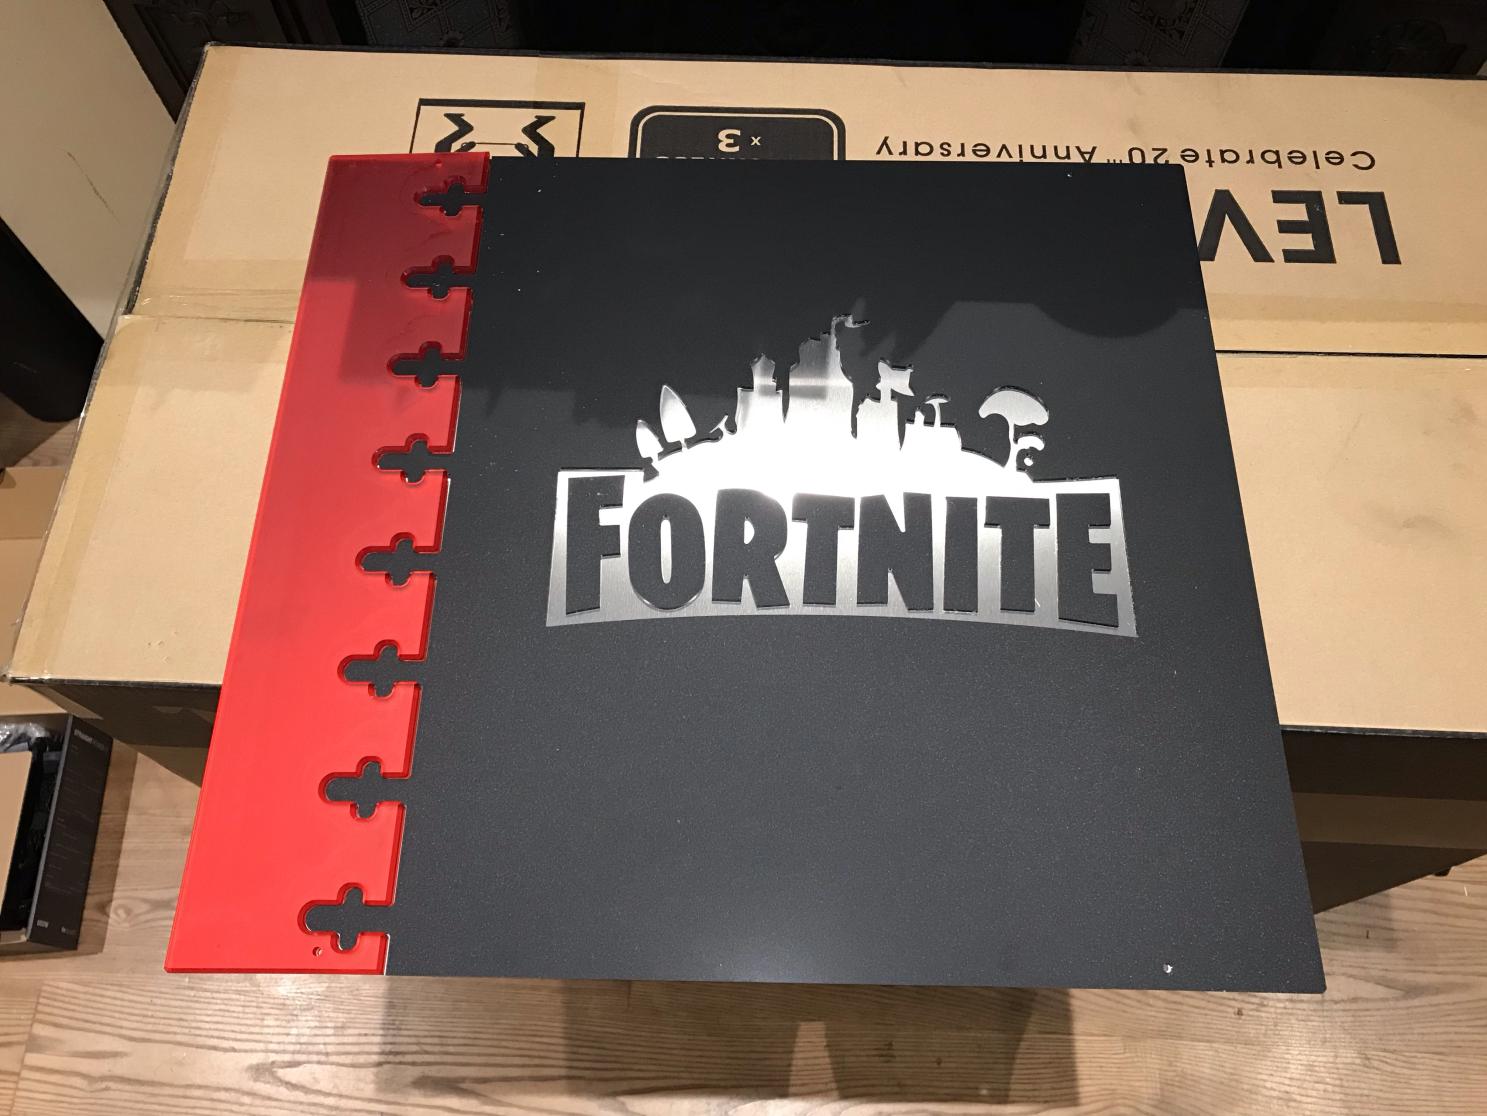
Lastly, the rear panel was given a looksy. On the stock case it's just an expanse of black, but the sides on this case are also interchangeable, as you're able to flip the case for an inverted ATX setup. That meant a newly made panel would only need four holes drilled into a big square, much like the tempered glass on the other side. I used that opportunity to inject a little more Fortnite into the build. After cutting a large 2mm aluminium square panel, I used the router to cut out a silhouette of the logo from matte black 3mm acrylic. Using more of the frosted red, I cut the regalia pattern into the side, then added more red leatherette behind the silhouette. Using the same techniques I also cut out an aesthetic backplate for the GPU.
All that was left to do at this point was fill her up, install windows for the DDR4 lighting control, and then ship her off to France! I chose to use Mayhem's Pastel Red coolant for this build. It was a toss up between a clear red and pastel, but pastel won out in the end, as it has a richer, more vibrant red that can stand up against darkness.


MSI MPG Velox 100R Chassis Review
October 14 2021 | 15:04

Want to comment? Please log in.