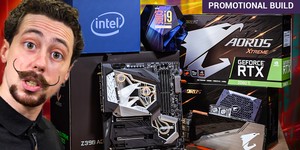
Video: Project #AORUS-KS Part 3: Building the Beast
February 4, 2020 | 17:00
Companies: #aorus #cooler-master #corsair #gigabyte #intel
Going from a design concept to a finished case-mod can be quite the undertaking. There's a very solid reason why so many of the project logs in the forums take months to years to complete, as there's a lot to consider and even more figure out along the way. Having a solid plan definitely helps, however, so for any build with a time constraint it's an absolute must, in my opinion at least.
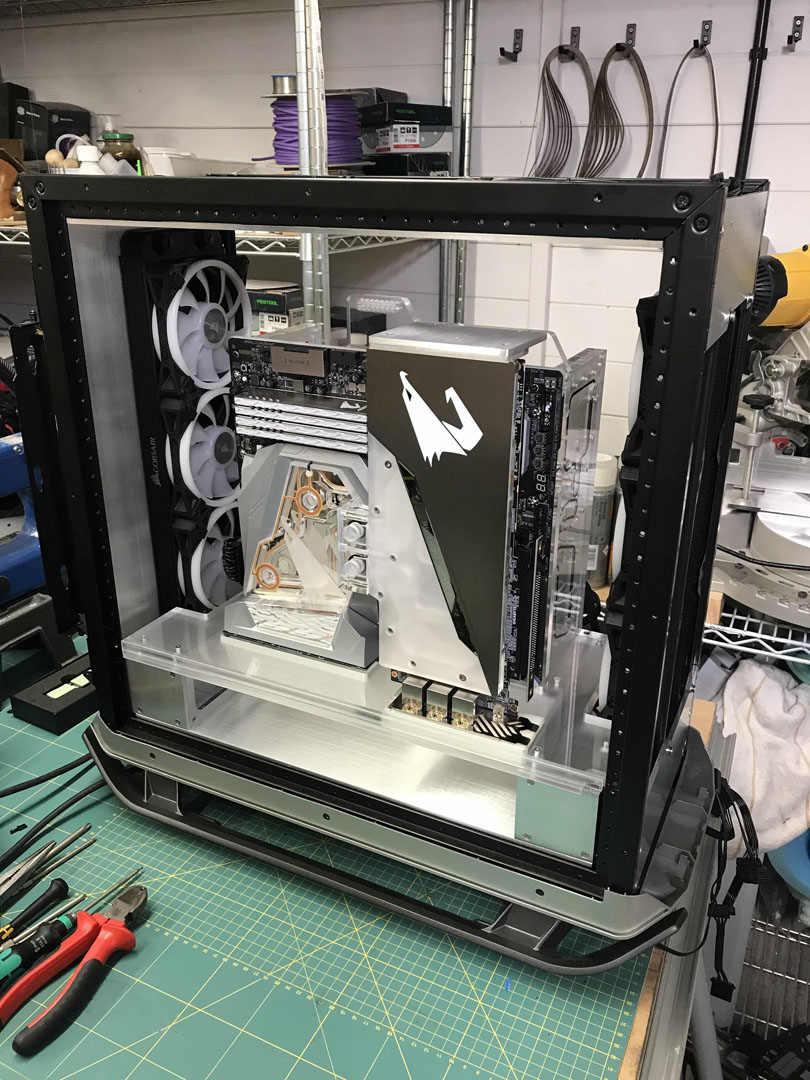
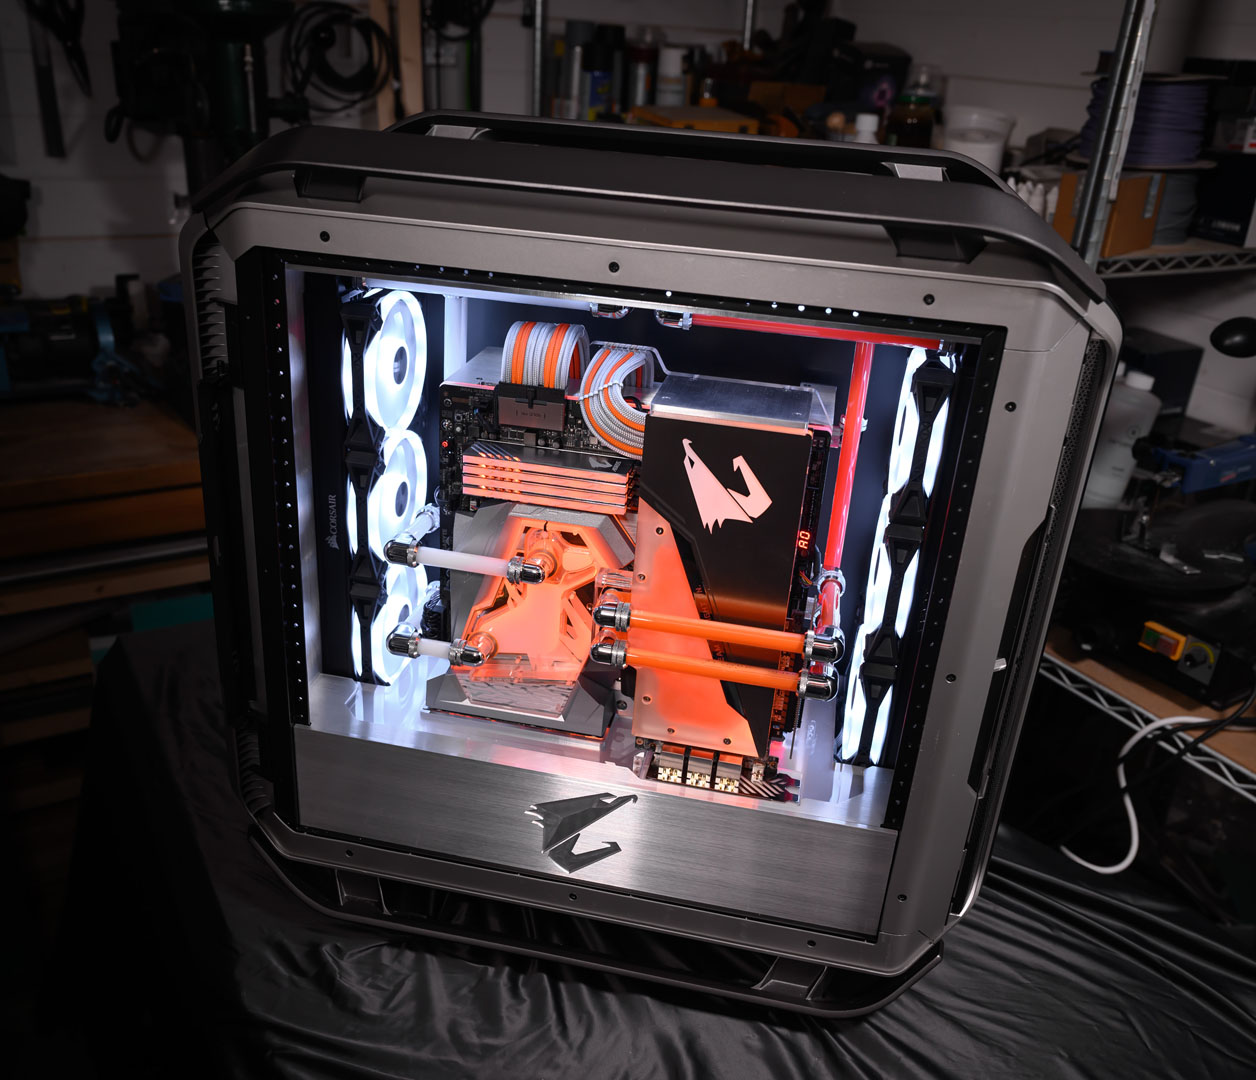
Our AORUS-KS project is quite an ambitious build in that barely any of the structure is stock. In fact, that's one of the main reasons I opted to use the Cooler Master C700M chassis. At first it can seem a bit wasteful recycling a large percentage of a chassis in a mod, but more often than not that's a result of modern manufacturing techniques. Most cases nowadays are built sort of like a house of cards - one removes a single panel and the whole thing concertinas since it turns out that was a structural element riveted to every other panel in the case. The great thing about module chassis interiors like found in the C700M and BeQuiet's Dark Base Pro 900 R2 is that they're designed with this in mind. The case itself is a framework, to which the interior and exterior panels bolt on to. This makes them very easy to mod for beginners and experienced folks alike as the case is meant to be rearranged.
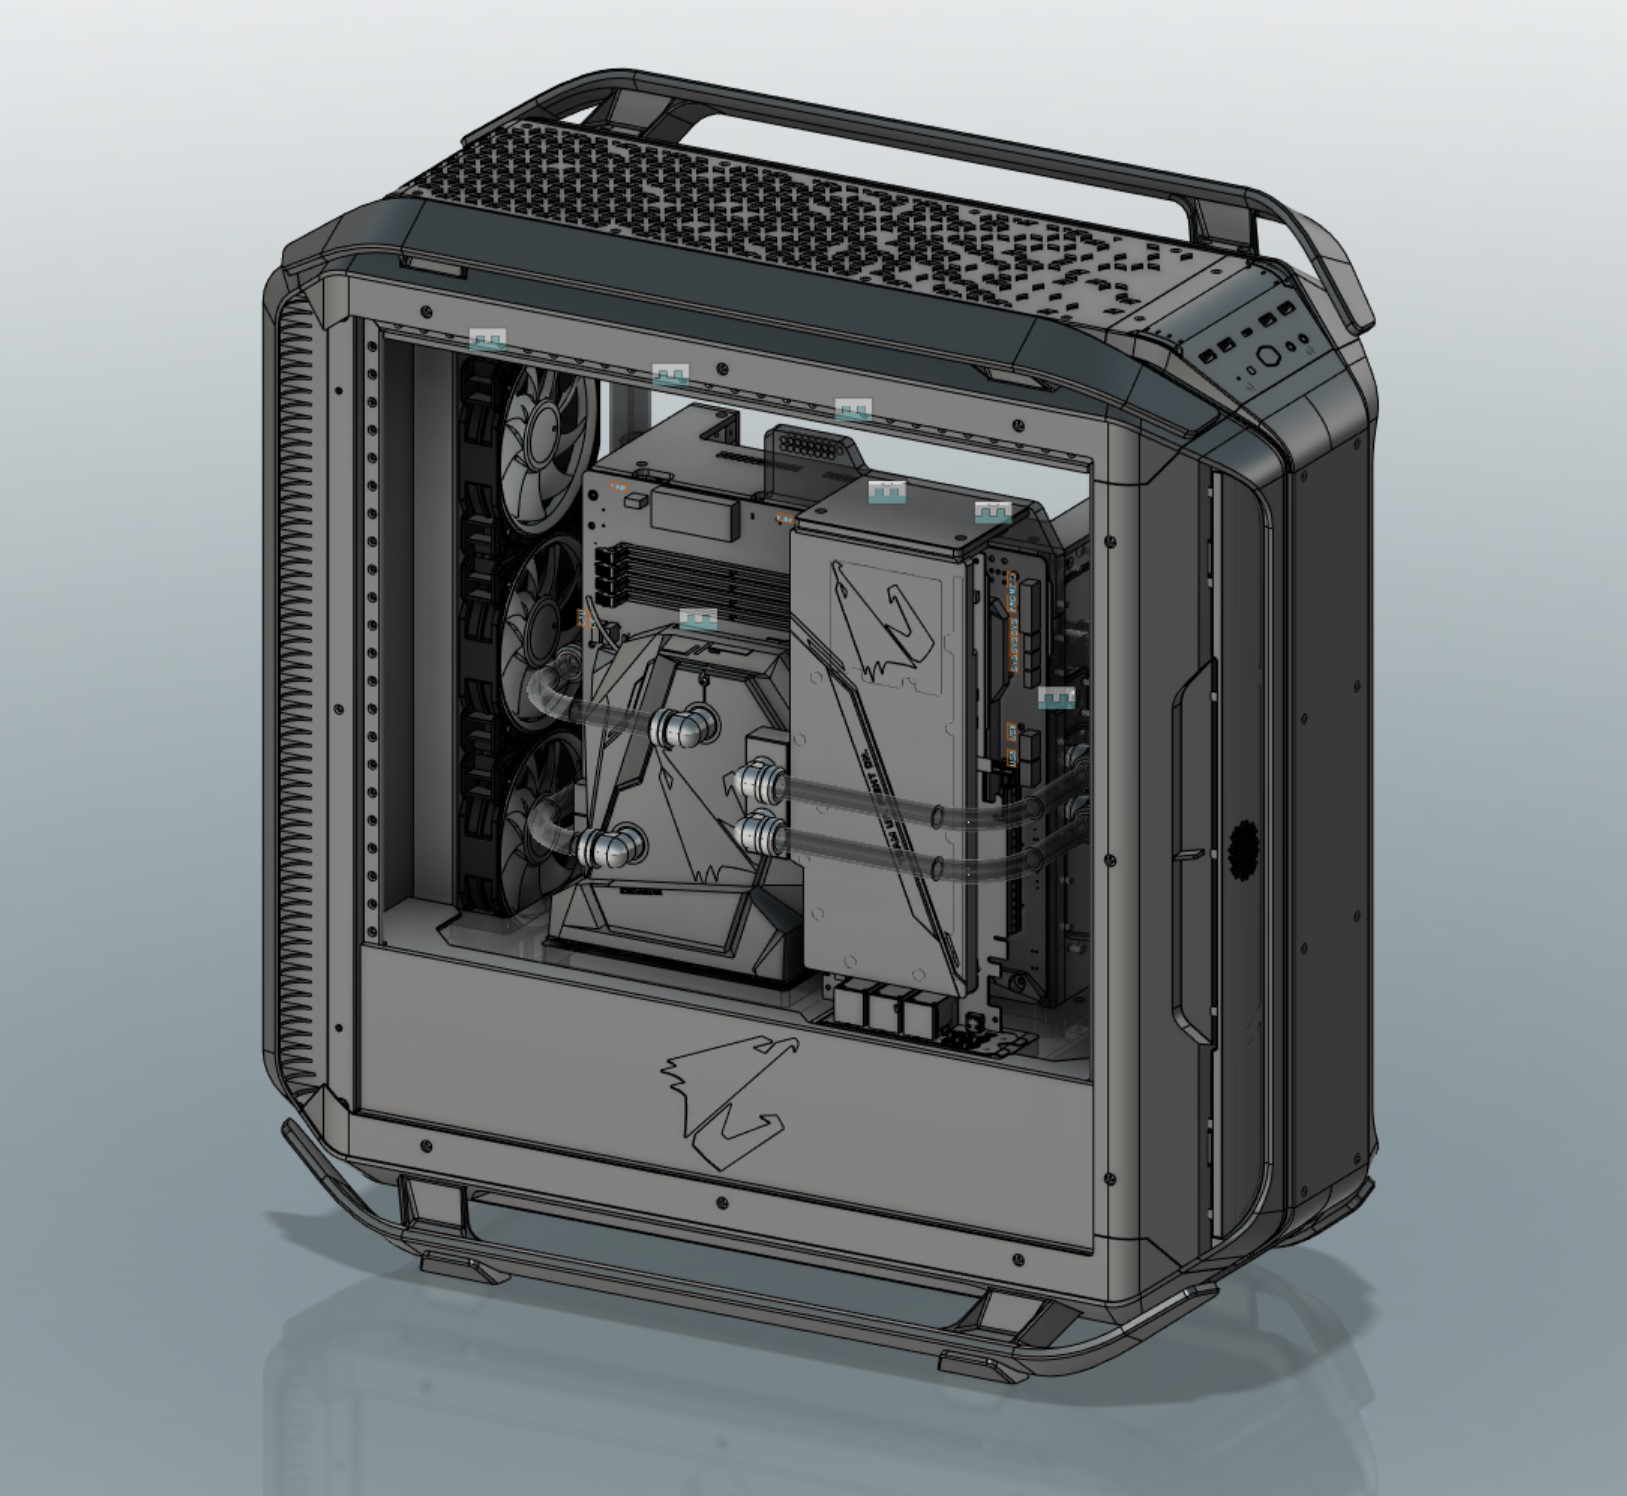
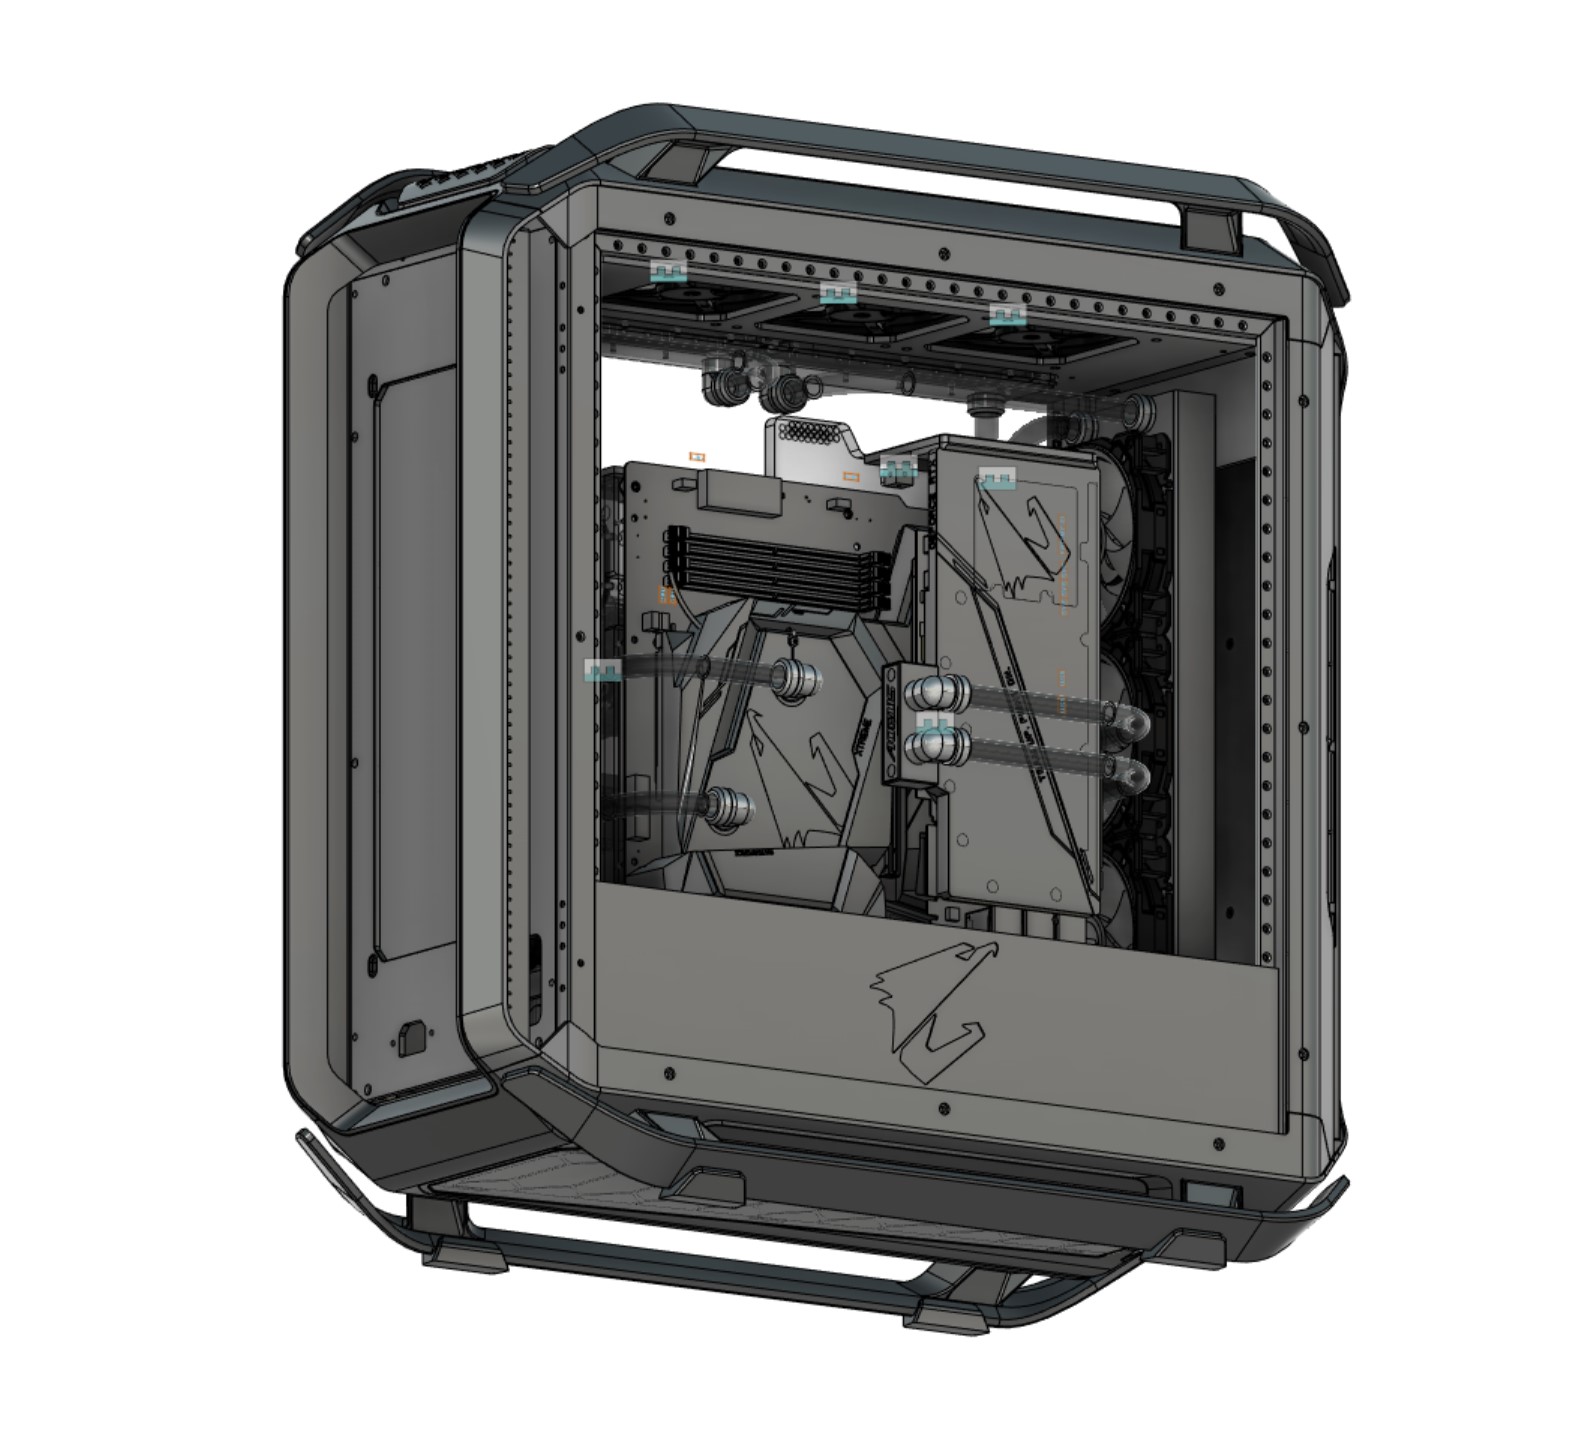
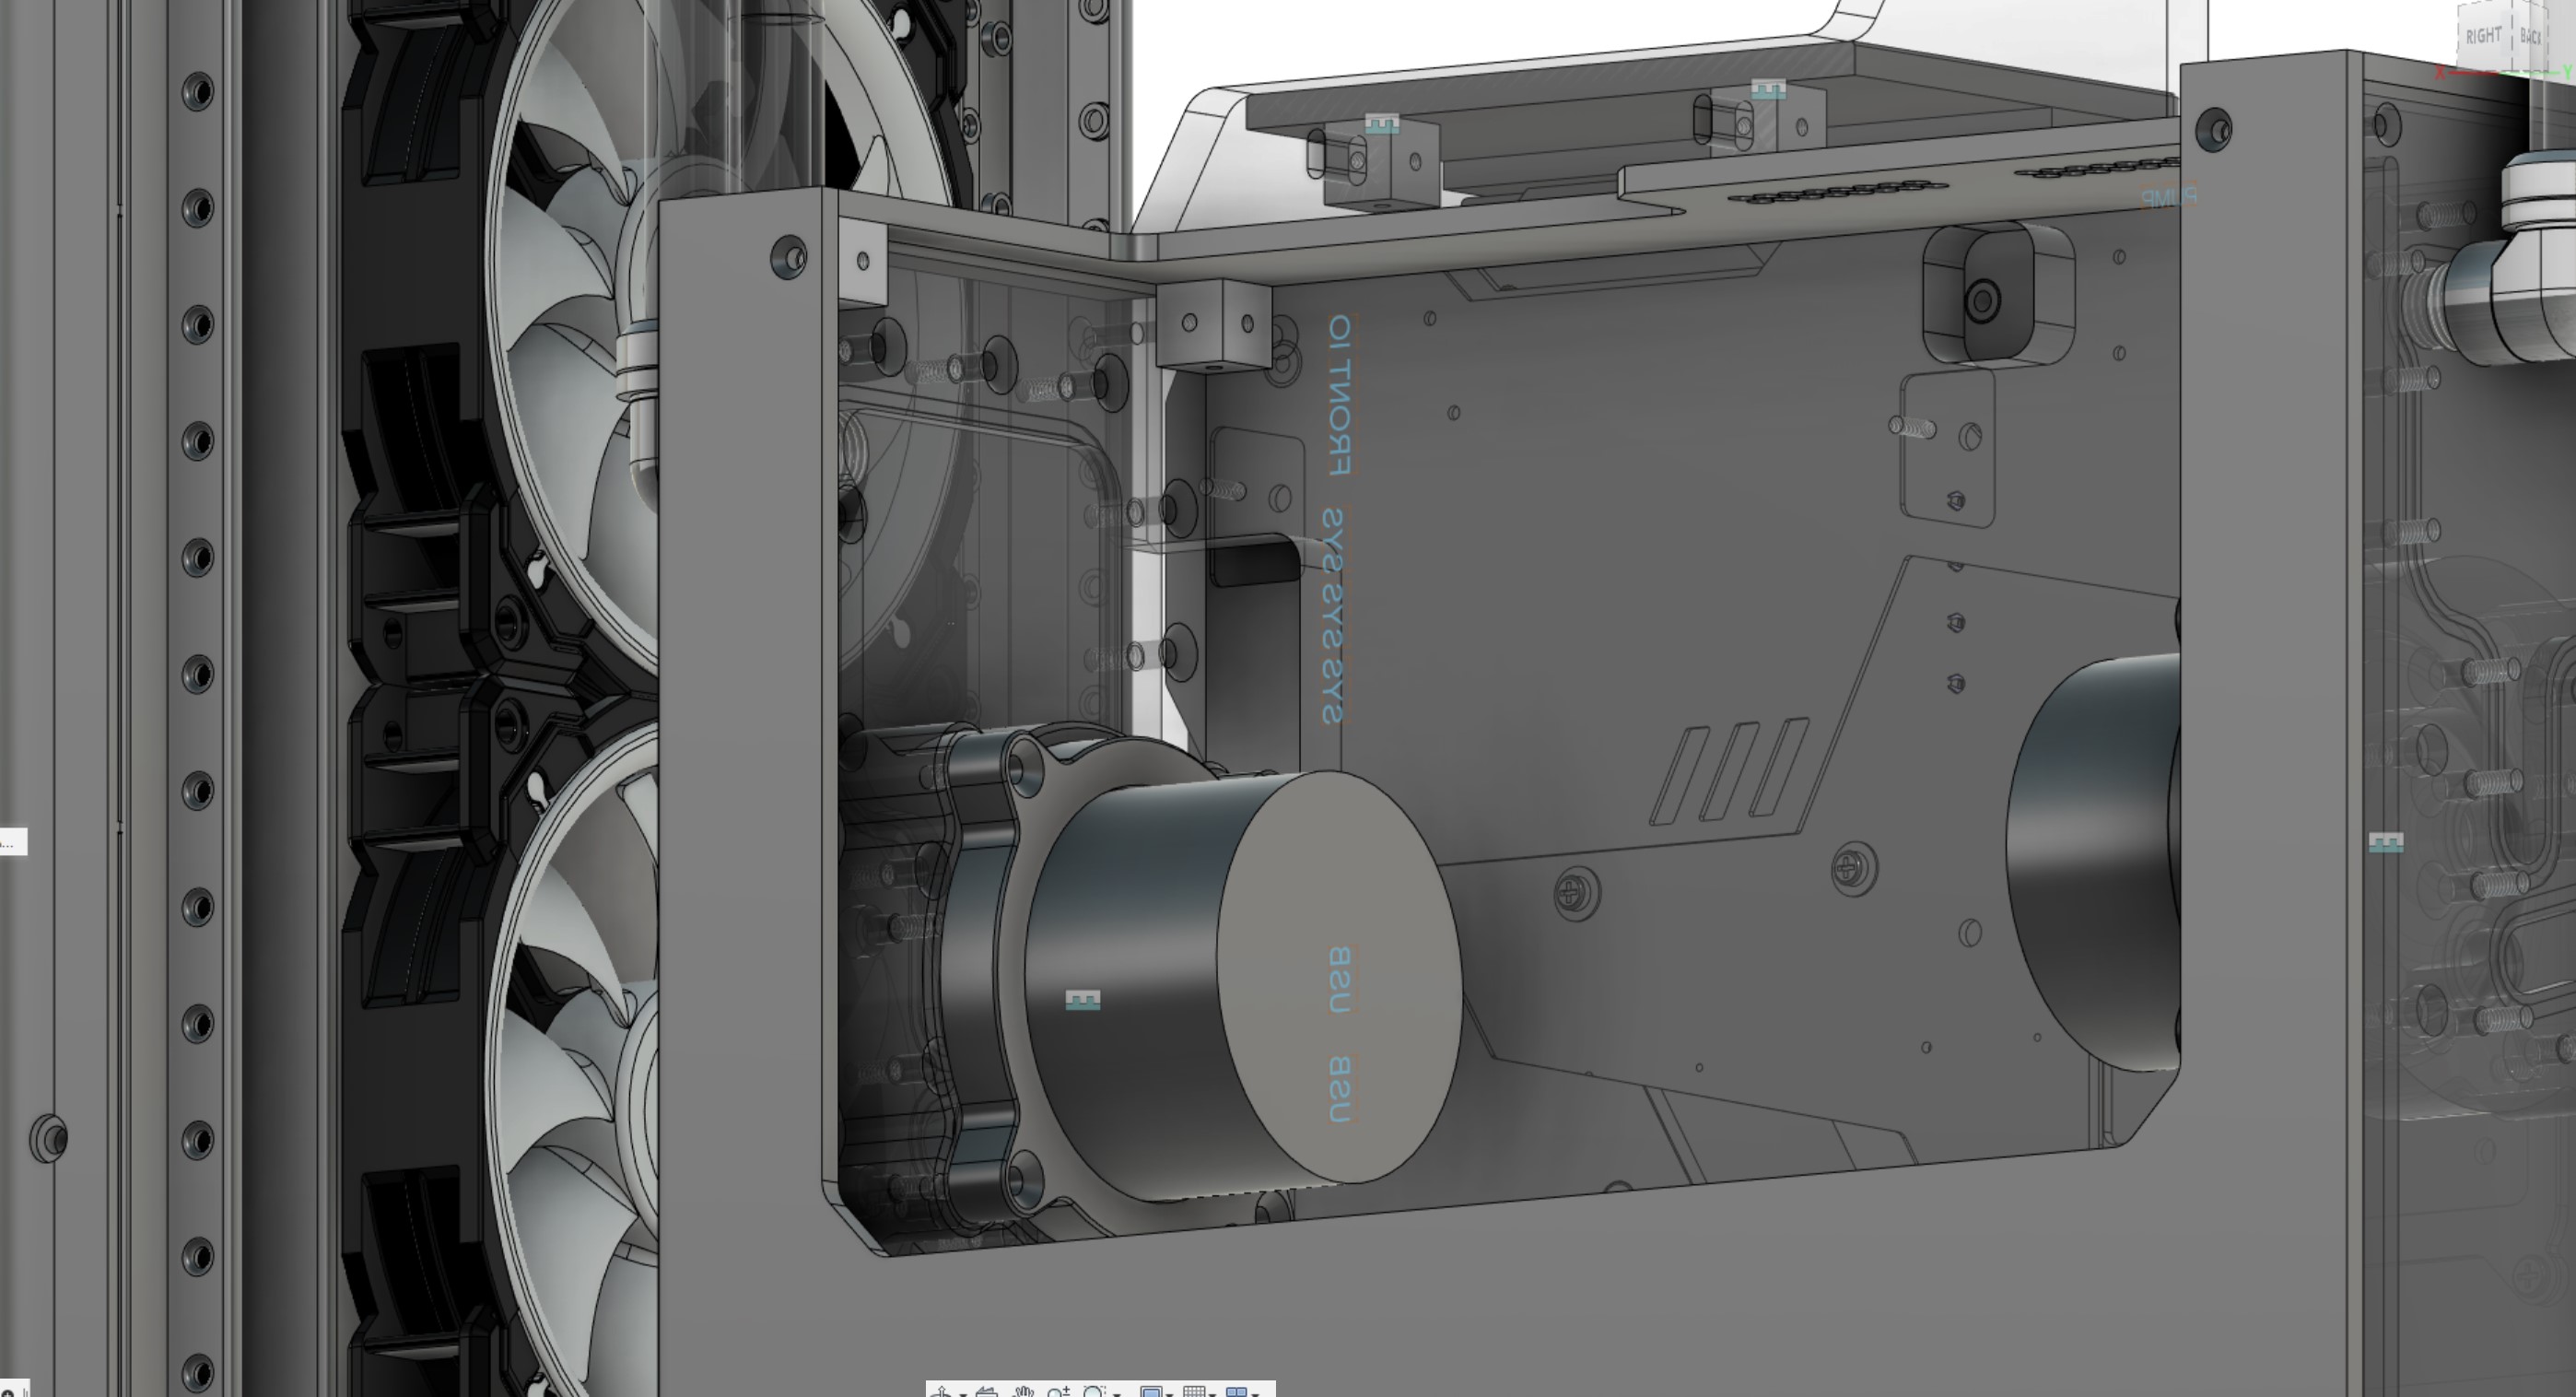
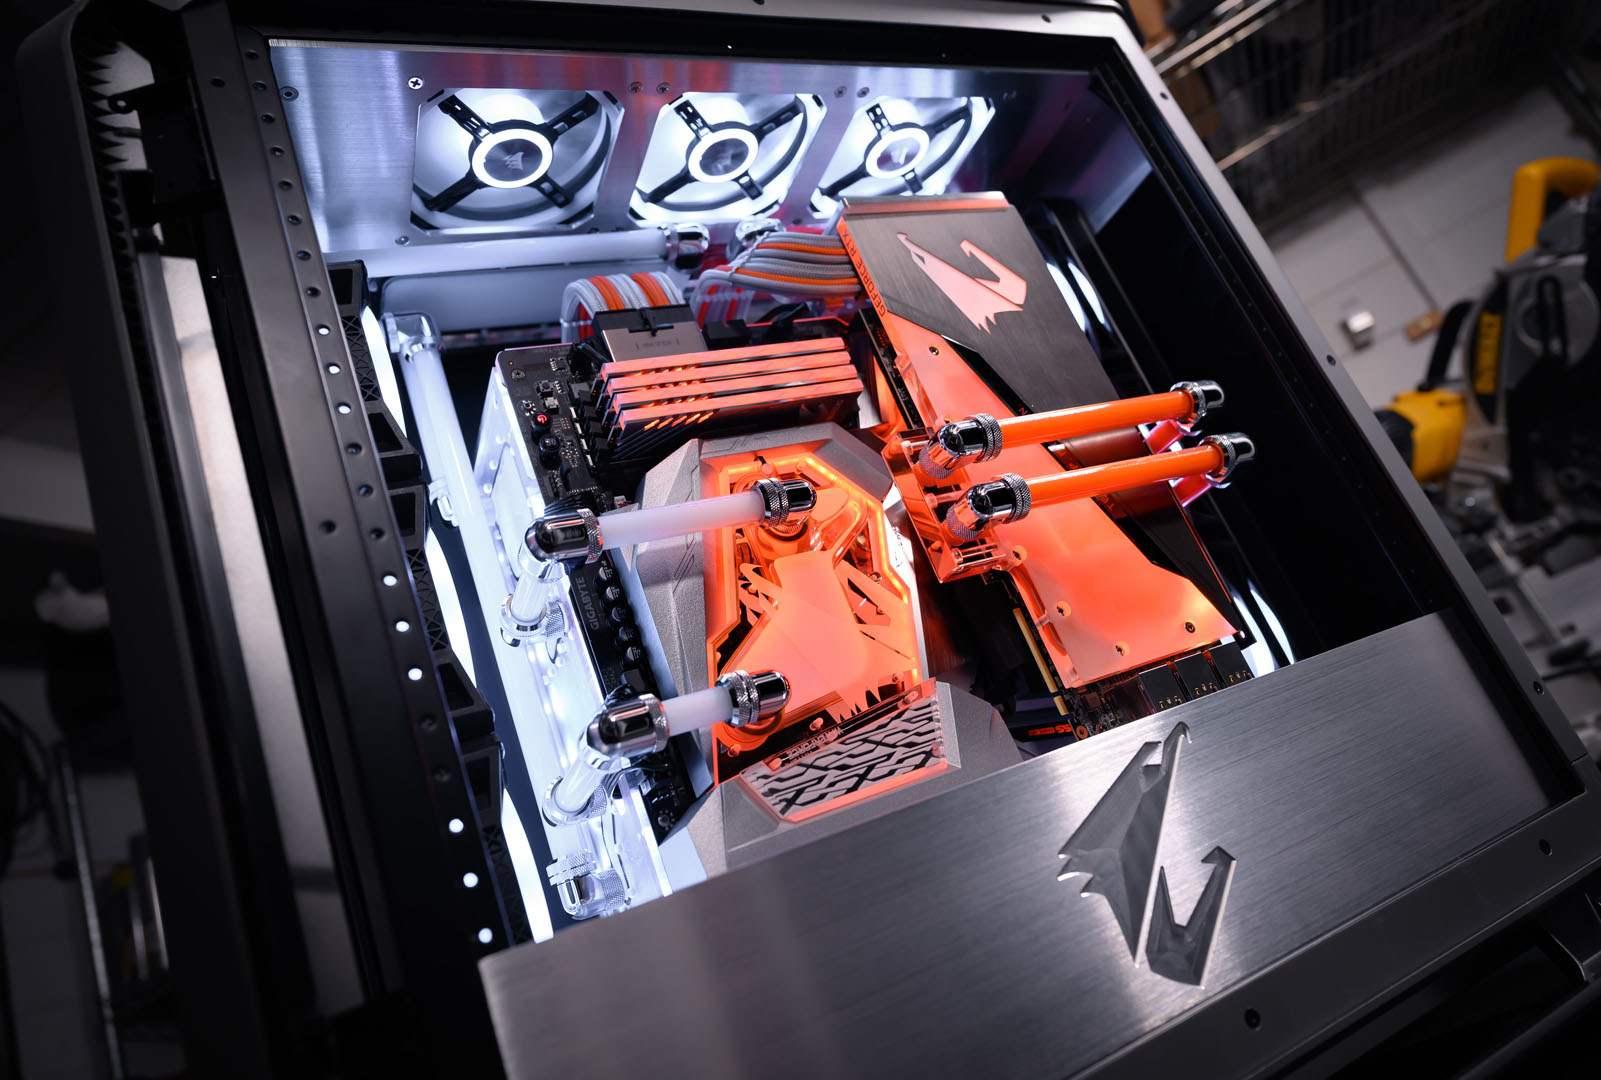
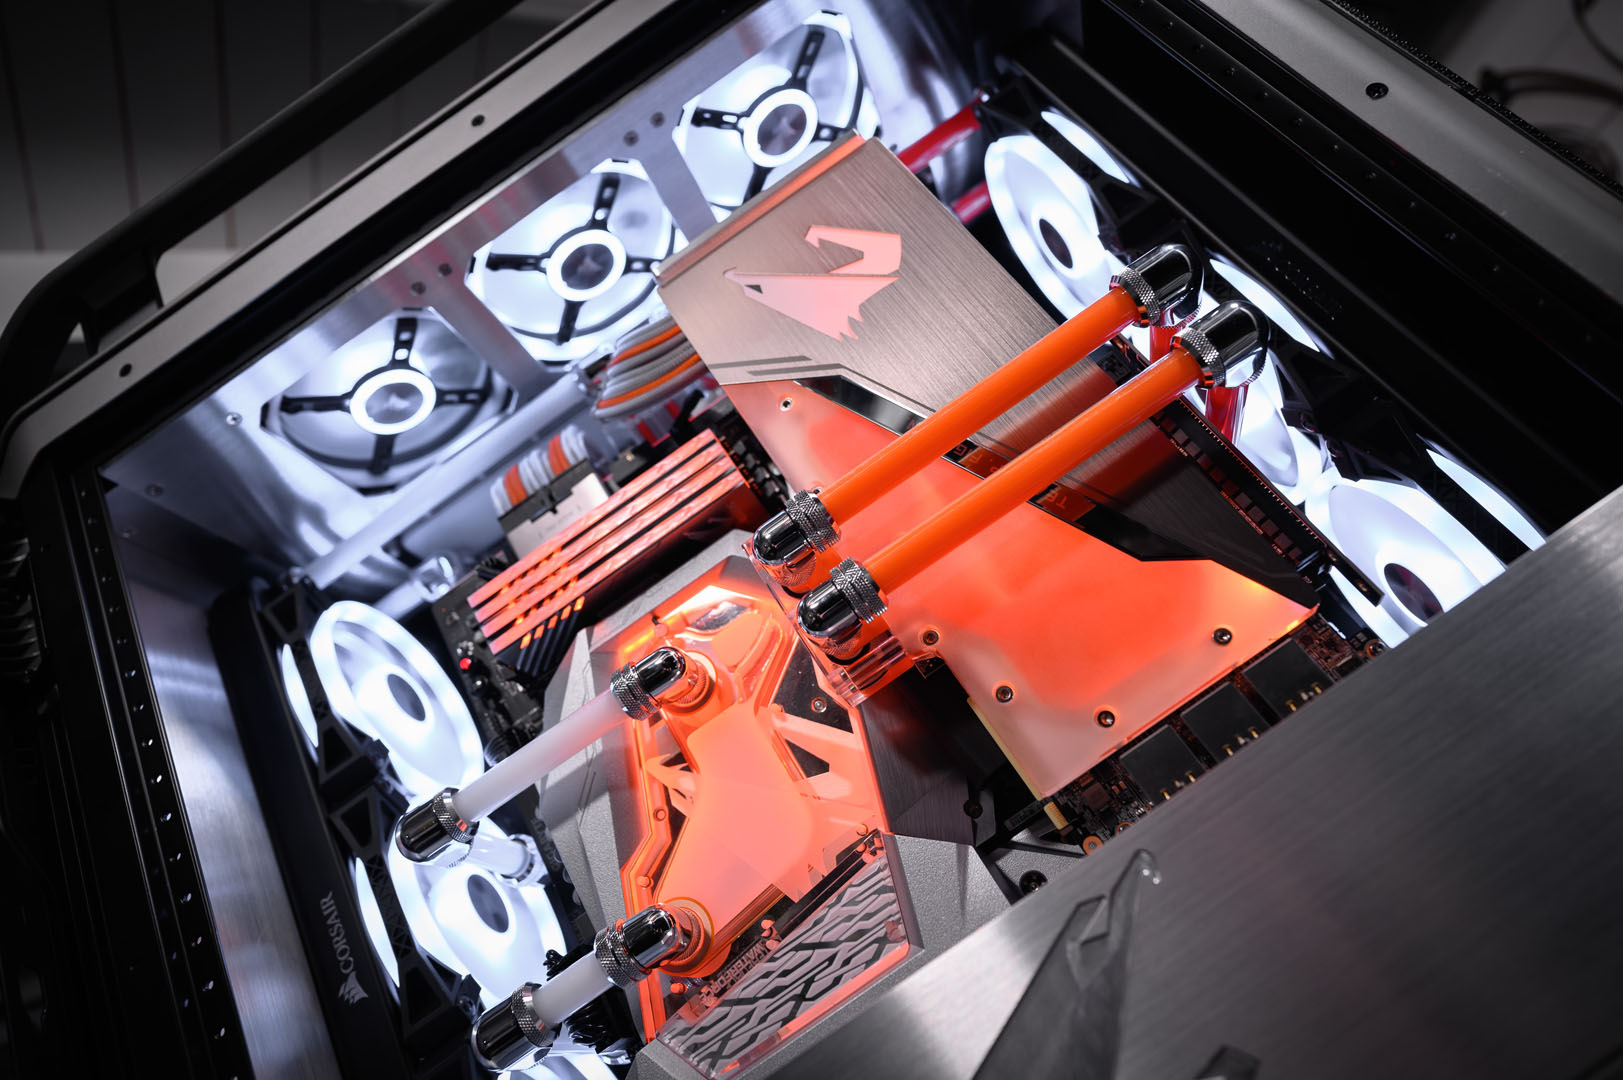
In the case of AORUS-KS, the motherboard tray is rotated 90-degrees with the I/O facing down. The front and rear instead play host to a pair of 360mm radiator mounts, the top panel then sports a dual-panel reservoir setup along with a further three fans for additional airflow and lighting. The main motherboard tray assembly is a 10mm acrylic panel to which the pump/reservoir panels fit directly, forming an isolated pillar of sorts with the hardware on show from all angles.
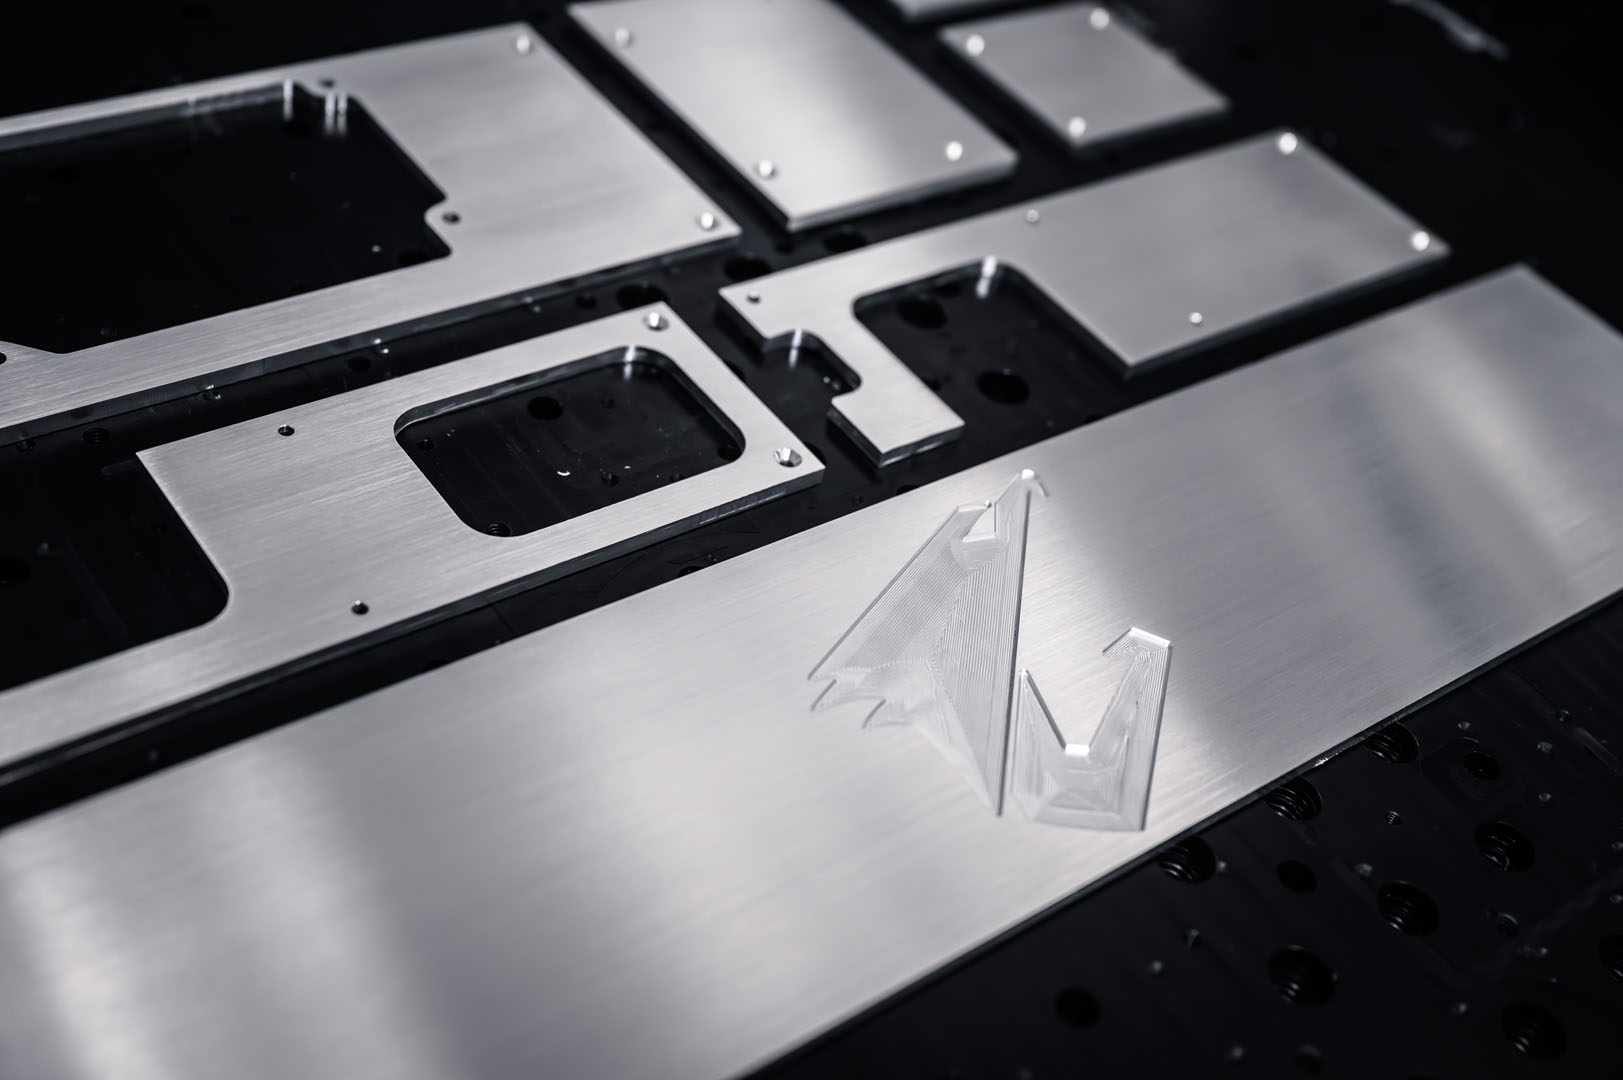
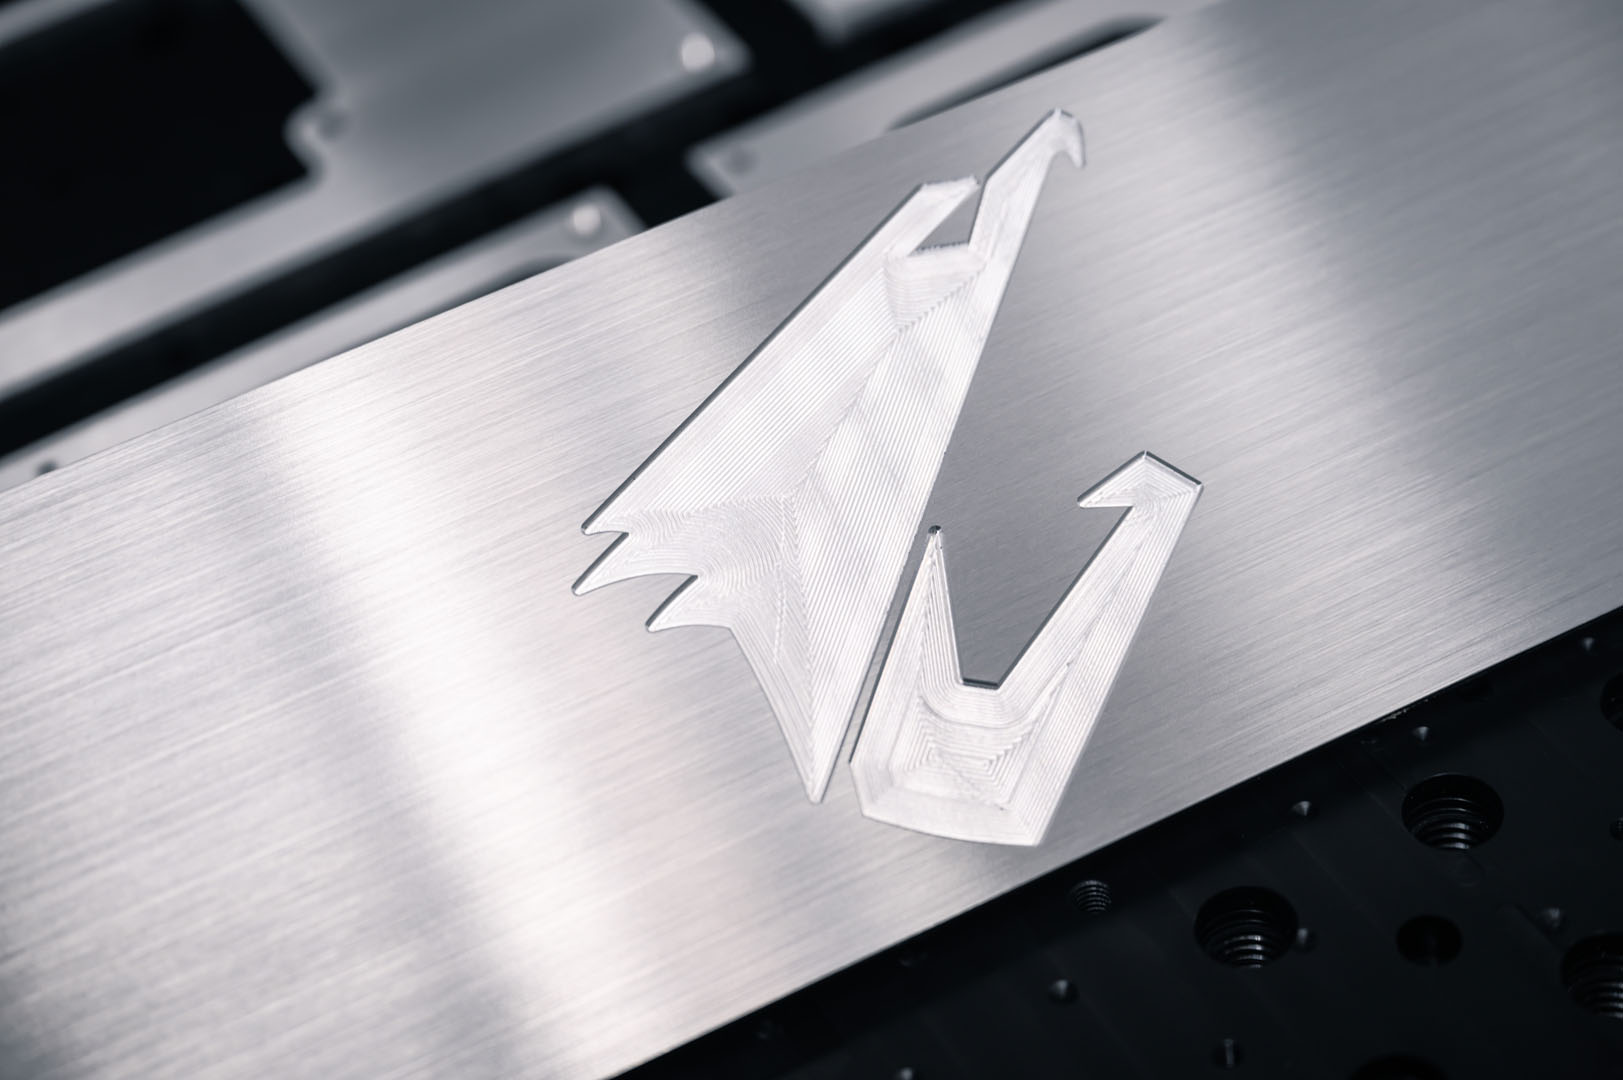
Having the I/O on the bottom raised an interesting challenge; how does one plug anything in? The way I worked around this was to keep a large compartment under the motherboard and GPU completely separate from the rest of the build. The last thing you want is to be navigating RGB wires and power-supply connections when simply trying to connect a mouse or plug in a USB stick. The compartment is covered by a large blanking plate made from 5mm-thick aluminium, which sports the AORUS logo. To keep things straightforward, this panel fits the case via use of strong neodymium magnets, meaning no screws and no lost time.
With the theme being brushed aluminium, I set to work brushing the panels in preparation for cutting. It's a good idea to do this before cutting the parts out as it allows for an even finish to be achieved with significantly lower effort. Brushing a whole flat panel is much easier than lots of small parts, it also removes the risk of accidentally rounding corners and edges with uneven sanding pressure, easily done by hand. I simply used a hand-sanding pad, an 80-grit Festool Granat sanding disc and a healthy portion of WD-40. The oil makes a big difference to the surface finish, looking at the panels you wouldn't immediately think they were finished to only 80-grit. Thanks to the tip, whoever brought it up in the G.Skill video comments!
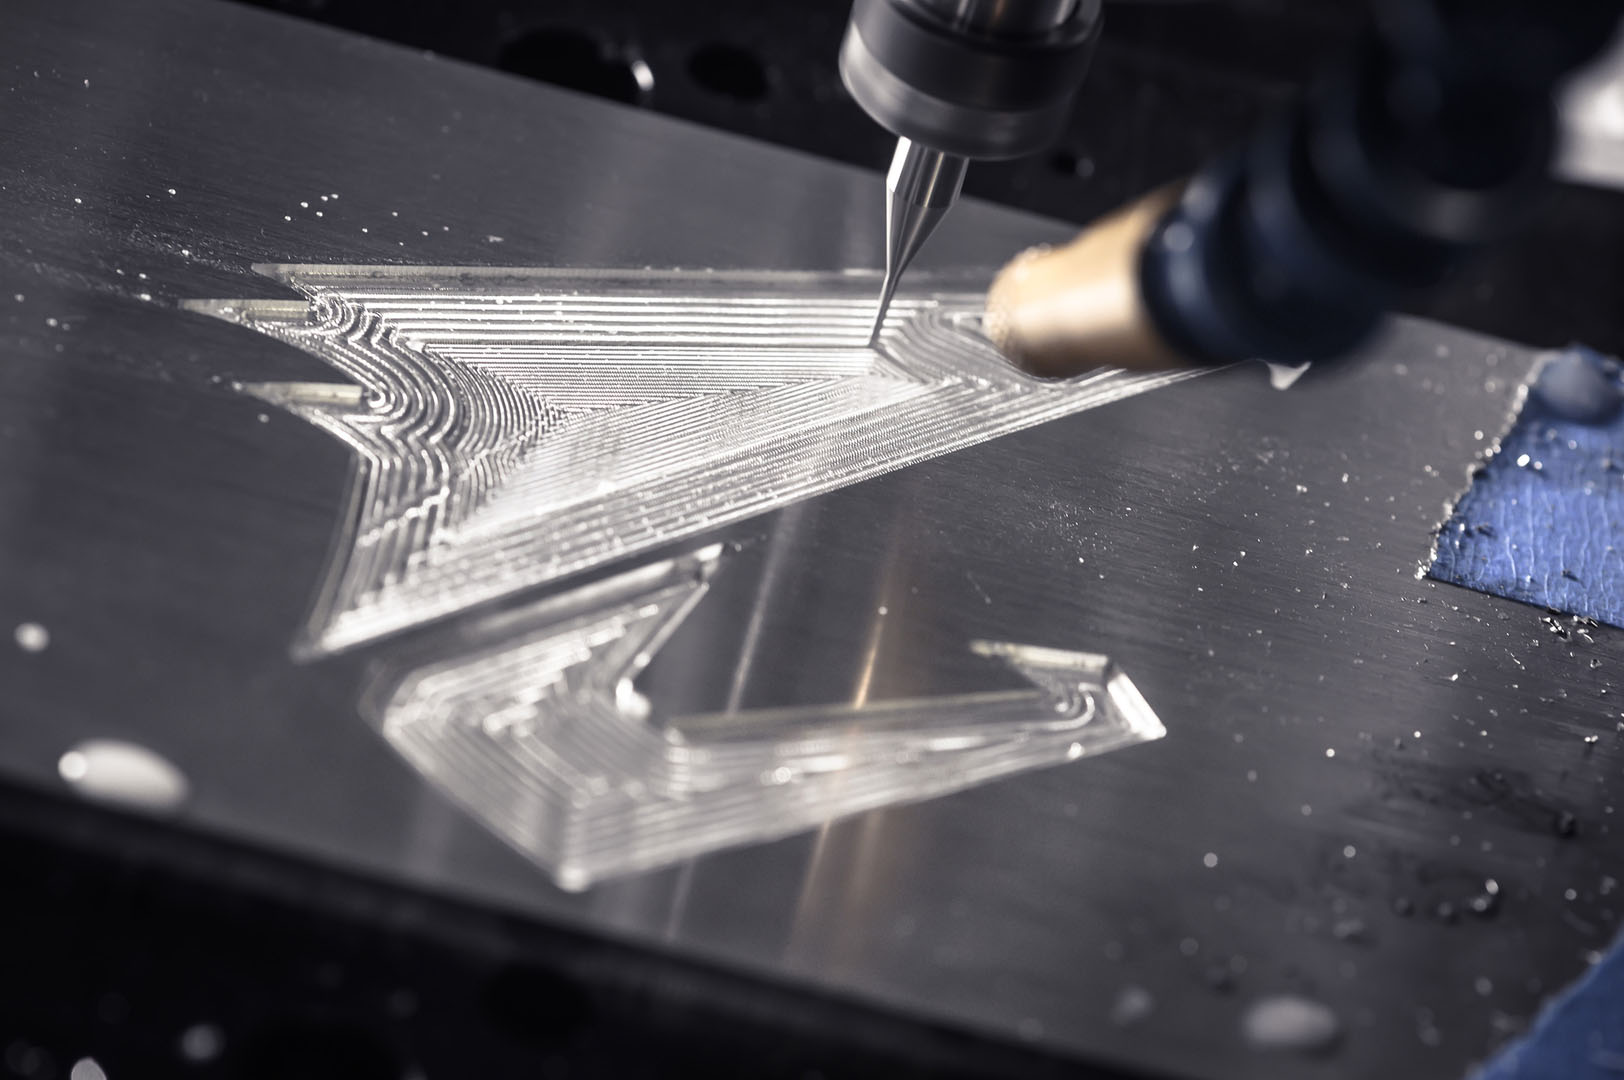
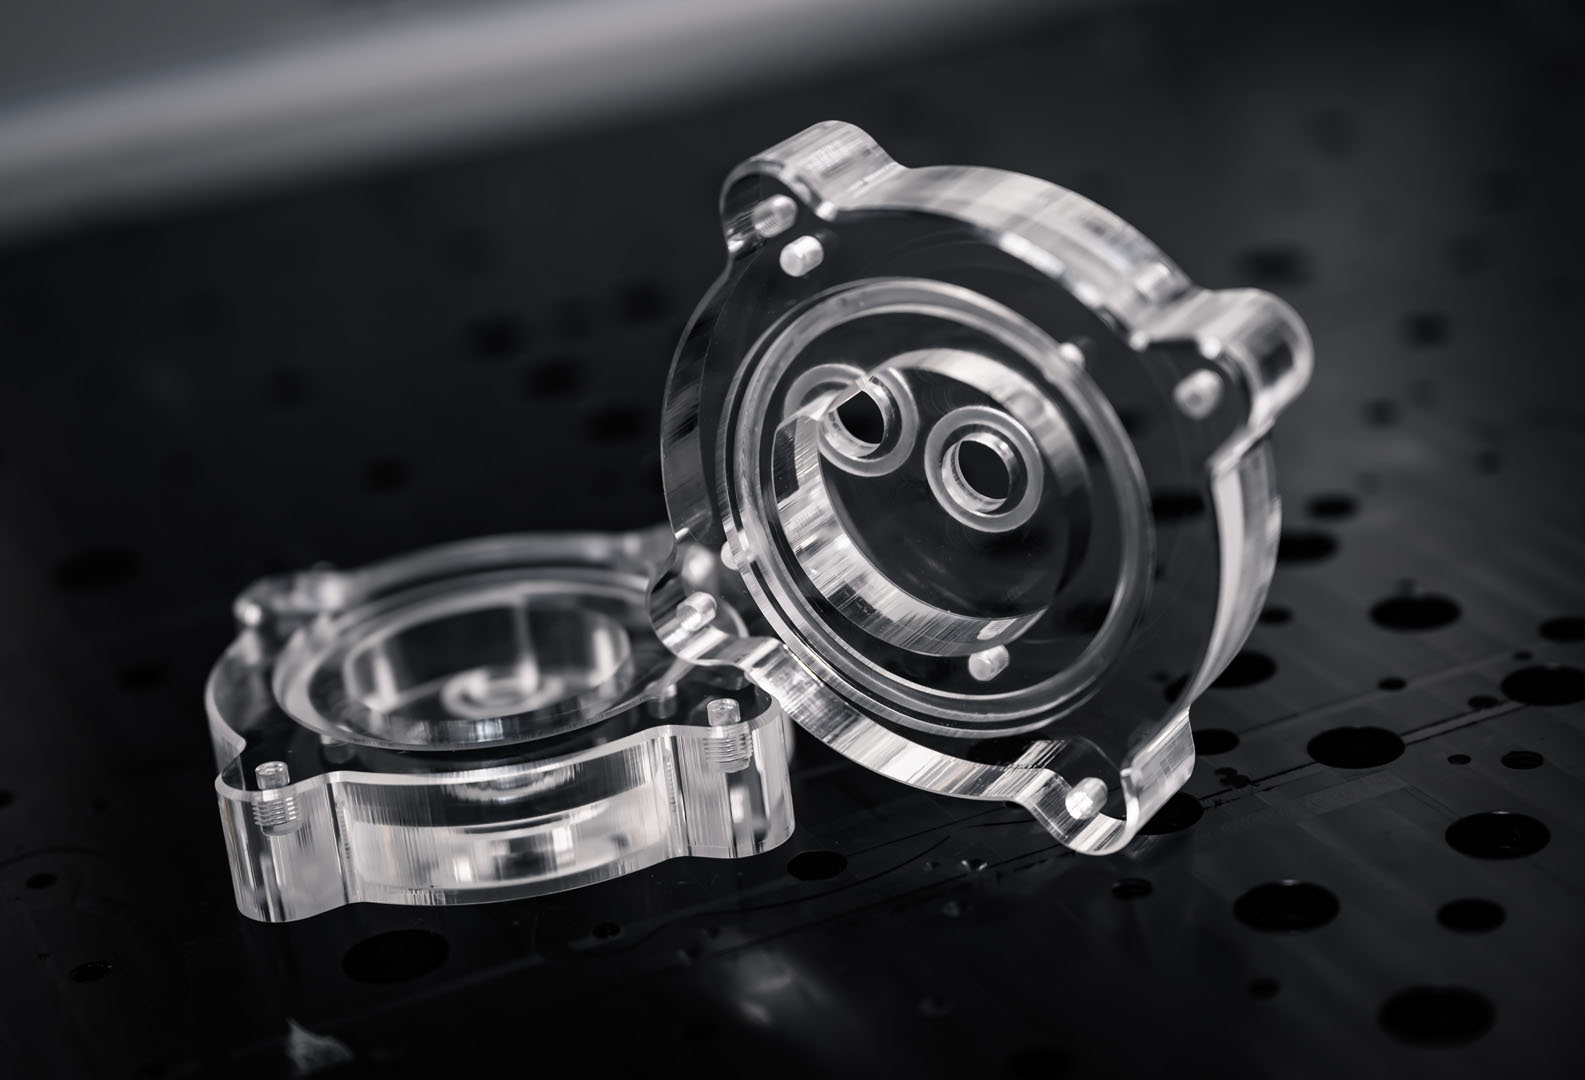
Cutting the parts was fairly straightforward, if a tad lengthy given my machine's lack of power. I used 0.4mm tabs to keep all the parts connected to the main sheets during cutting, and this technique works really well if you're able to finish the parts manually afterwards. The acrylic portions for this build were also largely straightforward. I used a sandwich of frosted acrylic topped with clear for the distros. This gives them a milky appearance which diffuses RGB strips very effectively, plus I just like how it's both transparent on the top and translucent underneath. To mount the D5 pumps, I made a set of adaptors from 20mm acrylic, with these simply screwing into the main distro plates and align with the ports. It saves doing large double-sided plates cut from thick acrylic. The retention rings were cut form 10mm aluminium and then given a light brushed surface by mounting in the lathe.
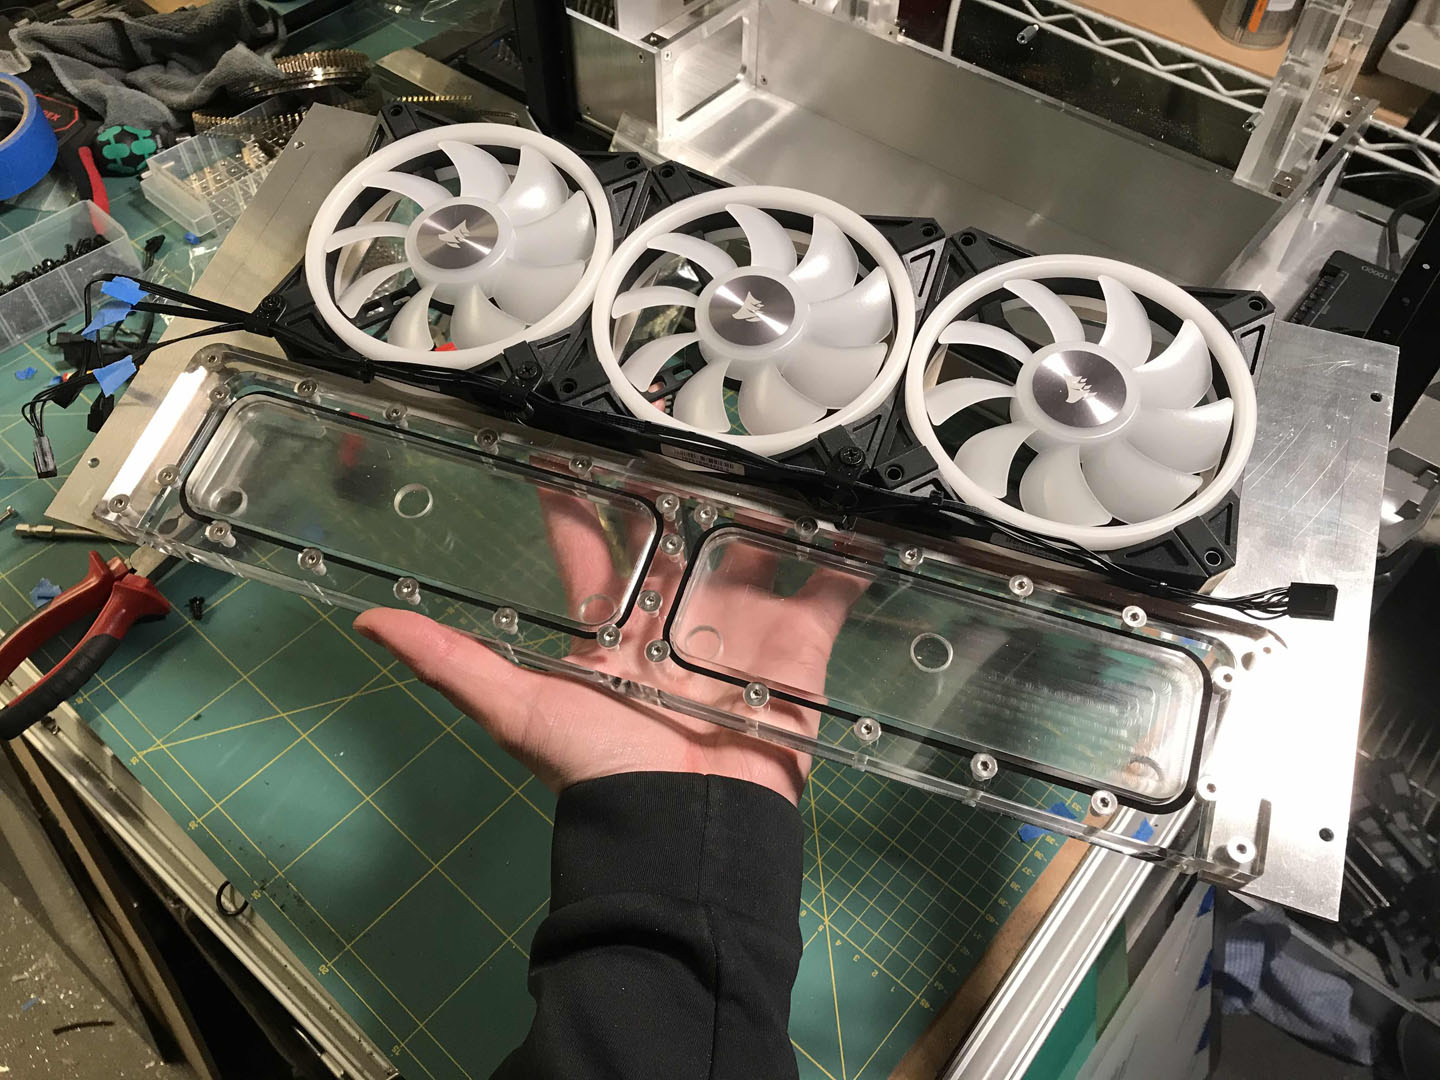
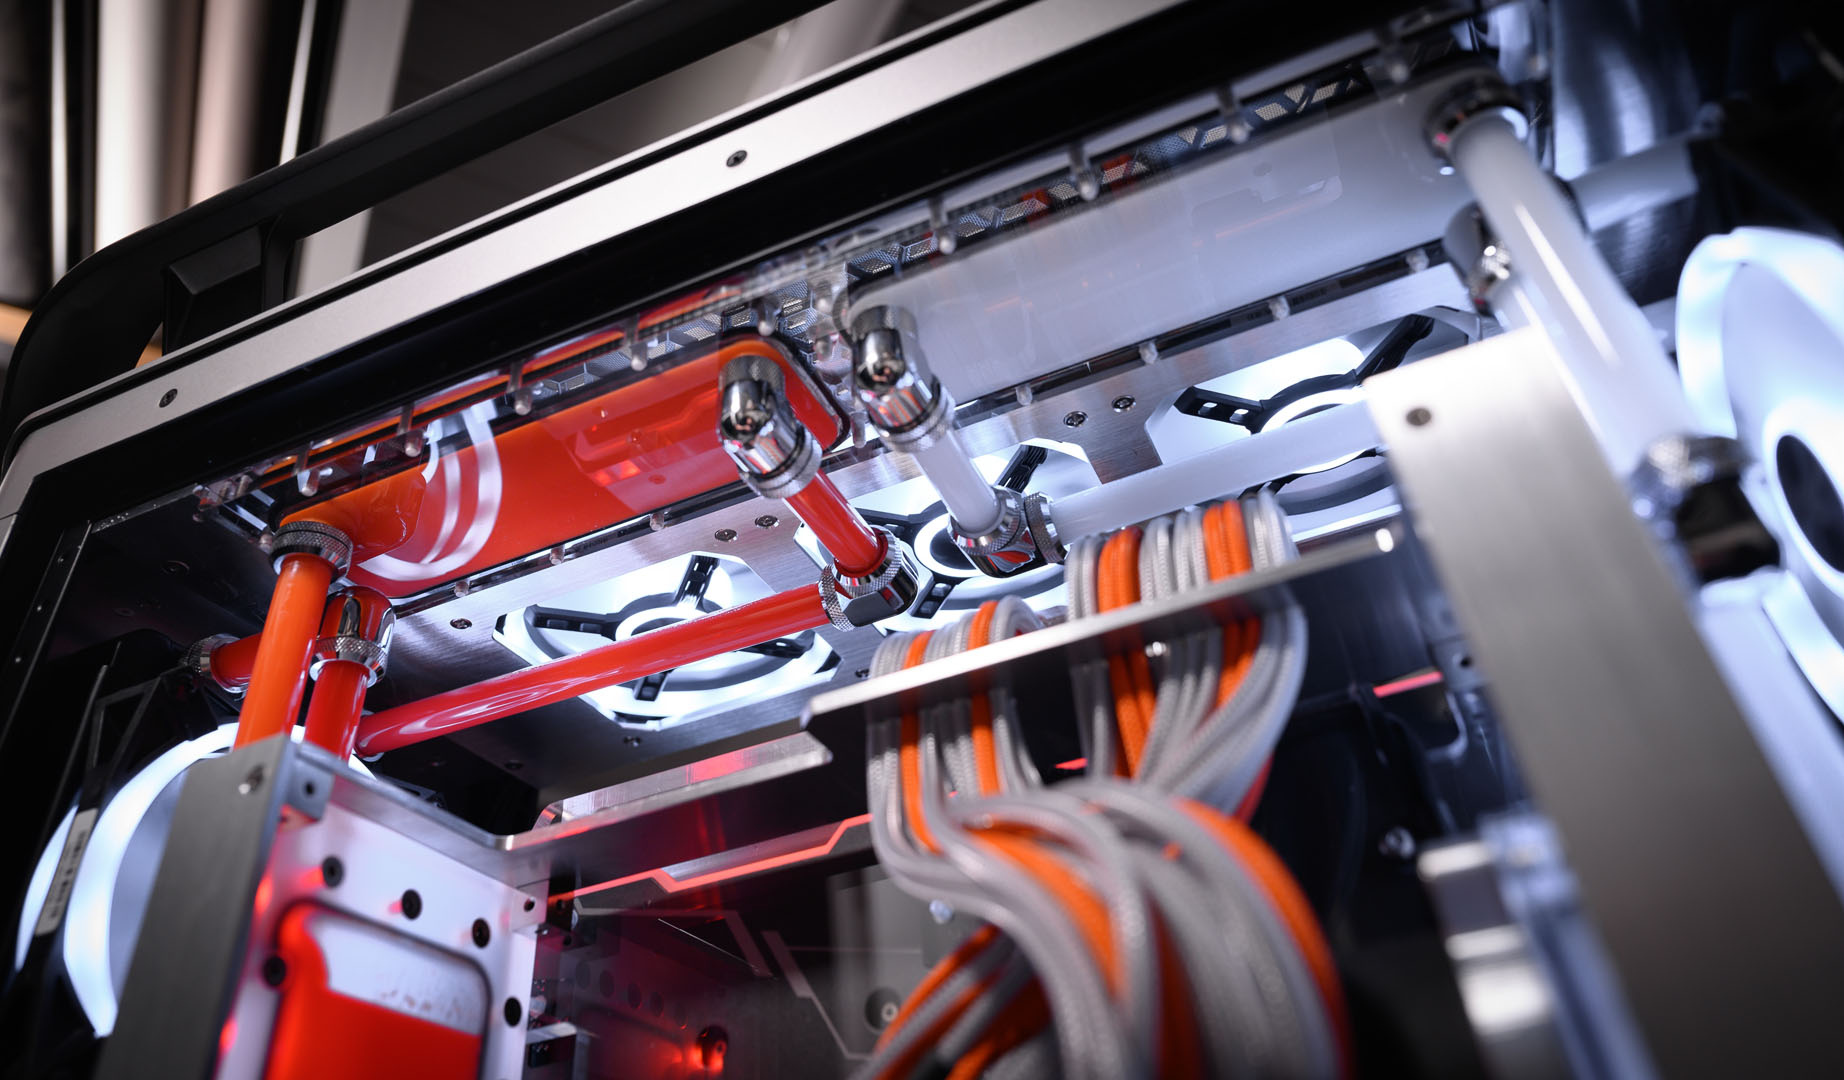
The next main step was the wiring and, boy, was there a lot of it. Whilst having a single GPU is manageable, it still has 2x 8-pin PCIe connectors, the motherboard also sports a pair of 8-pin EPS along with the 24-pin. However, given there are nine Corsair QL120 fans and 3 LED strips, that turned into a whole lot of minute wires. To power the fans, I used a combination of the motherboard and a Corsair Commander Pro controller. The Commander Pro handles the fans on the radiators, whereas the motherboard sorts out the top airflow fans. The Commander Pro by itself is capable of handling 12 fans if you place two per channel, but that ended up with odd control setups since the fans are in groups of three. To mitigate this, I combined the top three fans and ran to a strong motherboard header, the other six fans then were able to connect to the Commander Pro individually, leaving full control available on the radiators. Phew. For the RGB, I used the Commander Pro again for the LED strips, then the two lighting hubs for the fans, with each radiator going to a separate hub. These hubs were then connected to the Commander Pro via USB, which in turn was then plugged into the motherboard header.
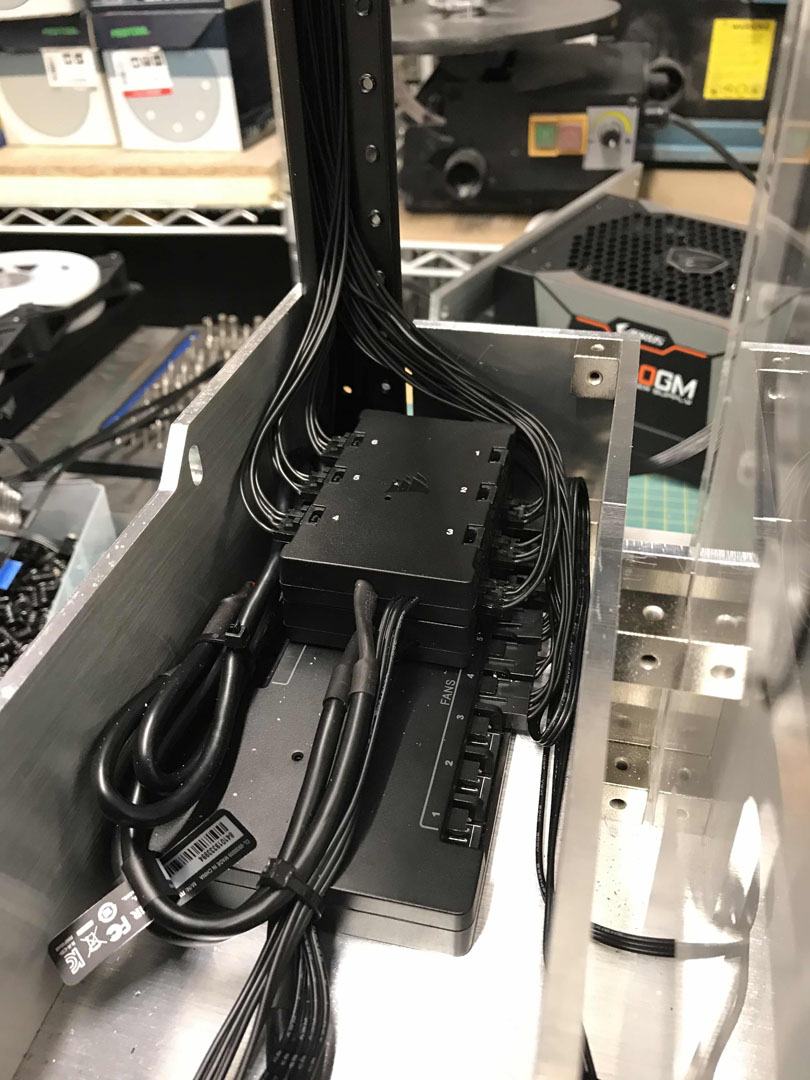
RGB cabling has to be one of the most tedious tasks imaginable. Remember that each fan is four wires for power, then 3-4 for RGB depending on the brand and control method. That means for just the nine fans you're looking at 63-72 wires, without extensions. I like to shorten the fan cables then make extensions in order to get the lengths right, it also makes the fans easier to reuse later on. Using that technique triples the number of pins you need to crimp, 216 or so just for the fans in this case. Add in the LED strips and then controller wires and the whole task can eclipse the main PSU cables.
For the sleeving, I tried out something new in the form of MDPC-X Clear sleeve. The interesting thing about clear is that it takes on the properties of the wire underneath, meaning you can achieve some rather interesting effects. In the case of black wiring, it forms a silver colour with depth to it, it plays with light and looks radically different to the flatter greys. I do have a metallic silver sleeve that a friend produced, but I'm running low and the effect still isn't quite as strong, so this was quite the discovery. The accent cables were done in Oxide-Orange, which turned out to be much brighter than I had been anticipating; coincidentally it matched up very well with the coolant however.
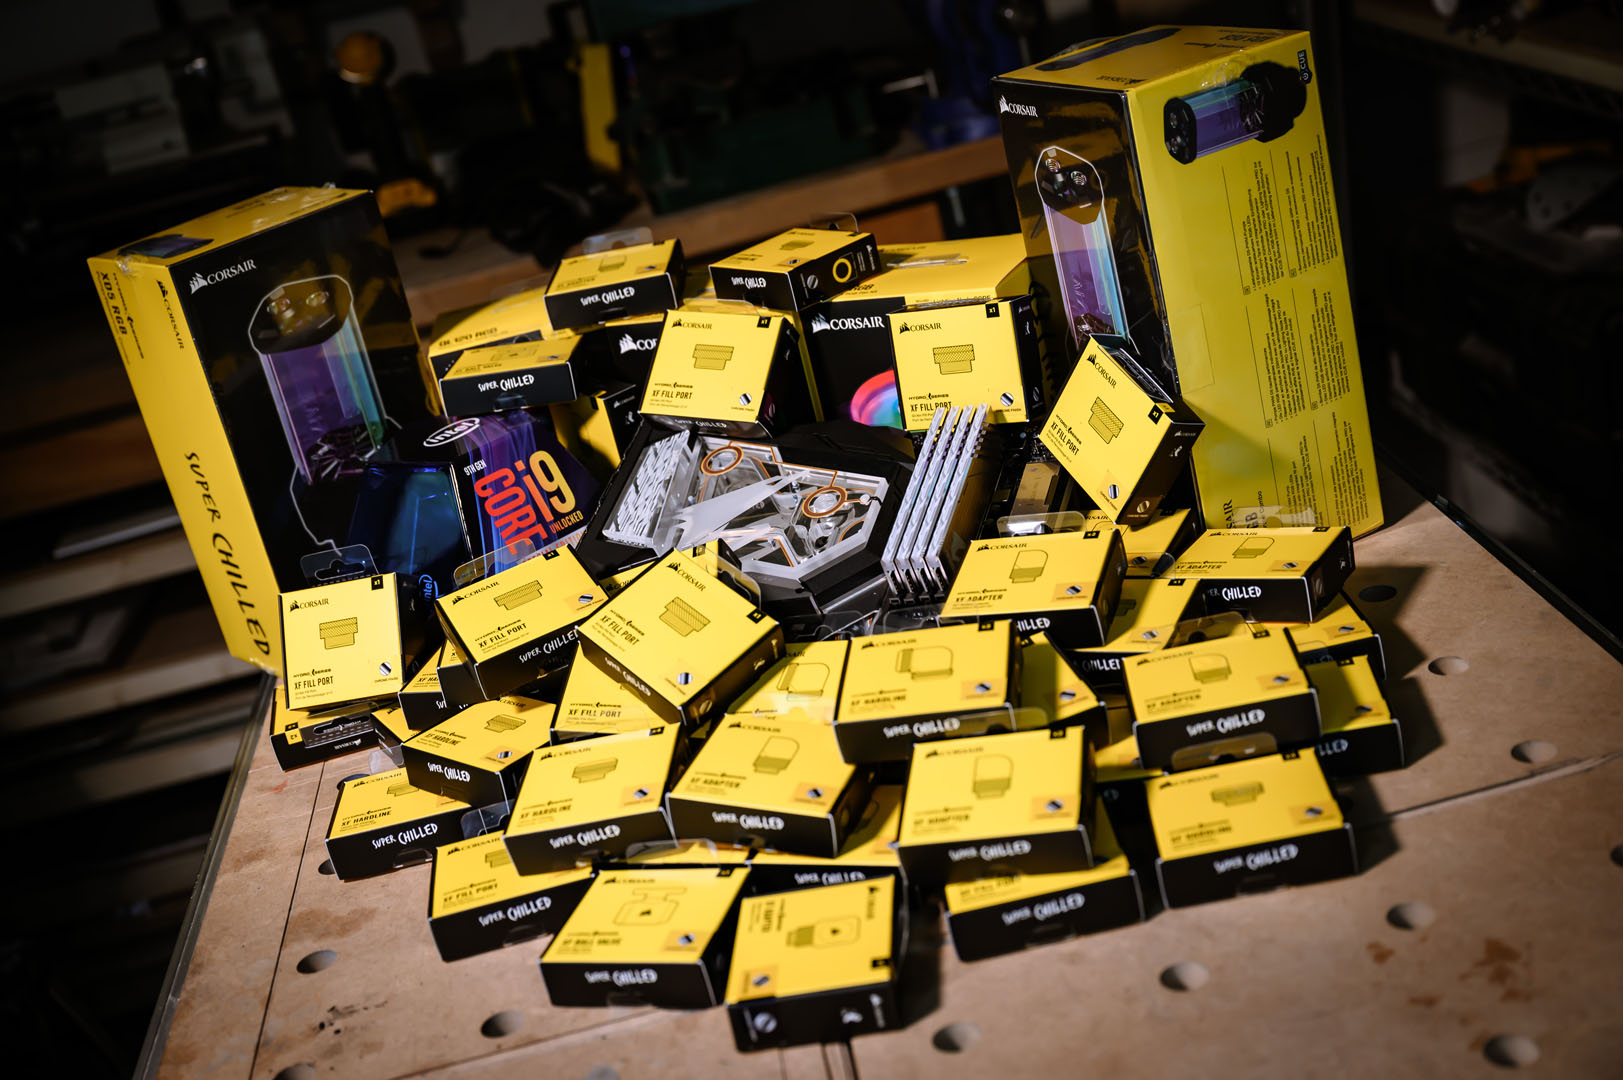
The watercooling parts for this rig were all Hydro X from Corsair. I opted to use chrome fittings so that they would match up with the colours better. It's always tricky trying to estimate parts before even designing a build, so we played it safe and went with quite a number of different options. As it turns out, this was a great move. The rig had really been designed with single bends in mind, but when it came time to do the tubing, I had miraculously lost my 10mm silicone-bending cord. At the last minute, the design changed from bends to using fittings and adaptors for corners, a decision which I think largely worked out. I'm not normally a fan of using fittings for bends as typically modders used to do it with 12mm tubes, which always gave the runs the appearance of having knobbly-knees. That said, I think with 14mm and 16mm tubes the side effect is fairly mitigated.
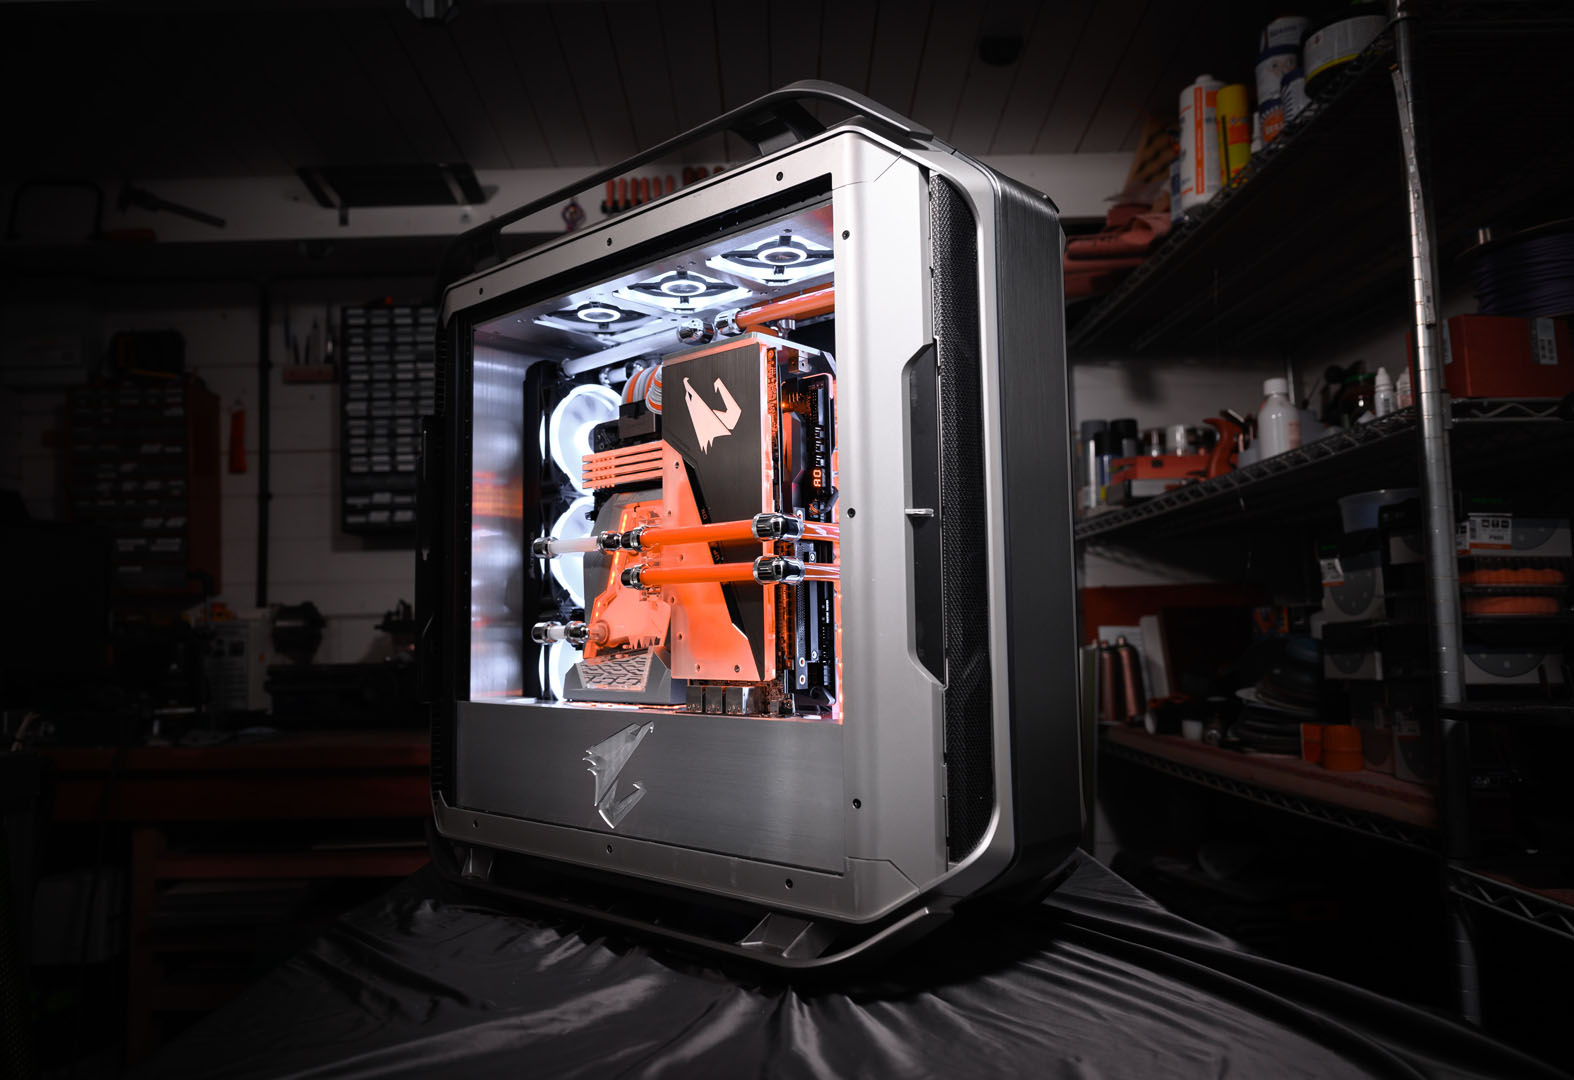
All in all I was very pleased with how the rig turned out. I'm a sucker for thick brushed metal as it has such a satisfying heft to it. The loops themselves were a fun challenge given the layout constraints, because trying to maintain a degree of symmetry can lead to difficult decisions having to be made. The rig really comes to life when switched on, too, the RGB lighting was set to flat white and orange, which provides a lot of colour depth and contrast - the CPU block really pops out thanks to it.

One again, thank you to Gigabyte and Intel for initiating this build, as well as Corsair and Cooler Master for sponsoring components. Now let's see what builds the rest of 2020 will bring!


MSI MPG Velox 100R Chassis Review
October 14 2021 | 15:04

Want to comment? Please log in.