
Step One
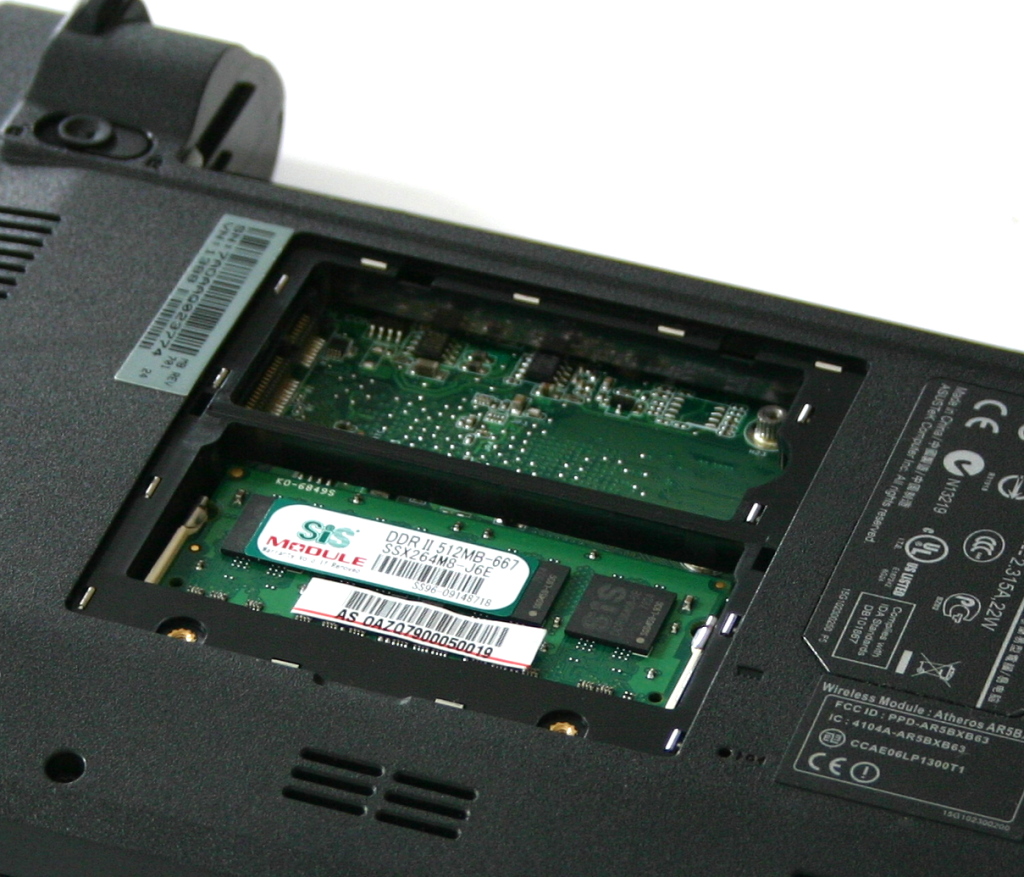
The first step is to unplug the Eee PC from the mains, and to then remove the battery. Using your screwdriver, unscrew the two screws holding the panel on the bottom of the notebook in place – this should uncover your system memory. This is where our flash drive is going to live, neatly out of the way. Take your insulating tape, and cover the PCB, and any other metal that you think could cause a short when your new equipment is housed in this area.
Step Two
Now you need to unscrew the rest of the screws on the base of the device – if you can see a screw, unscrew it. Don't worry about remembering which came from where – all the screws we are unscrewing are the same size, thread, shape and colour. There should be a total of six on the base, and another two for the access panel that was unscrewed in step one. When finished, flip the unit over.Removing the keyboard is next, and if you've never done this before – can be quite tricky. If you look above the Pause Key, F6 key and just to the left of the F1 key, you'll see three rather small spring-loaded clips. These hold the keyboard in place. The best technique to this is to start on the right hand side, pushing the first clip in using a flat head screwdriver or knife blade.
Once you’ve done this, try to leverage the keyboard very slightly with your finger so that the keyboard just about rises above the clip. While you’re still holding the keyboard, push the next clip along on. The pressure you are keeping on leveraging the keyboard should pop it up over the second clip too. Do this for the final clip and the keyboard should lift up. It might take a couple of attempts, but try not to leverage it too much as you can warp the keyboard, or pull keys off – a gentle touch is all that is required.
Well-built (or simply more expensive) laptops will also have screws on the base that go directly into the keyboard, to give a more solid feel. The Eee PC doesn't, which is why it can sometimes feel like it’s rattling around a little. The same technique as described above is used for replacing keyboards on most laptops, so now you know.
Step Three
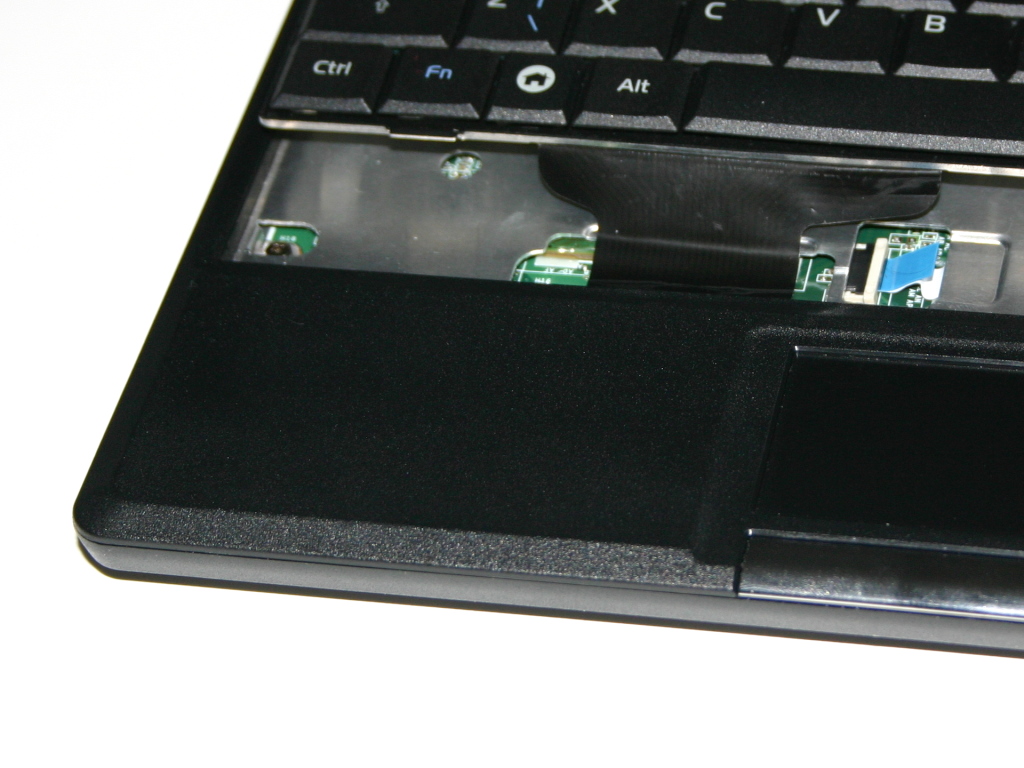
Once unclipped, you need to detach the keyboard from the base – it’s connected using a strip connector that slides inside a plastic clamp. To unclamp it, you will see a tab on either side that just needs pushing out slightly – the connector should then pull out easily. Make sure that you don’t force it! A similar clip holds in the track pad, just to the right of it – undo this in the same fashion.
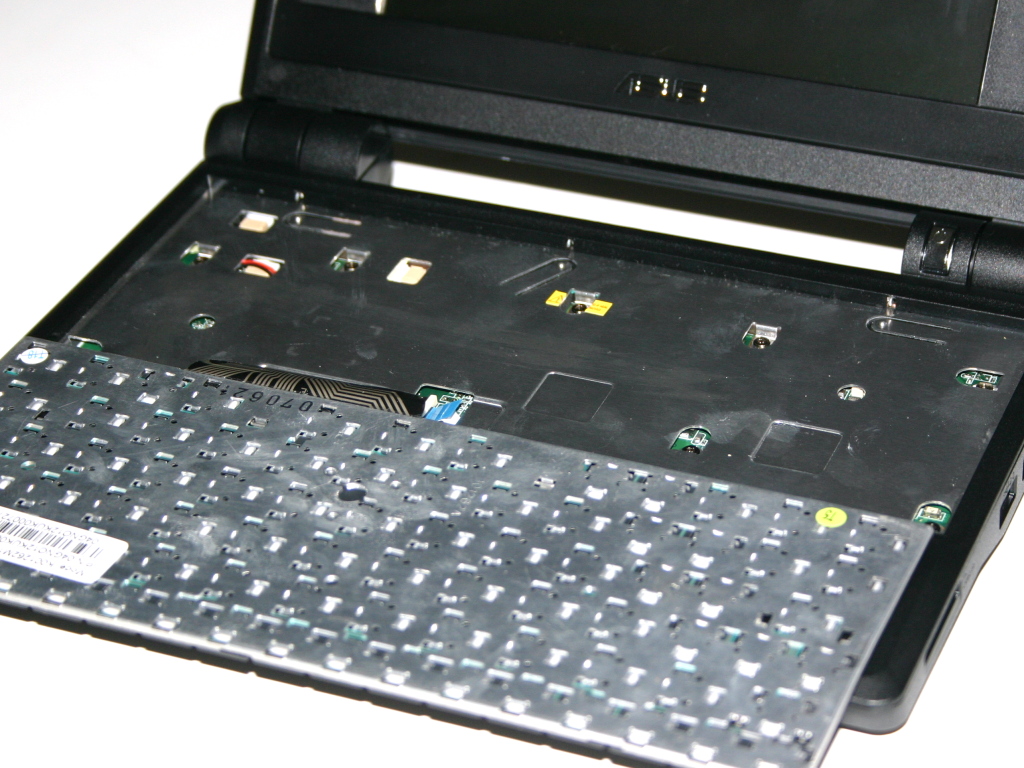
Underneath the keyboard, you will see another selection of screws. The same rules apply here, unscrew them all! Then, using your fingers only, start pulling the top off the Eee PC. It should not take much force, just gently prize it off – don’t use a screwdriver! The only area I had problems with was around the headphone outputs, as it needed lifting over the top of the connectors.
RELATED ARTICLES


MSI MPG Velox 100R Chassis Review
October 14 2021 | 15:04

Want to comment? Please log in.