Lian-Li sell an aluminium DVD cover that matches the finish of the PC-61, in order to hide your ugly beige drives. Many manufacturers, such as Shuttle, now use this design in order to maintain a clean look for the front of their cases.
We used one of these covers for Project Synapse but again, skinning the entire front bezel and making slits afterwards doesn't produce the cleanest result: without the skin wrapping around, you risk the edges peeling away over time.
With this in mind, I planned to use some leftover CaseSkin to individually wrap the DVD cover and avoid any rough edges.
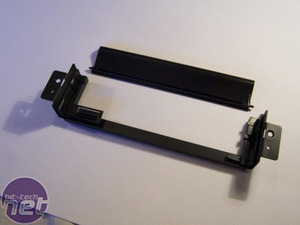
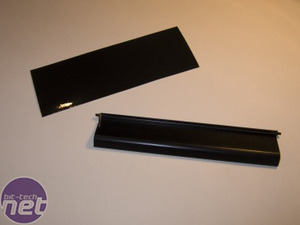
Here is the cover in pieces: two screws on either side and the small spring removed, and the front panel falls out. The second photo shows the plain black CaseSkin which I cut to match the width of the flap exactly, and wrapped all the way around it. During the design process, I deliberately kept the DVD drive area blank to avoid any nightmware of lining up patterns to match exactly.
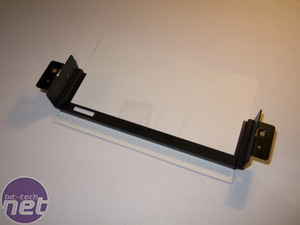
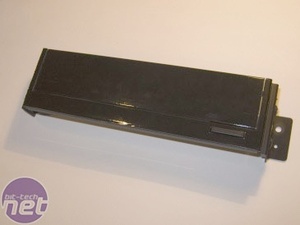
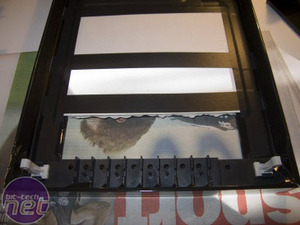
The next step was to skin the frame. The CaseSkin vinyl is quite tough, and cutting thin slivers can be difficult. The key is to ensure the bond is strong by applying lots of pressure, and using a super-sharp scalpel, cut from the back side using the frame as an edge guide. The end result (right) was well worth the hassle.
The disaster struck: in my rush to meet my deadline, I failed to consider the thickness of the caseskin when cutting my cardboard mask. I wanted a really tight fit so that the join would be as seamless as possible, and it was so snug with just a bare drivebay plate that when you add the thickness of the CaseSkin wrapping around the bezel top and bottom, the DVD cover would no longer fit!
After much swearing and cursing, the only solution was to carefully peel back the overlap and use my scalpel to trim the mask by a mere millimetre or two - you can now appreciate the benefits of working with cardboard!
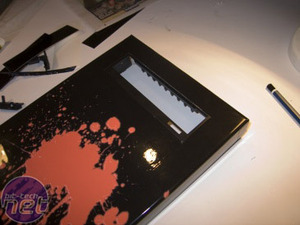
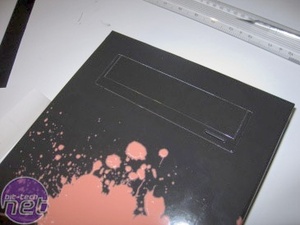
After a little trial and error, the DVD cover fit nicely and the fully assembled pair is shown here on the right. If you are wondering why it isn't just a single rectangle cut for the flap, it is because this cover actually screws to the case, rather than the bezel.
To install your DVD drive, you remove the bezel and screw the drive in as normal. You then screw this over over the outside of the drive, testing to make sure the eject button makes contact with the button on the drive. You then carefully replace the bezel, and both surfaces should make as seamlessly as possible.
We used one of these covers for Project Synapse but again, skinning the entire front bezel and making slits afterwards doesn't produce the cleanest result: without the skin wrapping around, you risk the edges peeling away over time.
With this in mind, I planned to use some leftover CaseSkin to individually wrap the DVD cover and avoid any rough edges.


Here is the cover in pieces: two screws on either side and the small spring removed, and the front panel falls out. The second photo shows the plain black CaseSkin which I cut to match the width of the flap exactly, and wrapped all the way around it. During the design process, I deliberately kept the DVD drive area blank to avoid any nightmware of lining up patterns to match exactly.


The next step was to skin the frame. The CaseSkin vinyl is quite tough, and cutting thin slivers can be difficult. The key is to ensure the bond is strong by applying lots of pressure, and using a super-sharp scalpel, cut from the back side using the frame as an edge guide. The end result (right) was well worth the hassle.

The disaster struck: in my rush to meet my deadline, I failed to consider the thickness of the caseskin when cutting my cardboard mask. I wanted a really tight fit so that the join would be as seamless as possible, and it was so snug with just a bare drivebay plate that when you add the thickness of the CaseSkin wrapping around the bezel top and bottom, the DVD cover would no longer fit!
After much swearing and cursing, the only solution was to carefully peel back the overlap and use my scalpel to trim the mask by a mere millimetre or two - you can now appreciate the benefits of working with cardboard!


After a little trial and error, the DVD cover fit nicely and the fully assembled pair is shown here on the right. If you are wondering why it isn't just a single rectangle cut for the flap, it is because this cover actually screws to the case, rather than the bezel.
To install your DVD drive, you remove the bezel and screw the drive in as normal. You then screw this over over the outside of the drive, testing to make sure the eject button makes contact with the button on the drive. You then carefully replace the bezel, and both surfaces should make as seamlessly as possible.

MSI MPG Velox 100R Chassis Review
October 14 2021 | 15:04


Want to comment? Please log in.