Applying a Bezel Skin on a PC-60 series case is much harder than you might expect: you have to remove the bezel in order to install any optical drives, and yet the drivebay covers remain fixed to the chassis.
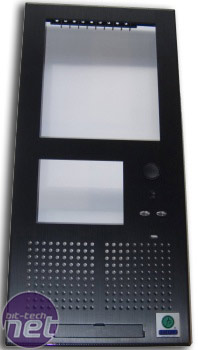
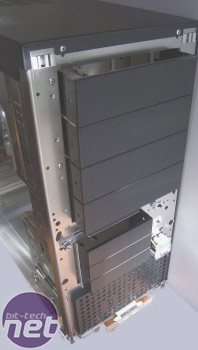
Here is the removed bezel (left) and the drivebay covers (right)
To date, there have been two solutions to this problem:
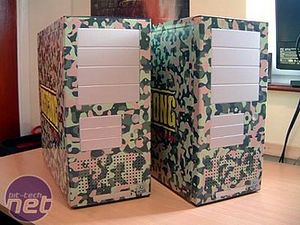
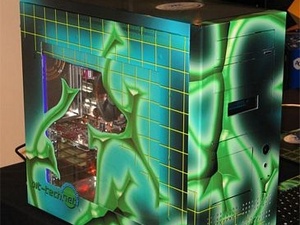
The easiest method is also the least appealing: skin the bezel but leave the drivebay covers nude, as shown with Jamie's Vietcong mod on the left. For Project Synapse, we applied the Bezel Skin with everything in place, and then made incisions where necessary to allow the bezel to be removed. Unfortunately, this breaks up the visual effect of the skin design, and there isn't enough skin material to smoothly cover both sides of the join.
For Project F.E.A.R. we would attempt a fresh approach: a completely stealthed bezel, aside from a single DVD drive - nobody uses a floppy drive these days, and a memory stick in the front USB ports is a far better solution. The challenge was to apply the skin such that it masked the unused drivebays, yet wasn't stuck to them, allowing the bezel to be easily removed.
Since this PC was a competition prize, I didn't want to employ any method that was permanent - if the winner ever wanted to add a second optical drive to this machine, I didn't want them to have to break out the Dremel to cut a second slot.
The easiest and lowest cost method was to use stiff cardboard to plug the gap: with the skin applied, there's no way to know from the outside that it is 'only' cardboard and not aluminium plate, and future modification should be straightforward.
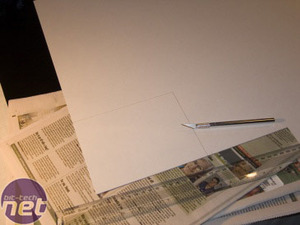

The card I had was 250gsm, and was nearly identical in thickness to the aluminium bezel. This proved ideal, since it allowed me to cut a second, slightly larger layer to strength the outer layer, and provide a larger area with which to secure the card in place.
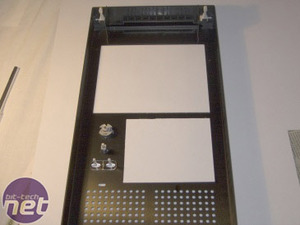
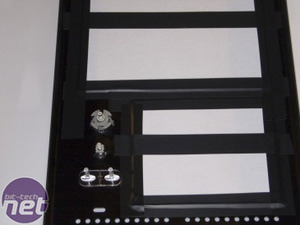
Here is the reverse side of the bezel, with the two cardboard pieces in place, and a spare 5.25 inch drive bay plate used as a guide for the DVD drive at the top. With everything a snug fit, I used PVC electrical tape to hold the cardboard; Gaffer or Duct Tape would also have been ideal, but standard Sellotape would not have provided a strong enough bond between cardboard and metal.
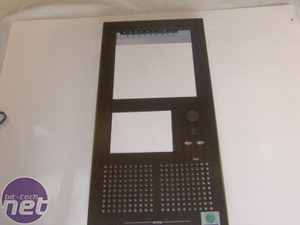
Here is the end result. Admittedly, it's not very glamourous, but sometimes modding can be like a Hollywood movie: outward appearances count the most, and you don't have to reveal the shortcuts taken to achieve that end result. Unless, of course, you're a writer on bit-tech!


Here is the removed bezel (left) and the drivebay covers (right)
To date, there have been two solutions to this problem:


The easiest method is also the least appealing: skin the bezel but leave the drivebay covers nude, as shown with Jamie's Vietcong mod on the left. For Project Synapse, we applied the Bezel Skin with everything in place, and then made incisions where necessary to allow the bezel to be removed. Unfortunately, this breaks up the visual effect of the skin design, and there isn't enough skin material to smoothly cover both sides of the join.
For Project F.E.A.R. we would attempt a fresh approach: a completely stealthed bezel, aside from a single DVD drive - nobody uses a floppy drive these days, and a memory stick in the front USB ports is a far better solution. The challenge was to apply the skin such that it masked the unused drivebays, yet wasn't stuck to them, allowing the bezel to be easily removed.
Since this PC was a competition prize, I didn't want to employ any method that was permanent - if the winner ever wanted to add a second optical drive to this machine, I didn't want them to have to break out the Dremel to cut a second slot.
The easiest and lowest cost method was to use stiff cardboard to plug the gap: with the skin applied, there's no way to know from the outside that it is 'only' cardboard and not aluminium plate, and future modification should be straightforward.


The card I had was 250gsm, and was nearly identical in thickness to the aluminium bezel. This proved ideal, since it allowed me to cut a second, slightly larger layer to strength the outer layer, and provide a larger area with which to secure the card in place.


Here is the reverse side of the bezel, with the two cardboard pieces in place, and a spare 5.25 inch drive bay plate used as a guide for the DVD drive at the top. With everything a snug fit, I used PVC electrical tape to hold the cardboard; Gaffer or Duct Tape would also have been ideal, but standard Sellotape would not have provided a strong enough bond between cardboard and metal.

Here is the end result. Admittedly, it's not very glamourous, but sometimes modding can be like a Hollywood movie: outward appearances count the most, and you don't have to reveal the shortcuts taken to achieve that end result. Unless, of course, you're a writer on bit-tech!

MSI MPG Velox 100R Chassis Review
October 14 2021 | 15:04


Want to comment? Please log in.