BaDassumption Part 1

May 8, 2007 | 07:59

Tags: #bad #badassumption #build #cars #case #cedar #dutch #dutchcedar #job #paint #scratch

Companies: #mod

Fitting the Bubbletop

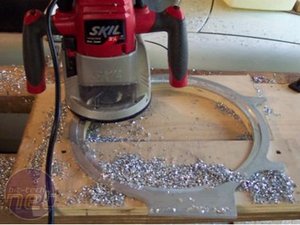
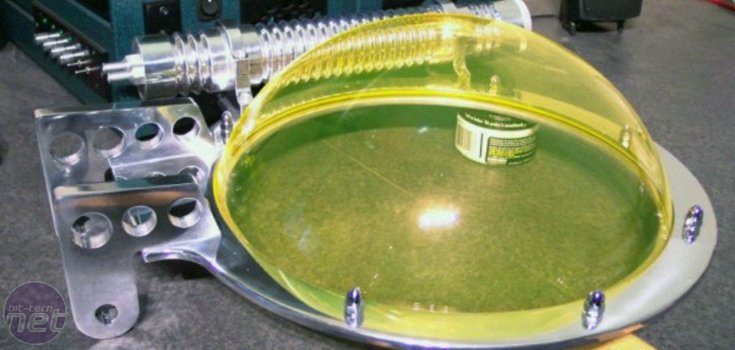
Well, so far we've used some homemade jigs and a router... it seemed to work pretty well, so the same methods were used on the dome ring.

BaDassumption Part 1 Bubbles, bubbles...

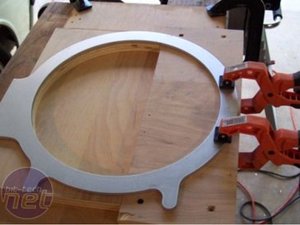
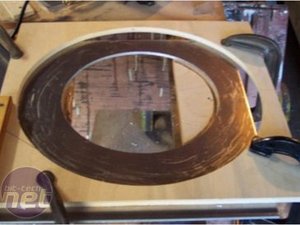
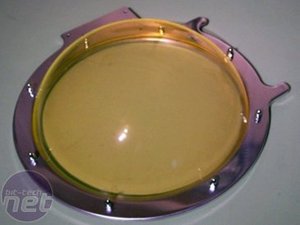
First, I cut a pattern from 3/4" plywood on the band saw that matches a bit more than half of the inside of the dome ring, screwed it down and clamped the dome ring in place. This allows the router bit's guide bearing to run on something other than the bottom of the 1/4" thick aluminium ring.

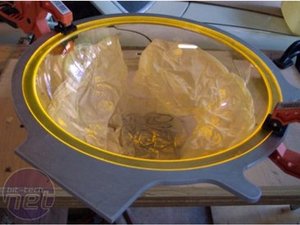
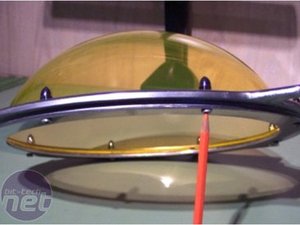
Then, very, very slowly, I ran the router around with a rabbeting bit set to 1/8" deep. The dome itself was then also trimmed to fit so it would sit flush with the bottom of the ring.

BaDassumption Part 1 Bubbles, bubbles... BaDassumption Part 1 Bubbles, bubbles...
Having some new found confidence with the whole router thing on aluminium, it seemed a good idea to stiffen the ring up with another ring to sandwich the acrylic dome. During a load test on the unsupported ring, using a weight for the reservoir, the dome ring twisted on the way up... not much, but enough to give me concern, particularly since it would be motorized later on.

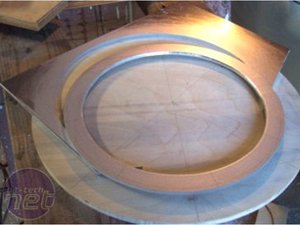
So, it was back into the metal pile for a piece of 1/4" thick 5052 aluminium. I cut a circle out of a piece of plywood to use as a guide for the router, so that I could cut the inside of the circle with a 1/4" straight bit. After that, the outside was cut on the band saw (after marking some hole locations).

BaDassumption Part 1 Bubbles, bubbles... BaDassumption Part 1 Bubbles, bubbles...
Once the two rings were bolted together, the whole assembly was quite a bit stiffer.

BaDassumption Part 1 Bubbles, bubbles... BaDassumption Part 1 Bubbles, bubbles...
BaDassumption Part 1 Bubbles, bubbles...
Those two brackets on the outside of the ring are used to hold up the radiator overflow tank (that will be a reservoir) and the holes in the back are for the pivot brackets. After a bunch of polishing, the assembly was looking pretty crazy - just how I wanted it.
Discuss this in the forums
YouTube logo
MSI MPG Velox 100R Chassis Review

October 14 2021 | 15:04

TOP STORIES

SUGGESTED FOR YOU