
Bits and bobs
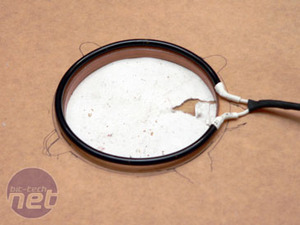
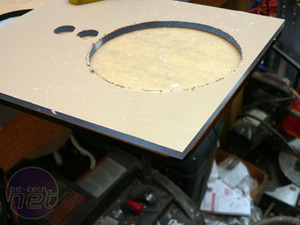
I wanted the cold cathode to sit right inside the UV blue acrylic layer to give it lots of glow effect. By mounting it flush with the blue acrylic, the cathode tube would also be hidden. The only problem was, the blowhole I had cut was just a little too small. So, using the original plastic enclosure for the tube, I traced the blue acrylic.
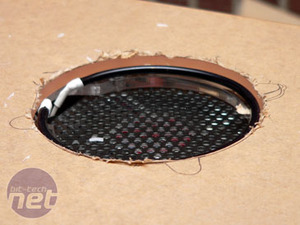
As it turned out, the perfect size was 92mm, so I just used the fan hole on the back of the C3 case as a router guide using my bearing bit. Now, the tube sits flush inside the blue UV layer.
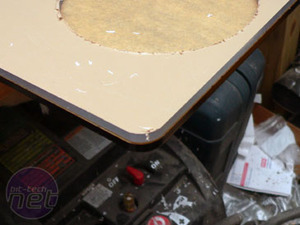
I mounted the fan to make sure it all fit together correctly - this was exactly what I wanted. For the final layer, I set a piece of black opaque acrylic on top of the blue UV layer. It’s starting to come together.
Pete used rounded corners on his front acrylic accent pieces and I decided to follow the same theme. C3 had cut me some perfect radius corners on the pieces for the top, but I needed to transfer that same radius to the front pieces that I created from scratch. So, I sandwiched and clamped them, and used them as a guide for my router.
Those are the clean, rounded corners I wanted. I just kept rotating the front pieces on the same template to round all the corners. Now, it’s time to mount my layers.
I taped each piece, then marked and drilled holes for the corners, then tapped them for my hex-head screws. Pete used silver screws on Orac, I’m using black oxide hardware to match the black/blue theme I have established on this system.
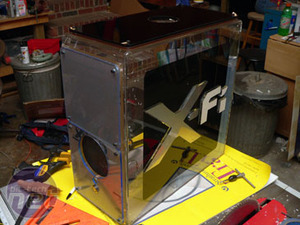
I went ahead and applied the X-Fi logo to the outside as well. I used the blank of this logo on the front page - this is what was cut out of it. It is clear acrylic, with a layer of vinyl film on it that has a brushed aluminum look. It also has a special crystal-clear layer of two sided tape on the back of it, so it can be applied to the outside of the case.
Using the blank that the logo was cut out of as my template for paint mask means that the cut out logo perfectly matches the masked paint section. This allows light to get to the logo and get some edge-glow action.
Finally, it's time to remove the protective paper and get a look at what we have.
The top accent plate on the front of the case the way it is will cover the front of the DVD-RW drive and the video screen I plan to install. Of course, I need to be able to hit the eject button on the DVD drive, and allow the drawer to come out. I also don’t want a blue tint to the video screen. Looks like I need to make some cuts.
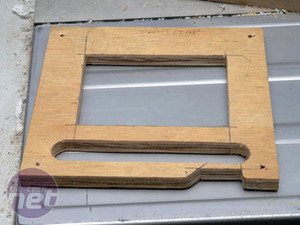
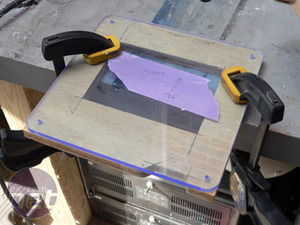
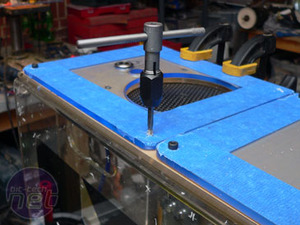
I’ve had so much success using templates with the bearing bit on my router, I decided to fabricate a template from plywood. Using my jigsaw, I cut out what I needed to make a template that would guide my cuts.
Clamping everything in place, I ran through everything using the template as, well... a template.
RELATED ARTICLES


MSI MPG Velox 100R Chassis Review
October 14 2021 | 15:04

Want to comment? Please log in.