The Case - From Render to Reality
The reason I chose this design over all the others was that it was the only design that I believed would be achievable with the tools and materials I had but also to provide the unique look I was after.It was actually a combination of the PS3, a car bumper and some of my own design mixed together to create the slim curved shape with stylish vents to provide adequate cooling.
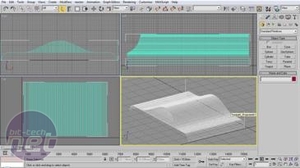
Now that the design was chosen I started to work on a scale rendered 3D model of the case in 3DS Max, to give me a feel of what the final case would look like when it was finished:
Needless to say I was very impressed with the final render, so I began the production of the case. My 3DS model of the case was then used to create a toolpath for a CNC machine in order to create a mould for the fibreglass.
In order to get 3DS Max to create the toolpath I used a plugin called CNC Toolkit which has a surprisingly large amount of features for a plugin. Throughout the build I used a variety of different stores in order to get the correct parts and materials. As fibreglass was the main material in my case my first task was to find a decent store in which to buy cheap but high quality glass fibre and resin.
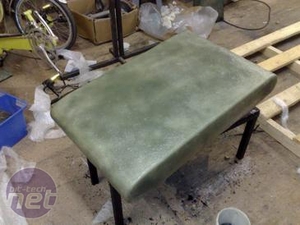
Eventually I found a store called Glasplies which sells pretty much everything required to fibreglass, from resins right down to gloves and mixing buckets. Glasplies even sell the REP foam I used to create a mould for the fibreglass aswell. As my CNC machine was too small to fit the entire case mould on I had to make it in sections then glue them together with high-strength spray glue. Now that the mould was finished I began the very messy job of fibreglassing over the mould
I then used various fillers in order to create a perfect smooth finish as the fibreglass itself is very rough. I started off using a car body filler to fill the more seriously rough areas then I used a different fine car surface filler to fill the less rough areas. However I eventually found to my suprise that plaster board filler actually worked better for creating a very smooth finish.
Once the body of the case was complete I used eBay heavily throughout the remainder of the build. The heatsink however was made using piping bought from my local plumbing merchants and all the fillers used in the project were from a local car maintenance store, and a local hardware store.
If you are planning a build yourself be sure to test the fillers and paints you are using as different brands can have a chemical reaction with each other which can result in cracking or, as I found out first hand, one filler can even partly dissolve another!

MSI MPG Velox 100R Chassis Review
October 14 2021 | 15:04


Want to comment? Please log in.