I needed to fabricate a drive assembly for the DVD RW drive and the hard drive. Once again tapping into the Linear pool of acrylic fabrication, I cut two identical upright pieces of acrylic for the vertical supports and a single horizontal piece for the hard drive.
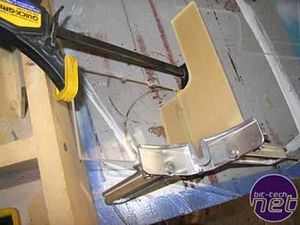
Above you will see that I am using a 90 degree vice to hold the two pieces in place and a set of quick clamps to apply the right amount of pressure. I then used IPS Weld-on to bond the pieces.
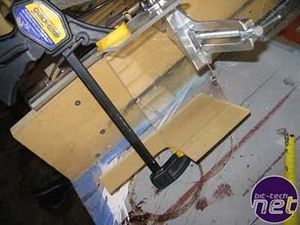
Above you are looking at the assembly on it side looking up from the bottom. Using the same set of clamps, I could IPS'd (hey, it's a verb now) the last piece in place.
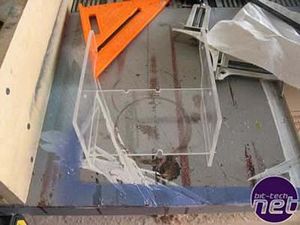
Here you see the finished piece. IPS Weld-on bonds quickly but you don't need to be man-handling it around for at least a little while after it sets. After about 24-48 hours it really sets up and is incredibly strong.
Hey did you know? That the length of a standard hard drive is exactly the width of a standard optical drive? Well I didn't until I really needed to wedge the hard drive in because of space. The hard drive will sit sideways, or perpendicular, from the optical drive. The hard drive will be mounted from the bottom using the threaded holes underneath the drive. The notches are where the screws fasten to the drive. Later, I had to cut slots on one side for the IDE cable and Power. All and all, it worked out pretty well, but I hope I don't have to go in and swap the hard drive for anything for a while.
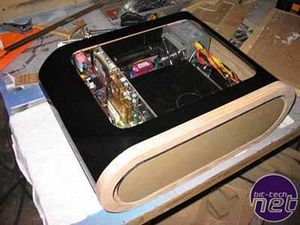
Now all I need to do is glue the drive bracket to the front bezel pieces. I put the bracket in the case and positioned the front bezel pieces where the front panel would float right in the middle of the front oak trim piece. Once I had it positioned, I used wood glue and brad nails from the inside to permanently fasten the front oak trim piece with no visible fasteners.
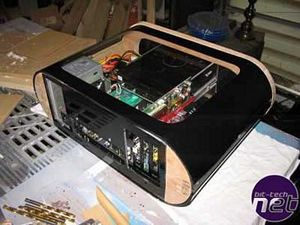
In this picture, you can see the drive bay in place. On the back is where I will fasten the back trim piece to cap the back end.
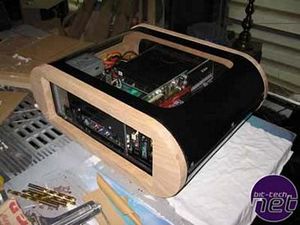
Using only countersunk screws from the inside (so I can remove it later) I mounted the back trim piece. This piece of wood does two things, it mirrors the front trim. The case rests on the trim wood not the acrylic so it doesn't get scratched up. The second thing it does is keep the motherboard tray firmly in place. Because I mounted the back of the motherboard tray flush with the back piece of the oak frame, with this trim piece in place, the motherboard tray is locked in tight.

Above you will see that I am using a 90 degree vice to hold the two pieces in place and a set of quick clamps to apply the right amount of pressure. I then used IPS Weld-on to bond the pieces.

Above you are looking at the assembly on it side looking up from the bottom. Using the same set of clamps, I could IPS'd (hey, it's a verb now) the last piece in place.

Here you see the finished piece. IPS Weld-on bonds quickly but you don't need to be man-handling it around for at least a little while after it sets. After about 24-48 hours it really sets up and is incredibly strong.
Hey did you know? That the length of a standard hard drive is exactly the width of a standard optical drive? Well I didn't until I really needed to wedge the hard drive in because of space. The hard drive will sit sideways, or perpendicular, from the optical drive. The hard drive will be mounted from the bottom using the threaded holes underneath the drive. The notches are where the screws fasten to the drive. Later, I had to cut slots on one side for the IDE cable and Power. All and all, it worked out pretty well, but I hope I don't have to go in and swap the hard drive for anything for a while.

Now all I need to do is glue the drive bracket to the front bezel pieces. I put the bracket in the case and positioned the front bezel pieces where the front panel would float right in the middle of the front oak trim piece. Once I had it positioned, I used wood glue and brad nails from the inside to permanently fasten the front oak trim piece with no visible fasteners.

In this picture, you can see the drive bay in place. On the back is where I will fasten the back trim piece to cap the back end.

Using only countersunk screws from the inside (so I can remove it later) I mounted the back trim piece. This piece of wood does two things, it mirrors the front trim. The case rests on the trim wood not the acrylic so it doesn't get scratched up. The second thing it does is keep the motherboard tray firmly in place. Because I mounted the back of the motherboard tray flush with the back piece of the oak frame, with this trim piece in place, the motherboard tray is locked in tight.

MSI MPG Velox 100R Chassis Review
October 14 2021 | 15:04


Want to comment? Please log in.