The final thing to do was to install the buttons. I had already created the button assemblies but they needed to be mounted in the front.

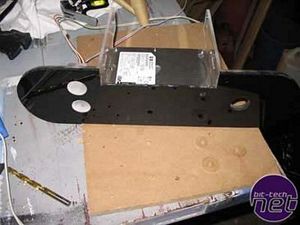
I marked my centers of all three hole locations and with a 1" spade bit drilled out the holes. The spade bit, when used properly, works great on acrylic. I used a piece of scrap mdf and laid the acrylic down to avoid chipping on the edges and slowly, slowly, slowly let the bit do the work. Stopping several times along the way helps keep the bit cool and make a better cut. I cut two on the left hand side (power and reset) and one on the right (cold cathode power).

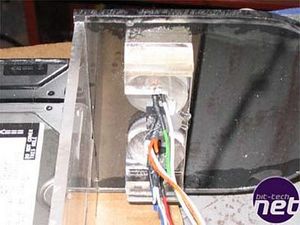
I laid the panel face down on a flat surface, placed the buttons in so they would be flush with the front and made some measurements. Then I made a quick little mounting bracket out of three pieces of acrylic and used IPS Weld-on to glue them, first together, and then to the back of the bezel. Then, I used a hot glue gun to glue the switches to the bracket.

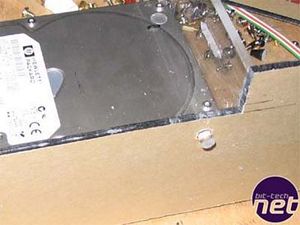
The last button was stressful to plan but easy to execute. I mounted the DVD RW drive in the bracket and made careful measurements where the eject button location was. Once I was confident, I had the right location (by measuring and remeasuring about 50 million times) I drilled a hole using a 1/4" drill bit. Then I cut a piece of 1/4" solid acrylic rod and slipped it in. Once the drive was installed I pulled the new button out, applied some hot glue on it and slid it in, careful not to get any glue on the walls of the hole. Holding the button against the drive trigger for a few seconds allowed a good bond and it clicked just like the manufactured button.
The last thing to finish off the front panel was the DVD RW drive tray bezel, that was just a matter of cutting a piece to fit the part I cut out and gluing it to the drive tray, not much to really show in that respect.

I marked my centers of all three hole locations and with a 1" spade bit drilled out the holes. The spade bit, when used properly, works great on acrylic. I used a piece of scrap mdf and laid the acrylic down to avoid chipping on the edges and slowly, slowly, slowly let the bit do the work. Stopping several times along the way helps keep the bit cool and make a better cut. I cut two on the left hand side (power and reset) and one on the right (cold cathode power).

I laid the panel face down on a flat surface, placed the buttons in so they would be flush with the front and made some measurements. Then I made a quick little mounting bracket out of three pieces of acrylic and used IPS Weld-on to glue them, first together, and then to the back of the bezel. Then, I used a hot glue gun to glue the switches to the bracket.

The last button was stressful to plan but easy to execute. I mounted the DVD RW drive in the bracket and made careful measurements where the eject button location was. Once I was confident, I had the right location (by measuring and remeasuring about 50 million times) I drilled a hole using a 1/4" drill bit. Then I cut a piece of 1/4" solid acrylic rod and slipped it in. Once the drive was installed I pulled the new button out, applied some hot glue on it and slid it in, careful not to get any glue on the walls of the hole. Holding the button against the drive trigger for a few seconds allowed a good bond and it clicked just like the manufactured button.
The last thing to finish off the front panel was the DVD RW drive tray bezel, that was just a matter of cutting a piece to fit the part I cut out and gluing it to the drive tray, not much to really show in that respect.

MSI MPG Velox 100R Chassis Review
October 14 2021 | 15:04


Want to comment? Please log in.