
I can't have the visible metal bits of a premier windowed system just showing bare metal. I need to dress them up a bit. First I'm gonna strip down the optical drive. Bear with me on this, it may seem like rudimentary steps to some of you but how to disassemble an optical drive for painting comes up in our forums more often than you think and it's hard to walk someone through it with just words.
You obviously can't just start spraying willy-nilly at an optical drive and expect decent results.
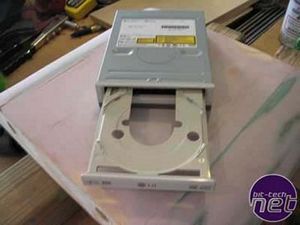
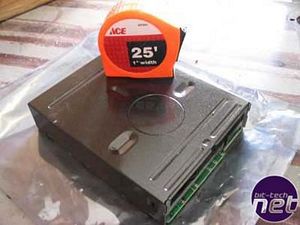
You need to take the parts to be painted off. First order of business is to power the drive up and open the drawer. Then, you can unplug it and take it out to your work area.
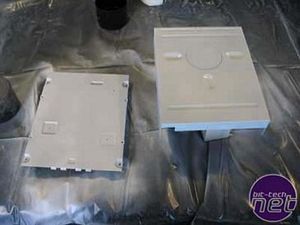
Then, remove the drawer bezel, the little panel on the end of the drawer. Usually it just snaps off by gently applying pressure and the plastic clips that hold it in place will release it. It varies from drive to drive so just take a second to look at the drawer bezel and it should be apparent how it is removed. In this case, it was just a matter of gently, but firmly lifting straight up holding the drawer in place so you don't damage it or bend it.
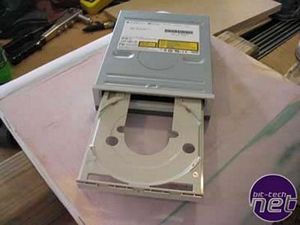
Once the drawer bezel is off, the drive bezel (the face plate on the drive) can be removed. Removing this also varies from drive to drive but 99% of the time, there are plastic clips on the sides and the bottom holding it in place. Pushing the clips in from the outside allows the bezel to be removed. Then just slide it away from the drive along the drawer.
You can stop there and just paint your two bezel pieces with vinyl dye or some other paint since now you have in your hand all the pieces that are visible from the outside with the drawer closed.
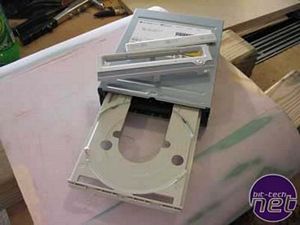
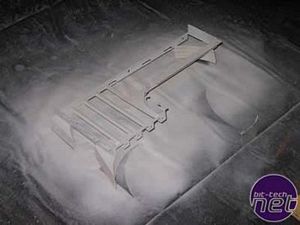
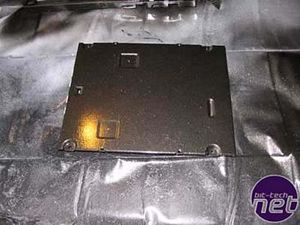
If you want to paint the drawer and/or the casing, you need to remove them. That involves opening the drive. There are usually four screws holding the drive casing together. Remove those screws and the casing comes away in two pieces, the base and the top. You now have the entire internals of your drive exposed so don't play around.
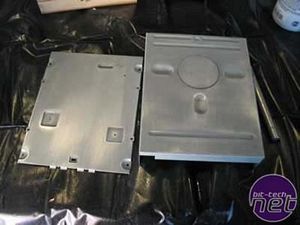
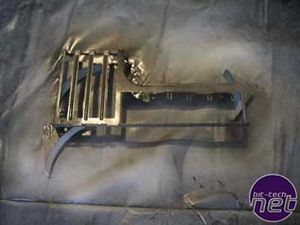
If you want to paint the drawer, you can remove it by finding the "stop" and disengaging it. The stop is a part in the drive that prevents the drawer from flying out when the eject button is pressed. Gently sliding the drawer back and forth, you can find what is acting as the stop, it's usually a plastic tab. Pressing the tab, or tabs, will allow the drawer to slide away from the drive assembly.
Once you have removed all the parts for painting, put the drive assembly into an anti-static bag for safe keeping. In this state, it is vulnerable to anything and everything bad happening to it.
Now it's time to prep.
First order of business is to remove all stickers/decals etc. Then cleaning the parts with a degreasing cleanser to make sure no oils or crud where on the metal and allowed to completely dry. Last step was sanding with 400 grit sandpaper to get a smooth but imperfect surface for the primer to bind to.
I applied two light layers of primer sanding after each one with 600 grit wet/dry sandpaper. For the metal parts, I'm using rustoleum enamel paint, so I am using matching brand and type of primer and clearcoat.
I/O frame with paint.
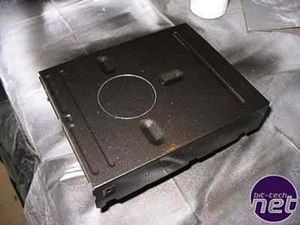
Top of DVD RW drive casing.
Bottom of DVD RW drive casing.
After a good/smooth coat of primer, I sprayed on several, light layers of paint. In this case, I am using a metallic black. After the last layer cured, I used 600 grit wet/dry sandpaper to even out the surface and then applied two layers of clearcoat.
The effects were pretty good.
You obviously can't just start spraying willy-nilly at an optical drive and expect decent results.
You need to take the parts to be painted off. First order of business is to power the drive up and open the drawer. Then, you can unplug it and take it out to your work area.
Then, remove the drawer bezel, the little panel on the end of the drawer. Usually it just snaps off by gently applying pressure and the plastic clips that hold it in place will release it. It varies from drive to drive so just take a second to look at the drawer bezel and it should be apparent how it is removed. In this case, it was just a matter of gently, but firmly lifting straight up holding the drawer in place so you don't damage it or bend it.
Once the drawer bezel is off, the drive bezel (the face plate on the drive) can be removed. Removing this also varies from drive to drive but 99% of the time, there are plastic clips on the sides and the bottom holding it in place. Pushing the clips in from the outside allows the bezel to be removed. Then just slide it away from the drive along the drawer.
You can stop there and just paint your two bezel pieces with vinyl dye or some other paint since now you have in your hand all the pieces that are visible from the outside with the drawer closed.
If you want to paint the drawer and/or the casing, you need to remove them. That involves opening the drive. There are usually four screws holding the drive casing together. Remove those screws and the casing comes away in two pieces, the base and the top. You now have the entire internals of your drive exposed so don't play around.
If you want to paint the drawer, you can remove it by finding the "stop" and disengaging it. The stop is a part in the drive that prevents the drawer from flying out when the eject button is pressed. Gently sliding the drawer back and forth, you can find what is acting as the stop, it's usually a plastic tab. Pressing the tab, or tabs, will allow the drawer to slide away from the drive assembly.
Once you have removed all the parts for painting, put the drive assembly into an anti-static bag for safe keeping. In this state, it is vulnerable to anything and everything bad happening to it.
Now it's time to prep.
First order of business is to remove all stickers/decals etc. Then cleaning the parts with a degreasing cleanser to make sure no oils or crud where on the metal and allowed to completely dry. Last step was sanding with 400 grit sandpaper to get a smooth but imperfect surface for the primer to bind to.
I applied two light layers of primer sanding after each one with 600 grit wet/dry sandpaper. For the metal parts, I'm using rustoleum enamel paint, so I am using matching brand and type of primer and clearcoat.
I/O frame with paint.
Top of DVD RW drive casing.
Bottom of DVD RW drive casing.
After a good/smooth coat of primer, I sprayed on several, light layers of paint. In this case, I am using a metallic black. After the last layer cured, I used 600 grit wet/dry sandpaper to even out the surface and then applied two layers of clearcoat.
The effects were pretty good.
RELATED ARTICLES


MSI MPG Velox 100R Chassis Review
October 14 2021 | 15:04

Want to comment? Please log in.