
Hummer PC
This project came about because of my desire to have both a top line computer and my love of cars. I wanted to mix the best of both worlds!
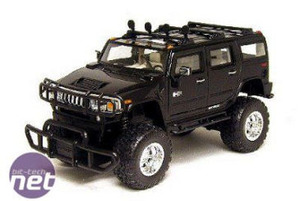
This project started with a 1/6th scale RC Hummer from NewBright Toys . The idea was to build a fully functioning gaming computer - but to also be able to unhook all the peripherals and drive the truck around, when I got bored and needed a break.
The specs on the computer had to be top of the line as I wanted not only a cool looking ride, but also an 'extreme performance' gaming/work PC.
To start with, I picked up:
Motherboard: Mini ATX motherboard from ASUS.
CPU: 3.0 Gig P4 Processor.
RAM: 1 Gig of Dual Channel Corsair Ram.
HDD: 120 Gig Seagate 7200 RPM HardDrive.
Cooling: Thermaltake Water-cooling Kit - have to keep everything cool and not much room for air cooling!
Video: 128 Mb Matrox Parhelia video card. Why Matrox? I do most of my design work on this computer.
Peripherals: Microsoft Wireless Keyboard and Mouse.
LAN: Wireless Network card USB.
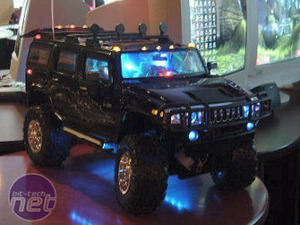
Mods: Crystal Fontz LCD Display for showing all my critical information.
First things first: tearing the whole thing down to see where to put the hardware.
Even though this is a big RC there are still going to be spatial concerns no matter what I did!
.jpg)
In the beginning I tore everything down and started measuring. I would dry fit all of the parts. Trying to fit a mini ATX motherboard in her was tough!
.jpg)
I decided to start the mod with the radiator, as its placement is critical not only for airflow but also for the steering.
.jpg)
The clearance isn't going to be a problem with a hood this big. There will be lots of room for airflow, even more with the hood open.
.jpg)
I then fitted the Reservoir/Pump combo as well as the water block and radiator; all parts were taken from a Thermaltake water cooling kit.
.jpg)
I thought this set-up would work best because it is pretty small, and the best fit all around.
.jpg)
With everything mounted it was time to test the fit of the the body. So far radiator looks like it came with the truck!
.jpg)
Under the hood is lots of room for airflow, shouldn't need to run with the hood open.
.jpg)
A quick look at the front shows that the radiator sticks out of the bottom a fair bit. I decided tol fix this up later when I might have to find a different radiator.
This project came about because of my desire to have both a top line computer and my love of cars. I wanted to mix the best of both worlds!
This project started with a 1/6th scale RC Hummer from NewBright Toys . The idea was to build a fully functioning gaming computer - but to also be able to unhook all the peripherals and drive the truck around, when I got bored and needed a break.
The specs on the computer had to be top of the line as I wanted not only a cool looking ride, but also an 'extreme performance' gaming/work PC.
To start with, I picked up:
Motherboard: Mini ATX motherboard from ASUS.
CPU: 3.0 Gig P4 Processor.
RAM: 1 Gig of Dual Channel Corsair Ram.
HDD: 120 Gig Seagate 7200 RPM HardDrive.
Cooling: Thermaltake Water-cooling Kit - have to keep everything cool and not much room for air cooling!
Video: 128 Mb Matrox Parhelia video card. Why Matrox? I do most of my design work on this computer.
Peripherals: Microsoft Wireless Keyboard and Mouse.
LAN: Wireless Network card USB.
Mods: Crystal Fontz LCD Display for showing all my critical information.
First things first: tearing the whole thing down to see where to put the hardware.
Even though this is a big RC there are still going to be spatial concerns no matter what I did!
In the beginning I tore everything down and started measuring. I would dry fit all of the parts. Trying to fit a mini ATX motherboard in her was tough!
I decided to start the mod with the radiator, as its placement is critical not only for airflow but also for the steering.
The clearance isn't going to be a problem with a hood this big. There will be lots of room for airflow, even more with the hood open.
I then fitted the Reservoir/Pump combo as well as the water block and radiator; all parts were taken from a Thermaltake water cooling kit.
I thought this set-up would work best because it is pretty small, and the best fit all around.
With everything mounted it was time to test the fit of the the body. So far radiator looks like it came with the truck!
Under the hood is lots of room for airflow, shouldn't need to run with the hood open.
A quick look at the front shows that the radiator sticks out of the bottom a fair bit. I decided tol fix this up later when I might have to find a different radiator.
RELATED ARTICLES


MSI MPG Velox 100R Chassis Review
October 14 2021 | 15:04

Want to comment? Please log in.