

And so the build begins!
TESTING THE PLEXI
First thing that came was the pile of white and transparent plexi.
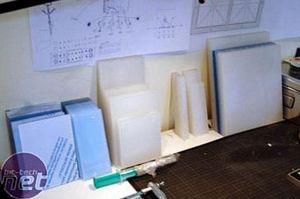
Here you see all the plexi nicely arranged by type on my desk. I\'m going to use two types of plexi: the plain transparent plexi that most people are familiar with and a frosted white plexi that is still a little bit translucent and lets light trough. Its a pity the sides of the panels arent polished (the company who deliverd them didnt have the time to do this because they were going on holiday for 3 weeks, and otherwise I had to wait for all this time. So I chose to get them like this and polish the sides myself.
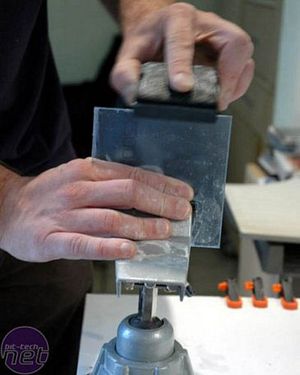
]The first test. I bought different types of sandingpaper to polish the plexi. First 400 grid, then 800 grid and at last a 1200 grid. You can find these types of sandpaper at your local paint store. All these papers can be used \"wet\" and they work better that way. The water makes a kind of paste from the plexi and that is used to polish it up. Its a time-consuming task, but well worth the effort.
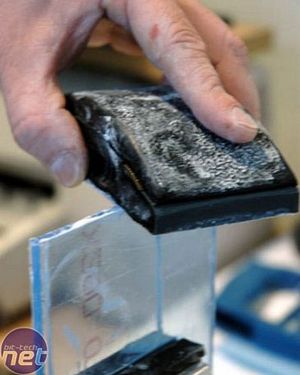
Here you can see a little the \"paste\" I was talking about earlier - it really gets the plexi nice and flat. If you\'re sanding down plexi you should use a straight base so the edge stays straight during sanding. I tried all different things for getting the edges of the plexi transparent. : Flame polish, toothpaste, polishing compound... but in the end the sanding with different grids got the best results.
RELATED ARTICLES


MSI MPG Velox 100R Chassis Review
October 14 2021 | 15:04

Want to comment? Please log in.