Two Faced
The standard beige floppy drive front just didn't look the part plus, the cut out for the drive was rather poorly made. After some thought I decided rather than just make a new front for the drive, I would make a complete new front to alter the overall look of the case.

The new front was made from 3mm clear Perspex sheet. After cutting the Perspex to shape and size, the holes for the intake fan and power button were marked out by holding the panel in position and marking through the existing holes in the original case front.
The nice thing about clear plastic is you can see through it to mark where holes need to be made rather than having to measure everything. In this picture the slots for the floppy drive and hole centre for the HDD activity light are about to be marked on the new front. I left the white backing on to allow the workpiece to stand out for the picture .


A Dremel with a sanding wheel fitted and mounted to its routing table was used to cut out the semicircle for the power switch.
I did some experimental routing using the Dremel and found it to be totally unsuitable for routing Perspex, leaving uneven cuts and melting the plastic. Fortunately I have a real router which spins much faster and is more powerful which I used to put a bevel on all the edges of the new panel. Here I am bevelling the fan intake hole.
NOTE: If you try this yourself and have little or no experience of routing, get someone who has to do the job. A router will remove a finger long before you realise anything is wrong! These machines are designed to cut through virtually anything effortlessly, flesh and bone is no obstacle! Modding is no fun when you lose body parts doing it.

The router bits I used. The angled one on the left was used to cut the bevelled edges, the straight channel cutter was used to cut out for the fan grill, described later on


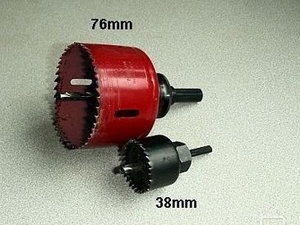
The front panel is starting to take shape. The slots for the floppy drive access and eject button and a hole for the HDD activity indicator have been added. Also all the edges have been bevelled. The slots were marked out and a series of holes drilled to remove the bulk of the waste. The slots were then shaped and finished off using needle files. The 2 large holes were cut out using hole saws and a variable speed cordless drill at low speed.


Now for the fan grill. I didn't want to just bolt it on so I decided to recess it into the front panel. The grill was positioned and drawn around, again using the CD marker pen. Following the same method as the CD drive before I also drilled a 1mm hole for some fibre optic for the floppy drive activity LED. Fan grill outline marked out and ready for routing the recess.


The 6mm straight router bit was used to make the recess for the grill. In case your not sure, the recess is on the back of the panel. The cutting depth was set slightly deeper than the thickness of the grill to ensure that the grill did not pertrude above the surface. Finally a test fit to make sure all is well before...

MSI MPG Velox 100R Chassis Review
October 14 2021 | 15:04


Want to comment? Please log in.