Bärsärkar-gång by Mach
Project log: HereBärsärkar-gång continues the varied style of modding this month with a decidedly steampunk look of worn brass and old fittings. Things started with a bang, mainly due to the fact the project was already under way by the time Mach started his project log a few weeks ago.
What's even more interesting is that Mach is planning to water-cool his brass contraption - something we haven't really seen since Steampunk Frankenstein.
There's some water cooling bling on show too thanks to the inclusion of more than a few Bitspower fittings courtesy of Vincent at Bitspower himself. They also appear to don a brass finish which we haven't seen from Bitspower yet.
There was so much going on Mach's project log that what you see here is only the tip of the iceberg. Be sure to check out his popular project log (link above) for even more info.


Yet more intriguing renders! This time we're looking at the internal design of Bärsärkar-gång exposing the cooling system. Originally Mach had planned to use copper barbs but these for some reason didn't work. Just as well he managed to get hold of the Bitspower gear then! We can also see the cooling system's reservoir - more on that in a minute.


The original container that was to be used for the reservoir only had one hole but as anyone who's dabbled in the moist world of water cooling knows you need an inlet and an outlet. You could use a t-line of course but a proper reservoir is much better. To solve the issue, Mach made a new end plate for the container and using solder, secured two threaded fittings into pre-drilled holes ready to accept some compression fittings.


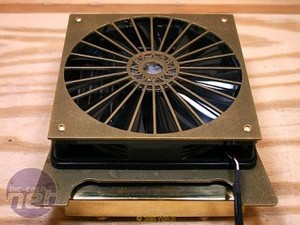
Alas the copper fittings were set to go but they did look good with some green tubing. How about that for a fan grille though! Here are those Bitspower fittings too. We hope Mach managed blag all of these as this lot would cost more than your average water cooling system, or at least they would in the UK!


There's definitely some hard core modding going on here. To apply etching to various small parts of the project, instead of going down the rotary tool route, Mach purchased a chemical etching kit. Check out the project log to see the results! Finally, again we've only shown a fraction of the mountain of work Mach has put into his project, here's a snippet from one of the more recent updates to the project log showing a full side shot of the case with a curious angled barb at the bottom.
Make sure you head over to Mach's project log to see the rest of the work and if you'd like to vote for Bärsärkar-gång, head over to our forums.

MSI MPG Velox 100R Chassis Review
October 14 2021 | 15:04


Want to comment? Please log in.