Mounting the Reservoirs...
My idea for mounting the two reservoirs involved having to cut a large hole in the top of the case, including removing a section all around the 80mm fan hole. I set to work:
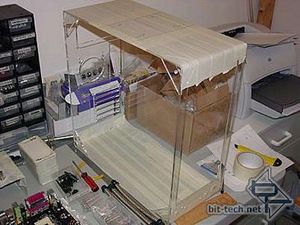
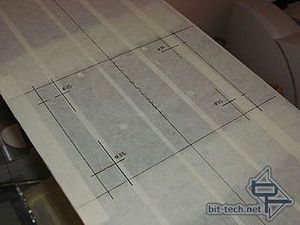
I taped up the top and inside bottom of the case to protect them from scratches. Some of the plastic material coming off the cuts was quite sharp so I didn't want to take any chances. The top hole was marked. Notice that I haven't drawn the rounded corners. A 35mm Hole-saw will take care of these.
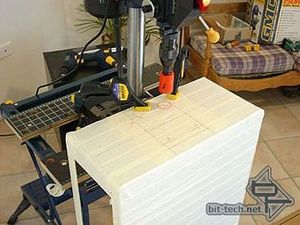
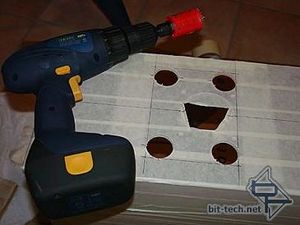
To get the rounded corners in my top-hole cut-out I used a Hole-saw. I wanted nice big curves and I extended the radius to the acrylic top-plate so that the curves follow the curve of the cut-out. I started with a complicated clamp/drill press arrangement. Even at a slow speed the Hole-saw would still bind and the chuck would come off the press so I ditched this method in favour of my cheapo cordless drill. I had to drill, remove melted plastic from teeth, drill a bit more, remove more plastic, etc. Slow process as the acrylic would melt and bind the saw quickly even at a very slow speed - once the melted plastic gummed up the teeth they refuse to bite.
I clamped a board under the top panel (to stop the back-side of the hole chipping out as I came through the material) and masked underneath as well so the board wouldn't scratch (as you know, you see scratches on acrylic irrespective of which side is scratched). It worked out well in the end.
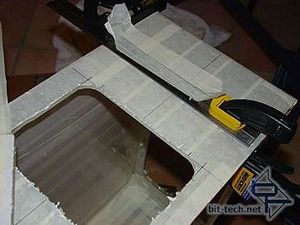
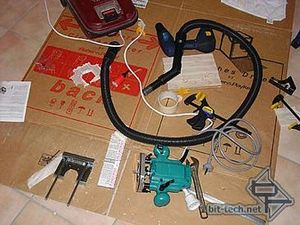
I used a Makita Router to cut the straight edges. It was the first time I had used a router, though I practiced on a few scrap pieces of acrylic beforehand. It scared the living crap out of me when I first switched it on to play with as it's an awesomely powerful bit of kit - I had visions of it wandering off course and tearing enormous molten chunks out my lovely delicate acrylic! I clamped a guide to the case to get the straight lines on the front and back edges but had to use the router's own guide rail to do the sides. I failed to put enough pressure against the guide when doing the sides and got slightly wobbly cuts on these two side edges.
Hmmm...might help if I had a proper workbench instead of the floor!
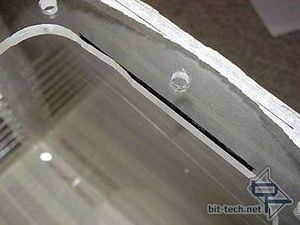
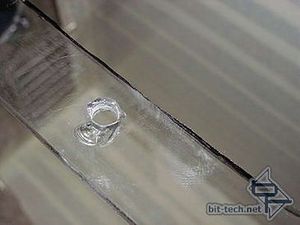
A permanent marker and ruler were used to rule a straight line on the two rough edges and the cut-out was cleaned up when I got to the filing/sanding/polishing. It cleaned up very nicely and I ended up with perfectly straight edges! I also drilled ¼" / 6mm holes through the top of the case for the socket-head cap screws that secure the top-plate. Another mistake I made early on was to try and drill the holes using a normal drill bit. It would 'grab' the acrylic and tear chunks out of it! Luckily I only damaged two holes (the worst is shown in the picture).
I even shattered the corner off my first top plate and had to make another! Murphy's Law then kicked in and the blade on my (cheap) bandsaw broke. I ended up cutting out the new cover by hand with a hacksaw. Absolutely dead straight as it turned out. I rounded the corners by filing/sanding. I was so happy with the result I have cut out everything since with the hacksaw and cleaned up with a file and various grades of wet and dry sandpaper.
My idea for mounting the two reservoirs involved having to cut a large hole in the top of the case, including removing a section all around the 80mm fan hole. I set to work:


I taped up the top and inside bottom of the case to protect them from scratches. Some of the plastic material coming off the cuts was quite sharp so I didn't want to take any chances. The top hole was marked. Notice that I haven't drawn the rounded corners. A 35mm Hole-saw will take care of these.


To get the rounded corners in my top-hole cut-out I used a Hole-saw. I wanted nice big curves and I extended the radius to the acrylic top-plate so that the curves follow the curve of the cut-out. I started with a complicated clamp/drill press arrangement. Even at a slow speed the Hole-saw would still bind and the chuck would come off the press so I ditched this method in favour of my cheapo cordless drill. I had to drill, remove melted plastic from teeth, drill a bit more, remove more plastic, etc. Slow process as the acrylic would melt and bind the saw quickly even at a very slow speed - once the melted plastic gummed up the teeth they refuse to bite.
I clamped a board under the top panel (to stop the back-side of the hole chipping out as I came through the material) and masked underneath as well so the board wouldn't scratch (as you know, you see scratches on acrylic irrespective of which side is scratched). It worked out well in the end.


I used a Makita Router to cut the straight edges. It was the first time I had used a router, though I practiced on a few scrap pieces of acrylic beforehand. It scared the living crap out of me when I first switched it on to play with as it's an awesomely powerful bit of kit - I had visions of it wandering off course and tearing enormous molten chunks out my lovely delicate acrylic! I clamped a guide to the case to get the straight lines on the front and back edges but had to use the router's own guide rail to do the sides. I failed to put enough pressure against the guide when doing the sides and got slightly wobbly cuts on these two side edges.
Hmmm...might help if I had a proper workbench instead of the floor!


A permanent marker and ruler were used to rule a straight line on the two rough edges and the cut-out was cleaned up when I got to the filing/sanding/polishing. It cleaned up very nicely and I ended up with perfectly straight edges! I also drilled ¼" / 6mm holes through the top of the case for the socket-head cap screws that secure the top-plate. Another mistake I made early on was to try and drill the holes using a normal drill bit. It would 'grab' the acrylic and tear chunks out of it! Luckily I only damaged two holes (the worst is shown in the picture).
I even shattered the corner off my first top plate and had to make another! Murphy's Law then kicked in and the blade on my (cheap) bandsaw broke. I ended up cutting out the new cover by hand with a hacksaw. Absolutely dead straight as it turned out. I rounded the corners by filing/sanding. I was so happy with the result I have cut out everything since with the hacksaw and cleaned up with a file and various grades of wet and dry sandpaper.

MSI MPG Velox 100R Chassis Review
October 14 2021 | 15:04


Want to comment? Please log in.