
The Case...
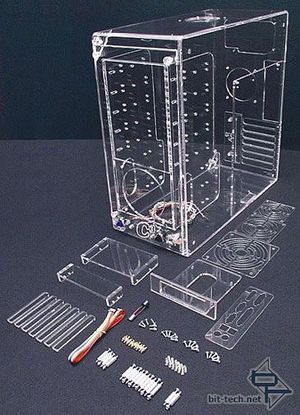
Image courtesy ClearComputerCase
This is the bare C³ case from ClearComputerCase . After looking at a number of options from different manufacturers I ordered the 'deluxe' clear case - 'deluxe' meaning it has a few extra bits/fan guards etc. It was shipped out to me from the US as they weren't available in Australia. It's a beauty of a case, precision cut by...*Dr Evil voice*...la-sers! It just oozes quality - a good starting point.
Prior Preparation (and all that)...
Once I had the case in my hot, sweaty, white-cotton-gloved hands and, as further components arrived I sat down and started to PLAN... ...and PLAN...
...and PLAN...
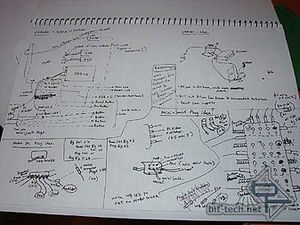
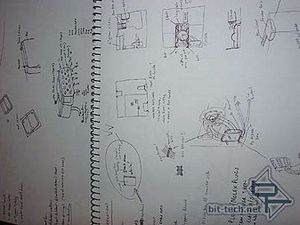
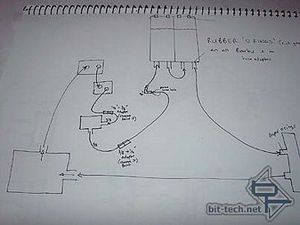
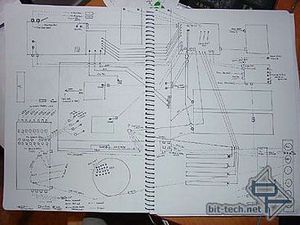
...and PLAN some more. I was trying to follow the modder's mantra of 'measure twice, cut once'. I also didn't want to screw up my case. Mostly though, the ideas just kept flooding out. Note the high tech case design software I am using in the pictures - called SketchBOOK! I discovered years ago the importance, when formulating a plan, to stay flexible and work-in contingencies in case you need to change it further down the track. As a result I started by sketching broad concepts/ideas and then refined them down to detailed working drawings, with a couple of options, as I went along with the test fitting and as each component arrived.
Once I had filled this book up with drawings - yes, I actually filled it - and measured and test fitted some things (i.e. 3 weeks of sitting and measuring and pondering and frowning and asking the odd question in the forums - you know how it is) I had a pretty good idea of exactly what the case would look like and exactly which parts I would be modding (basically everything). Most importantly though, I had a PLAN!
The saying goes "The first casualty of war is your plan" but (another saying) "prior preparation prevents piss-poor performance". So, walking this metaphorical knife-edge between too much planning and not enough, I got down to work...
Shiny stuff...
When I finally got my digital camera I had already sent off a number of things to be chromed. The chroming is the only thing in this mod I wasn't able to do myself as I simply don't have the skills/equipment to do it (if you know much about electroplating you'll understand why I went to the professionals). In my opinion nothing, I mean NOTHING looks quite as awesome as real chrome. There are some good chrome paints out there. I tried a few. No paint came close to the professional finish I got with the real thing:
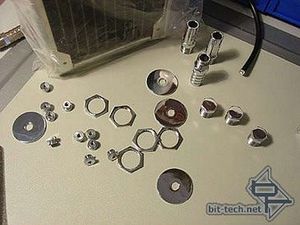
PSU cover, DVD drive covers, the aluminium HDD rack taken out on my Lian-Li and various assorted hose barbs, fasteners etc.
They came out brilliantly well! I just went to a small local place that looked like something out of a Charles Dickens book, Victorian brick building and weather-beaten craftsmen with blackened faces and big leather aprons. They stripped (where necessary) and chromed all the metal Parts - I don't think they had any idea what the parts were for judging by the weird looks I got. They had to take paint off the DVD and PSU covers before chroming which the guy did with some super-industrial strength paint-stripper or acid or something (he said he "soaked" them in it?). I had the little things done, like the brass hose barbs, brass reservoir plugs and brass water-block hold-downs in my water cooling set-up, and the brass nuts that secure the vandal switches as I wanted this sort of attention to detail to flow throughout the case.
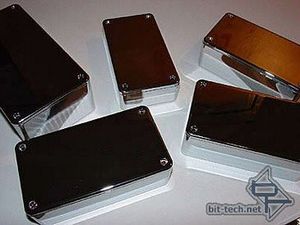
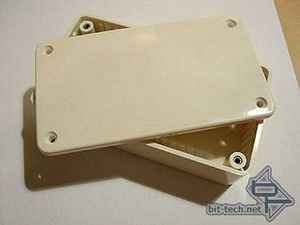
I also had some ABS plastic project boxes chromed. They were done at www.bronzingstudio.com.au . The finish is identical to the hi-brightness chrome finish on my metal parts and I was quite literally gob-smacked when they arrived as the finish is superb.
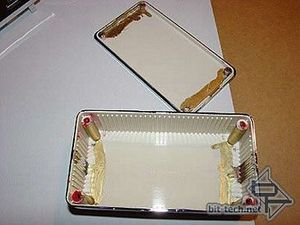
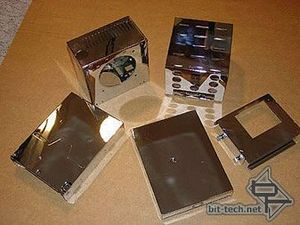
It looked like they had painted the plastic with some sort of electrically conductive paint (the gold paint in the picture) and then chromed it like you would a piece of metal. The coating is fairly thick, and I could see how it might dent slightly with the softer plastic behind it - care will be needed. There is also the issue of the different thermal expansion properties of the bonded materials (i.e. no putting a heat gun anywhere near them). These chrome project boxes feature in the mod as well - you can see I have already used 3 of them in the PSU mod.
Also before I got my camera, I had begun to cut and bend quite a number of the panels and covers that I will be using in the case. You will see more of these in later articles and project updates.
The PLAN involved working from the top of the case down as modding this case was like eating a meal where you eat the yucky stuff first and the yummy stuff later - what I planned on doing with the cabling and PSU looked like being the most difficult and time-consuming (all that wiring to do, ho hum). I wanted also to finish the PSU work first to assist in testing things as I put them into the case.
Image courtesy ClearComputerCase
This is the bare C³ case from ClearComputerCase . After looking at a number of options from different manufacturers I ordered the 'deluxe' clear case - 'deluxe' meaning it has a few extra bits/fan guards etc. It was shipped out to me from the US as they weren't available in Australia. It's a beauty of a case, precision cut by...*Dr Evil voice*...la-sers! It just oozes quality - a good starting point.
Prior Preparation (and all that)...
Once I had the case in my hot, sweaty, white-cotton-gloved hands and, as further components arrived I sat down and started to PLAN... ...and PLAN...
...and PLAN...
...and PLAN some more. I was trying to follow the modder's mantra of 'measure twice, cut once'. I also didn't want to screw up my case. Mostly though, the ideas just kept flooding out. Note the high tech case design software I am using in the pictures - called SketchBOOK! I discovered years ago the importance, when formulating a plan, to stay flexible and work-in contingencies in case you need to change it further down the track. As a result I started by sketching broad concepts/ideas and then refined them down to detailed working drawings, with a couple of options, as I went along with the test fitting and as each component arrived.
Once I had filled this book up with drawings - yes, I actually filled it - and measured and test fitted some things (i.e. 3 weeks of sitting and measuring and pondering and frowning and asking the odd question in the forums - you know how it is) I had a pretty good idea of exactly what the case would look like and exactly which parts I would be modding (basically everything). Most importantly though, I had a PLAN!
The saying goes "The first casualty of war is your plan" but (another saying) "prior preparation prevents piss-poor performance". So, walking this metaphorical knife-edge between too much planning and not enough, I got down to work...
Shiny stuff...
When I finally got my digital camera I had already sent off a number of things to be chromed. The chroming is the only thing in this mod I wasn't able to do myself as I simply don't have the skills/equipment to do it (if you know much about electroplating you'll understand why I went to the professionals). In my opinion nothing, I mean NOTHING looks quite as awesome as real chrome. There are some good chrome paints out there. I tried a few. No paint came close to the professional finish I got with the real thing:
PSU cover, DVD drive covers, the aluminium HDD rack taken out on my Lian-Li and various assorted hose barbs, fasteners etc.
They came out brilliantly well! I just went to a small local place that looked like something out of a Charles Dickens book, Victorian brick building and weather-beaten craftsmen with blackened faces and big leather aprons. They stripped (where necessary) and chromed all the metal Parts - I don't think they had any idea what the parts were for judging by the weird looks I got. They had to take paint off the DVD and PSU covers before chroming which the guy did with some super-industrial strength paint-stripper or acid or something (he said he "soaked" them in it?). I had the little things done, like the brass hose barbs, brass reservoir plugs and brass water-block hold-downs in my water cooling set-up, and the brass nuts that secure the vandal switches as I wanted this sort of attention to detail to flow throughout the case.
I also had some ABS plastic project boxes chromed. They were done at www.bronzingstudio.com.au . The finish is identical to the hi-brightness chrome finish on my metal parts and I was quite literally gob-smacked when they arrived as the finish is superb.
It looked like they had painted the plastic with some sort of electrically conductive paint (the gold paint in the picture) and then chromed it like you would a piece of metal. The coating is fairly thick, and I could see how it might dent slightly with the softer plastic behind it - care will be needed. There is also the issue of the different thermal expansion properties of the bonded materials (i.e. no putting a heat gun anywhere near them). These chrome project boxes feature in the mod as well - you can see I have already used 3 of them in the PSU mod.
Also before I got my camera, I had begun to cut and bend quite a number of the panels and covers that I will be using in the case. You will see more of these in later articles and project updates.
The PLAN involved working from the top of the case down as modding this case was like eating a meal where you eat the yucky stuff first and the yummy stuff later - what I planned on doing with the cabling and PSU looked like being the most difficult and time-consuming (all that wiring to do, ho hum). I wanted also to finish the PSU work first to assist in testing things as I put them into the case.
RELATED ARTICLES


MSI MPG Velox 100R Chassis Review
October 14 2021 | 15:04

Want to comment? Please log in.