
Continued from Orac³ Part 1
Welcome to the second article in the series following the Orac³ project - my conversion of a clear acrylic case into ... well, something else! Continuing with the vintage British Sci-Fi theme inspired by the TV series Blakes 7 you will see things really starting to take shape.
In this installment I tackle the Vacuum Fluorescent Display (VFD), Fan Controller, Front Bezel and Front Switches. With one of the prime goals being to make the case look good when viewed from any angle, you will start to see an even distribution of wiring down both sides and an equal amount of attention paid to the details on whichever side they happen to be.
Here are some images of the parts of the project I will be covering in this article:
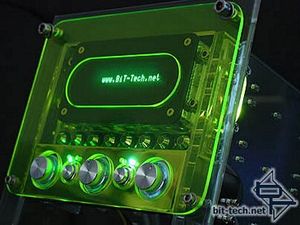
VFD in action in it's housing along with the fan controller and a neon green acrylic front cover. It's a superb Matrix Orbital display with four lines of 20 characters running LCDC software. The knobs on the fan controller will eventually have a glowing ring around them, which will also light up the fiber-optic position indicators I installed.
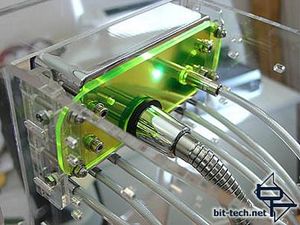
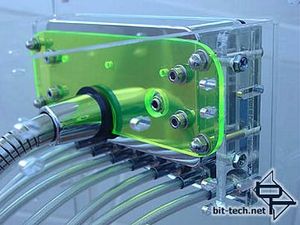
The rear of the VFD module - chrome housing, power-on LED that lights up the neon green plexi rear mounting panel, chrome jack plug power and serial cable inside chrome shower hose. Polished stainless steel fasteners and a row of LEDs wired up in chrome holders (these will be connected to a controller eventually). There are an additional two 3mm white LEDs inset into the rear mounting panel. These are connected to the General Purpose Output of the VFD. When activated there is an effect much like a car tail light at night when the brakes are applied - a sudden increase in brightness of the back panel. I can program these to notify me of nearly anything, such as: New email, computer about to melt down etc. The power-on LED is extra bright when the lights go down!
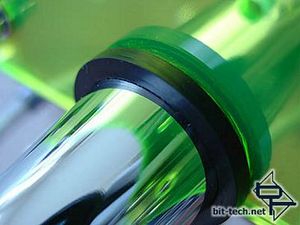
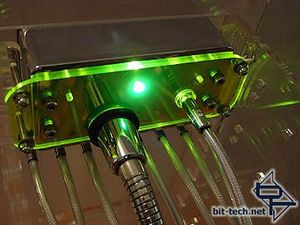
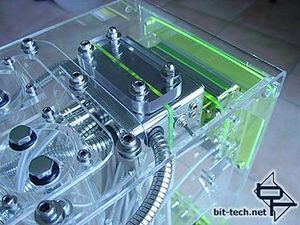
The serial cable entering the back of the VFD module and the Module mounted. The rubber surround is stepped, with the narrow step fitting neatly into the hole in the plexi panel. This rubber surround is yet another piece salvaged from the hand shower kits shown in the first article in this series. The custom mounting bracket and stainless steel fasteners can be clearly seen .
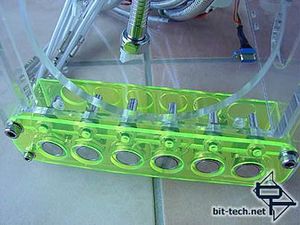
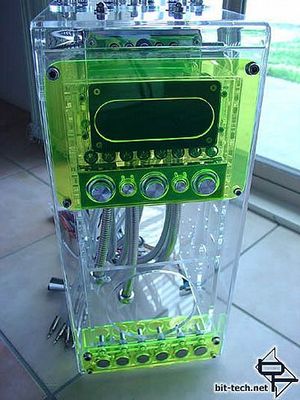
The front switches and the case overall. The switch panel is now complete with a new front and rear cover, stainless steel vandal-resistant switches and a row of chrome-encased indicator LEDs.

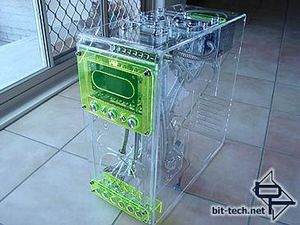
Here you can see the front of the case from the rear and viewed from another angle. I was pretty happy with how the glowing ring framing the VFD turned out. You'll see how I did it later.


Nicely glowing. I'll be lighting the knobs up in the next article.
I will also be installing a cover for the rear of the fan controller in the next article which should improve the appearance of the front panel a little.
Now that you've seen the overall look, here's what I did...
Orac³
Part 2 - From VFD to Front Bezel SwitchesWelcome to the second article in the series following the Orac³ project - my conversion of a clear acrylic case into ... well, something else! Continuing with the vintage British Sci-Fi theme inspired by the TV series Blakes 7 you will see things really starting to take shape.
In this installment I tackle the Vacuum Fluorescent Display (VFD), Fan Controller, Front Bezel and Front Switches. With one of the prime goals being to make the case look good when viewed from any angle, you will start to see an even distribution of wiring down both sides and an equal amount of attention paid to the details on whichever side they happen to be.
Here are some images of the parts of the project I will be covering in this article:
VFD in action in it's housing along with the fan controller and a neon green acrylic front cover. It's a superb Matrix Orbital display with four lines of 20 characters running LCDC software. The knobs on the fan controller will eventually have a glowing ring around them, which will also light up the fiber-optic position indicators I installed.
The rear of the VFD module - chrome housing, power-on LED that lights up the neon green plexi rear mounting panel, chrome jack plug power and serial cable inside chrome shower hose. Polished stainless steel fasteners and a row of LEDs wired up in chrome holders (these will be connected to a controller eventually). There are an additional two 3mm white LEDs inset into the rear mounting panel. These are connected to the General Purpose Output of the VFD. When activated there is an effect much like a car tail light at night when the brakes are applied - a sudden increase in brightness of the back panel. I can program these to notify me of nearly anything, such as: New email, computer about to melt down etc. The power-on LED is extra bright when the lights go down!
The serial cable entering the back of the VFD module and the Module mounted. The rubber surround is stepped, with the narrow step fitting neatly into the hole in the plexi panel. This rubber surround is yet another piece salvaged from the hand shower kits shown in the first article in this series. The custom mounting bracket and stainless steel fasteners can be clearly seen .
The front switches and the case overall. The switch panel is now complete with a new front and rear cover, stainless steel vandal-resistant switches and a row of chrome-encased indicator LEDs.
Here you can see the front of the case from the rear and viewed from another angle. I was pretty happy with how the glowing ring framing the VFD turned out. You'll see how I did it later.
Nicely glowing. I'll be lighting the knobs up in the next article.
I will also be installing a cover for the rear of the fan controller in the next article which should improve the appearance of the front panel a little.
Now that you've seen the overall look, here's what I did...


MSI MPG Velox 100R Chassis Review
October 14 2021 | 15:04

Want to comment? Please log in.