
The VFD Module
The Plan...
My plan for the VFD display involved creating a separate \'module\' that would follow along with the case themes (chrome, neon plexi, stainless steel hose/fittings etc). Being inside the clear acrylic case meant that the unit had to look good from any direction. I specifically didn\'t want to mount it directly to the inside front of the case as I wanted it to sit back into the interior, but still be able to be read easily. I also didn\'t want it to look anything like a VFD display, necessitating a fully enclosed module.
I saw the value of tinted plexi covers to be able to make VFD text just \'appear\' on the surface of the plexi after seeing Macroman\'s Macro Black case. I wanted a front cover to the VFD module that would look like a black mirror where the unlit dot-matrix characters would barely be visible, even under strong direct light, and not visible at all under most lighting.
I also had to design a mounting system and a way of connecting serial and power to the module that fitted into the themes. After clarifying on the forums at BiT-Tech what the General Purpose Output actually did on my VFD, I knew that there had to be a way that I could incorporate the use of this in a different way to what I had seen, and one in keeping with the case themes.
One last consideration for this part of the case was where I would place my row of LED chaser lights (hey, it isn\'t vintage Sci-Fi without a flashing light or two! (or 32). The lights would have to fit between the VFD and the Fan Controller located just below it. These lights are white LEDs diffused and placed behind the neon front panel so as to light it up - I also have a special plan for these that will be implemented in the next article. Once I knew what I would use as a mounting bracket the idea of where to place the LEDs just came to me out of the blue - (in the words of the New Zealand poet Sam Hunt) ... like Seagull S**t on your shoulder mate!
The victim - a Matrix Orbital 20x4 VFD. I chose MO after reading all the excellent reviews and because I wanted to use LCDC software which is optimised for the MO displays. I wasn\'t disappointed when my package winged its way from MO to my doorstep - It is a quality unit.
At the time of writing this, Matrix Orbital have sent me a newer version of the display currently in the case - the new VK204-25 USB. This newer display has an incredible amount of features and the intent is to eventually replace the older serial display with the new USB model.
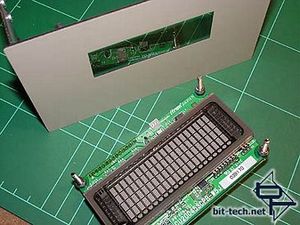
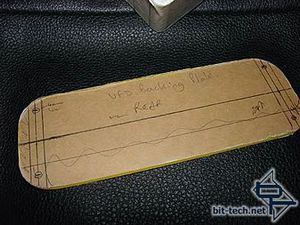
It came with a beige housing for mounting in two 5.25 bays. The first task was to rip it out of there (i.e. I carefully unscrewed it). I then set to work on the parts that would make up the VFD module starting with a backing plate - cut from 3mm neon green plexi with a hacksaw and then filed/sanded/polished to size. The other parts included:
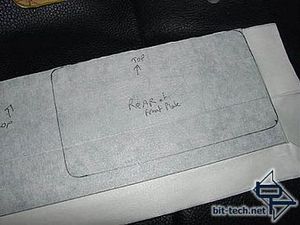
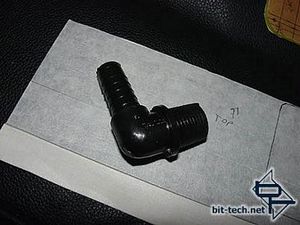
A scrap piece of 3mm tinted plexi from the suppliers offcut bin - taped and marked for cutting and a 90 degree plastic hose fitting from a Boating supplies shop.
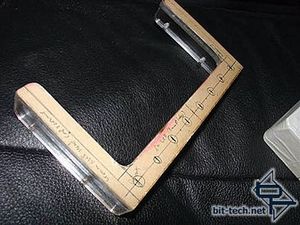
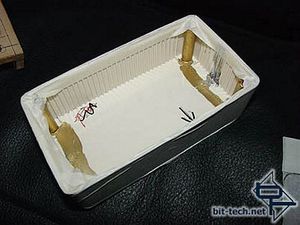
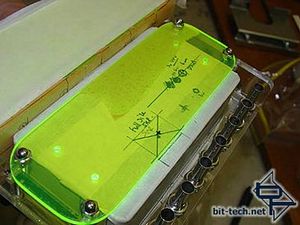
A \'U\' shaped bracket made from the 2-up plexi drive bay cover that came with the case, here marked for drilling, and a chromed project box - masking-taped and ready for drilling as well.
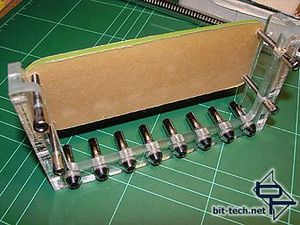
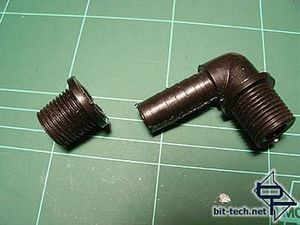
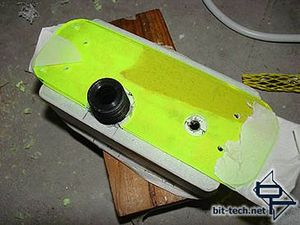
The first task was to drill 8mm holes for the LED holders and drill and check the fit of the rear mounting plate. I got a hacksaw and cut off the threaded end of the hose fitting from the marine shop. You can see it here with a non-vandalised, err... cut, fitting for comparison.
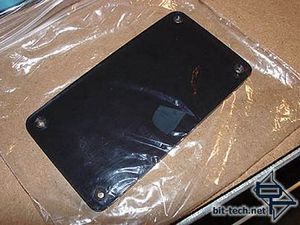
Tinted plexi cover - cut with a hacksaw (I\'m beginning to love that hacksaw!), filed/sanded and polished, with countersunk holes drilled in the corners. There was a fair amount of test-fitting the mounting bracket as I marked the box for drilling.
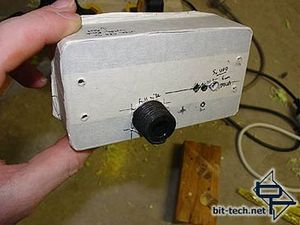

I drilled the box with a step-drill and inserted the hose fitting from the inside. It locks in place nicely. Using a hole-saw in my drill press I drilled a clearance hole for the shower hose fitting I am using for the VFD serial cable.
Another test-fit - Mmmm ... perfect!
The Plan...
My plan for the VFD display involved creating a separate \'module\' that would follow along with the case themes (chrome, neon plexi, stainless steel hose/fittings etc). Being inside the clear acrylic case meant that the unit had to look good from any direction. I specifically didn\'t want to mount it directly to the inside front of the case as I wanted it to sit back into the interior, but still be able to be read easily. I also didn\'t want it to look anything like a VFD display, necessitating a fully enclosed module.
I saw the value of tinted plexi covers to be able to make VFD text just \'appear\' on the surface of the plexi after seeing Macroman\'s Macro Black case. I wanted a front cover to the VFD module that would look like a black mirror where the unlit dot-matrix characters would barely be visible, even under strong direct light, and not visible at all under most lighting.
I also had to design a mounting system and a way of connecting serial and power to the module that fitted into the themes. After clarifying on the forums at BiT-Tech what the General Purpose Output actually did on my VFD, I knew that there had to be a way that I could incorporate the use of this in a different way to what I had seen, and one in keeping with the case themes.
One last consideration for this part of the case was where I would place my row of LED chaser lights (hey, it isn\'t vintage Sci-Fi without a flashing light or two! (or 32). The lights would have to fit between the VFD and the Fan Controller located just below it. These lights are white LEDs diffused and placed behind the neon front panel so as to light it up - I also have a special plan for these that will be implemented in the next article. Once I knew what I would use as a mounting bracket the idea of where to place the LEDs just came to me out of the blue - (in the words of the New Zealand poet Sam Hunt) ... like Seagull S**t on your shoulder mate!
The victim - a Matrix Orbital 20x4 VFD. I chose MO after reading all the excellent reviews and because I wanted to use LCDC software which is optimised for the MO displays. I wasn\'t disappointed when my package winged its way from MO to my doorstep - It is a quality unit.
At the time of writing this, Matrix Orbital have sent me a newer version of the display currently in the case - the new VK204-25 USB. This newer display has an incredible amount of features and the intent is to eventually replace the older serial display with the new USB model.
It came with a beige housing for mounting in two 5.25 bays. The first task was to rip it out of there (i.e. I carefully unscrewed it). I then set to work on the parts that would make up the VFD module starting with a backing plate - cut from 3mm neon green plexi with a hacksaw and then filed/sanded/polished to size. The other parts included:
A scrap piece of 3mm tinted plexi from the suppliers offcut bin - taped and marked for cutting and a 90 degree plastic hose fitting from a Boating supplies shop.
A \'U\' shaped bracket made from the 2-up plexi drive bay cover that came with the case, here marked for drilling, and a chromed project box - masking-taped and ready for drilling as well.
The first task was to drill 8mm holes for the LED holders and drill and check the fit of the rear mounting plate. I got a hacksaw and cut off the threaded end of the hose fitting from the marine shop. You can see it here with a non-vandalised, err... cut, fitting for comparison.
Tinted plexi cover - cut with a hacksaw (I\'m beginning to love that hacksaw!), filed/sanded and polished, with countersunk holes drilled in the corners. There was a fair amount of test-fitting the mounting bracket as I marked the box for drilling.
I drilled the box with a step-drill and inserted the hose fitting from the inside. It locks in place nicely. Using a hole-saw in my drill press I drilled a clearance hole for the shower hose fitting I am using for the VFD serial cable.
Another test-fit - Mmmm ... perfect!


MSI MPG Velox 100R Chassis Review
October 14 2021 | 15:04

Want to comment? Please log in.