The Fan Controller
The victim - A \'Noise Isolator\' PWM fan controller. I saw this in a review at Modthebox.com and immediately liked the look of it - I decided it would be great for the project. This one also has two push-button switches for general 12v power outs. It features backlit knobs and on/off indicator LEDs for the switches. Of course, when I thought it would be great for my project, I had my Mod-coloured glasses on as the writing on the front is pretty cheap looking with a horrible old-fashioned, my-grandma\'s-writing text in the top left corner - Bleeeeechh!
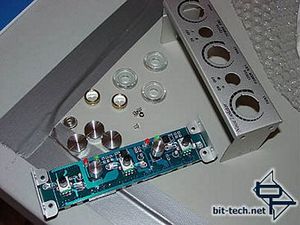
In a modding frenzy I tore it apart! I am Modder...hear me ROAR!
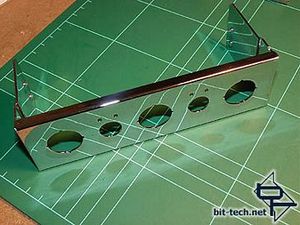
\"Make sure you get rid of that ugly writing off the front\" I said to the chroming guy - and he did!
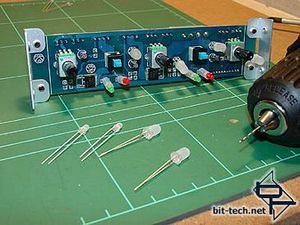
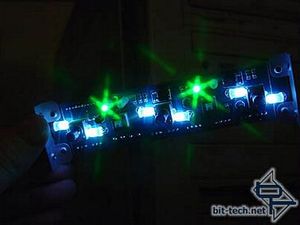
I changed all the 5mm LEDs from blue to nice, clean white and changed the 3mm LEDs to green for \'on\' and white for \'off\'. I had to use a 1mm drill to clean the pin-holes of solder before putting in the new LEDs. Disco, anyone? (Starburst filter on the digicam).
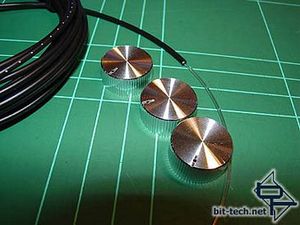
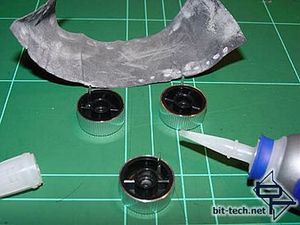
One thing I noticed, when playing around with the controller, was how hard it was to see the position indicators on the knobs, particularly in dim light, while backlit by their glowing plexi surrounds. I decided to improve this state of affairs by taking some 1mm fibre-optic cable, drilling 1mm holes in the position indicators on the knobs and inserting the optic fibres into the hole. The ends were cleaned up with sandpaper first and superglue was used to fix them in place.
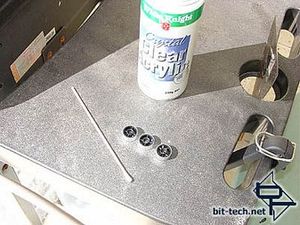
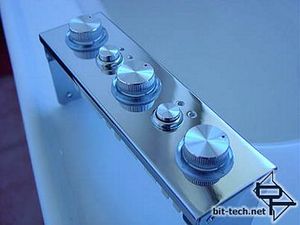
Clear, gloss acrylic was sprayed onto a cotton swab and the ends of the optic fibres dotted carefully. The gloss acted to smooth out any imperfections and will maximize the brightness of the position indicators. The front of the fan controller is complete and I am constructing a cover for the rear. This will be wired up for jack plugs and will be covered in the next article in this series.<br> <br> I then had to work on finishing the new acrylic front bezel for the Fan Controller and the VFD display. I wanted a one-piece cover for both units and it\'s at this point where I begin to use the neon green acrylic on the outside of the case.
The victim - A \'Noise Isolator\' PWM fan controller. I saw this in a review at Modthebox.com and immediately liked the look of it - I decided it would be great for the project. This one also has two push-button switches for general 12v power outs. It features backlit knobs and on/off indicator LEDs for the switches. Of course, when I thought it would be great for my project, I had my Mod-coloured glasses on as the writing on the front is pretty cheap looking with a horrible old-fashioned, my-grandma\'s-writing text in the top left corner - Bleeeeechh!

In a modding frenzy I tore it apart! I am Modder...hear me ROAR!

\"Make sure you get rid of that ugly writing off the front\" I said to the chroming guy - and he did!


I changed all the 5mm LEDs from blue to nice, clean white and changed the 3mm LEDs to green for \'on\' and white for \'off\'. I had to use a 1mm drill to clean the pin-holes of solder before putting in the new LEDs. Disco, anyone? (Starburst filter on the digicam).


One thing I noticed, when playing around with the controller, was how hard it was to see the position indicators on the knobs, particularly in dim light, while backlit by their glowing plexi surrounds. I decided to improve this state of affairs by taking some 1mm fibre-optic cable, drilling 1mm holes in the position indicators on the knobs and inserting the optic fibres into the hole. The ends were cleaned up with sandpaper first and superglue was used to fix them in place.


Clear, gloss acrylic was sprayed onto a cotton swab and the ends of the optic fibres dotted carefully. The gloss acted to smooth out any imperfections and will maximize the brightness of the position indicators. The front of the fan controller is complete and I am constructing a cover for the rear. This will be wired up for jack plugs and will be covered in the next article in this series.<br> <br> I then had to work on finishing the new acrylic front bezel for the Fan Controller and the VFD display. I wanted a one-piece cover for both units and it\'s at this point where I begin to use the neon green acrylic on the outside of the case.

MSI MPG Velox 100R Chassis Review
October 14 2021 | 15:04


Want to comment? Please log in.