The Front Cover
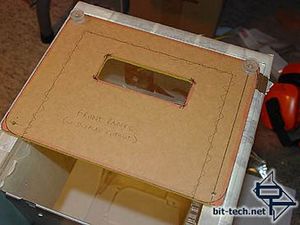
A few weeks before even starting the VFD module I had started on a front cover and all that remained was some finishing off and working out where openings would go in it. Note the square-ish hole in the front and the not-so-round corners. Upon reflection, I realized I wanted much rounder corners and all my earlier acrylic pieces have since been modified to incorporate more sweeping curves. You can see in the pic where I have marked the new corners. Most of the corners in the case are the same diameter curve - I used the edge of the same, very large, steel washer as a template.
Here\'s what I did to the front cover:
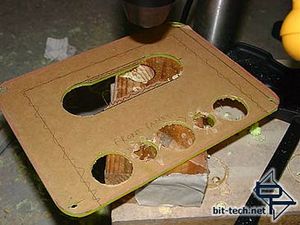
I used a holesaw at each end of the opening to create more rounded ends. I ruled the straight edges to be filed away later (it eventually took half an hour to file and clean up) and cut out a piece of plexi as an insert. I had also used the fan controller cover as a template and marked hole positions for the knobs and switches. These were drilled using a holesaw (big holes) a step drill (medium-sized holes) and a plexi drill (small holes). I used the edge of the next step in the step drill, and a larger plexi drill, to chamfer the edges of the medium and small holes respectively.
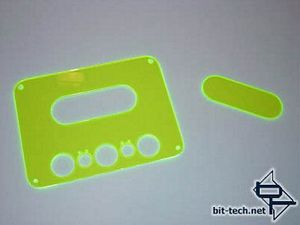
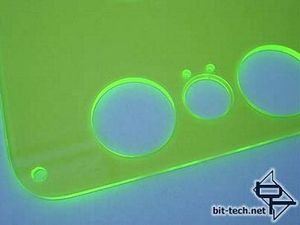
The finished pieces of the front cover and a close-up of the holes. The screw hole on the lower left is a little rough as I had to enlarge it slightly with a needle file to make the cover line up better to the front bezel - although it will eventually be concealed by a stainless steel washer. I had done all my ruling and drilling with the front of the case off, not realizing that there was an ever so slight curve in the front bezel plexi. The front bezel flattens when it\'s screwed down to the case, moving my mounting holes a millimetre or so further apart. Luckily I only had to adjust
the two smaller screw holes slightly.
Another idea I had for the front cover over the VFD mount was to firstly use neon green plexi to alter the colour of the VFD to match the rest of the case and to create a sort of glowing \'frame\' to highlight the actual display area - hence the hole cut out with the matching insert. When the insert is in...
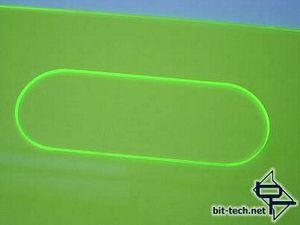
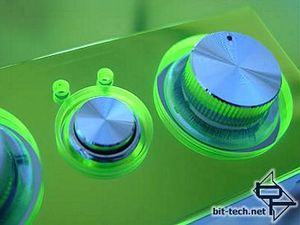
...it creates a glowing neon ring! This looks particularly nice as it runs full-thickness through the plexi and really catches the light. The chrome of the switches and knobs looks great behind the neon acrylic and the edge glow highlights the controls.
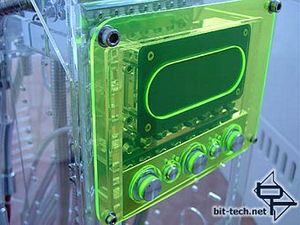
The finished front cover in place. In some of these images, the camera only makes things look about half as good as they do in reality. The neon acrylic is really difficult to photograph as to what it really looks like, which is quite simply stunning.

A few weeks before even starting the VFD module I had started on a front cover and all that remained was some finishing off and working out where openings would go in it. Note the square-ish hole in the front and the not-so-round corners. Upon reflection, I realized I wanted much rounder corners and all my earlier acrylic pieces have since been modified to incorporate more sweeping curves. You can see in the pic where I have marked the new corners. Most of the corners in the case are the same diameter curve - I used the edge of the same, very large, steel washer as a template.
Here\'s what I did to the front cover:

I used a holesaw at each end of the opening to create more rounded ends. I ruled the straight edges to be filed away later (it eventually took half an hour to file and clean up) and cut out a piece of plexi as an insert. I had also used the fan controller cover as a template and marked hole positions for the knobs and switches. These were drilled using a holesaw (big holes) a step drill (medium-sized holes) and a plexi drill (small holes). I used the edge of the next step in the step drill, and a larger plexi drill, to chamfer the edges of the medium and small holes respectively.


The finished pieces of the front cover and a close-up of the holes. The screw hole on the lower left is a little rough as I had to enlarge it slightly with a needle file to make the cover line up better to the front bezel - although it will eventually be concealed by a stainless steel washer. I had done all my ruling and drilling with the front of the case off, not realizing that there was an ever so slight curve in the front bezel plexi. The front bezel flattens when it\'s screwed down to the case, moving my mounting holes a millimetre or so further apart. Luckily I only had to adjust
the two smaller screw holes slightly.
Another idea I had for the front cover over the VFD mount was to firstly use neon green plexi to alter the colour of the VFD to match the rest of the case and to create a sort of glowing \'frame\' to highlight the actual display area - hence the hole cut out with the matching insert. When the insert is in...


...it creates a glowing neon ring! This looks particularly nice as it runs full-thickness through the plexi and really catches the light. The chrome of the switches and knobs looks great behind the neon acrylic and the edge glow highlights the controls.

The finished front cover in place. In some of these images, the camera only makes things look about half as good as they do in reality. The neon acrylic is really difficult to photograph as to what it really looks like, which is quite simply stunning.

MSI MPG Velox 100R Chassis Review
October 14 2021 | 15:04


Want to comment? Please log in.