
The Hard Drive Rack
I suppose I could have made a custom rack for the case, but I had been eyeing off and quite liking the look of the unused rack in my PC65. To get it to fit with my themes for this project would require some work, but I still wanted to retain the overall look of the rack. Other considerations were its perfect size and the ability to fit...
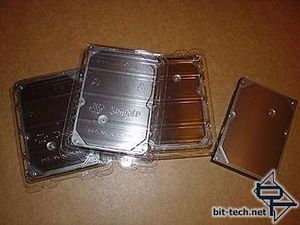
...the stack of drives I plan on using. All the stickers were removed and they were given a light polish.
In Part 1 of the project I showed a picture of some of the chromed parts that I would be using - visible are the parts for the HDD rack. The raw aluminium of the rack, even if polished, wouldn\'t have matched the deep, reflective finish I got with the chrome plating. After months of the rack quietly gathering dust, I began to mod it...
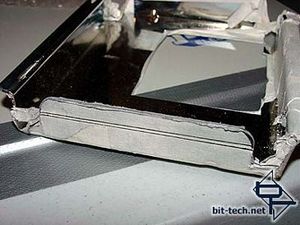
While experimenting earlier, I had bent up the flap that was the original method of securing the rack to its base. Now I decided to cut it off altogether. I marked it up, clamped it into a small vice and...
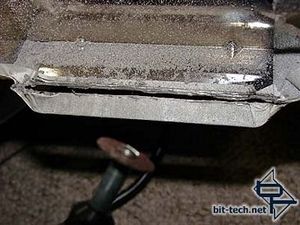
... sliced it off with a dremel. After mainly cutting stainless steel, it was like the proverbial hot-knife through butter.
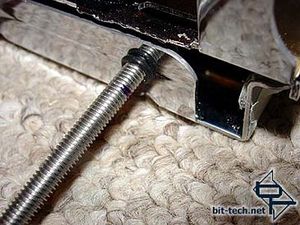
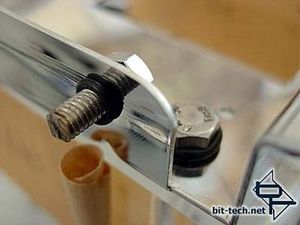
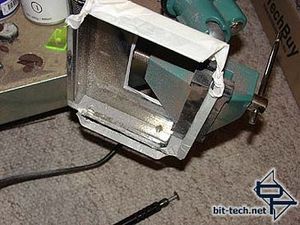
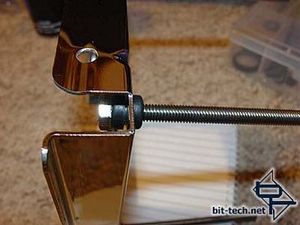
After cleaning up the cut and rounding the corners by filing/sanding, I drilled a pair of holes and settled on 6mm stainless steel bolts, marked and cut to length for holding the locking piece on. A small rubber o-ring acts to prevent the bolt from being pushed back through when fitting the locking piece. This will sit into the chamfered edges of the holes I had also drilled in the locking piece.
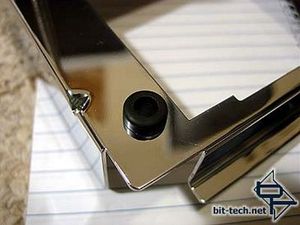
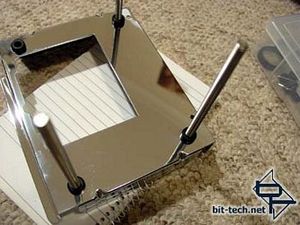
For mounting the base to the mounting blocks I drilled 9mm holes, inserted rubber grommets and then ran some 6mm stainless steel bolts through.
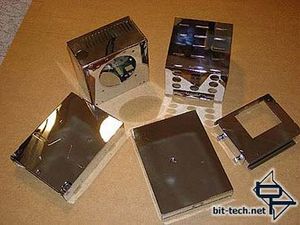
You can see how the rubber grommets act as vibration absorbing insulators between the base and the mounting blocks. The blocks were made from \'scrap\' 25mm (1\") Lexan, cut with a jigsaw and the corners rounded with a disk sander. The edges were tidied up and polished using a sanding block and some plastic polish. They came up with a nice satin finish which I liked as it gives them a more solid feel than if I had polished to absolute transparency.
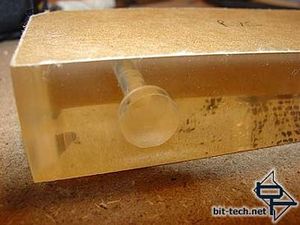
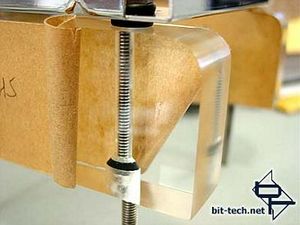
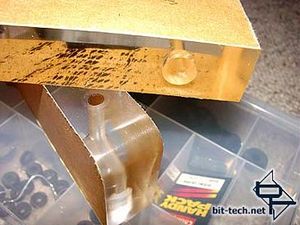
Holes were drilled with a drill-press and a larger hole was drilled part-way through from the bottom to accommodate the nyloc nuts that will be holding it all together. From the side you can see the bolt passing through the block and make out the hint of black where I used a rubber washer to cushion the nut. More anti-vibration overkill
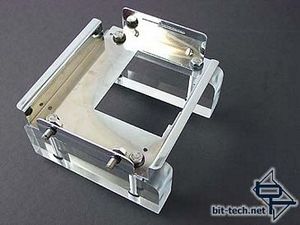
The base assembled with the protective paper removed and the bolts trimmed to length. It worked out better than I thought it would. Now for a way to secure the rack to the base...
I suppose I could have made a custom rack for the case, but I had been eyeing off and quite liking the look of the unused rack in my PC65. To get it to fit with my themes for this project would require some work, but I still wanted to retain the overall look of the rack. Other considerations were its perfect size and the ability to fit...
...the stack of drives I plan on using. All the stickers were removed and they were given a light polish.
In Part 1 of the project I showed a picture of some of the chromed parts that I would be using - visible are the parts for the HDD rack. The raw aluminium of the rack, even if polished, wouldn\'t have matched the deep, reflective finish I got with the chrome plating. After months of the rack quietly gathering dust, I began to mod it...
While experimenting earlier, I had bent up the flap that was the original method of securing the rack to its base. Now I decided to cut it off altogether. I marked it up, clamped it into a small vice and...
... sliced it off with a dremel. After mainly cutting stainless steel, it was like the proverbial hot-knife through butter.
After cleaning up the cut and rounding the corners by filing/sanding, I drilled a pair of holes and settled on 6mm stainless steel bolts, marked and cut to length for holding the locking piece on. A small rubber o-ring acts to prevent the bolt from being pushed back through when fitting the locking piece. This will sit into the chamfered edges of the holes I had also drilled in the locking piece.
For mounting the base to the mounting blocks I drilled 9mm holes, inserted rubber grommets and then ran some 6mm stainless steel bolts through.
You can see how the rubber grommets act as vibration absorbing insulators between the base and the mounting blocks. The blocks were made from \'scrap\' 25mm (1\") Lexan, cut with a jigsaw and the corners rounded with a disk sander. The edges were tidied up and polished using a sanding block and some plastic polish. They came up with a nice satin finish which I liked as it gives them a more solid feel than if I had polished to absolute transparency.
Holes were drilled with a drill-press and a larger hole was drilled part-way through from the bottom to accommodate the nyloc nuts that will be holding it all together. From the side you can see the bolt passing through the block and make out the hint of black where I used a rubber washer to cushion the nut. More anti-vibration overkill
The base assembled with the protective paper removed and the bolts trimmed to length. It worked out better than I thought it would. Now for a way to secure the rack to the base...


MSI MPG Velox 100R Chassis Review
October 14 2021 | 15:04

Want to comment? Please log in.