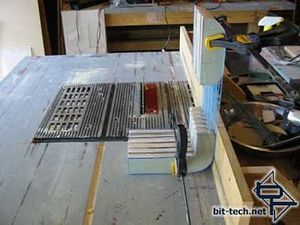
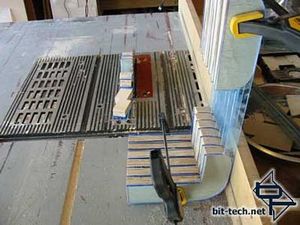
I have been avoiding this step until the last possible moment both for assurance that I am doing it right and because I tend to avoid stressful moments. I needed to trim the front wall sections to make them straight and to open the front a little for the various things that will be included in the front panel. I had to make darned sure that all the corners were set because this more or less casts the design in stone (well wood but you get the idea).

I lined them all up and clamped the whole thing together. There has <b>got</b> to be a be a better way to do this (probably a band saw but I don't have one of those... yet). I fire up the table saw and do the Catholic cross symbol even though I'm not catholic and guided it through.

It actually worked out really nice. Took a while since the material was so thick but I was patient and it came out fine. I basically repeated the same step for the other side.
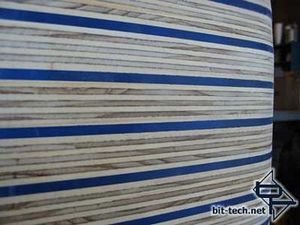
I'm really getting to the end of forming all these pieces now and getting to finishing touches and preparation for staining the wood. Now that I have final dimensions of all the pieces. I load the air sander with 120 Grit sandpaper and go to town getting a finished surface to the case. Three hours go by and I'm pretty happy. The wood is easy, getting a good look on the edge of the acrylic is the key.

I didn't want a "polished" clear finish on the edges of the acrylic because I'm wanting that "glowie" effect but I don't want the edges to look like the victim of a rogue animal attack either. Because the acrylic was colored, it really made finding areas that needed attention fairly easily. Sawdust and acrylic dust would collect and show where the edge was too rough. I did as much as I could with the air sander but eventually had to move to a sanding block with 120 Grit sandpaper to finish it. The sanding block was key to sanding the "vent" areas since I was too nervous to use the air sander in those for fear of the vibration cracking the acrylic.

I lined them all up and clamped the whole thing together. There has <b>got</b> to be a be a better way to do this (probably a band saw but I don't have one of those... yet). I fire up the table saw and do the Catholic cross symbol even though I'm not catholic and guided it through.

It actually worked out really nice. Took a while since the material was so thick but I was patient and it came out fine. I basically repeated the same step for the other side.
I'm really getting to the end of forming all these pieces now and getting to finishing touches and preparation for staining the wood. Now that I have final dimensions of all the pieces. I load the air sander with 120 Grit sandpaper and go to town getting a finished surface to the case. Three hours go by and I'm pretty happy. The wood is easy, getting a good look on the edge of the acrylic is the key.

I didn't want a "polished" clear finish on the edges of the acrylic because I'm wanting that "glowie" effect but I don't want the edges to look like the victim of a rogue animal attack either. Because the acrylic was colored, it really made finding areas that needed attention fairly easily. Sawdust and acrylic dust would collect and show where the edge was too rough. I did as much as I could with the air sander but eventually had to move to a sanding block with 120 Grit sandpaper to finish it. The sanding block was key to sanding the "vent" areas since I was too nervous to use the air sander in those for fear of the vibration cracking the acrylic.

MSI MPG Velox 100R Chassis Review
October 14 2021 | 15:04


Want to comment? Please log in.