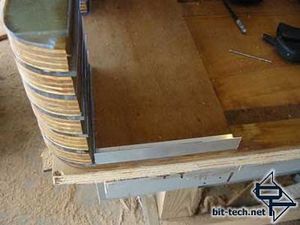
I mounted a bottom rail to provide the back plate I need to mount the power supply. It will work with the rail that goes across the top as a good frame for the panel.

Screwed into and countersunk.
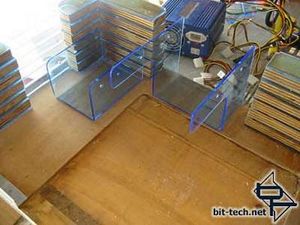
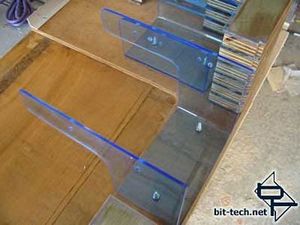
Then I moved on to making drive cages. I used the same technique as in my article on fabricating acrylic with one exception. The optical drive bracket needs to allow the mobo and friends to slide in comfortably. So I fabricated it just as I always do and then cut out the notch and polished the edges. I test-fit the mobo tray and it has room to spare. Of course, this limits my options optical drive-wise but this case is so specialized, I'm not losing sleep over it. I also still have plenty of room below the drive mount for the other goodies that are going in.

Finding a location was key. The optical drive was automatic... the hard drive cage was not. I didn't want to block the exhaust fan port too much but also wanted plenty of breeze going past the hard drive. I also have to fit the power supply in the space just behind the hard drive and that takes up more real estate than you think. Oriented like this, the intake fan on the power supply should suck air right out of the hard drive cage which was a bonus.

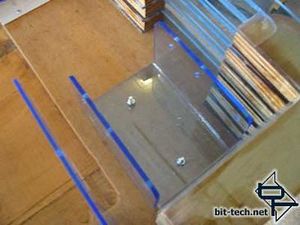
I didn't have access to the mounting screws for the drives once they were in the case and I didn't have access to the bottom of the drive cages when the drives were in... a regular catch-22. The solution was to run screws up through the bottom. I will epoxy the nuts to the drive cages so I don't even need to bother with holding them still when I unscrew the drive cages, the whole thing will just come out.

A shot of the hard drive cage in place and fastened down.

Screwed into and countersunk.
Then I moved on to making drive cages. I used the same technique as in my article on fabricating acrylic with one exception. The optical drive bracket needs to allow the mobo and friends to slide in comfortably. So I fabricated it just as I always do and then cut out the notch and polished the edges. I test-fit the mobo tray and it has room to spare. Of course, this limits my options optical drive-wise but this case is so specialized, I'm not losing sleep over it. I also still have plenty of room below the drive mount for the other goodies that are going in.

Finding a location was key. The optical drive was automatic... the hard drive cage was not. I didn't want to block the exhaust fan port too much but also wanted plenty of breeze going past the hard drive. I also have to fit the power supply in the space just behind the hard drive and that takes up more real estate than you think. Oriented like this, the intake fan on the power supply should suck air right out of the hard drive cage which was a bonus.

I didn't have access to the mounting screws for the drives once they were in the case and I didn't have access to the bottom of the drive cages when the drives were in... a regular catch-22. The solution was to run screws up through the bottom. I will epoxy the nuts to the drive cages so I don't even need to bother with holding them still when I unscrew the drive cages, the whole thing will just come out.

A shot of the hard drive cage in place and fastened down.

MSI MPG Velox 100R Chassis Review
October 14 2021 | 15:04


Want to comment? Please log in.