Ok, the plan is to trim this baby out with layers of blue UV reactive acrylic from Delvies. This is the first time I have worked with cell cast acrylic. Prior to this, I have only had the luxury of working with the extruded type (the stuff commonly found at your local DIY store with the clear plastic protective film). Let me take a moment to say, this stuff is in a class all by itself. I threw everything at it: router, jigsaw, miter saw, table saw (I'll get to that) and it took it all in stride like it was just another weekday (but an hour behind, acrylic is unaware of daylight savings time). It cuts like a soft material when machining, a real dream. Let's just say I recommend it, seek it out you won't be sorry.
Now, cutting these shapes are going to be very similar with just one difference than the wood pieces that make the walls. In the wood pieces, there was a window for the fan inlet and outlet that enabled me to break up the design into small pieces. The acrylic is going to span these gaps to function as a decorative fan guard so they are going to be larger. Larger pieces means larger chances to waste some serious money if I get this wrong. I planned and mapped these pieces many times to make sure there were no mistakes before cutting.
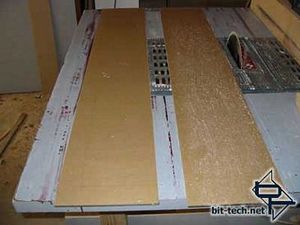
I figured the maximum width dimension and ripped two sheets out of the original 24x48" piece I ordered. If you look closely at the piece on the left, I have mapped out my pieces in the similar "yin-yang" manner I did with the wood pieces. This was the best way to most efficiently make use of the material with minimal waste.
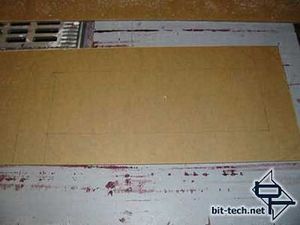
A closer look of the mirrored "yin-yang" cut layout.
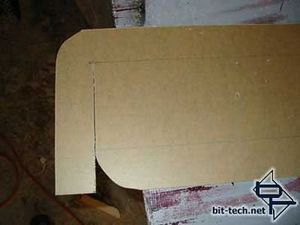
Cutting away with the jig-saw... trying to be exact with the rounded corners but not to concerned. As long as I cut outside the lines, I can sand down any imperfect cuts. The key is to <b>never, never</b>, go inside the shape.
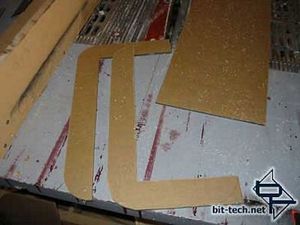
This is what you get... (I did go back and cut that last round corner in the bottom right hand piece after I took the picture)
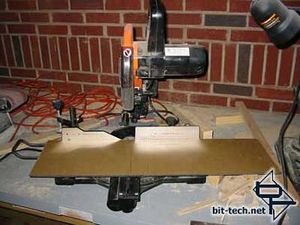
I'm always looking to raise the anxiety level of my projects if it means greater results. Since the short sides of my pattern represents the front edge of the case I would prefer to have them as straight as possible. I'm not ashamed of my jig-saw skills but it can't compare to the miter saw. This was no minor gamble since I had no extra acrylic and I wasn't too sure if this was a good idea. The blade in this saw is a 100 tooth blade (same as my table saw) so I figured it should work fine... in theory.
Turns out it worked fantastic to give me a nice straight 90 degree cut. I knew I forked out extra for the sliding model saw for a reason. I probably would not try this with extruded acrylic for fear of it shattering.
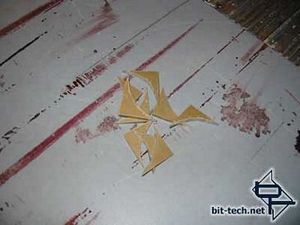
This is just an illustration of the difference between the value of acrylic vs. plywood. When I cut out the plywood pieces the fall to the floor and get kicked around, swept up, or eaten by the dog (he's not smart). When I cut out these corners of acrylic, I carefully pick them up and collect them, you never know when they may come in handy... thus, acrylic is more important than plywood. You already knew that but sometimes we need evidence of how neurotic we are, I'm sure there's a file on me somewhere. My son also was happy to point out that if you stick them between your fingers when making a fist, you can make some pretty convincing wolverine claws :)
I was itching to see how the fans looked in place as well so I threw them in there too. This is going to be the final dimensions of the case and hopefully, this will be as rough as it's ever going to look too.
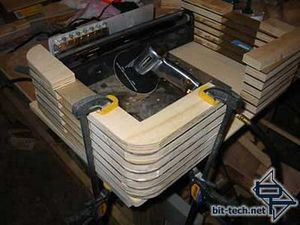
Time to smooth out these corners. Using my air-sander and clamping the pieces down real tight. I have a 40 grit paper on the sander because I need to move a lot of material out of the way here. Note: 40grit going 28,000 rpm hitting acrylic creates some funky air particles. I am appropriately suited up.
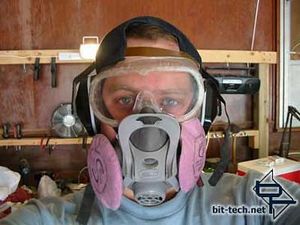
Had to breakout the uncool/old school version of eye protection... fine wood and acrylic particles were still getting in my eyes with the downhill joe-cool goggles on.
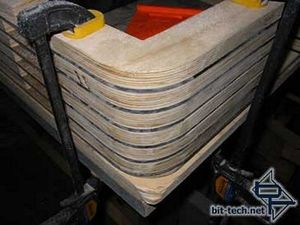
All the layers are coming together now. I'm just going for a rough marriage a this point. Once I'm satisfied none of the layers need to be shifted or replaced, I will be permanently fastening them down and can do some more refined finishing of the shape and surface.
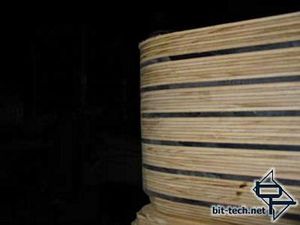
A side shot. Note that all the layers are shifted off the base so I don't grind down the base shape at all since it is finished and acting as a guide. Once the other layers mimic their basement brother, I will shift them all over and sand them all together with a fine sand paper.
Now, cutting these shapes are going to be very similar with just one difference than the wood pieces that make the walls. In the wood pieces, there was a window for the fan inlet and outlet that enabled me to break up the design into small pieces. The acrylic is going to span these gaps to function as a decorative fan guard so they are going to be larger. Larger pieces means larger chances to waste some serious money if I get this wrong. I planned and mapped these pieces many times to make sure there were no mistakes before cutting.

I figured the maximum width dimension and ripped two sheets out of the original 24x48" piece I ordered. If you look closely at the piece on the left, I have mapped out my pieces in the similar "yin-yang" manner I did with the wood pieces. This was the best way to most efficiently make use of the material with minimal waste.

A closer look of the mirrored "yin-yang" cut layout.

Cutting away with the jig-saw... trying to be exact with the rounded corners but not to concerned. As long as I cut outside the lines, I can sand down any imperfect cuts. The key is to <b>never, never</b>, go inside the shape.

This is what you get... (I did go back and cut that last round corner in the bottom right hand piece after I took the picture)

I'm always looking to raise the anxiety level of my projects if it means greater results. Since the short sides of my pattern represents the front edge of the case I would prefer to have them as straight as possible. I'm not ashamed of my jig-saw skills but it can't compare to the miter saw. This was no minor gamble since I had no extra acrylic and I wasn't too sure if this was a good idea. The blade in this saw is a 100 tooth blade (same as my table saw) so I figured it should work fine... in theory.
Turns out it worked fantastic to give me a nice straight 90 degree cut. I knew I forked out extra for the sliding model saw for a reason. I probably would not try this with extruded acrylic for fear of it shattering.

This is just an illustration of the difference between the value of acrylic vs. plywood. When I cut out the plywood pieces the fall to the floor and get kicked around, swept up, or eaten by the dog (he's not smart). When I cut out these corners of acrylic, I carefully pick them up and collect them, you never know when they may come in handy... thus, acrylic is more important than plywood. You already knew that but sometimes we need evidence of how neurotic we are, I'm sure there's a file on me somewhere. My son also was happy to point out that if you stick them between your fingers when making a fist, you can make some pretty convincing wolverine claws :)
I was itching to see how the fans looked in place as well so I threw them in there too. This is going to be the final dimensions of the case and hopefully, this will be as rough as it's ever going to look too.

Time to smooth out these corners. Using my air-sander and clamping the pieces down real tight. I have a 40 grit paper on the sander because I need to move a lot of material out of the way here. Note: 40grit going 28,000 rpm hitting acrylic creates some funky air particles. I am appropriately suited up.

Had to breakout the uncool/old school version of eye protection... fine wood and acrylic particles were still getting in my eyes with the downhill joe-cool goggles on.

All the layers are coming together now. I'm just going for a rough marriage a this point. Once I'm satisfied none of the layers need to be shifted or replaced, I will be permanently fastening them down and can do some more refined finishing of the shape and surface.

A side shot. Note that all the layers are shifted off the base so I don't grind down the base shape at all since it is finished and acting as a guide. Once the other layers mimic their basement brother, I will shift them all over and sand them all together with a fine sand paper.

MSI MPG Velox 100R Chassis Review
October 14 2021 | 15:04


Want to comment? Please log in.