Now I sat there and stared at the finished layers and the nice little alcove I had created and wondered how in the world am I going to mount the fans to the case. I don't want to fasten them to the top because that will be removable... at least that's the plan. I can't mount the fans in the traditional sense because my wall that they mount to is comprised of a couple of slits of acrylic. Lightning strikes in a blurry mountain dew fueled moment of "der".
I decided to use some aluminum L-channel to fashion brackets to hold a piece of acrylic to mount the fans. One bracket will be counter sunk in the top layer of acrylic and the other will go into the base. I decided to use some of the smoked acrylic for the mounting because it looks so one, three, three, seven.
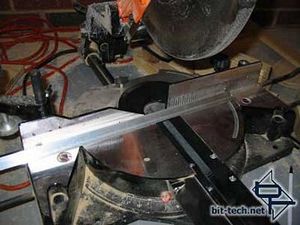
Measured the length for the top brackets and went to town on the miter saw.
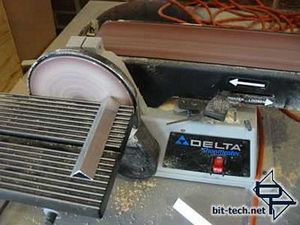
Threw them on the sander for clean/straight edges..
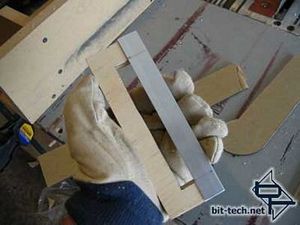
Back on the handy little jig to mark for the dimensions to create the top lip.
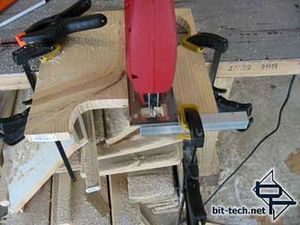
Back on the little workhorse for some cutting... I cut the line out one side and then used the table saw to cut the other side of the square out since it was right along the wall of the L. Then used a hand file to clean up any little misses.
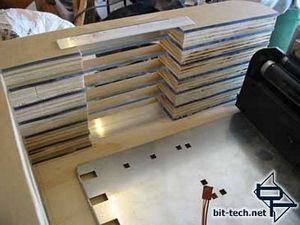
A test fit shows that they work well... The one on top sits perfect providing a vertical panel for me to fasten the fan face to. The bottom one was easy, just cut on the saw and place at the bottom of the window.
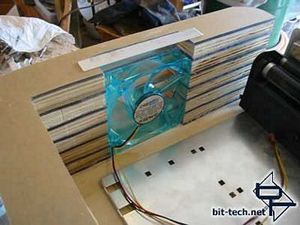
With the fan set in there just to verify the overall fit.
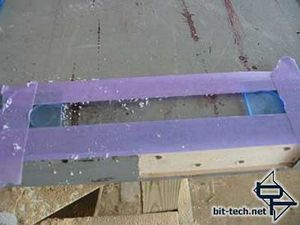
I taped off the area I needed to rout out. The goal here is to create a little step for the L-channel aluminum that is going to have the fans mounted on them to sit in so the whole thing sits flush with the top. I clamped down the piece to the worktable because at this point, I don't feel like finding out how far the router could throw the acrylic. After the initial routing and testing with the L-channel, I needed more material removed so I took the tape off and free handed it... sometimes you can be too careful.
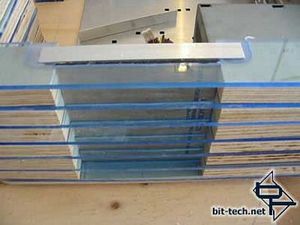
Here's a shot with the L-channel sitting in its new home. Placing the top on was the final test to make sure it wouldn't affect how it sat on the walls.
I decided to use some aluminum L-channel to fashion brackets to hold a piece of acrylic to mount the fans. One bracket will be counter sunk in the top layer of acrylic and the other will go into the base. I decided to use some of the smoked acrylic for the mounting because it looks so one, three, three, seven.

Measured the length for the top brackets and went to town on the miter saw.

Threw them on the sander for clean/straight edges..

Back on the handy little jig to mark for the dimensions to create the top lip.

Back on the little workhorse for some cutting... I cut the line out one side and then used the table saw to cut the other side of the square out since it was right along the wall of the L. Then used a hand file to clean up any little misses.

A test fit shows that they work well... The one on top sits perfect providing a vertical panel for me to fasten the fan face to. The bottom one was easy, just cut on the saw and place at the bottom of the window.

With the fan set in there just to verify the overall fit.

I taped off the area I needed to rout out. The goal here is to create a little step for the L-channel aluminum that is going to have the fans mounted on them to sit in so the whole thing sits flush with the top. I clamped down the piece to the worktable because at this point, I don't feel like finding out how far the router could throw the acrylic. After the initial routing and testing with the L-channel, I needed more material removed so I took the tape off and free handed it... sometimes you can be too careful.

Here's a shot with the L-channel sitting in its new home. Placing the top on was the final test to make sure it wouldn't affect how it sat on the walls.

MSI MPG Velox 100R Chassis Review
October 14 2021 | 15:04


Want to comment? Please log in.