Now a side note for you modders and a personal appeal to pc-mods. First, thank you for selling Lian-li motherboard trays but for the love of all that is warm and fuzzy, please include the motherboard standoffs. I had to order the hardware box separate which includes the standoffs. You can't use standard threaded brass standoffs with these trays and you end up paying quite a bit and get a lot of hardware that is good but that I also have tons of (various PC screws).
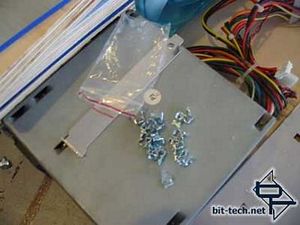
Here are the little guys that are so coveted. Note how they come in a crack-cocaine baggie...not a coincidence, about the same street value when you really need them but at least they are legal to send through the mail. (although I did have a nightmare last night that standoff sniffing dogs detected some in my luggage and there was some pepper spray and waking up in a special room in the airport with a light in my face.)
I'm going to give the motherboard tray a little bed to sit in. This will accomplish two things. One, help stabilize the board when in the case. Two, buy me a little more head room where the tray and the top of the case meet. Because the top has so much material cut out of it, it is a little flimsy for my taste. I need to reinforce the top in the back where it spans the entire width of the case. I don't want my monitor/tv caving in this baby.
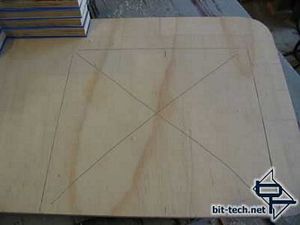
Trace out the motherboard outline.
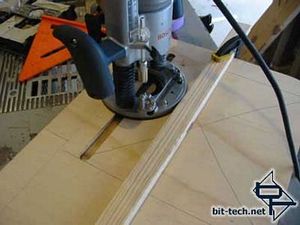
Belly up to the plunge router with a 3/4" flute bit and set the jig to cut the first edge of the "bed". Note that the top here is set at an angle at the edge of my worktable. That allows me to clamp down the jig and the top to the table so everything is set good and no chance of walking around.
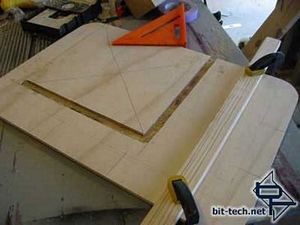
Rotate the arrangement and more of the same...
I did all three sides and then removed the jig and just clamped the wood down to the table. This technique is like coloring around the edges in a coloring book before running amuck with your big fat crayon doing the fill. Once you have the outside lines established, you can go to town with the inside of the box confidently. I just freehanded the rest in a pattern kind of like mowing a lawn, up and down eating half a bit's worth with each pass, moving a lot of material and making mountains of sawdust. You bet your pants I wore a respirator.
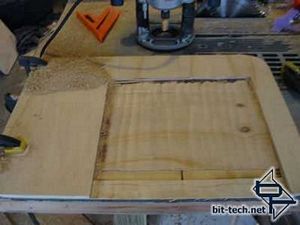
Note the piles of sawdust, that was just a fraction of what came outta there... also the groove in the "bed" that was just were one of the layers where missing and I discovered it like Indiana Jones and the Temple of Plywood. I was upset at first but this will be under the motherboard tray and no one will see it. Plus, I can use this opportunity to use a trick someone told me about that will involve recycling some of that sawdust.. I collect some in a
stainless steel bowl for later.
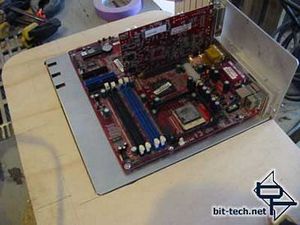
Now to test fit the tray... nice snug fit... me likey.
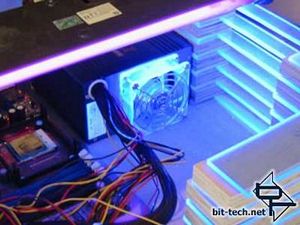
Raidmax sent a sample of one of their 400W blue aluminum PSU's. I thought to myself how fortunate that it was blue and would be perfect for this project with the blue UV theme. At close inspection of the unit, I suspected that the fans maybe UV reactive too... so I popped it in there and tested it. RESULT! This discovery went beyond fortune and threatened, dare I say, serendipity!. :)

Here are the little guys that are so coveted. Note how they come in a crack-cocaine baggie...not a coincidence, about the same street value when you really need them but at least they are legal to send through the mail. (although I did have a nightmare last night that standoff sniffing dogs detected some in my luggage and there was some pepper spray and waking up in a special room in the airport with a light in my face.)
I'm going to give the motherboard tray a little bed to sit in. This will accomplish two things. One, help stabilize the board when in the case. Two, buy me a little more head room where the tray and the top of the case meet. Because the top has so much material cut out of it, it is a little flimsy for my taste. I need to reinforce the top in the back where it spans the entire width of the case. I don't want my monitor/tv caving in this baby.

Trace out the motherboard outline.

Belly up to the plunge router with a 3/4" flute bit and set the jig to cut the first edge of the "bed". Note that the top here is set at an angle at the edge of my worktable. That allows me to clamp down the jig and the top to the table so everything is set good and no chance of walking around.

Rotate the arrangement and more of the same...
I did all three sides and then removed the jig and just clamped the wood down to the table. This technique is like coloring around the edges in a coloring book before running amuck with your big fat crayon doing the fill. Once you have the outside lines established, you can go to town with the inside of the box confidently. I just freehanded the rest in a pattern kind of like mowing a lawn, up and down eating half a bit's worth with each pass, moving a lot of material and making mountains of sawdust. You bet your pants I wore a respirator.

Note the piles of sawdust, that was just a fraction of what came outta there... also the groove in the "bed" that was just were one of the layers where missing and I discovered it like Indiana Jones and the Temple of Plywood. I was upset at first but this will be under the motherboard tray and no one will see it. Plus, I can use this opportunity to use a trick someone told me about that will involve recycling some of that sawdust.. I collect some in a
stainless steel bowl for later.

Now to test fit the tray... nice snug fit... me likey.

Raidmax sent a sample of one of their 400W blue aluminum PSU's. I thought to myself how fortunate that it was blue and would be perfect for this project with the blue UV theme. At close inspection of the unit, I suspected that the fans maybe UV reactive too... so I popped it in there and tested it. RESULT! This discovery went beyond fortune and threatened, dare I say, serendipity!. :)

MSI MPG Velox 100R Chassis Review
October 14 2021 | 15:04


Want to comment? Please log in.