
Inside
We couldn't really call ourselves enthusiasts if we didn't actually get in there and see what makes the Nautilus work, so we cracked it open (not literally).Once you peel back the rubber feet on the underside you will have access to four screw holes, and with the aid of a thin nose cross-headed screwdriver removing all four is all you have to do to get inside.
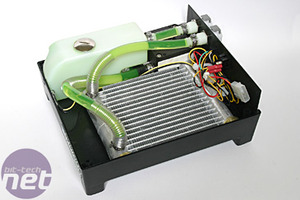
Once we had the lid off we noticed that it is in fact a three piece watercooling setup, with radiator, reservoir and external pump. Many of the all in one kits I have seen previously have had the reservoir and pump in one. The only disadvantage I can see with this method is having extra connections inside the unit, but seeing how securely they are fitted I don't see it as an issue.
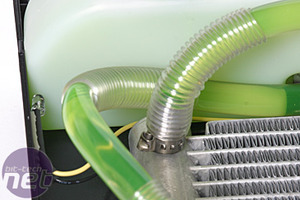
Talking of fittings, you can see they used the same method of fitting as the CPU waterblock - the metal hose clip is very similar to a Jubilee clip, but is sealed shut permanently, so once fitted properly, leaks should not be an issue. Corsair have also fitted some spiral wrap around the bends of the tubing, to avoid possible kinks - a nice touch that seems borne from testing rather than design. You can also see the LED used to illuminate the reservoir (above left). If you are feeling brave and fancy colour co-ordinating your PC you could always swap it out for a different colour, no doubt voiding your warranty, but Corsair's hardware is usually so solidly built, there should be no need for warranty claims anyway.
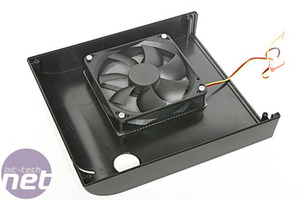
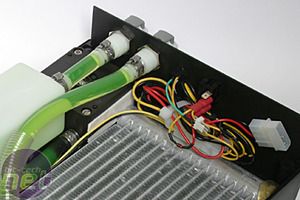
The second image shows clearly the unbranded 120mm pumping out 74.4 CFM fan set at high. The 12v power leads going to a 4 way molex-type connector and the tach signal wire going to a separate motherboard 3 pin header connector. This means that you can actually have feedback on the speed of the fan into the software of your choice. As a seasoned modder I can't help noticing the scope for a simple mod to the unit to be able to set the fan speed more precisely, as the onboard switch only toggles between High and Low. Whilst we would never recommend hacking up the Nautilus, the sheer space inside offers plenty of modding "real-estate" as such.
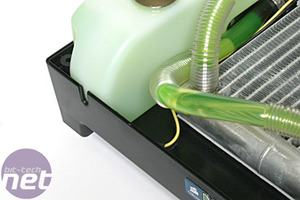
In this close up you can just about see that the radiator has been fitted using double sided sticky foam tape - hardly revolutionary but very good at what it does. We had a good play with it to see if we could move it in any way but the adhesion is good, so you shouldn't worry about it coming dislodged when being moved, even full of coolant.
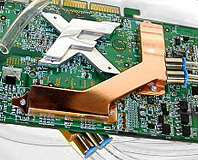
On the other side of the innards there is the non-submersed pump. This has a quoted Head Pressure of 13.05ft at 12v, with a maximum flow of 350 Litres Per Hour. This has been surrounded by double sided sticky foam to prevent unnecessary vibration or noise.
One thing Corsair seems to be bad at is cable management - as you can see by the spaghetti junction of cables. I don't consider this to be an issue at all as the unit is not meant to be opened. I'm just glad these units are tested well at the build stage because some loose water could certainly cause some damage in there!
We know what's outside and in, now to get the thing assembled...
RELATED ARTICLES


MSI MPG Velox 100R Chassis Review
October 14 2021 | 15:04

Want to comment? Please log in.