Rear I/O
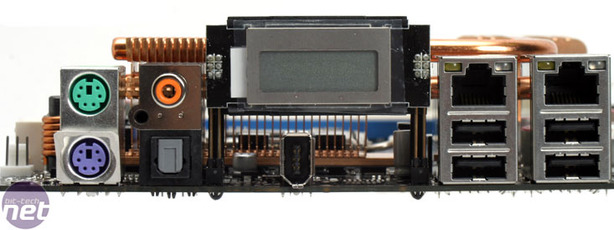
The rear I/O is actually a little sparse compared to other RoG boards. While it features the LCD display that is now traditional with Republic of Gamer motherboards, it lacks the light bulb switch that is used to turn the now missing PCB LEDs off and on. There are also no eSATA ports under the LCD display, either.There are still the usual PS2 ports, single 6-pin Firewire, four USB 2.0 and both Gigabit Ethernet sockets, although the sockets aren't labelled as to which is PCI versus PCI-Express. Following the traces on the board, the left RJ45 socket (in the picture) is connected to the PCI-Express chipset.
Sound is provided by a daughterboard just below the rear I/O panel and comes with six 3.5mm jacks for analogue audio. Interestingly though, S/PDIF out is catered for by both optical and coaxial on the rear I/O. Despite the fact that S/PDIF is separate, you still have to have the daughterboard plugged in and the drivers installed in order to use it.
Overall it's a pretty good mix and although we find the LCD display very useful in testing, we still question its usefulness at the back of a case: hardly an ideal reading position. Under the LCD screen there is space for two more USB ports as well, so perhaps the space could have been better used to readdress the functionality placement.
BIOS
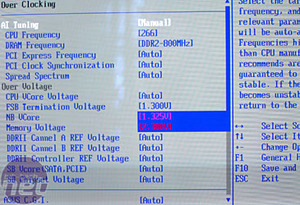
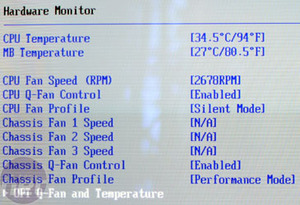
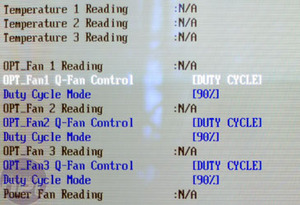
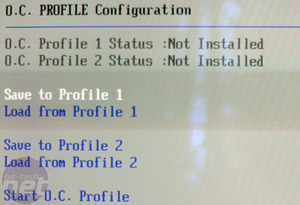
Frequency Adjustments: CPU front side bus (100-650MHz in 1MHz increments); DRAM Frequency (533/667/800/889/1066MHz CPU:Memory straps); PCI-Express (90-150MHz in 1MHz increments); PCI Clock Sync.
The frequency adjustments are pretty comprehensive, with an optimistic upper limit of 650MHz for CPU FSB providing plenty of headroom. There's no 1200/1333 memory strap however, which means you can't run insane memory speeds. Although overclocking to 400+MHz FSB and setting the 1066MHz memory strap should provide more memory MHz than anyone can currently use.
Voltage Adjustments: CPU voltage (1.10V to 1.85V in 0.0125V increments); FSB termination voltage (1.2 to 1.55V in 0.05V increments); northbridge core (1.250 to 2.025V in 0.025V increments); Memory Voltage (1.80V to 3.375V in 0.025V increments); DDR2 channel reference voltage (+/- 30mV in 10mV increments); DDR2 controller reference voltage (+/- 30mV in 10mV increments); Southbridge core voltage (1.50V to 1.85V in 0.05V increments); Southbridge chipset voltage (1.050V to 1.225V in 0.025V increments);
The voltage adjustments are boarding on the insane. If you like quick-fried-hardware, then try 3.3+V through your memory, 1.8V through your CPU and 2+V through your northbridge. That's not to say the motherboard won't warn you as the values change from blue to pink to red as you get into "dangerous" over-voltage changes. They are however, a little overzealous and jump straight to red with only a little extra umpf on some of the settings.
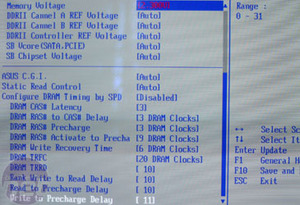
Memory TimingstCAS (CAS Latency); tRAS (RAS to CAS Delay); tRP (RAS Precharge); t (RAS Active to Precharge); tWR (Write Recovery Time); tRFC (Row Refresh to Active Cycle Time); tRRD (Row to Row Delay); tWTR (Write to Read Delay); (Read to Precharge Delay); (Write to Precharge Delay);
There are a great deal of memory timings over and above the standard four, although Row Cycle time (tRC) and Command Rate are missing. tRC is probably a chipset limitation, since even the latest CPU-Z cannot recognise the value. Setting our Commando straight to 3-3-3-9 didn't even cause it to break a sweat, and it happily sat there through all of our testing. The only Fritz-inducing factor was reducing tWTR to try and get a performance enhancing "4" out of it, but anything lower than SPD would make the board unhappy, even with a variety of memory modules.
The BIOS we used was version 0803, dated 7th February 2007.
Asus BIOS extras include:
- Crash Free BIOS 3 and EZ Flash 2 - You can flash BIOS' from a USB stick assign a hotkey to BIOS flashing without booting into windows.
- ASUS MyLogo 3 - Add a customisable boot logo to replace the standard Republic of Gamers one.
- C.P.R. Recall - Automatically resetting the system back to defaults after a failed overclock, however this doesn't help if the system manages to boot, but is so unstable it crashes before you can go into the BIOS and change the settings.
- OC Profile - Create BIOS profiles for different setups: if you're testing how far new memory overclocks, you might want to save the older settings that definitely work.
- AI NOS - The Non-delay Overclocking System contains several presets that you can set to enable auto-overclocking when the system loads to give you the extra boost without having the system constantly overclocked and hotter than it should be, all of the time. You get the option of a somewhat pointless 1% to quite a substantial 15%, although as ever with overclocking: nothing is guaranteed.

MSI MPG Velox 100R Chassis Review
October 14 2021 | 15:04


Want to comment? Please log in.