
Building the beast...
As touched on before, one of the main concerns about HTPCs is the noise they generate; this would interfere to say the least with the application they are designed for. You need to consider though that modern HTPCs are simply not media servers. They are in fact fully fledged media processors. By this I mean they are often called up on to encode, decode and display media of different types concurrently. For this to be 100% stutter free the underlying system has to have some muscle and storage flexibility whilst still remaining within the realms of quiet operation.The Zalman HD160 HTPC Enclosure promises to bridle the noise issue and still offer the option to put some beefy hardware inside. How can we call ourselves enthusiasts if we didn't do exactly that?
The system we are putting in the HD160 is:
- Gigabyte GA 81955 X Royal Motherboard
- Intel Pentium 4 3.4EE LGA775 overclocked to 3.73GHz Fitted with a Zalman CNPS9500-AT CPU Cooler
- 1GB (2x512MB) Corsair XMS2 5400 RAM
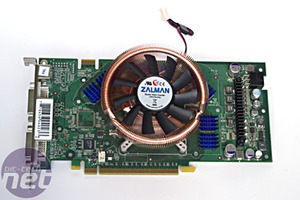
- NVIDIA GeForce 6800GT fitted with a Zalman VF900 VGA Cooler
- Terractec Dual Tuner DVB Card
- 2 x Samsung Spinpoint SATA 120GB HDD
- 1 x Samsung Spinpoint ATA 120GB HDD
- Plextor SATA DVD-RW Drive
- Zalman ZM460-APS ATX Noiseless PSU 460W
Zalman obviously recommends use of their own quiet components in the HD160, and having seen the performances of some of their cooling products in the past it seemed appropriate to use them for testing. My next article will have a roundup of these products, but for now we will just skim over the basics.
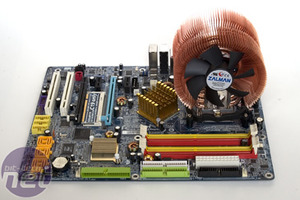
The CNPS9500-AT is the Socket 775-specific triple heatpipe CPU cooler. It has an ultra quiet PWM fan that adjusts itself to you required speed for the heat it needs to dissipate.
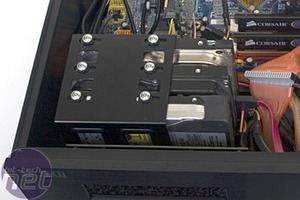
The second image shows the VF900 GPU cooler - this comes with an Fanmate controller to manually set the fan speed. We kept it to the minimum at all times during testing. We also found that the vent holes on the underside of the HD160 were perfect to pass the fan controller out of the enclosure for fixing to the rear/side for easy adjustment.
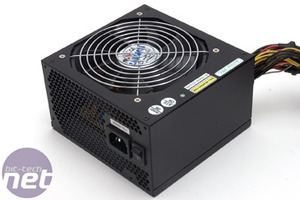
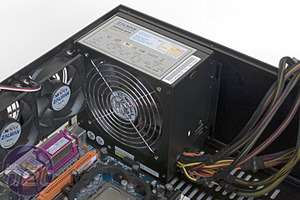
The ZM460-APS is Zalman's noiseless 460W power supply, and from our testing it definitely is noiseless. As the cool air is drawn in from the bottom the positioning of the side vent on the HD160 allows for fresh external air to be sucked in and pushed straight out, helping it keep noise to a minimum. Here I have placed the PSU the wrong way round, to give you an idea of where the fan will be in relation to the side vents when reversed.
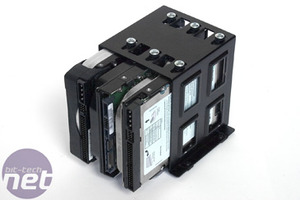
Here is the hard drive cage: the lower part is screwless with the drives simply resting on the small squares of vibration absorbing sponge, whilst the top half pins them into position using screws going through rubber insulating washers. Once the drives are fitted it is a bit of a tight squeeze - the airflow between them is pretty paltry and under testing we felt the hard drives heat up considerably. This could be a concern but only long term testing would reveal if the heat issues would be detrimental to their life span.
If you were only using two drives we recommend that you keep them apart in the cage, to help with ventilation. To that end, we did not in fact test the HD160 with the drives configured as shown: we used two Samsung Spinpoint SATA drives configured in RAID spaced apart for better cooling and mounted a third drive above the optical drive (see below).
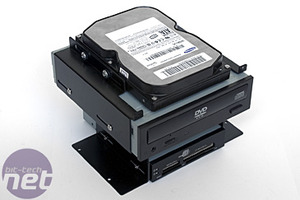
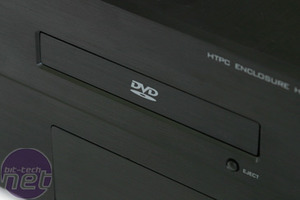
The right hand side of the case houses a cage that is designed to take an optical drive, the card reader and a fourth hard drive, although if you are only using three drives in your system it would be a good place to put the third one.
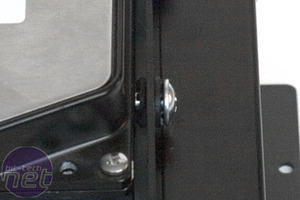
The second image shows the screw grommets that reduce vibration and subsequently noise.
Fitting the optical drive was not the easiest of tasks, because it is difficult to reach the left hand side retaining screws with the cage in situ. If you fit it before you mount the cage, you are left guessing the alignment of the drive door in relation to the front of the case.
We found that fitting the drive was a multi stage process: remove the cage; loosely fit the optical drive screws; place the cage in the HD160; fix the accessible screws after aligning the drive; remove the cage again; fix the non accessible screws then fit the cage once more. Convoluted but successful, there really is no way around this other than using screwless drive rails, but that would possible introduce unnecessary vibration to the melee.
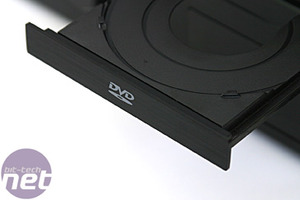
The last thing to do once assembled is to fit the bezel to the optical drive, an easy job requiring simply the use of the double sided tape already attached to the bezel.
When disassembling and rebuilding the HD160 we noticed how easy it is to misplace the tiny black screws used to keep the drive mountings and lid in place. We also would have found it difficult to reach some of the screw locations without the help of a magnetised or gripping screwdriver so bear that in mind before getting your hands inside.
That's it full to the brim of expensive shiny stuff, "throw the power Igor"...
RELATED ARTICLES


MSI MPG Velox 100R Chassis Review
October 14 2021 | 15:04

Want to comment? Please log in.