Interior
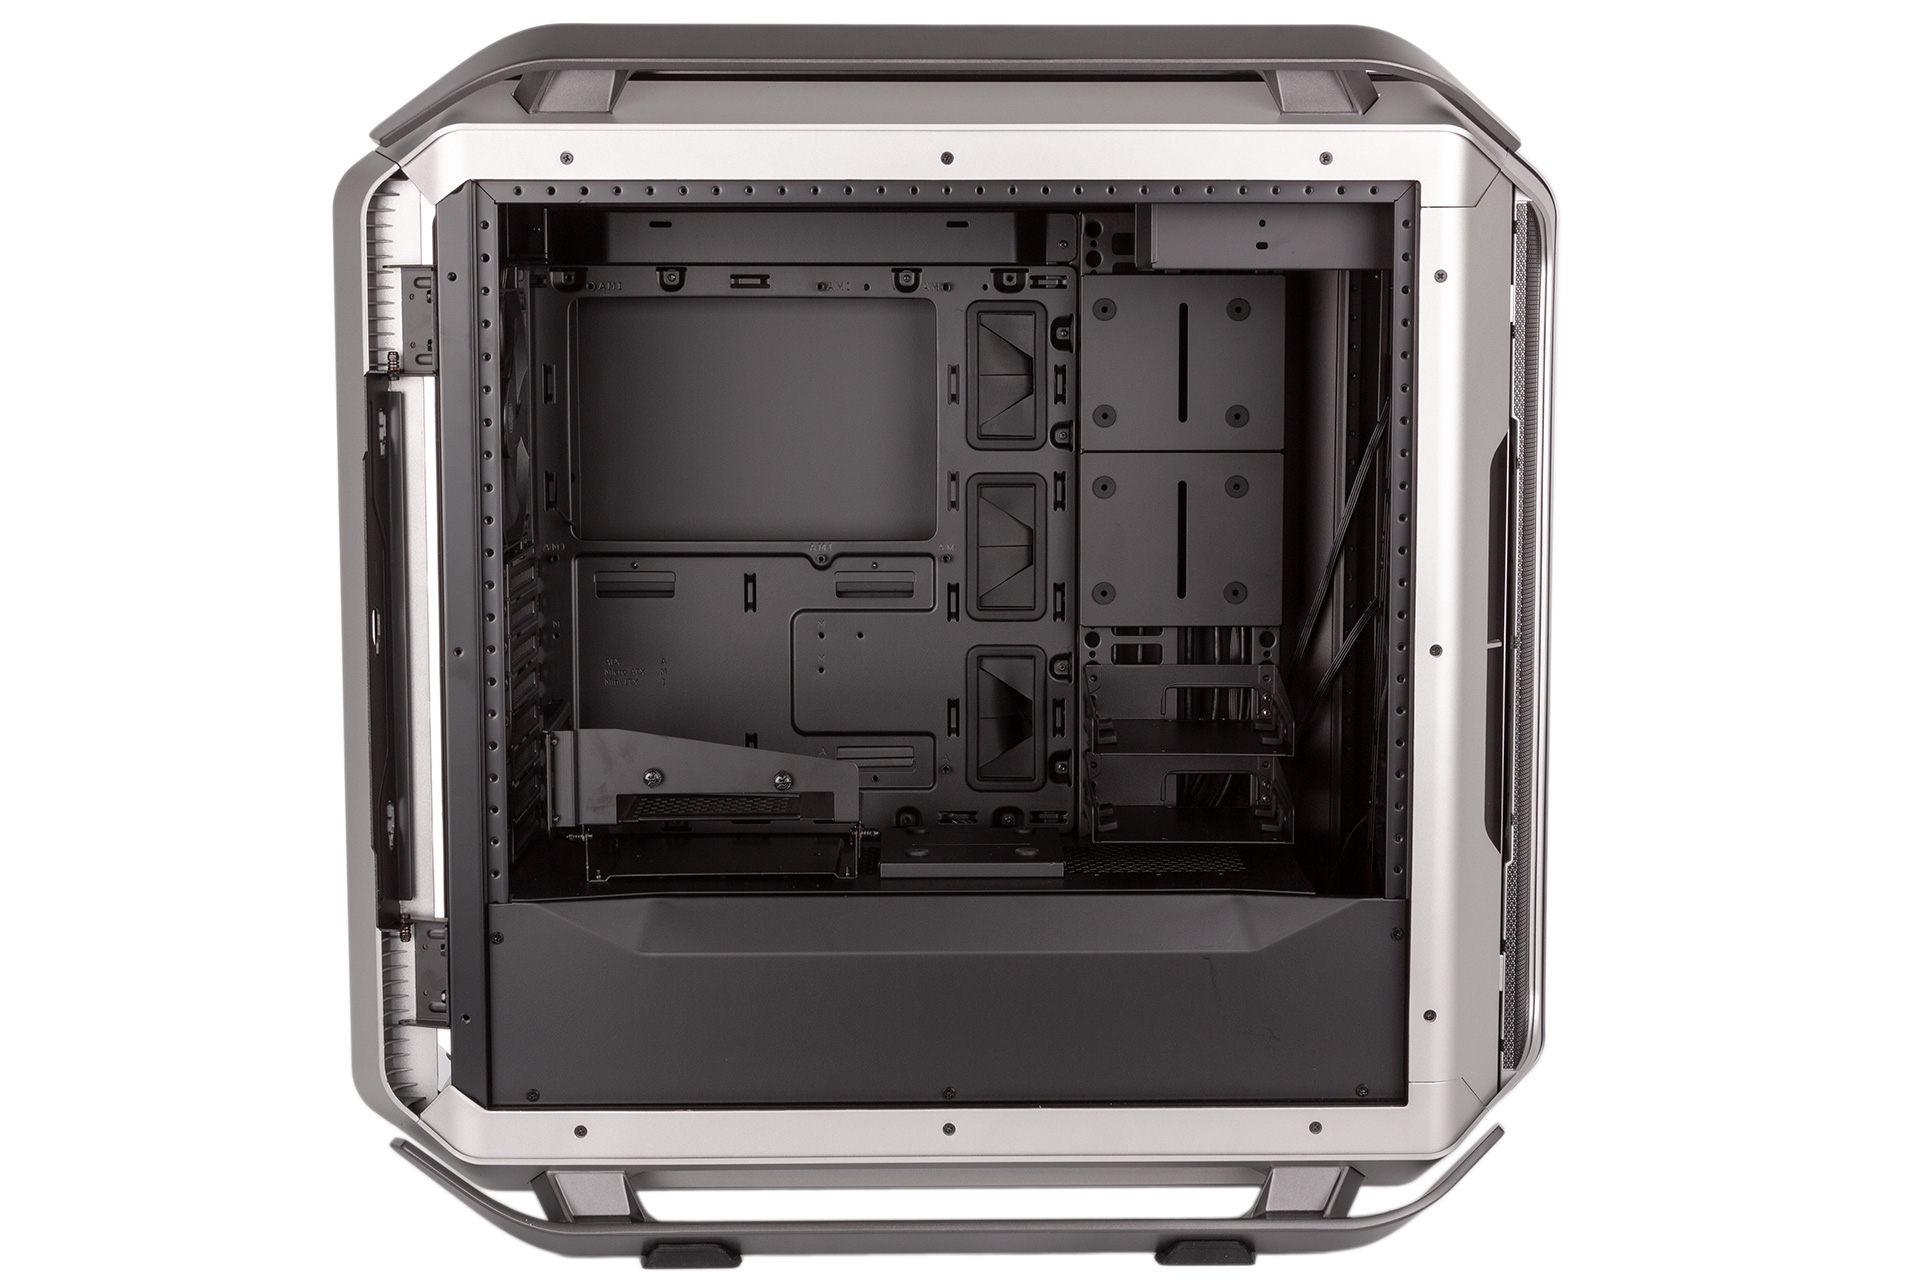
If you thought there was a lot going on externally on the C700M, you haven’t seen anything yet. While the default layout follows standard full-tower design principles, a design ethos known as MasterConcept 2.0 means that the internals of the C700M are very modular. Pretty much all internal plates, trays, and brackets are removable, which means you can invert the layout or even rotate it for chimney-style airflow (think SilverStone Raven/Fortress cases).
As you can imagine, switching to a different layout involves significant extra build time, so it’s something you want to plan and commit to rather than experiment with. The C700M is unashamedly a case for those that love to tinker and plan their build down to the last detail, and its flexibility is admirable, although given the size we would appreciate the option for a dual-system build too. The downside, of course, is that you’re paying for the engineering work that’s made this doable, while likely only settling on one layout (possibly even the default one), but flexibility like this does come at a cost and is reserved typically for beasts like this. Note, though, that an inverted layout is also possible on cheaper cases like the Be Quiet! Dark Base Pro 900 Rev. 2.

Back to the default layout, one awesome inclusion is the GPU bracket and PCIe riser cable that makes alternative GPU mounting methods available out of the box – the current trend is to make this an aftermarket extra. The PCIe cable is likely a significant contributor to the cost; the 200mm one from Cooler Master costs £25, but this one is double that length. The bracket allows you to mount your graphics card inside the chassis atop the PSU shroud either horizontally with the cooler facing up, vertically so that it faces the window, or even at an angle between 0° and 90° thanks to the rotation mechanism. You can even detach it from the PSU shroud and mount it instead to the so-called M.Port (modular rails to which the HDD trays also attach) so that it faces vertically downwards. And if you want to get even more creative, it’s handy having this bracket generally, as it pretty much allows you to put the card anywhere you mount the bracket. Grommeted holes on the back panel mean you can route video cables into the chassis as well.

With so much space inside the C700M, building is pretty straightforward once you’ve got your layout sorted. Pre-installed motherboard mount help, but if you’re still struggling you can remove the motherboard tray completely and work on it externally. One niggle, though, is that the additional screws are not separated into convenient bags or boxes, which is unfortunate for something so premium.
Under the shroud, the PSU is elevated on its own bracket which has rubber padding. Units slot in from the right side, but if you have an exceptionally long PSU you may need to remove the front cable cover.
In the rare case that you need to install two 5.25” drives, you need to make use of extra brackets and add a few more steps to your build. This isn’t an issue, though, as we expect most will either ignore this section or remove the 5.25” support entirely in favour of water-cooling.

The C700M has three more HDD brackets than the C700P, which only had two. Two here are installed beneath the PSU shroud, and two are fitted above it while another is provided spare. The brackets themselves are high quality metal and pre-fitted with rubber around the 3.5” mounting holes, while 2.5” drives are of course also supported. The modular M.Port bracket into which they slot has plenty of holes, so you can set drives at whatever height you like. The brackets are then secured with screws on the opposite side. We also like the pre-cut cable holes for SATA/power in the drive trays.
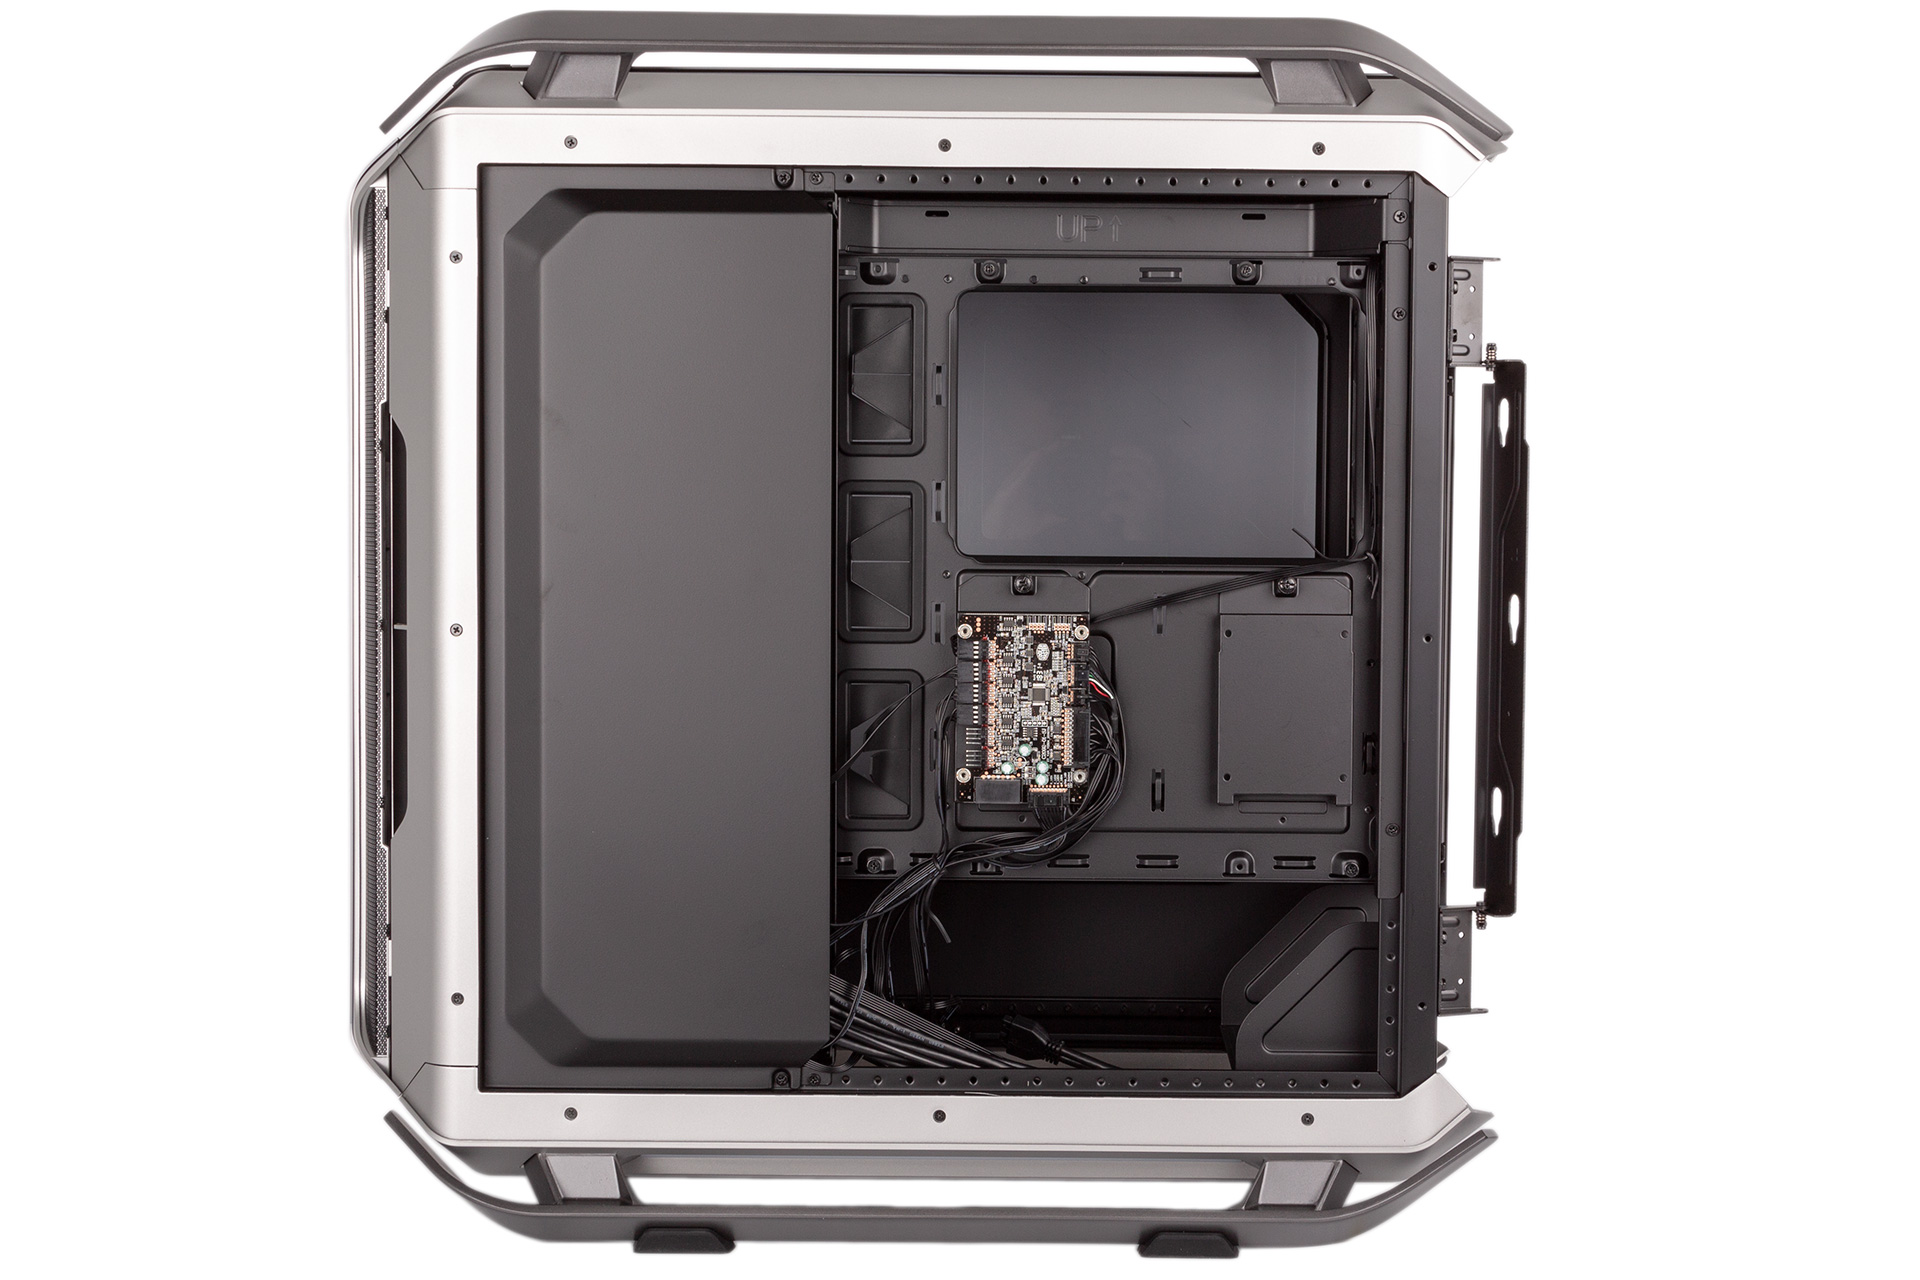
On the reverse of the motherboard tray, you get two dedicated metal 2.5” mounting brackets, although one is occupied by the fan/RGB hub. Furthermore, there are three additional brackets that do the same thing but with a different design: one on the PSU shroud, and two at the top of the M.Port. These also double up as reservoir mounting points and cable covers, and you can move them around these two locations as desired.
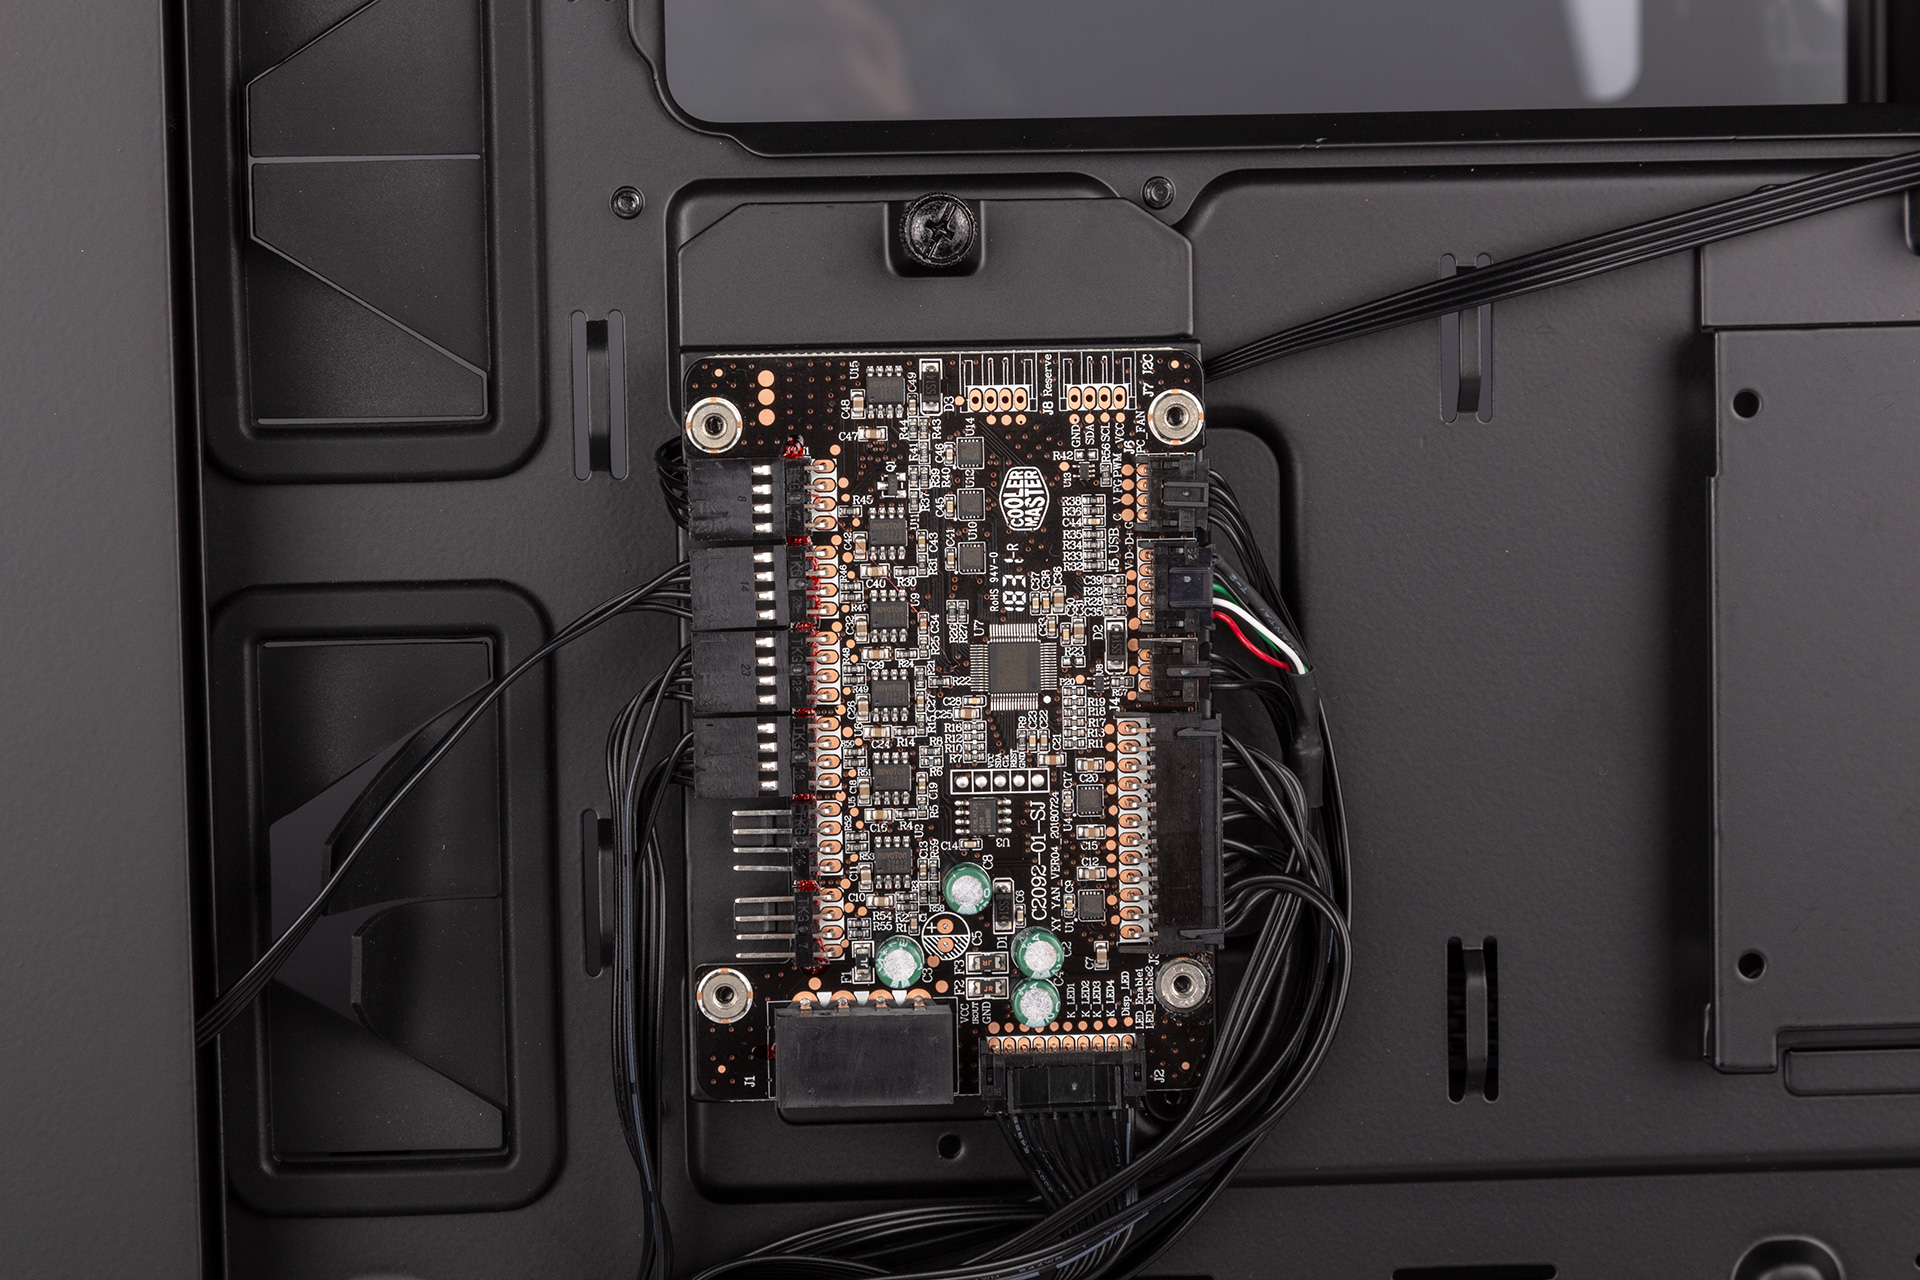
The fan/RGB hub offers four addressable RGB channels with support for up to 2A per channel, while the fan portion offers six channels with up to 0.4A per channel. The combined maximum amperage unfortunately necessitates a Molex connector (SATA is limited to 4.5A). You also have motherboard connectors to enable PWM fan control and software control of the lighting, while a USB 2.0 header is used solely for firmware updates. Three aRGB channels are taken up by the case (top including power button, front, and bottom) and four fan channels are occupied by the fans, and thankfully all the wiring for this is done for you. An extra SATA power connector is needed for the fourth aRGB channel to keep the lights bright, and this is provided as part of a splitter cables which splits that channel into three separate connectors, so you can easily add a fair bit of extra aRGB lighting in one form or another.
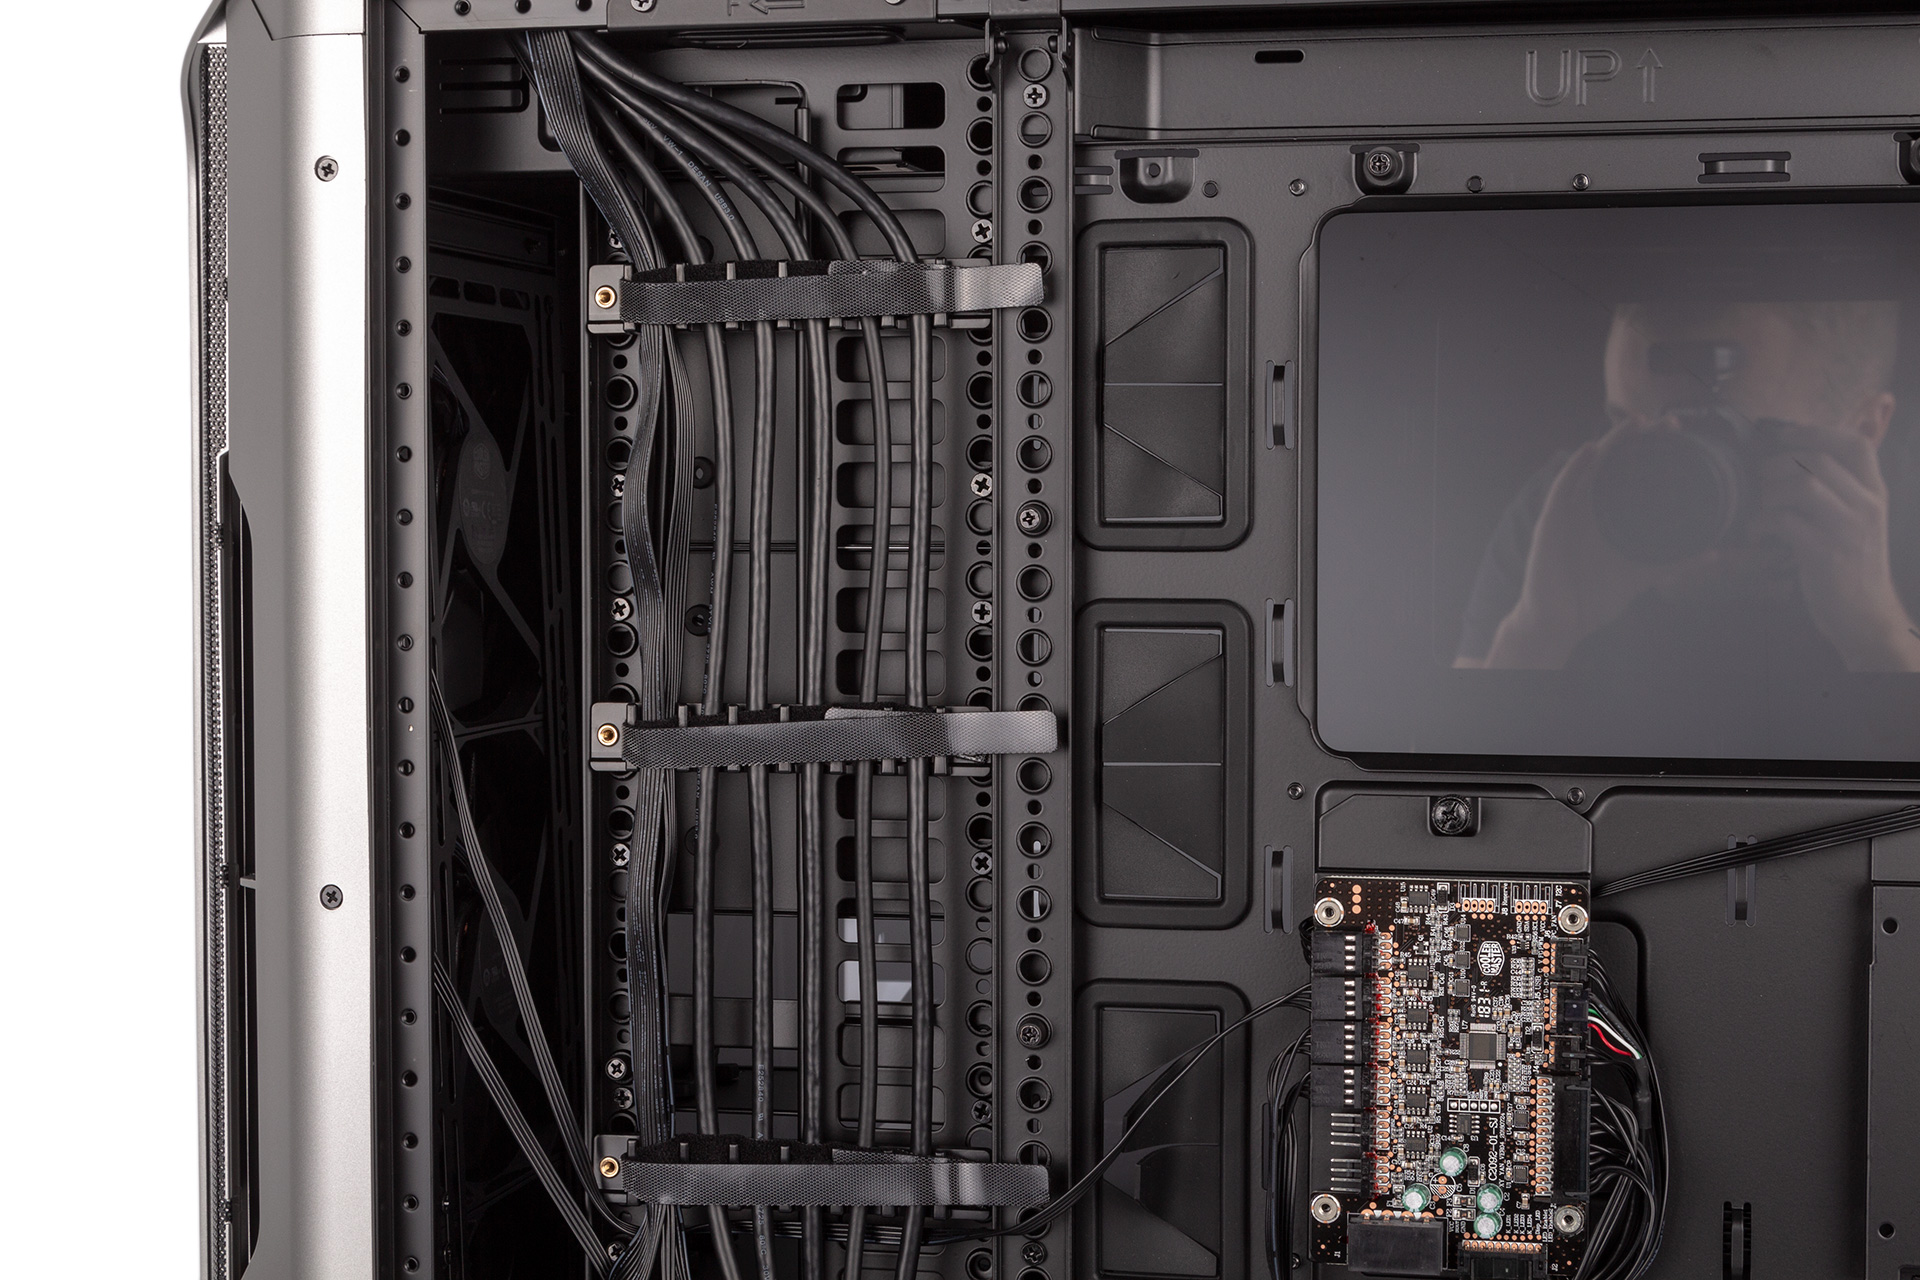
As well as the aforementioned cable covers and the ample space below the PSU shroud, the primary cable routing area benefits from the extruded side panel and also from channelled routes that run from top to bottom and Velcro cable ties. This makes it theoretically possible to divide cables for certain components between different channels and simplify potential upgrades/maintenance. Arguably this section is a little over-engineered, but in a case like this it’s not a big deal. Whether you want to perfectly tidy every cable or just “shove and forget”, the C700M has you covered.

As discussed, you get two removable fan/radiator brackets here. Each one can support both 360mm and 420mm radiators, but there are limitations to be aware of depending on where you position them. For example, the optical drive cage will need to go if you want to use 360mm or 420mm radiators in the top, or if you want to use 420mm models in the front. You can even move one bracket to the bottom of the case as part of a layout change (PSU will need moving, of course), where 360mm radiators can also be fitted.
RELATED ARTICLES


MSI MPG Velox 100R Chassis Review
October 14 2021 | 15:04

Want to comment? Please log in.