Cooler Master HAF XM - Interior
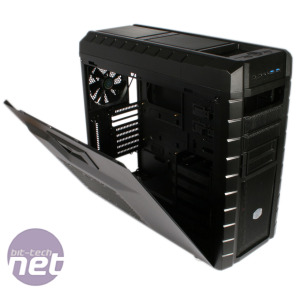
It’s smaller than the case that inspired it, but there’s still ample room inside the HAF XM for a tidy build. Getting inside requires removing two thumbscrews from each panel, and the left panel also has a quick release handle to make it easier to get on and off. The locking mechanism holds the panel firmly in place, so there’s no need to put the thumbscrews back once you’ve finished a build – especially as you can rest the panel at a 60 degree angle for a quick peek inside. Both the left and right side panels bow outwards, leaving plenty of room for errant cables.
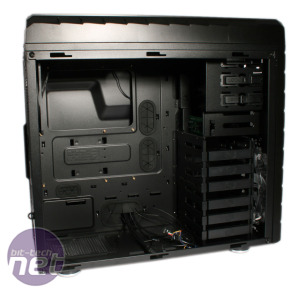
The motherboard tray is large enough for E-ATX boards and has a large cut-out for installing CPU cooler backing plates. Two pre-cut cable management holes are covered with rubber grommets, which are refreshingly secure in that we didn’t poke them out every time we pushed through an ATX power cable. There are also more cable management holes above and below the motherboard, for 4/8-pin ATX power and I/O panel headers.
Click to enlarge
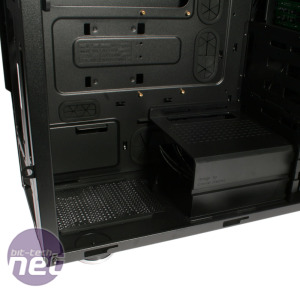
A dust filter has been fitted to the PSU floor mount, but on the inside of the case rather than the exterior. This means you’ll have to open it up and potentially remove the PSU just to clean it, which is a lot of hassle. The PSU ducting cover makes a welcome return from the HAF X, hiding away any unruly power cables from view.
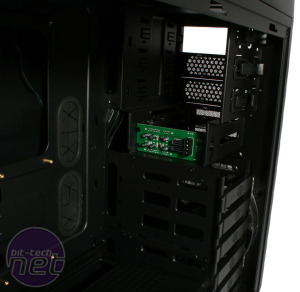
Six side-mounted 3.5in drive bays all have tool-free disk caddies, but only for mechanical hard disks – you’ll need to break out a screwdriver to fit SSDs. The caddies themselves might be made from plastic, but the locking mechanisms are firm and unlikely to spring loose when the case is in transit. Two further 3.5in bays have been reserved for the hot-swap system in the front of the case – these naturally face forward, and are a convenient way to add or remove extra storage quickly. One final 2.5in disk mount is hidden behind the motherboard tray, in case you fill up all the others. The tool-free locking mechanisms for each of the two 5.25in drive bays are incredibly sturdy and applied a firm grip to our optical drive - it’s a welcome change from the plastic locking mechanisms of the past.
Click to enlarge
Cooler Master fits a 200mm fan in the front intake, although you can swap it out for two 120mm or 140mm fans if you prefer. There’s also a pre-fitted 140mm exhaust on the rear, with alternative mounting holes for a 120mm fan. Both these fans, as well as the 200mm exhaust mounted in the roof, use 3-pin motherboard headers, but Cooler Master also installs 3-pin to Molex adaptors on each. Finally, there are two 120mm fan mounts on the left side panel, or alternatively one 140mm fan.

MSI MPG Velox 100R Chassis Review
October 14 2021 | 15:04


Want to comment? Please log in.