Poke it! Poke it!
Now we move to the penultimate stage of our review – the testing. There are three things which we primarily want to see in a case here; ease of use, solid cooling performance and low noise levels.The ideal case should be easy to install and remove system parts from, while remaining cool throughout our admittedly tough testing and shouldn’t be loud enough to bother us. It has to be vibration and rattle free, with options for extra cooling.
The current king of the hill is the Antec P182, with the P190 being more preferable for real high-end users. The Cooler Master CM 690 may pose a threat to those two though, if all goes well here.
On the cooling front things are already looking good for the CM 690 and there’s definitely plenty of ways to tweak it with different fans in different positions, but our testing requires us not to customise at all. If we go down that route then we’d have water-cooled doodads poking out every-which-way and we’d probably lose a staff member or two in the tangle of tubes.
To get started, we have to install a test system. We always use the same one, to help keep things fair. If you aren’t familiar with our standard test rig though then you can check out the specs below.
CPU: Intel Pentium XE 955 (dual-core, 3.46GHz)
Graphics Card: Sapphire Radeon X1600 XT Ultimate
Motherboard: MSI P6N SLI Platinum
RAM: 2x 512MB Corsair XMS2-667
Hard Drive: 1x 250GB Western Digital WD2500 7200RPM
Heatsink: Asus Silent Square Pro
This system may not bowl you over with its high-tech specs, but it is carefully chosen to generate a substantial amount of heat and noise while still being representative for a lot of people. This is one of those few occasions where we want a PC to get too hot – because we want to see how the case shifts that heat.
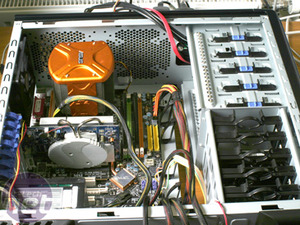
Installing the system was actually incredibly easy. Putting the PSU in the base means that there’s none of this awkward reach-around (I should maybe choose a different word, I know) nonsense where you have to hold the unit in place on the inside, while screwing from the outside. With the 690, you just screw it in.
The cable tidy clips also come into play here and are fantastic for keep cables out of the way while the motherboard is put in, as well as keeping cables in place once the whole thing is together. The HDD trays, which I originally thought were a bit flimsy, feel a lot more sturdy once the drive is inserted and the whole thing remains snug and secure whilst also being screwless.
The only problem with the case really is the side fan, which has the same problem that all side fans have: you forget that it is there and end up breaking it or your motherboard when you take the panel off. Cooler Master gets around that this time by having a fairly long cable which has a breakaway section. Clumsy tinkerers need worry no longer.

MSI MPG Velox 100R Chassis Review
October 14 2021 | 15:04


Want to comment? Please log in.