
Rising to the occasion
The next build stage concerns the most vexing aspect of the case: the riser cards.I assume the idea was to keep the case compatible with full-height PCI cards, but this is totally unnecessary! Practically all PCI cards relevant for HTPCs such as sound cards and TV tuner cards come in half-height format, and since due to its passive cooling arrangement the case is limited to lower-end graphics cards (not exceeding 75W), half-height versions can be selected also. There is no reason to accommodate full-height cards.
At the very least, mCubed could have issued a back panel with vertical half-height card slots, seeing as it has gone through the effort to issue an optional back panel with SCART and HiFi connectors. This would totally obviate the need for any complicated riser card arrangement and guarantee compatibility with any combination of PCI slots on any mATX or ATX board.
Instead, the user is limited to three expansion slots (choose your cards carefully) angled at 90 degrees to the motherboard, in which cards have to be mounted in a specific order to maintain compatibility with the order of PCI slots on the motherboard. If the first slot on the motherboard is not a PCIe x16 slot but, say, a PCIe x1 slot, you're stuffed.
Moreover, you need to buy the Top PCI riser card to get the arcylic mounting panel and relevant screws that are needed to mount the Middle PCI riser card, even if you don't need the Top PCI riser card. But you cannot use the middle PCI riser card if you plan to use the PCIe x16 riser card to add a dedicated graphics card (which, incidentally, does not need the mounting panel). You can also install either a Bottom PCI riser card or a PCIe x1 riser card, which again do not need the mounting panel. Confused? I was.
For this case, I ended up selecting a PCIe x1 card for the Abit PCIe x1 WiFi network card (your HTPC needs an Internet connection to download TV guide and optional media content, after all), and a Top PCI riser card for the TV Tuner. The case kit includes a set of plastic black brackets which are screwed to the outside of the back panel and allow the PCI cards or blanking plates to be secured in their slots with the usual mounting screws. There are counterparts for the inside of the case which hold the tab of the PCI card or blanking plates, but I found these a bad fit and quite useless. The mounting instructions here are notoriously vague and it appears again a bit of a sloppy afterthought solution.
A remote chance...
The HFX Mini can be controlled with a Windows MCE remote through an (optional) internal receiver circuit. This is attached with velcro (yes, velcro. Don't get me wrong --it is sturdily attached, but still...) to the side of the acrylic cradle that faces the front panel.Again, several problems become immediately obvious. One is that it is a very tight fit, mainly because of the thickness of the connectors of the circuit (it is not made very clear which is the USB connector and which is the IR blaster connector; the manual confuses the two. Read the circuit board symbols carefully. In any case no damage is done if you get it wrong -- it just won't work). Added to this is the annoyance that the included USB cable which connects the circuit to a USB header on the motherboard is really several inches too short.
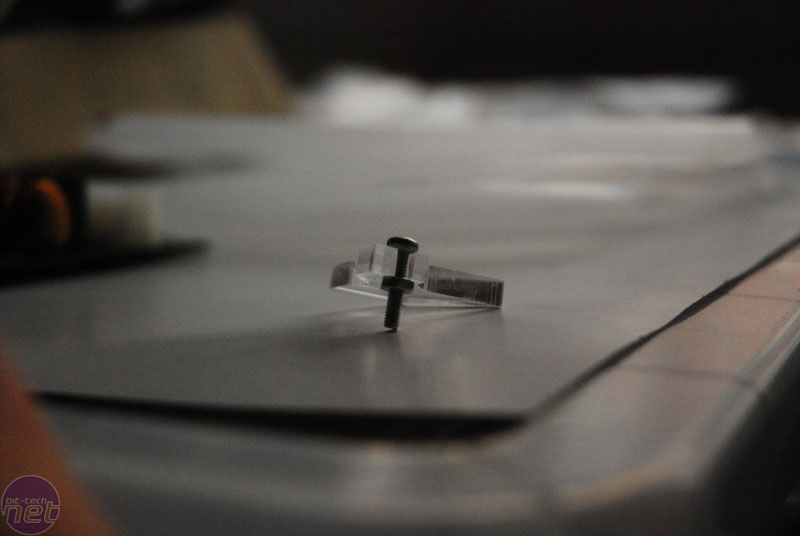
Yet another grievance is that the plastic light guide that channels the infra-red beam from the lens in the front bezel of the case to the IR receiver diode on the circuit is 2mm too thin. When mounted (with a screw to the front panel bracket that also holds the front audio and USB ports), it does not align correctly with the lens. As such, several posters on the mCubed support forum have noted problems getting the HTPC to see the remote.
A simple remedy however is to prop this light guide up with a 2mm nut or washer:
Click to enlarge.
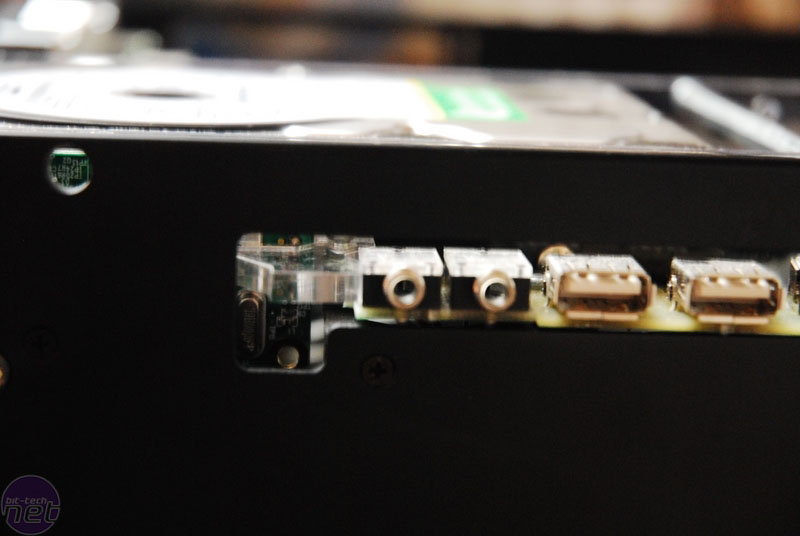
When properly aligned, it should be in-line with the audio ports right next to it, and I can assure you that it works perfectly fine then.
Driving on

Click to enlarge.
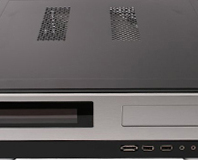
The DVD drive is a good quality Plextor drive and configured for Cable Select. This means that you can connect to both the Master or Slave connector of the IDE cable and it will happily configure and work to suit. Included with the drive is a laptop drive to desktop IDE connector, which allows a standard IDE cable to be used, and a floppy molex for power.
For a cramped setup like this case, I find that conventional flat IDE cables, folded strategically like origami, work best. Because only one connector is needed, the surplus was removed with a very sharp scalpel (it has to be sharp; frayed cables = short circuit = disaster!).
The HDD is best connected with as short a SATA cable as possible, preferably with a 90-degree angled connector on the motherboard end (lest it interferes with the internal PSU circuit). AC Ryan does a nice 30cm one, which can be snapped up from wherever you fancy for a few quid.
RELATED ARTICLES


MSI MPG Velox 100R Chassis Review
October 14 2021 | 15:04

Want to comment? Please log in.