Interior
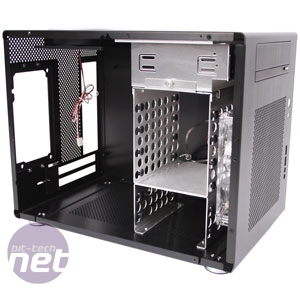
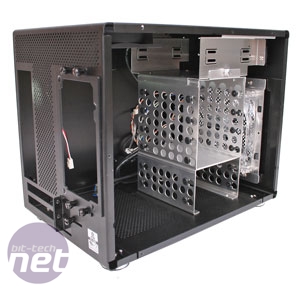
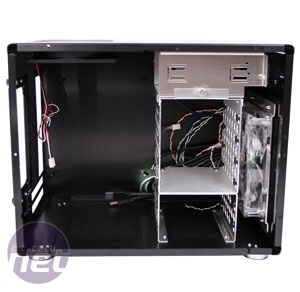
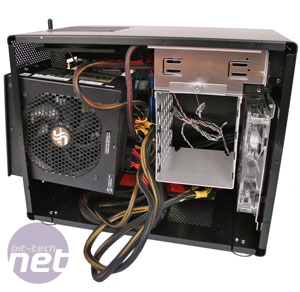
The side panels of the PC-Q08 are secured by six screws each, making the case a little tricky to get inside. The screws are required due to the case’s reliance on its side panels for rigidity – remove them both and the remaining framework is worryingly wobbly. Once inside, we were surprised to find the PC-Q08 (unusually for a SFF case) was remarkably open and spacious. The motherboard mounts, drive bays and cabling were all generously laid out and during our build there was little of the finger-bending frustration so common with tiny PC builds.This is because the PSU - the component that requires the most space by volume - is mounted directly above the motherboard. This is not so good for showing off your hardware, but is a clever use of space thanks to the case’s roomy width. The PSU is also, unusually, the last component you’ll need to fit, allowing you plenty of room to build the PC before sliding the PSU into place via a removable mounting bracket. The left side panel also includes a large vented area that can be positioned over either the PSU’s intake (if it’s got a floor fan) or over the drive bays if not. This is a wonderful inclusion, even if we would have liked a dust filter.
The motherboard actually mounts onto one of the side panels, as you can see from the shots above – the rear I/O hole runs up the back of the case, and the expansion slots are at near the floor. This allows you to fit the motherboard, memory, front panel connectors and CPU cooler free from the confines of the case before screwing the side panel back into place.
As the PSU sits right above the motherboard though, you’ve only got 100mm of headroom for your CPU cooler. While this is more than enough for reference coolers, you’ll need a low profile aftermarket cooler if you plan on upgrading your CPU’s cooling.
The PC-Q08’s hard disk bays comprise two separate, removable cages, with all eight slots fitted with vibration dampening rubber grommets through which the mounting screws run. The two-bay cage is screwed to the floor of the case and you’ll need to remove it should you choose to install a fast graphics card into the PC-Q08. The four-bay cage is suspended from the 5.25in drive bay in the roof of the case.
However, we’ve found that the larger drive bay clashes with PSUs that are 160mm long. This is pretty much every modular ATX-sized PSU we’ve seen, which is a shame – either you’ll have to use a short PSU (which will probably have captive cables) or you’ll have to remove the large drive bay caddy.
Despite a roomy interior, a 160mm long PSU will foul the internal drive cages. Click to enlarge
As a shorter (typically 140mm), captive cable PSU will result in a horrible mess of cables inside what is a still a small chassis, we’re surprised Lian Li didn’t spotted this issue. The upshot is that if you want to build a powerful PC in the PC-Q08, you’ll either have to get very creative with PSU cable tidying or you’ll have no drive bays at all (as the lower one will have been removed to make way for your graphics card).
While the 5.25in bay also incorporates a 2.5in drive mount into its base (handy for SSDs) this is still very disappointing. It’s particularly frustrating considering that if the case was just 2cm longer, the PSU and drive bay problem wouldn’t be an issue.
Other than this, building a mini-ITX system in the PC-Q08 was otherwise a simple and pleasant experience. The removable nature of the motherboard mount is great, and as we used Seasonic 750W modular PSU, we were able to connect all the hardware up first, before sliding in the PSU and connecting the cables to it. It’s just a shame we has to forego having an optical drive, instead using a 5.25in to 3.5in adapter in the single 5.25in bay.

MSI MPG Velox 100R Chassis Review
October 14 2021 | 15:04


Want to comment? Please log in.