Revving the Engine
Whenever we test a case we want to look for three main things after we’ve assessed how good or bad the case looks. We test for noise performance, as nobody wants a hurricane in their living room, heat performance, because nobody wants a tropical hurricane in their living room and ease of installation, because you want to be able to rebuild your living room quickly if the worst should happen.Now, we usually would use a standard and consistent testing system with an established set of hardware to ensure reliable results which are comparable to other systems we test.
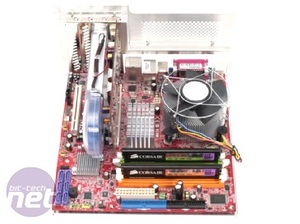
With the V350 however, we couldn’t do that. Our normal testing system uses an ATX motherboard, so we had to change it. We grabbed the nearest and most suitable mATX board we could find and loaded in the same old RAM to give us a decent starting point.
We mounted this motherboard and RAM, using the same CPU from the usual test rig too, on the motherboard tray. Then we grabbed a DVD drive, a power supply, a fresh hard disk and the usual GPU and sat down to have a think. We’ll detail the specific bits in just a moment, because we had a whole heap of problems installing the hardware and the rig ended up changing almost entirely.
Because the V350 is so restrictive in terms of space, we wanted to be dead sure about the order in which we installed our system. It’d be no use to install the mobo, only to find we then couldn’t get the PSU in without removing the heatsink, which would in turn require the whole motherboard be removed. No, this would require careful thought.
We started by installing the PSU – and we made damn sure that we used a modular PSU too. Because of how small the space was between the side of the 5.25” drive cage and the end of the PSU, we had to use a modular power supply to stop the motherboard literally drowning in cables. We had to then connect in the various cables we knew we would need, starting with the furthest away and least accessible.
Then we realised our first mistake. We removed the PSU and installed the DVD drive first because, with the PSU in the way it’s impossible to access the screws to hold the DVD drive in. With the DVD drive and the PSU installed, we turned our eyes to the motherboard.
Thunk – that’s the noise that the Asus Silent Square Pro heatsink made when it rammed the side of the case. No matter we thought, removing it and trying a new one. Thunk again. With just 11cm of vertical space at a maximum and much less horizontal, we tried a number of PSUs before resorting to the dreaded stock cooler.
However, lo and behold the third thunk – this time from the graphics card as the heatsink on that proved to be too tall and collided the side of the chassis. We tugged out the old Sapphire Radeon X1600 XT Ultimate and plugged in a new card instead – the only comparable one we could find that would fit. Still, the amount of clearance was so small that we’re not sure any GPU with a back mounted heatsink would work.
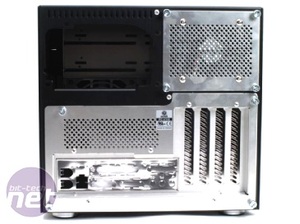
The fourth thunk came when we tried to put the hard drive in and the fan on the back of the case wouldn’t go on properly. The problem was caused by the SATA cable, which despite being a normal cable with a straight connector was still too big to fit in. There were two ways to solve the problem. We could either take out the drive and mount it in the other way around so that the cable came underneath the drive and out through the plastic-ringed whole intended for cables.
Or we could just use one of those SATA cables with a right-angled connector. I don’t know the proper name for them – Rich just tossed one to me and told me to use “this right-angled-jobby.” This enabled me to get the back-mounted 80mm (2,200 RPM) fan screwed back into place.
After that was all said and done, we did have a lot more troubles. Broken installations, a knackered DVD drive and an installation disk which was so scratched it must have been an extra on Will It Blend? However, none of this can really be blamed on Lian-Li. Instead, it’s much more convenient to blame it all on Hiren. It’s his fault, blame him.
Anyway, with a scapegoat conveniently found, let’s move onto the testing proper and bombard our new system (details of the page) with complex calculations.

MSI MPG Velox 100R Chassis Review
October 14 2021 | 15:04


Want to comment? Please log in.