Donning The Armour
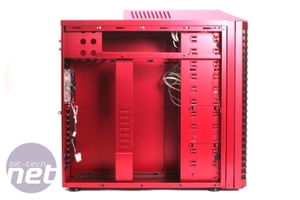
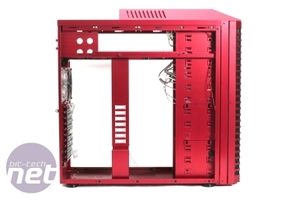
With the outside of the case fully surveyed and appreciated, we whipped off the side panels and had a good ol’ gander at the inside of the Armoursuit. Again though, just because our review sample here is bright ATI red doesn’t mean that the standard design is. The basic Armoursuit comes in black, not crimson.Inside, the Armoursuit is almost a work of art and, even though the exterior didn’t exactly bowl me over, the inside certainly made an impression.
The first thing to notice is the removable motherboard tray, which is accessible only when the back side panel is completely taken off. It took me a little while to figure this out as the review sample we received didn’t come with any manuals or guides, but it wasn’t a big issue and soon enough we had the tray separated from the main body.
The PSU shelf is pretty noteworthy too, and the Armoursuit uses a full size bracket to support larger power supplies, with each surface of the shelf perforated with holes so that the PSU can remain well-ventilated no matter where the fan is positioned.
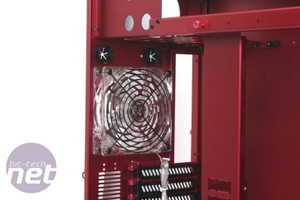
Speaking of ventilation, Lian Li has been pretty smart when it comes to managing the various connections and such for the fans. Complementing the three large fans in the door of the case, which run at 1,200 RPM when on full speed, is a 120mm fan in the back of the case and another in the ceiling. It’s for this ceiling fan that the Armoursuit has the extra bulk on top.
The power connections for these plentiful fans are cleverly managed. For the system fan at the back of the case there’s a single, simple power 4-pin connector, just as you’d expect. The front and ceiling fans however all feed in to a chip located just behind the fan controller knob and a single power connection spirals off this to power all four fans.
All the fans in the case are accompanied by LEDs too – red in this ATI case, but blue in the usual design.
If cooling is something you’re seriously concerned about though and you think that standard fans just aren’t going to cut it then the Armoursuit still has you covered – there’s watercooling pipe ports in the top and bottom of the case. If you’re new to watercooling and want to check out some more information on the essentials then you can check out our Watercooling 101 feature which serves as an excellent introduction to the idea.
In the centre of the case is a supporting brace for oversized graphics cards. It’s hard to miss in the pictures – it’s the huge red bar down the middle of the chassis. The brace itself is designed to give extra security and support to large PCI cards so, if you have a huge graphics card that you don’t want wiggling around when you move your case about, you can fasten it in with this brace.
Cleverly catering to the type of market who would have such huge cards, the brace itself is moveable to one of a few set positions which should accommodate most sizes and also has gaps in it should you want to put two (or more) such cards in an SLI or CrossFire configuration. The actual cards themselves screw directly into the brace elsewhere, while the brace itself fastens into the PSU shelf up top and the base of the case down below.
Speaking of the bottom of the case – rest assured that the rubberised feet on the Armoursuit will stop the case being moved around unintentionally. Those things grip the floor so hard that we occasionally struggled to shift the thing when we were doing the photoshoot – which is a good thing for owners, but a bad thing for the spines of photographers.
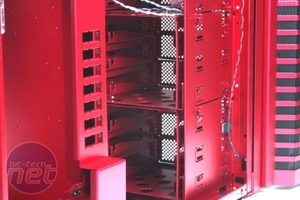
The hard drive cage for the Armoursuit is pretty similar to the B25 too – we didn’t get along too well with that last time. When reviewing the B25 we found hard drives were difficult to mount but now, after a little experience, this method is easy to use and requires little actual thought – though it would be nice is the case actually came with a paper manual all the same.

MSI MPG Velox 100R Chassis Review
October 14 2021 | 15:04


Want to comment? Please log in.