
Interior
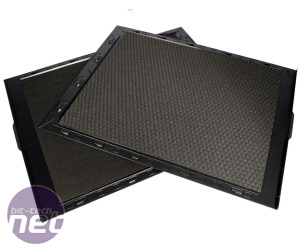
Both side panels utilise thumbscrews but are still quite difficult to get on and off, especially the right one which is incredibly stiff on our sample. While the use of rails and multiple hooks and notches to attach them does mean they hold in place tightly, they can be difficult to line up and we'd much rather have seen a hinged design, but it's hardly a deal breaker. The panels themselves are thankfully sturdy, with a generous helping of noise absorbing foam applied to the inside of both.Getting the plastic front face off the case is much easier, requiring just a tug from the bottom, although it won't come fully away from the case thanks to the wiring. Both front fans are attached to a single dust filter (a single 140mm fan can also be secured to it instead), which then screws directly onto the chassis itself. It's a shame, therefore, that Nanoxia has opted to remove the lower front door, as it's now necessary to pull off the front panel even if you just want to clean the front dust filter.
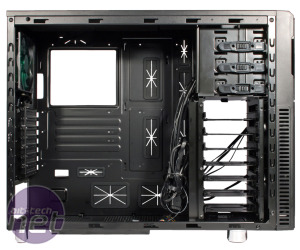
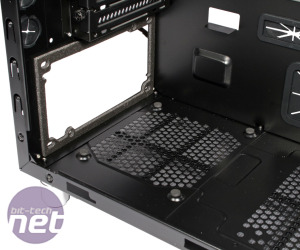
Last time around we were impressed by Nanoxia's attention to detail, something that the DS2 retains both practically and functionally. Each of the PCI brackets feature thumbscrews and are reusable, and a huge CPU cutout will make installing hefty coolers that little bit easier. Elsewhere, the PSU area sports anti-vibration padding and feet while each of the hard drive trays reduce noisy vibrations with rubber lined mounting holes. The internal cables are all sleeved in black too, with the separate connectors for the fan controllers clearly labelled as A or B to distinguish them.
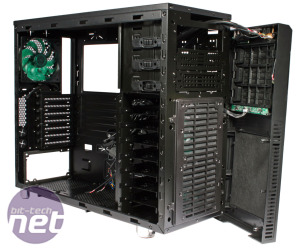
Optical drives are held in place with clips on both sides that are both easy to use and very secure. External 3.5-inch devices are also supported thanks to supplied adaptors. Below the external drives are seven side-facing internal drive trays, just one less than in the taller DS1. It's pleasing to observe that these are all made from metal too, and each one supports both HDDs and SSDs, though a slight inconvenience is that both types of drives require screws to be mounted.
Unlike the modular solution found in the DS1, no part of the drive cage is removable in the DS2. This is a shame, as even cases quite a bit cheaper often have removable drive cages and they're useful for improving airflow and installing long graphics cards. However, the significant depth of the case means it still supports graphics cards up to 340mm in length, or even 375mm if you remove the internal fan mount, which is plenty of room. The internal mounting bracket is fitted to the rear of the HDD cage and can be outfitted with a pair of 120mm fans to increase airflow around your hard drives and graphics hardware.
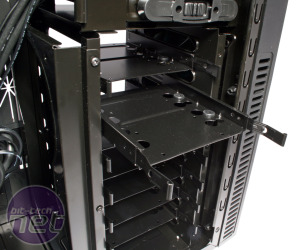
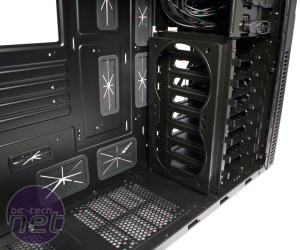
Click to enlarge - The drive cage sports metal mounting trays and a internal fan bracket attached to its rear
You can also attach 120mm and 240mm radiators to the internal mounting bracket, and the depth of the case allows for full height radiators with fans on both sides to be fitted here without any impediment on ATX motherboards. Adding radiators and fans to the bracket will naturally reduce the length of graphics cards you can install accordingly, however, which is something to be wary of. Double radiators are not supported in the roof section, unfortunately, which is one of the consequences of the case's shorter profile. It would have been nice to see support even for slimline radiators here, but nevertheless the water-cooling options that are present are still impressive for a £75 case.
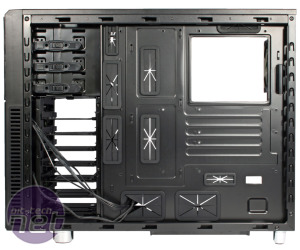
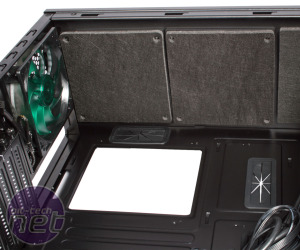
Click to enlarge - There's plenty of cable routing options, but there's little water-cooling support in the roof
The multitude of cable routing holes are well positioned around the motherboard tray, with holes specifically designed for E-ATX boards present too. As before, the grommets are excellent, with the flaps that allow cables through being thin and flexible, but the grommets themselves being firmly affixed. As well as zip ties, Nanoxia even bundles an extension cable for the 8-pin AUX12V connector; a rare sight in this price range. Our one criticism in this area is that space behind the motherboard tray can feel a little limited, and this isn't helped by the flat side panel lined with foam. Putting the case on its side is the easiest way to reattach the side panel here, but pleasingly we never observed any bulging once it was back in place.

MSI MPG Velox 100R Chassis Review
October 14 2021 | 15:04



Want to comment? Please log in.