
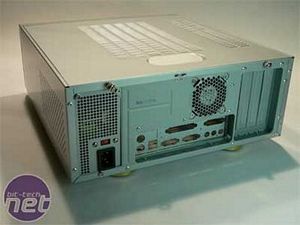
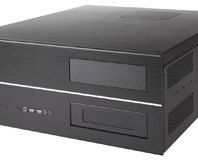
Moving along to the back, things look pretty standard here. The body of the chassis is very sturdy. Your ventilation is a result of the aforementioned vents and a solitary 60mm fan seen here in the back. The removal of two thumbscrews gives you access to the inside by sliding the top panel off.
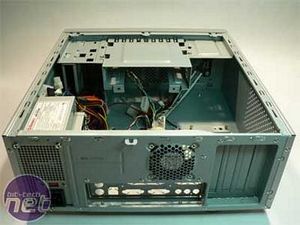
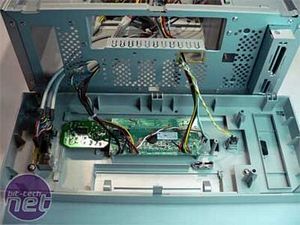
The inside is pretty standard fare with a good bit of room for the motherboard since the front brackets are suspended above the floor of the case.
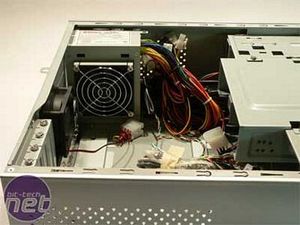
A side shot reveals the included Enermax PSU. The position and orientation of the power unit means that it, in conjunction with the rear exhaust fan, will be pulling air from the general area of where the CPU will most likely be located which is sound thermal thinking.
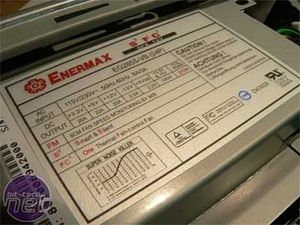
NMEDIA chose to include the Enermax EG285S-VB power supply which is a welcome sight. Enermax power supplies have a well established reputation for performance and stability. Many included supplies can be on the skimpy and generic side, not so here. This model is compliant with Intel 915 and the newer AMD Athlon64 chipsets.
With this PSU you get plenty of power support for devices including:
- 20+4 Pins Main Power: 1 (support 24p and 20p MB)
- P4 +12V CPU x 1
- Serial ATA x 2
- HDD Power (4 pin molex) x 3
- FDD Power x 1
- Fan Monitor x 1
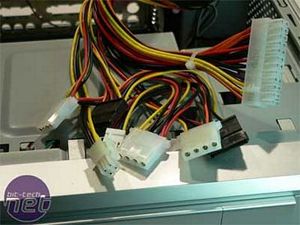
At first I was a bit peeved that a 24 to 20 ATX adapter wasn't included (as I plan to install the AMD XP MicroATX motherboard that I used in my CinemediaPC) until I realized that Enermax has accommodated me in a subtle way. The four new pins added to the ATX for the new power compliances can actually be detached from the block connector to allow it to be connected to a 20 or 24 pin motherboard eliminating the need for an adaptor.
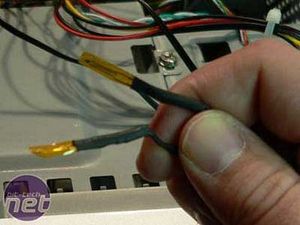
Now we move onto the front panel wiring. The HTPC 100 includes two thermal probes that report thermal readings to the front panel display. One is labeled "cpu" and the other is labeled "case" making it pretty easy to figure out what to do. This may sound like a moronic detail to point out but I have had several thermal monitoring products in my hands where they don't label the sensors and you only realize that you have installed the wrong sensor in the wrong location after you have installed everything and buttoned up the case and are forced to go back in and reroute the sensor locations if you want your temps to display the correct data for what it is identified as on the display.
The probes are not of the variety that will allow you to install through the pins of your CPU and directly to the core like others but they are certainly thin enough to mount under the heat sink.

The rest of the wiring harnesses deal mainly with the front comm port connections to your motherboard. I've said before how much I like the "consolidated block" USB wire headers instead of having them broken out into pairs like seen here. From a convenience standpoint, it is so much easier but these are not difficult to install, just not as easy as the block-socket type. The front display requires a molex pass-through connection to power the display.
Another feature is that the 3-pin connector for the CPU fan. Some motherboards require a fan to be connected to the CPU fan header which may not allow you to use the NMEDIA controller the way it was intended. Luckily my Asus A7V8X-MX-SE board doesn't care. If you love to use motherboard utilities to monitor your fan speeds though, you will need to decide to use the front fan controller or your motherboard fan header, your choice.
It's also worth mentioning that the rear exhaust fan has a 4-pin molex pass-through connection which does not allow you to connect it to either a fan header on the motherboard without the use of an adaptor (not provided). It would've been much better for NMEDIA to include a fan that has a 3-pin header instead to allow you some speed control options.
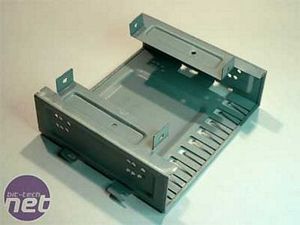
Here you can see the optical drive mounting bracket removed. It is secured by two screws once it is in place and secure. Having this bracket removable was a must in my opinion. Once the motherboard is in place and you are routing all your wires and ribbon cables, mounting the optical drive would've been very difficult without allowing you to remove the bracket, install the drive and replace the bracket.
I did have some level of hassle actually installing the drive into the bracket. This may sound picky, but when I was trying to align the drive to properly work with the front bezel drive door and button, it became difficult to get it just so. The holes where the bracket is fastened to the chassis are slotted allowing you some play. If the holes for securing the drive to the bracket were also slotted, it would've been much easier to install.
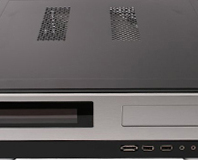
Let's look behind the front bezel removed. As you can see, NMEDIA has added a lot of elements specific to HTPC needs as opposed to dressing up an old MicroATX desktop chassis. The memory card reader is really just a floppy drive slot reader, but their implementation of it makes it look like it was specifically built for the case because of color match, fit and finish.


MSI MPG Velox 100R Chassis Review
October 14 2021 | 15:04

Want to comment? Please log in.