
Interior
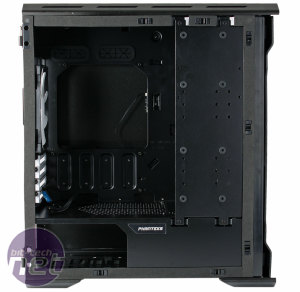
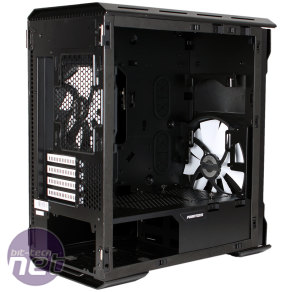
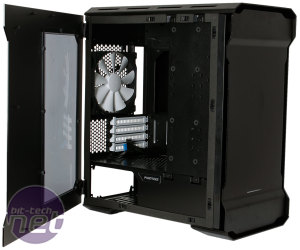
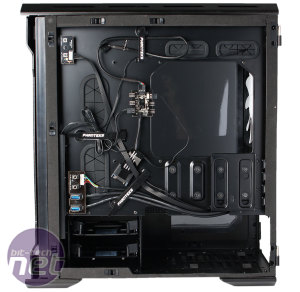
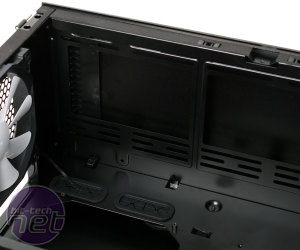
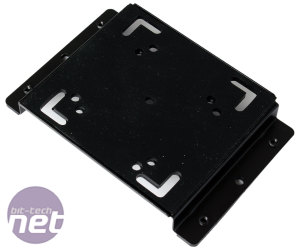
Peering inside reveals a case divided by a mid-plate into two sections. The main one, you'll notice, has no drive cages, so graphics and expansion cards can use as much of the case's length as possible, and air from the front fan flows unrestricted to your core components. We also find some pre-installed motherboard mounts, a massive CPU cooler cutout on the motherboard backplate (there's loads of room for chunky tower coolers), thumbscrews on the PCI brackets and a good paint job on the steel insides – Phanteks hasn't let its attention to detail slip in the transition to a smaller form factor.Hidden by the non-windowed part of the side panel is a side bracket, which you can use to mount storage devices or even a reservoir. The eight holes fitted with rubber washers can be used to vertically mount two 2.5-inch drives. The wider spaced mounting holes at the top allow you to install a single 3.5-inch drive, again vertically, and this still leaves you with room beneath for a 2.5-inch one. The entire bracket is also easily removed via four screws to make drive installation less fiddly or in case you simply want rid of it altogether.
As mentioned, the two side panels are actually doors, held in place by hinges at the rear, and a pair of clips at the front. This makes it incredibly easy to access either side of the case, and with the panels open you can simply lift them off the hinges entirely if they're getting in the way. Re-aligning them can be a bit fiddly, however, and it requires a fair bit of force to close them up at the front again, but equally both panels feel just as secure as those locked in with thumbscrews.
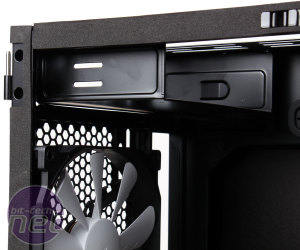
We also mentioned that the rear of the case has a drive cover for an optical drive. The bay for this is actually modular – Phanteks supplies a bracket that you'll need to screw into position with six screws in the top rear corner, after which it functions like a normal optical drive bay, other than that it is accessed from the back, of course. We actually quite like this solution; it keeps a feature for those that truly need it, but frees up space in the chassis and avoids spoiling the clean looks of the case for the rest of us.
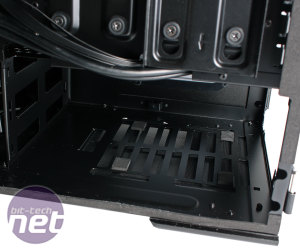
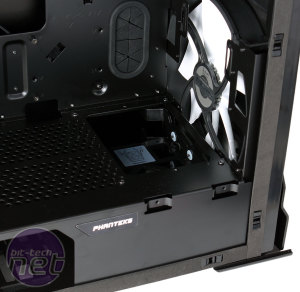
In the lower section is where the PSU goes, as well as a drive cage, and both of these are best accessed from the other side. The PSU simply slots into place, resting on some pads that will help absorb fan vibrations. The mid-plate above it ensures that all cables are hidden from view.
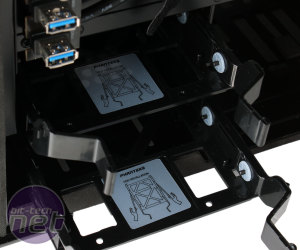
The drive cage can play host to two more hard drives, and the drive trays support both 2.5-inch and 3.5-inch models. Larger drives are installed tool free using fold out arms on the tray that lock the hard drive in place with pins that are surrounded by rubber to combat noise. The entire cage is modular too, so if you don't need it and want to install an extra long PSU or just have more room for cables, you can remove it entirely.
There's also a 'Drop-N-Lock' SSD bracket secure to the rear of the motherboard tray using rubber washers. It's very easy to use – simply screw your drive into the bracket and slide the bracket into place along the washers. Two sets of washers are provided, so you can use either position, or buy an additional tray from Phanteks if you need it.
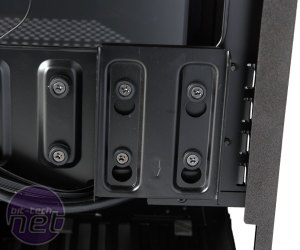
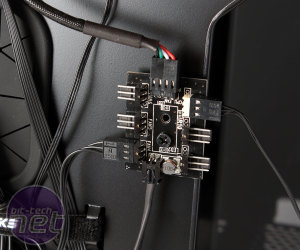
Click to enlarge - The Drop-N-Lock SSD bracket and the PWM hub, both on the rear of the motherboard tray
The Enthoo EVOLV also sees the return of the excellent PWM hub. Using the PWM signal and power from your motherboard's CPU_FAN header, this hub can control the speed of up to eleven 3-pin fans, based on your PWM profile. It's a simple and tidy way of introducing automatic, temperature-based fan control to the whole system.
The out of the box cable routing is, as ever with Phanteks, excellent – few other manufacturers go to this effort to supply you with a tidy case. Everything is tied down securely using the excellent Velcro straps, with the two case fans pre-connected to the PWM hub and the front panel cables left dangling with sensible rather than excessive lengths. An extra pair of Velcro straps are supplied, as well as numerous zip ties too. There are two routing holes to the side of the motherboard and two above it, all of which are fitted with secure rubber grommets. There's also lots of space in the lower section to stash cables, and as said you can create more by removing the HDD cage. If we had to criticise it, we'd say that any mini-ITX users will have a bit of cabling on show between the side of their board and the routing points, which are designed with micro-ATX users in mind.
240mm radiators can be fitted up front, though this requires the removal of the front portion of the mid-plate using two thumbscrews, as well as the entire drive cage beneath it. With this done, there's room for a full thickness radiator, but this will impact GPU clearance, so beware. The roof, meanwhile, can support both 240mm and 280mm radiators, with 58mm of clearance before the motherboard; enough for a slim radiator and one set of fans. The mounting holes are as offset to the side as possible, however, so it may be possible to use thicker set-ups depending on your hardware, especially with 240mm radiators.
Unlike most manufacturers, Phanteks always considers placement of reservoirs and pumps, and here is no different. Remember that side bracket? Its set of universal mounting holes can be used to attach reservoirs of various sizes while still leaving room for a single 2.5-inch drive above in most instances. Phanteks also supplies a universal pump mount that is heavily rubberised to absorb vibrations. This too can be fitted to the side bracket, or to the floor of the case by removing the HDD cage.

MSI MPG Velox 100R Chassis Review
October 14 2021 | 15:04



Want to comment? Please log in.