
Phanteks Enthoo Primo Review - Interior
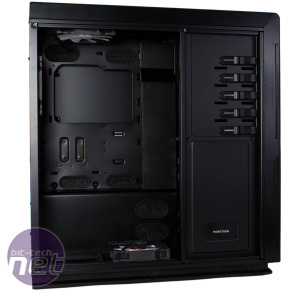
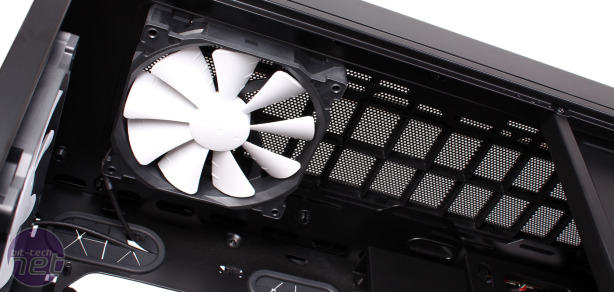
The side panels are well designed and easy to get on and off thanks to their front hinges. Pulling off the right panel reveals a blanking plate behind the fan mounts there, but it's a single plate, so if you wanted to just use one fan mount the other one would be left open. You'll also find the bundled accessories box inside, which contains neatly compartmentalised screws, plenty of cable ties, foam padding for any secondary PSU users and a radiator bracket for the side fan mounts.The inside is very large and will dwarf any normal ATX build. The 207mm of cooler clearance is crazy, but we do think the case could benefit from being a little deeper – the reservoir mount and its cover (the angled plate just to the right of the motherboard tray) limit the GPU clearance to 257mm, so you'll need to remove it (as we did) to install most current high end graphics cards (which users of such a case are likely to use). This is a shame – not only is it a useful feature for water-coolers, but the cover provides an easy way to cover up stray cables. With the PSU and hard drives also shielded from view of the window, a build inside the Enthoo Primo would be very tidy indeed if you could keep the cover in place.
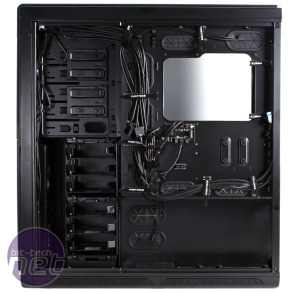
The motherboard tray has a massive cutout for CPU coolers as well as pre-installed ATX mounts. It's also nicely recessed, making way for plenty of water-cooling gear but still leaving at least 30mm of room for cable tidying behind it. The internal metal is very well machined and has a decent paint job, which matches the collection of black sleeved cables.
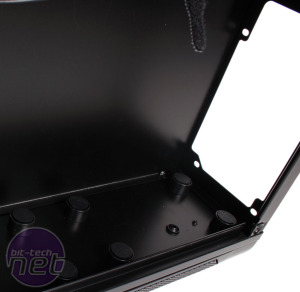
The PSU sits atop six rubber feet, which will dampen vibrations, and further in from these is a pump mount that's sturdy and also lined with thick rubber – a handy addition for any water-cooling case. This can be moved further back into the case or even positioned where the lower HDD cage rests, provided you're not using it of course.
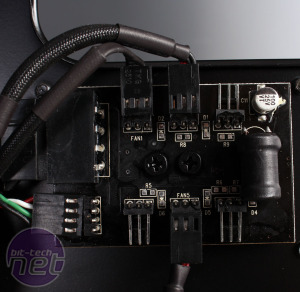
Similar to NZXT's Grid, Phanteks includes what it terms a PWM Hub, designed to use the power and PWM signal from just one of your motherboards 4-pin headers to power up to 11 fans (five of the six fan connectors can power two fans each). It's less versatile than the multi-channel controller on NZXT's Phantom 820, and we'd liked to have seen fan control included on the case itself. Nevertheless, PWM can still be an effective method of controlling fans, and users could also hook it up to their own controller. Bear in mind though that the Hub requires a signal on the fourth pin to function – it refused to power our fans from a three pin connection even with a 12V molex plug connected to its supplementary power input.
Also included in the collection of cables is a molex input for the LEDs, which are all controlled by a separate circuit just beneath the I/O panel. Four extra fan LED connectors (in addition to those already connected to the front fans) are provided so that users can add up to four more of Phanteks' own LED fans, should they wish.
The nine sensibly placed cable routing holes, as well as the extra one beneath the internal reservoir mount, are covered by secure rubber grommets. In addition, Phanteks ships the case with the five fans wired to the PWM Hub and ready to go and does a good job of tidying the numerous included cables. There are plenty of in-built velcro ties and hooks behind the motherboard too, so keeping extra wires out of the way shouldn't be an issue.
The two modular drive cages can be removed or moved further back into the case, and each features a 120mm fan mount in case additional internal airflow is needed. It's a shame that the SSD/HDD trays inside them are plastic, as they feel cheaper than the rest of the case. Regardless, they work well, and the swing out arms make mounting hard drives without tools a cinch. Optical drives are likewise easy to install using the tool free clips, although users can also screw these into place. Finally, four SSDs can be housed in the two trays secured behind the optical drive cage and these are again very user friendly – the trays simply slide on and off of their rubberised mounts (another set of which is found beneath the CPU cutout).
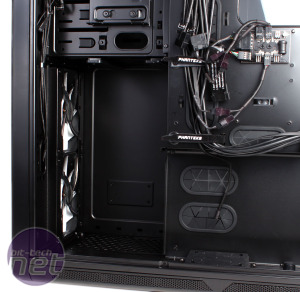
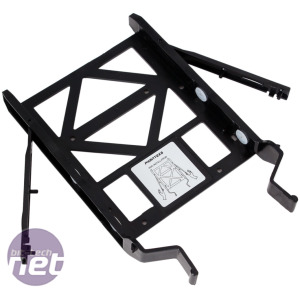
Click to enlarge - Removing the drive cages frees up room for water-cooling (left) and Phanteks apparently take inspiration from Super Meat Boy for its drive tray design (right)
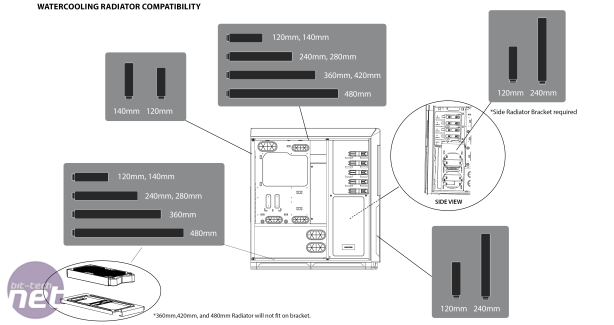
There are plenty of water-cooling options for the Enthoo Primo, and the Phanteks website has the best information about them including clearance space for those interested. Nevertheless, the roof has room for either a triple 140mm radiator (up to 45mm thick in push/pull) or a quad 120mm radiator (up to 70mm thick in push/pull). Without removing the HDD cages, you can also squeeze in a slimline 240mm radiator behind the front fans (tubing could be difficult here) as well as a 240mm or 280mm set-up on the bottom bracket.
Removing the HDD cage and bottom bracket expands your options further. For starters, it removes the slimline limit on the front 240mm radiator, which can now essentially be as thick as you like. You could also now use the side mounts and bracket to install another 240mm radiator. Finally, with no bottom bracket or HDD cages, the lower mounts could house a 360mm or even another 480mm radiator. Naturally, the dimensions of the radiators you use in the front, side and bottom mounts will limit what you can use in the others, but all in all the case clearly has fantastic potential for liquid cooling.

MSI MPG Velox 100R Chassis Review
October 14 2021 | 15:04



Want to comment? Please log in.