Interior
The side panels are affixed with a standard notches and rails system; not as good as hinges but at this price point we can't complain. Removing them using the thumbscrews reveals a dual chamber design, with the lower section used as a way of isolating the PSU thermally and shielding the excess cables that spawn from it from view when peering through the window.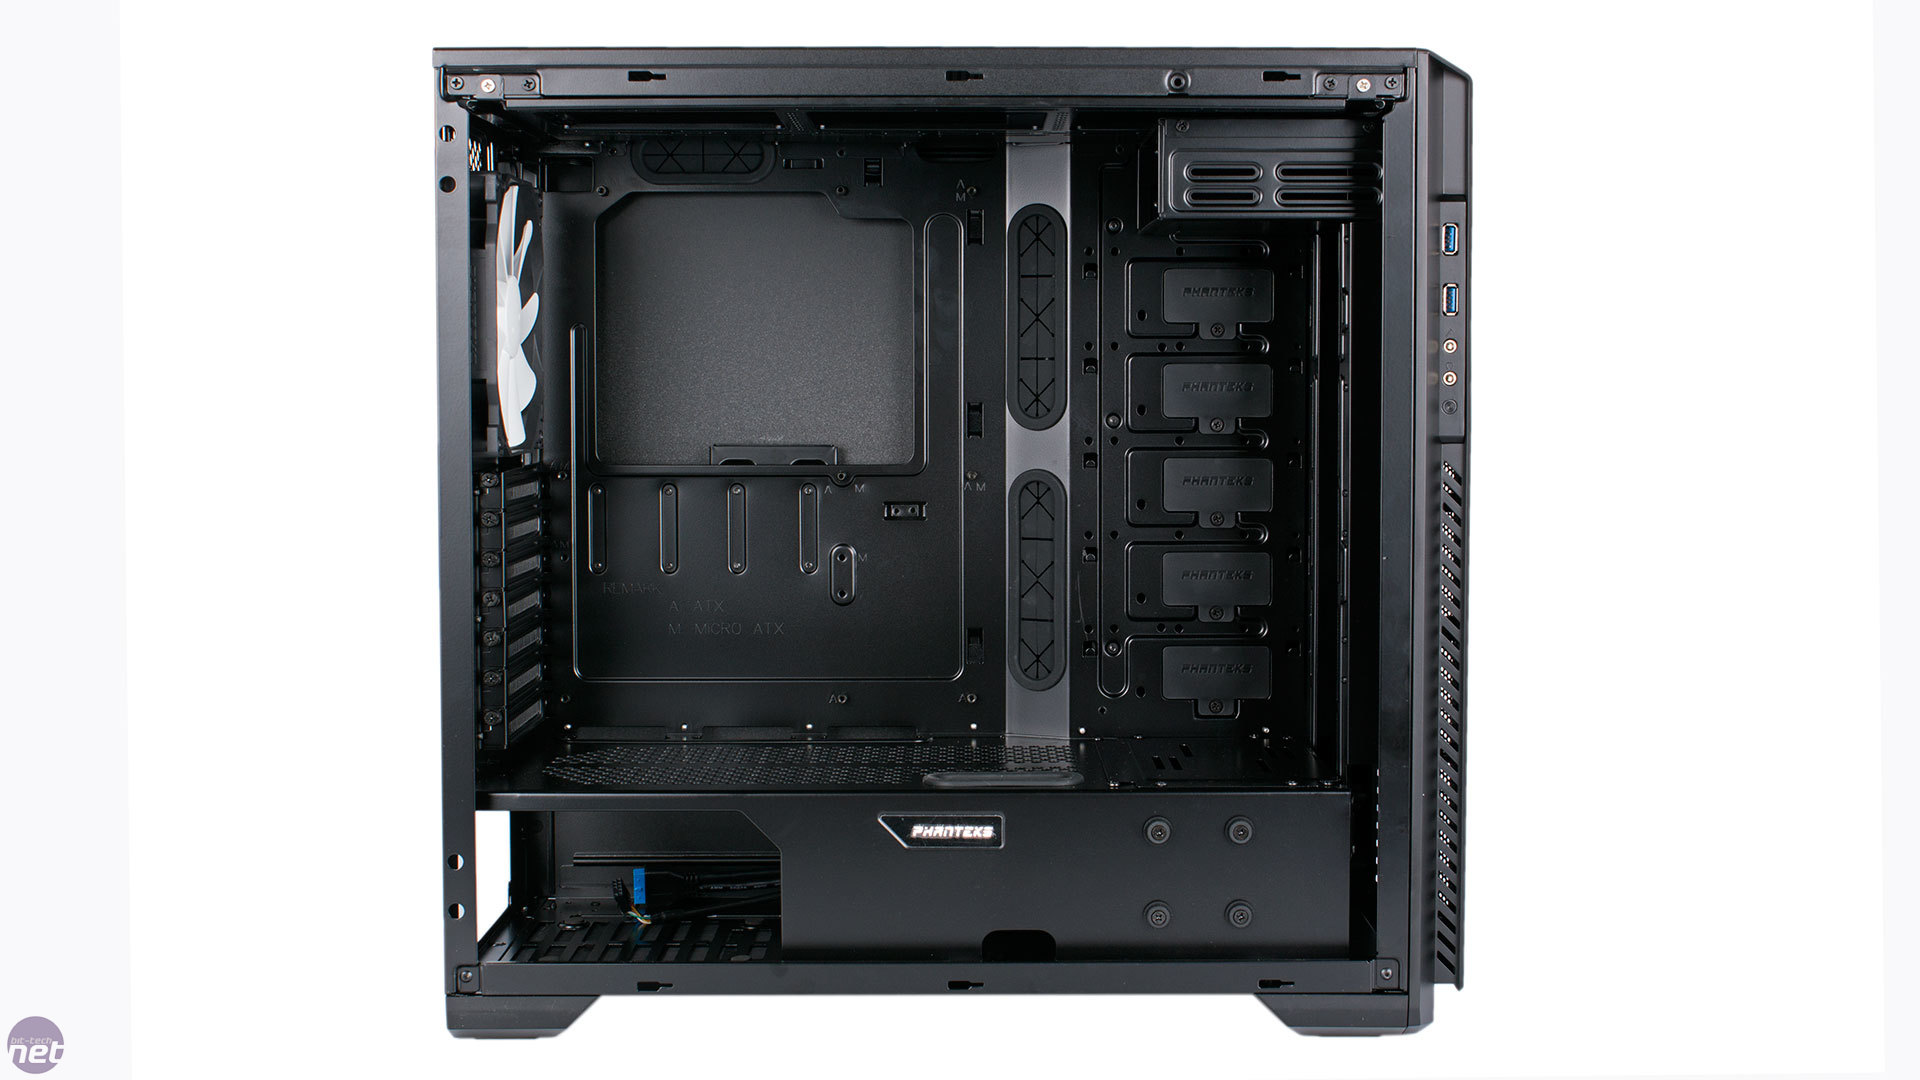
Click to enlarge
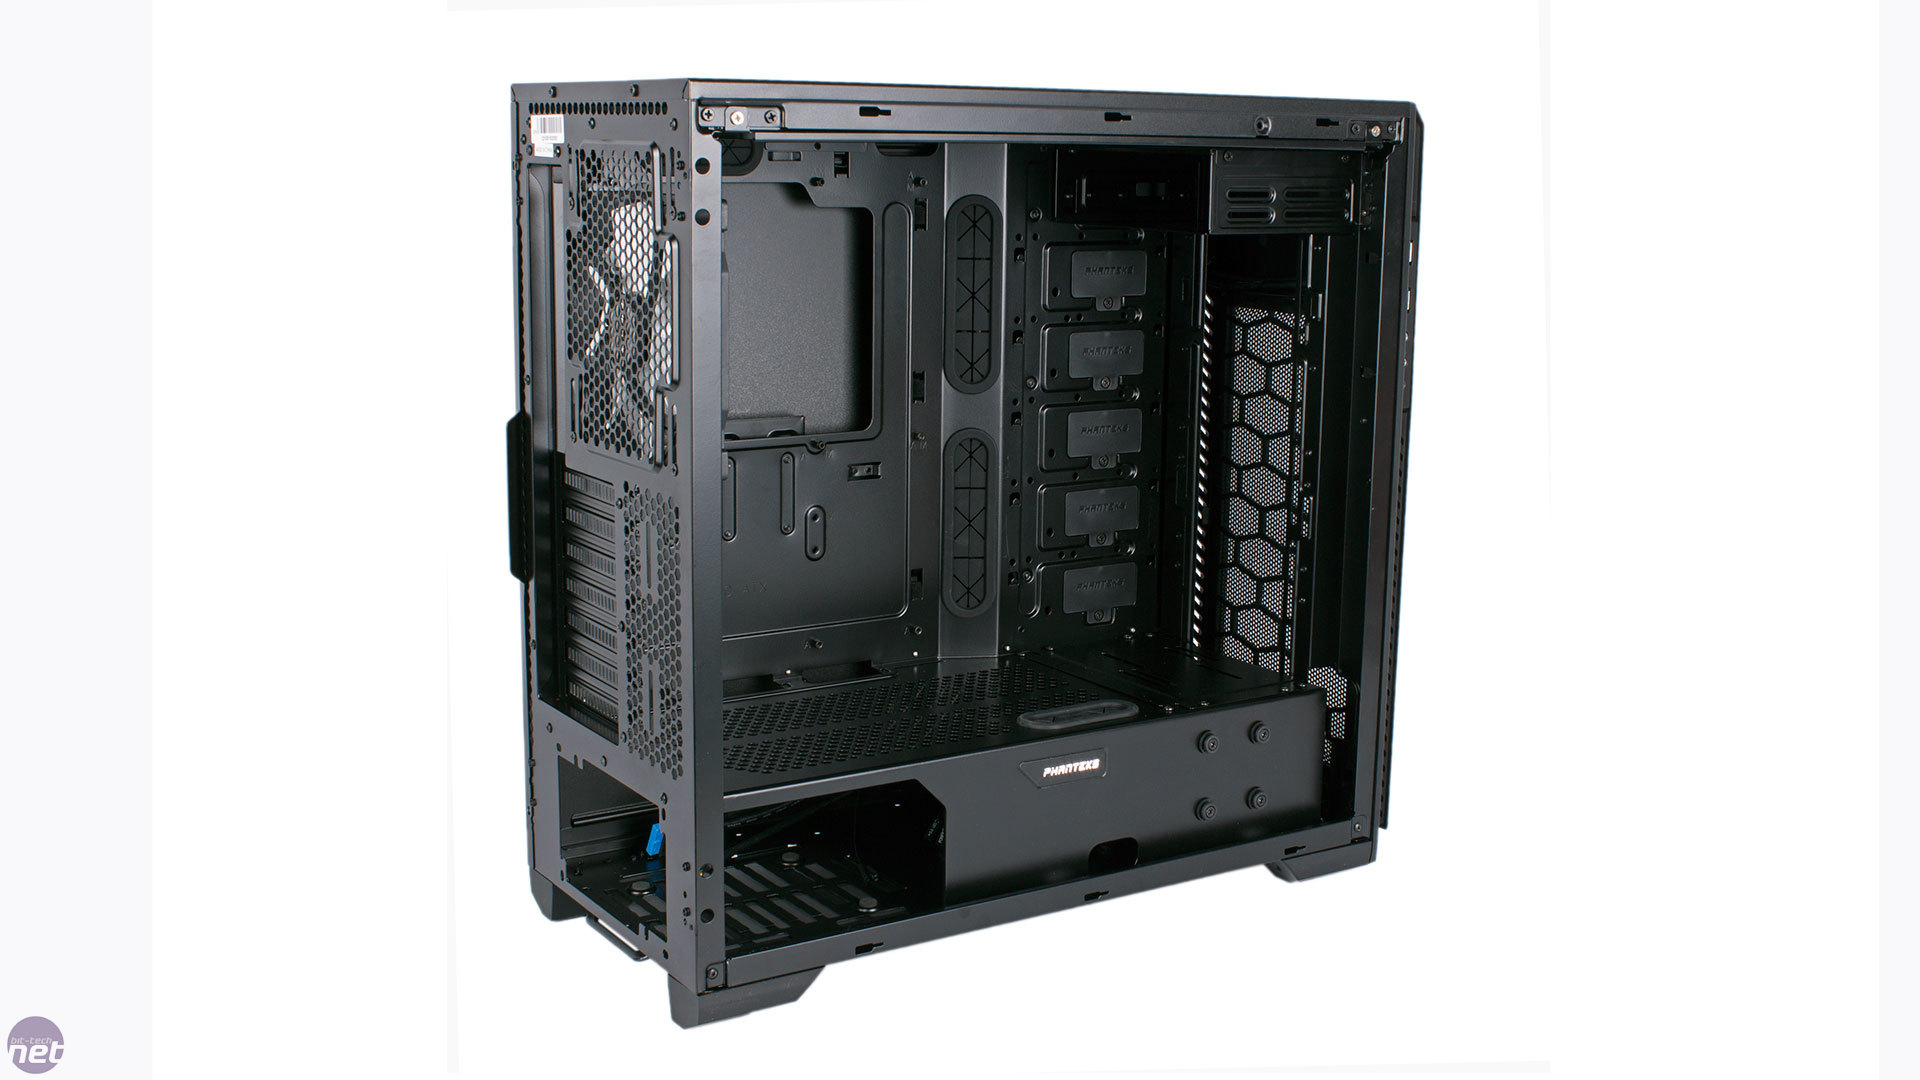
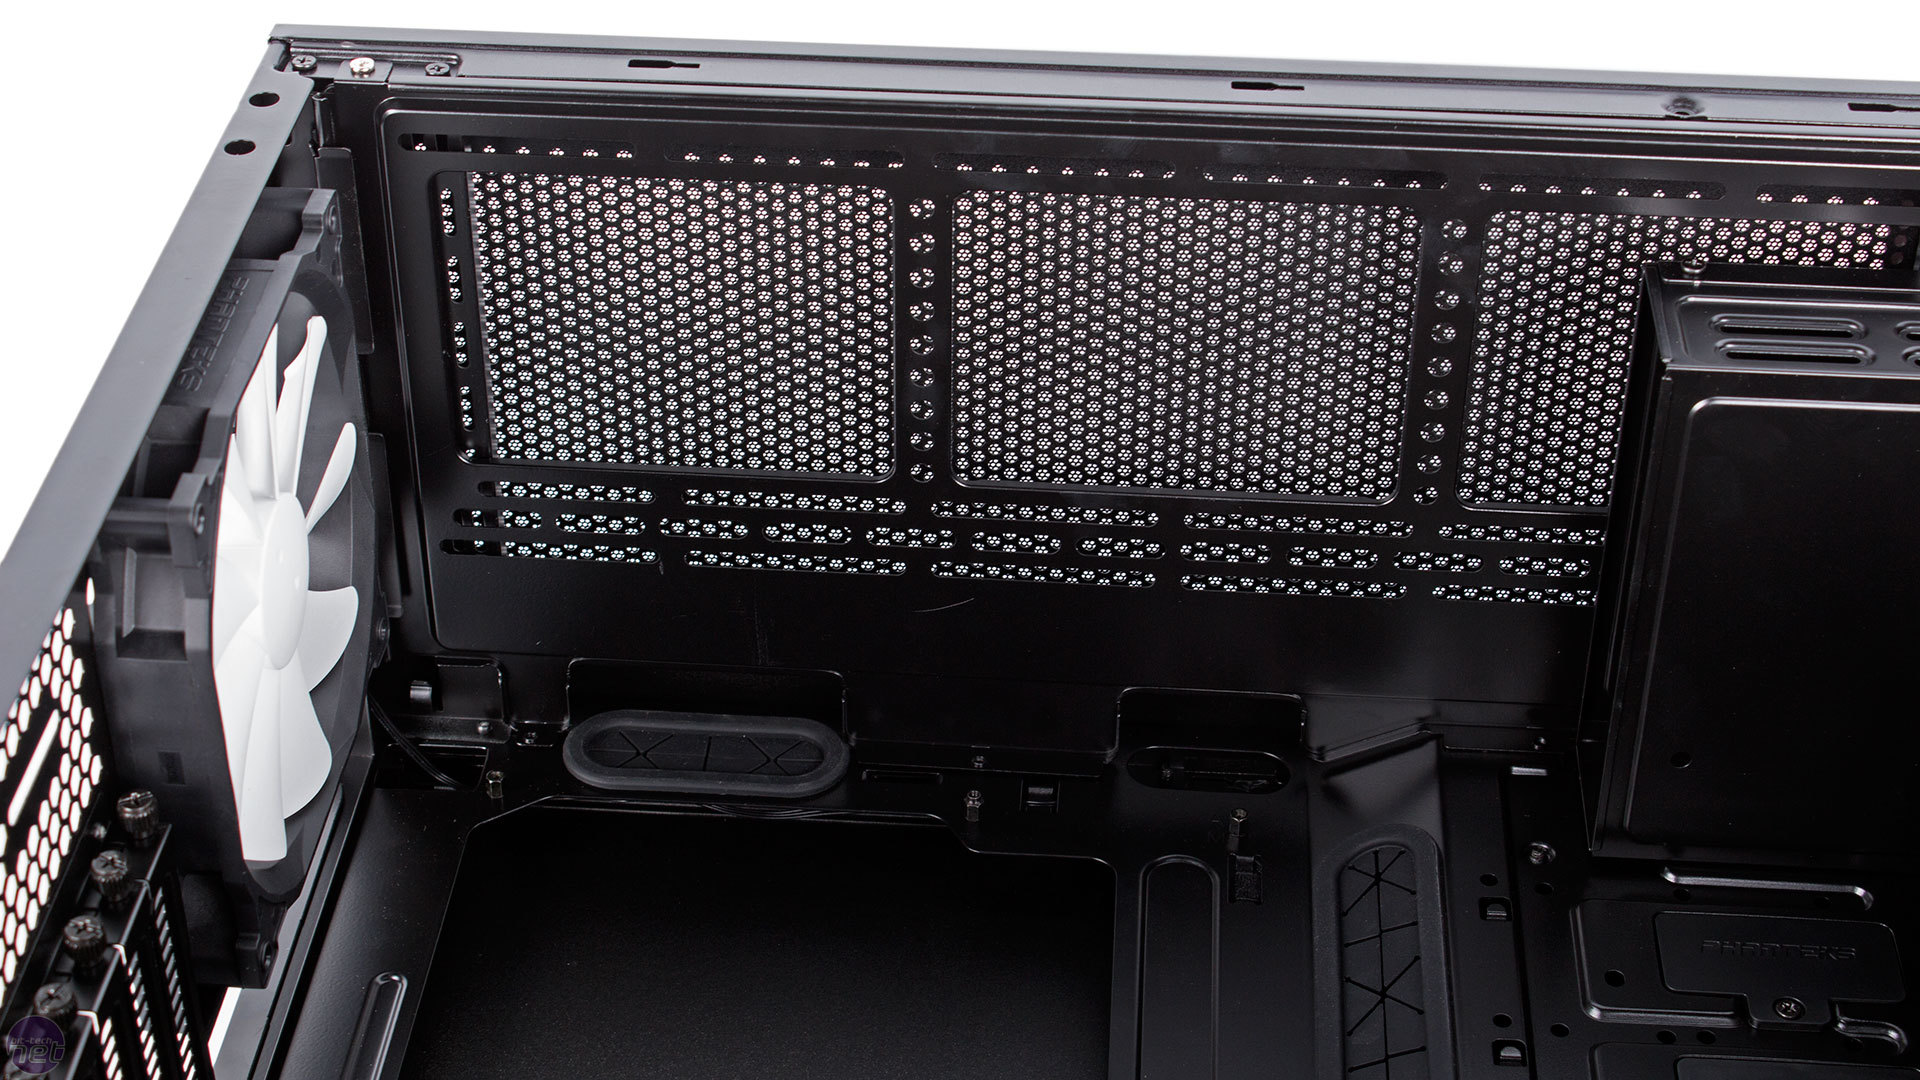
Up in the main section, we find a full set of pre-installed motherboard standoffs and a sizeable cutout in the motherboard tray for easy CPU cooler installation. You'll also note just how spacious this volume is, with no front drive bays impeding the flow of air through the case (though remember there's only one fan). All you have is the single optical drive bay, which relies on screws rather than tool-free fittings. You'll need to remove this bay if you want to install a third fan in the roof or front panel.
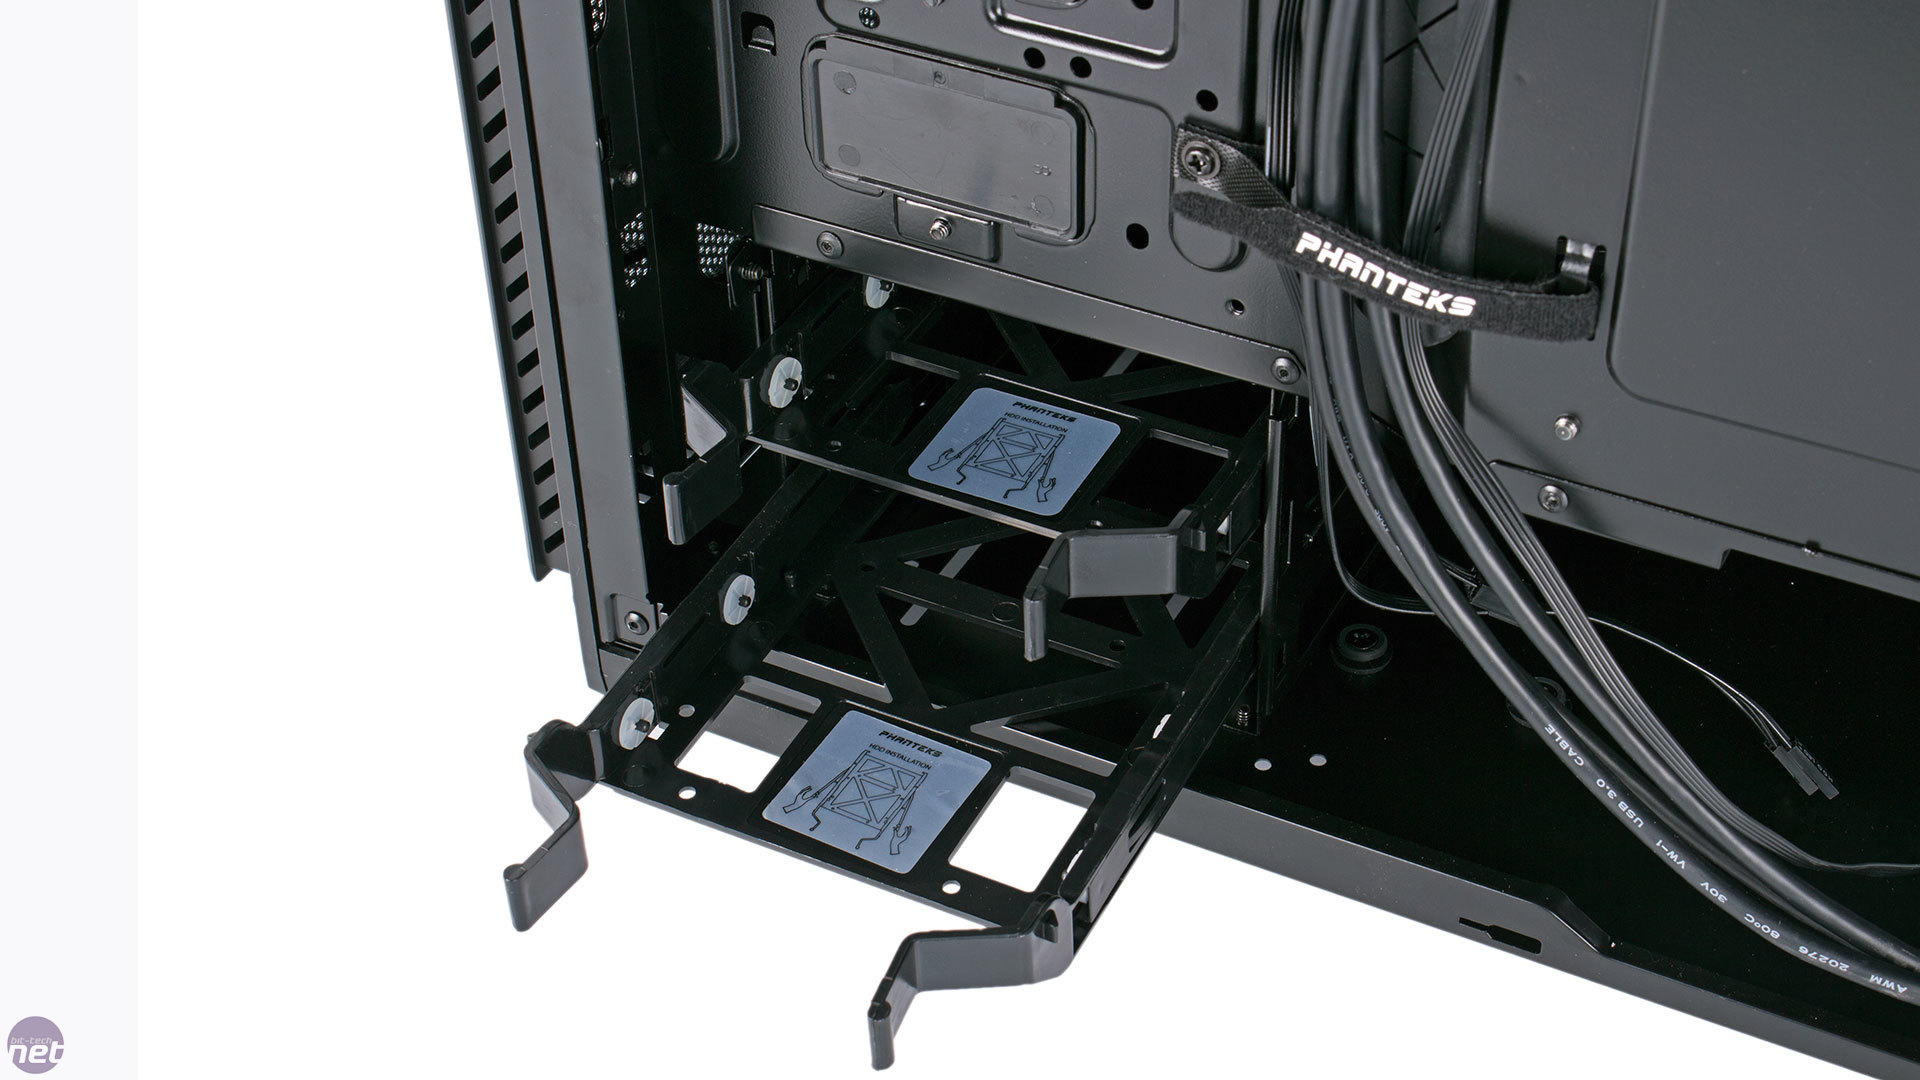
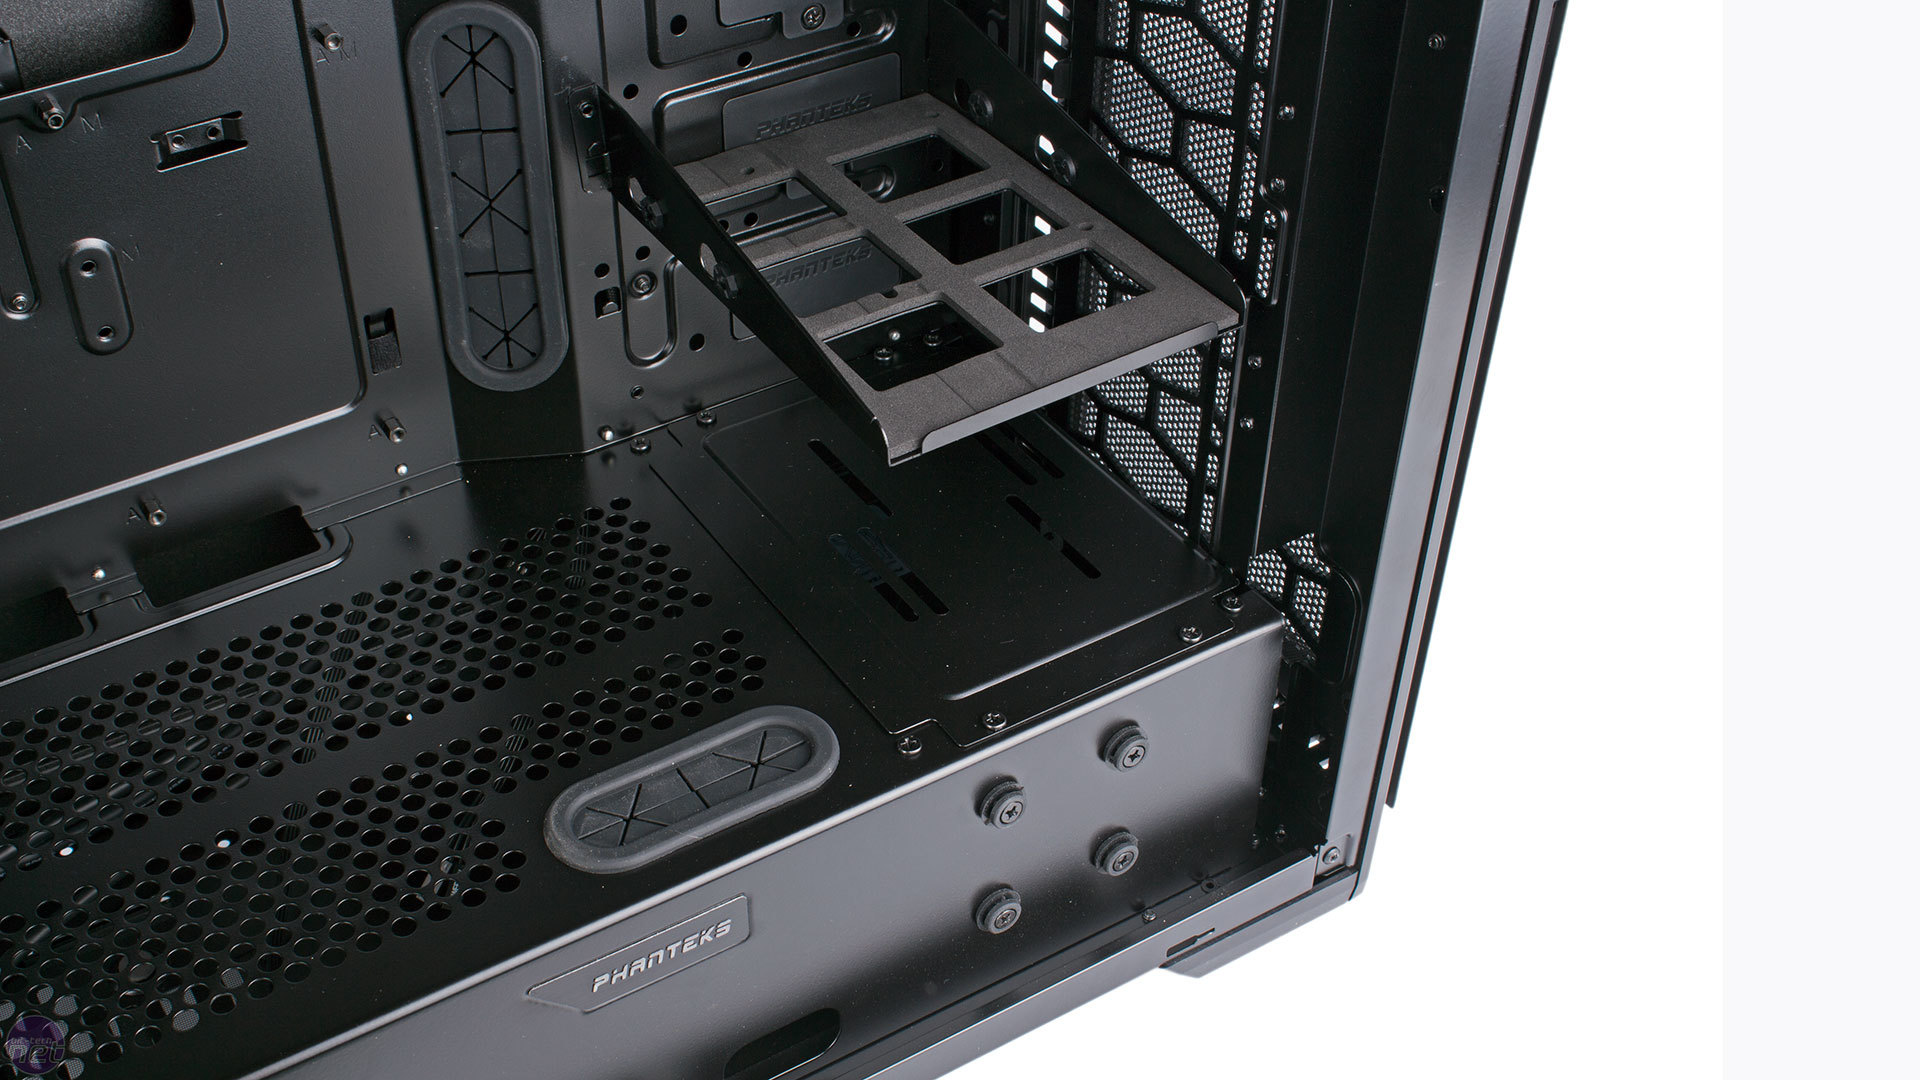
Instead, the Enthoo Pro M's drive bays are located in the lower cavity at the front. Here, there is a single cage with two universal mounting trays – SSDs will need to be screwed in but 3.5in disks can be locked in with plastic arms, with anti-vibration material also included. There is also one of Phanteks' metal Drop-N-Lock brackets for SSD mounting, which is very simple to use – just slide and lock it directly onto the fixed rubber grommets. There are three positions you can put it in (two behind the motherboard tray, one on the side of the PSU cover) and this also means you can buy extra 2.5in or 3.5in brackets for future expansion.
Click to enlarge
The PSU is installed by sliding it in from the right side. It rests on a quartet of rubber pads to stop metal vibrating against metal.
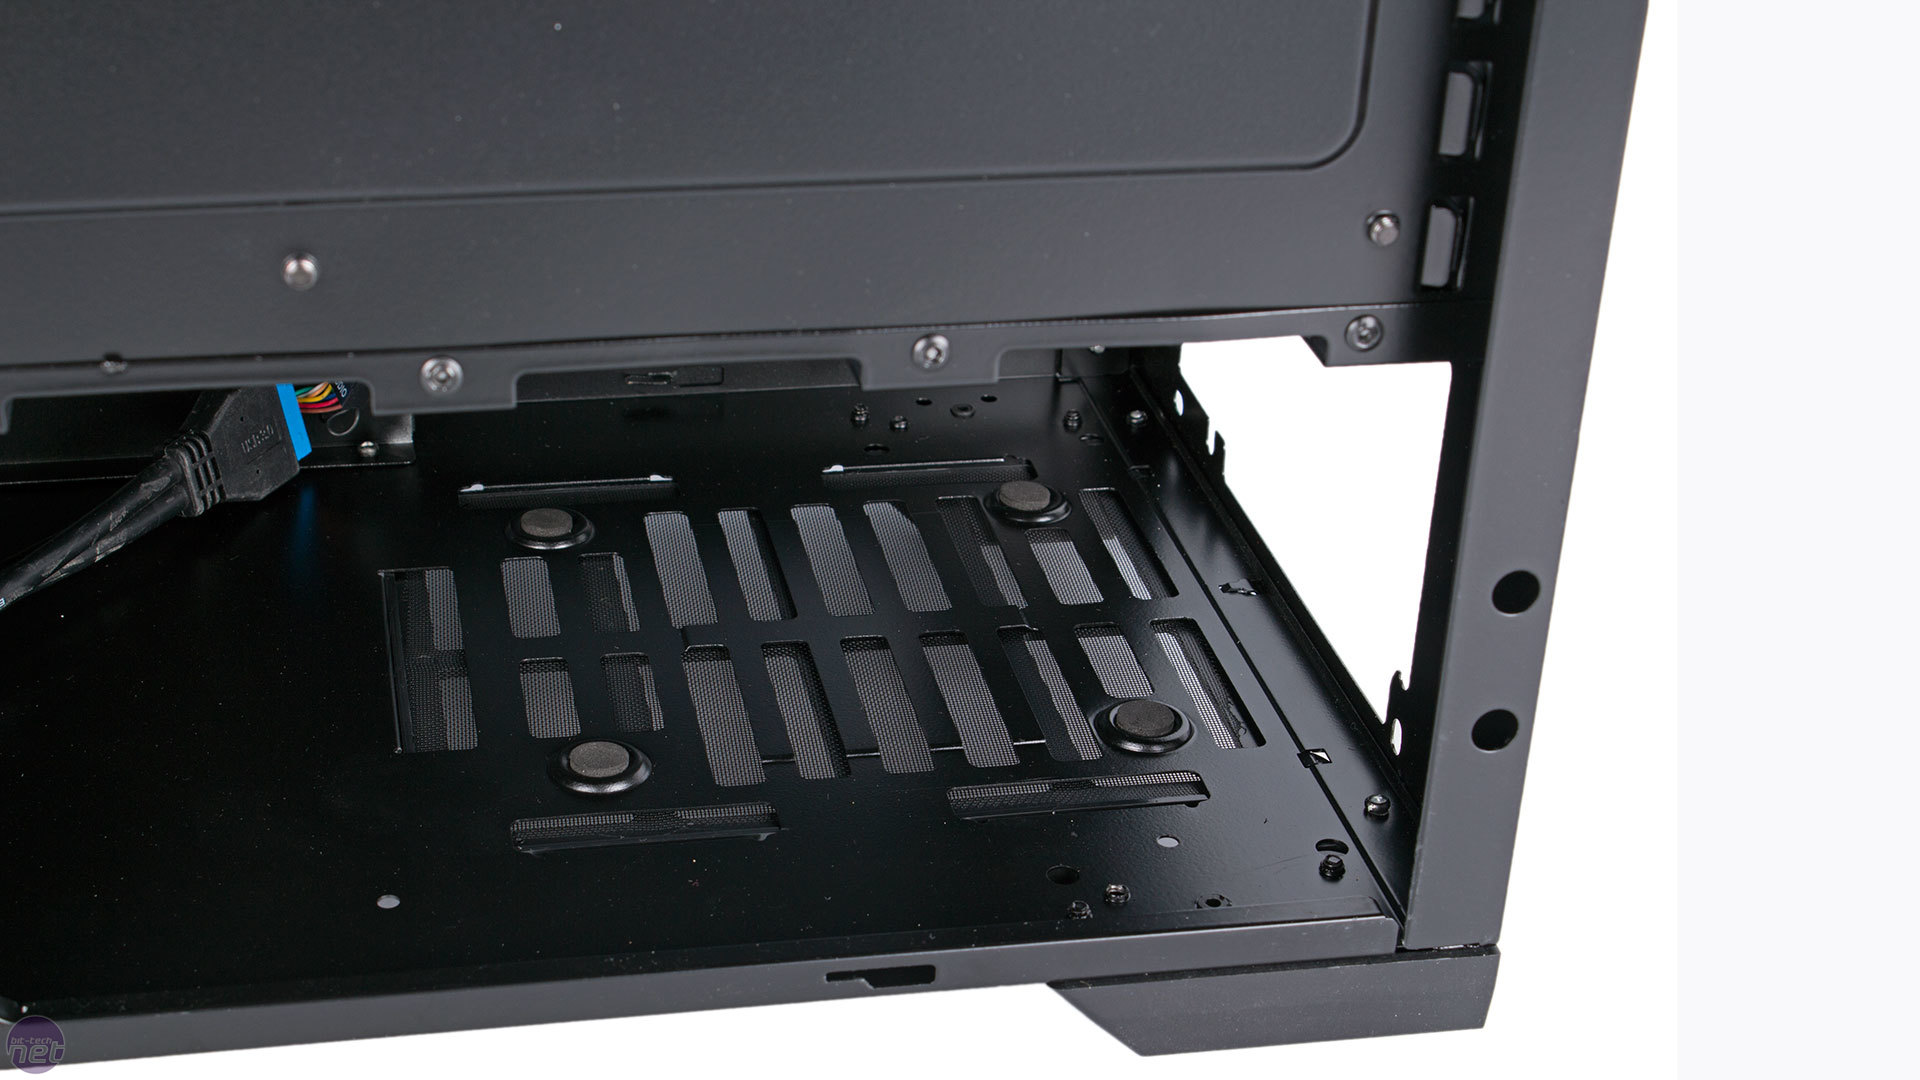
The space beneath the ODD cage in the main area can also be used to install HDDs or SSDs, with five mounting points available. However, you'll need to purchase one of Phanteks' metal drive trays for each one you'd like to use. This helps to keep costs and wasted material down, while giving users an easy upgrade path if they decide they need more storage space. The trays are very sturdy and have plenty of anti-vibration padding. They simply hook onto notches at the front of the extended motherboard tray, and are secured with a pair of screws. Even with all five bays occupied, there would be a lot of space between the drives so airflow shouldn't be too badly affected.
Click to enlarge - You can buy extra 3.5in/2.5in modular brackets for installation beaneath the ODD cage (left)
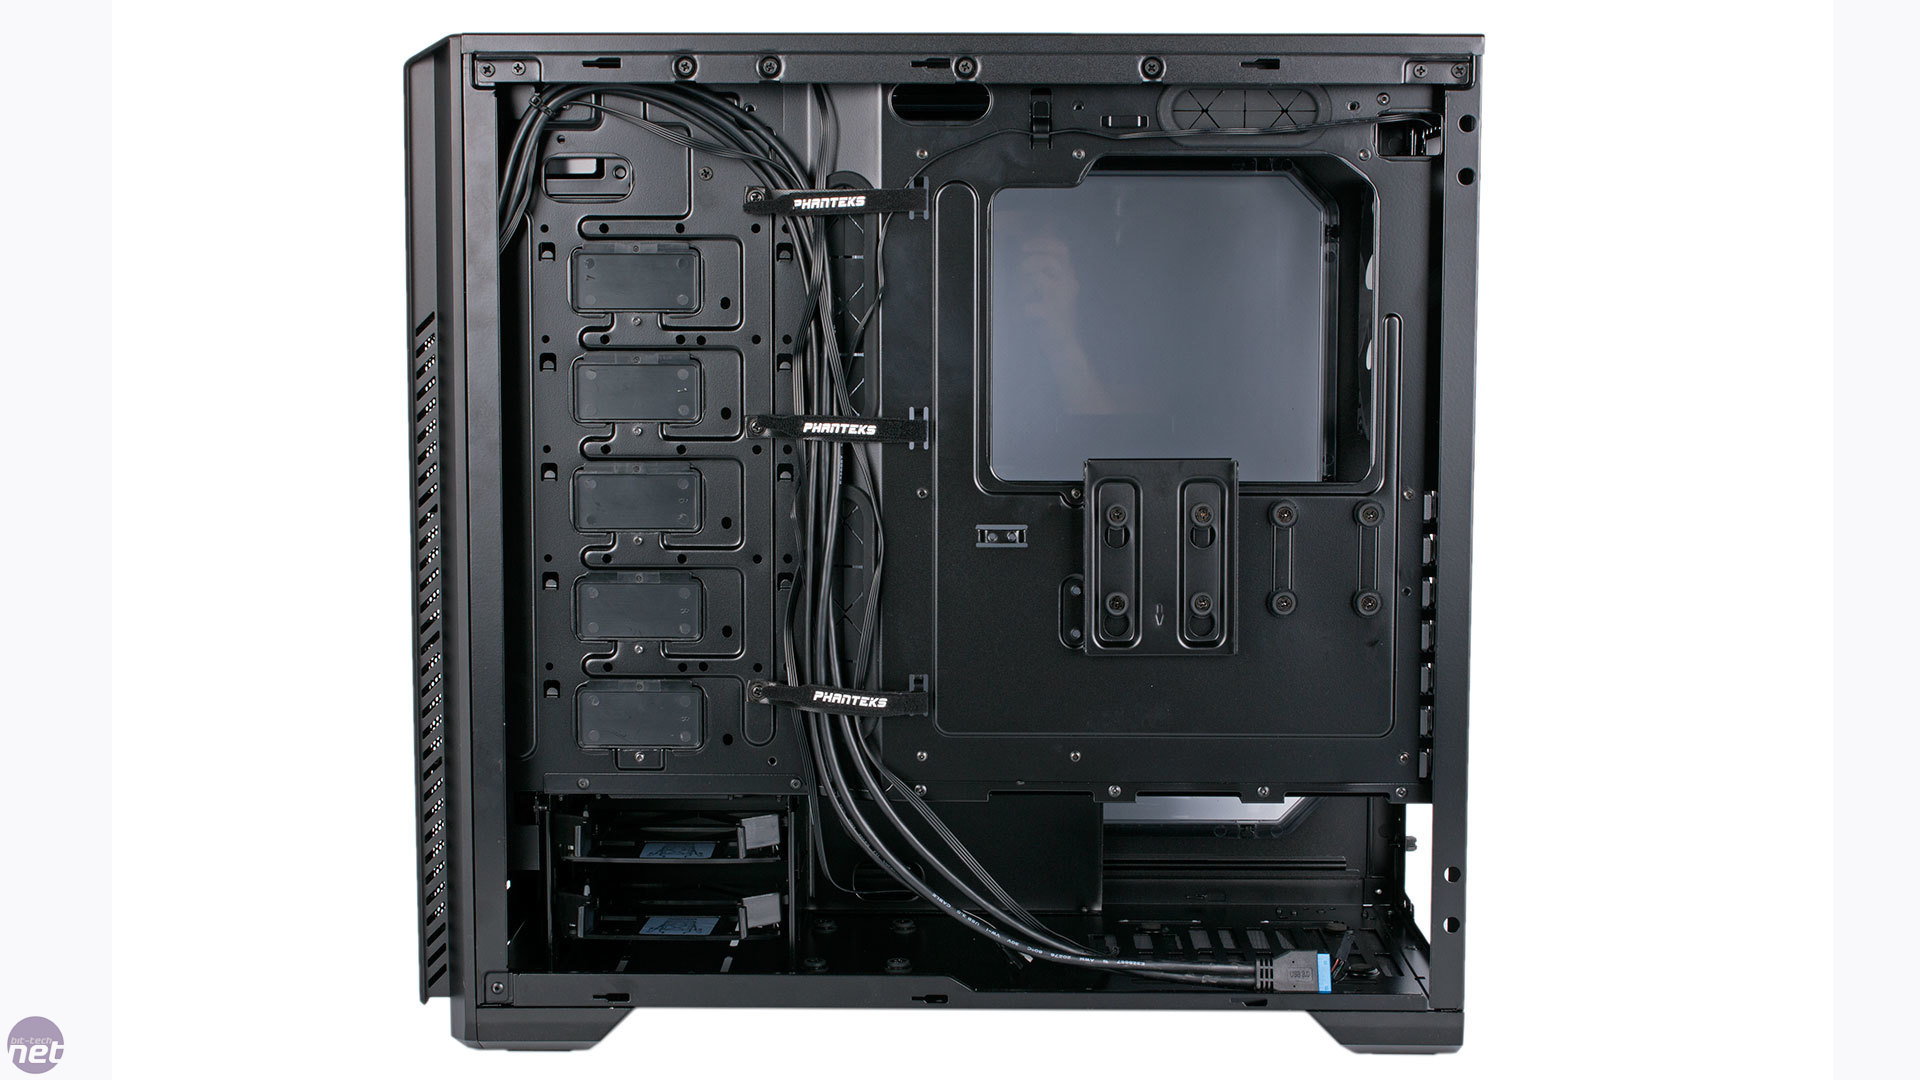
As ever, Phanteks' cable management is very strong. Fixed to the main cabling channel are three Velcro ties, which are super easy to use and make adding or removing a piece of hardware at a later date less daunting and less likely to spoil your hard work cable routing. There are also routing holes above, below and to the side of the motherboard as well as one in cut into the PSU cover. It's great to see the use of rubber grommets at this price point and there's no excuse for a messy system here. One minor niggle is that the 8-pin CPU connector was very tight getting through – the holes above the motherboard could do with being a bit bigger.
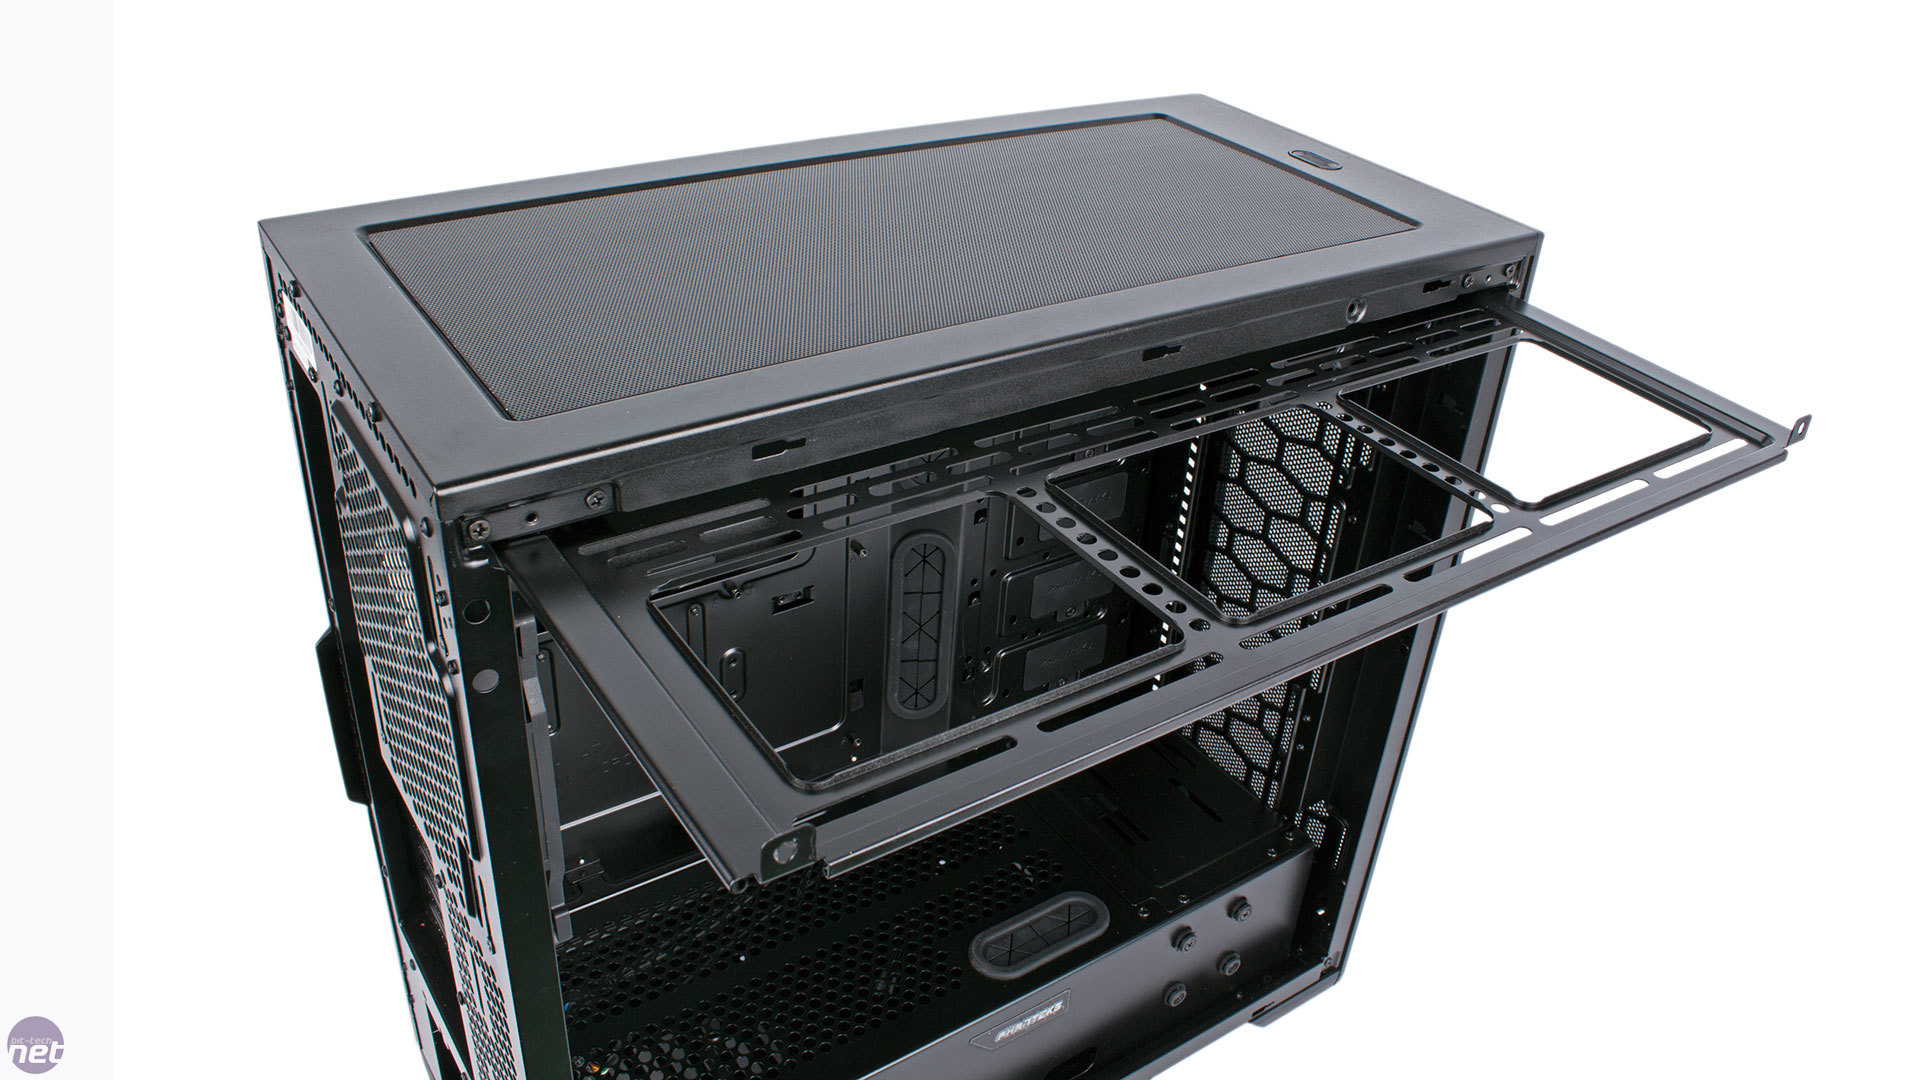
Phanteks sticks to the same top radiator mounting bracket as with the Enthoo EVOLV ATX. One downside is that a bit of space is wasted in the area between it and the roof, but it does make the installation process easier. Five screws need to be removed, after which you can slide the bracket out, affix your radiator and fans to it and resecure it. Radiators up to 280mm or 360mm in size are supported, with the latter also requiring that the ODD cage be removed. The same size radiators are supported in the front, once you remove the lower HDD cage and the mid-plate above it.
Click to enlarge
There's enough room for full thickness radiators in this front section, and practically any thickness radiator in the roof thanks to the offset mounting points. There are also integrated pump mounting points atop the mid-plate and on the floor of the chassis beneath the removable HDD cage. Lastly, you can easily mount a reservoir at the front of the elongated motherboard tray, and there're mounting struts for a smaller one at the back besides the PCI-E brackets. All in all, this is an almost unbelievable level of water-cooling support and flexibility which is great to see in a sub-£60 chassis.


MSI MPG Velox 100R Chassis Review
October 14 2021 | 15:04

Want to comment? Please log in.