
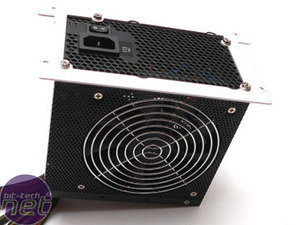
Installing the motherboard using the tray is an obvious advantage. Cooler Master followed a similar line of thinking with the power supply with a removable mounting plate. You can remove the plate from the case, attach it to the power supply, then slide the power supply into the cage and fasten the plate to the case. This is much easier than the precarious dance of holding the power supply inside the case with one hand and trying to get that first screw started (which invariably falls off your screwdriver no matter how magnetic) and you have to start all over. With the cage inside the case, you pretty much have to install it this way anyhow.
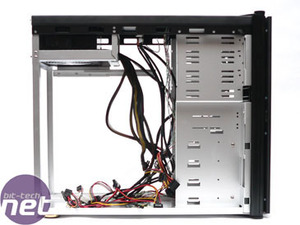
It's shown here with a power supply and the wiring from the top input panel. You have a good few wires to deal with, but all the lengths are more than adequate for reaching everything and even some clean routing options.
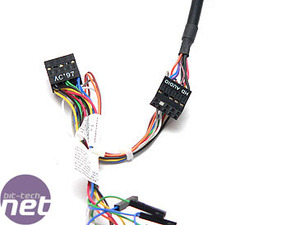
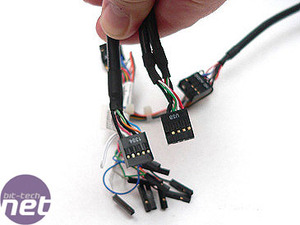
 The top input panel lines are terminated about as well as you could expect. Cooler Master went the extra mile and block terminated common headers in series to make installing easy. Some cases will only include the individual pin connectors which are a stone-cold *@%$# to connect to your motherboard. Cooler Master includes block terminations for HD Audio and AC ’97 as well as the individual pin headers. USB and firewire are also terminated in the common block connectors making installation a breeze.
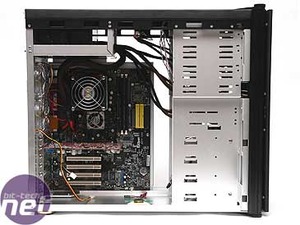
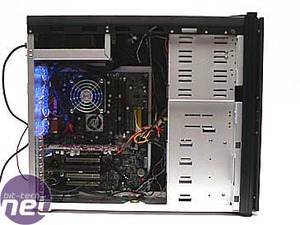
With everything installed you have some pretty good routing options in the Praetorian 730. Because of the significant gap behind the motherboard tray and the side panel combined with the ample length of the cabling, you can create a pretty clean solution. I routed my ATX power cable around the HSF and the rest of my molex lines behind the motherboard tray. In the picture below on the left, you can see the power wires from the rear 80mm fans and why I have a problem with them. They leave you very limited options for routing and even basic connectivity without some sort of adaptor/extender. The image below and on the right shows the entire setup running. I could’ve spent a little more time tidying up, but you should get the idea. Overall, you can create a very clean setup that not only looks good but promotes excellent ventilation.
It's shown here with a power supply and the wiring from the top input panel. You have a good few wires to deal with, but all the lengths are more than adequate for reaching everything and even some clean routing options.
Wire Routing
With everything installed you have some pretty good routing options in the Praetorian 730. Because of the significant gap behind the motherboard tray and the side panel combined with the ample length of the cabling, you can create a pretty clean solution. I routed my ATX power cable around the HSF and the rest of my molex lines behind the motherboard tray. In the picture below on the left, you can see the power wires from the rear 80mm fans and why I have a problem with them. They leave you very limited options for routing and even basic connectivity without some sort of adaptor/extender. The image below and on the right shows the entire setup running. I could’ve spent a little more time tidying up, but you should get the idea. Overall, you can create a very clean setup that not only looks good but promotes excellent ventilation.


MSI MPG Velox 100R Chassis Review
October 14 2021 | 15:04

Want to comment? Please log in.