Interior
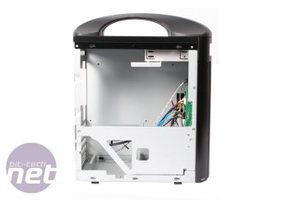
The difference between the Sugo SG03 and the SG04-H are all external, so internally the cases are made of the same stuff. The design of both the interiors are very clever so it allows the case to boast the same TARDIS-like internal cavity. In total you can install two hard disks, one external 3.5" device, one external 5.25" device, an ATX PSU and two double-slot, 10.5in-long graphics cards. You will however be limited to using a low profile CPU cooler with the above kit installed.As mentioned, the internals of the SG04-H are identical to those seen in the SG03 but for those that didn’t read the SG03 review, here is the low down of why they are some of the finest guts you’re likely to encounter in any PC chassis.
Most of the internal components of the Sugo have more than one use. For example, the bottom of the case removes in two parts which provides better access for building. The underside of each of these two parts holds one of the Sugo’s long rubber feet. Each part is also an internal 3.5" bay and they're are made from thick, ridged aluminium that effectively makes them heatsinks for your hard disks, in addition to providing a solid base.
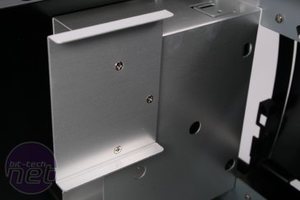
Another good example is the bracket that holds the external 3.5" bay. This doubles up as a shelf to take the weight of your PSU, and also strengthens the frame of the case as it screws on from one side to the other.
The removable fascia on the front is capable of fitting two 120mm fans but like the SG03, the SG04 ships with just one fan attached. This is a shame, as in a £110 case an extra fan wouldn’t have been much to ask. Still, it’s not a difficult or expensive bit of kit to add yourself and we would recommend doing so, even if you’re not planning on building such a high end system in the little blighter.
Building a System in the SG04-H
Building a PC inside the SG04-H and SG03 is a surprisingly easy affair, but only if you install your kit in the correct order. If you don’t then you’ll find yourself removing the PSU to gain access to the optical drive connectors or taking out the GPU again to you can plug in the CPU power connector. It takes patience and a 3D Tetris level building skill, as well as a strong drink, just to finish the first build. After that, it certainly gets easier.We broke down the build process when we reviewed the SG03, and the walk through of how we found it easiest to piece together can be found here.
The main issue with building inside a case that’s roughly the same dimensions as a shoebox is cable management. The SG04-H is entirely bereft of cable management features, with not so much as a crafty outcut in sight. It's not unsurprisingly given the size though - but it means your hardware choice to pair with the case is very crucial.
Unless you want to decimate the Sugo's already limited airflow you’ll need to be pretty tight with your cables if you want to get the most out of it. We’d absolutely recommend opting for a modular PSU with as few attached cables as possible. The BFG 550W model that we used has only the 24-pin motherboard power connector and 4pin CPU power connector pre-attached which makes it an ideal candidate for the job.
Silverstone has clearly taken into account this fact and has made all of the front panel connector cables removable apart from the all important power switch, so using these sockets is entirely optional.

MSI MPG Velox 100R Chassis Review
October 14 2021 | 15:04


Want to comment? Please log in.