
Thermaltake Chaser A31 - Interior
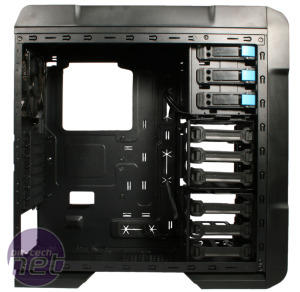
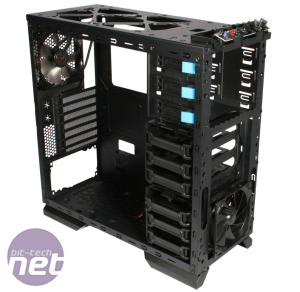
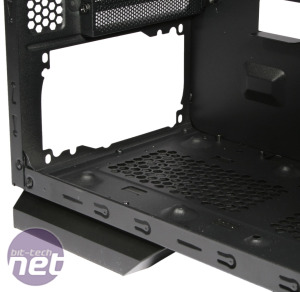
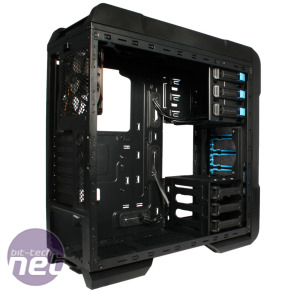
Thumbscrews make getting into the Chaser A31 a breeze, and the roof and front panels both come completely off with firm tugs too. This gives you quick access to any part of the case, which may seem like a simple point, but it's one too often overlooked by manufacturers and super handy if you perform a lot of upgrades and maintenance.The internal design is pretty bog standard for an ATX case, but that's no bad thing. Motherboard mounts come pre-fitted, and a large CPU cutout means installing bulky coolers shouldn't be too much of a hassle. We were a little disappointed not to find any rubber in the PSU area, as this is fast becoming the norm even in cheap cases, but it's hardly a dealbreaker and our PSU still fitted in comfortably.
You'll need to remove the front panel to take off the optical drive bay covers, and Thermaltake provides a conversion bay and cover to make one of these into a 3.5-inch drive bay. Drives are held in place by a single plastic clip on one side. These are simple to use, locking the drive into place as you slide it in, but the fit they provide is weak and flimsy, so we'd recommend just taking the clips off and using the regular screw holes instead.
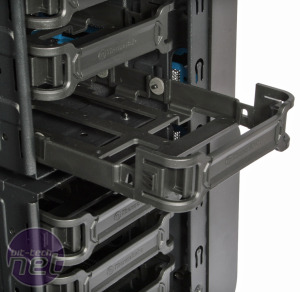
As for the internal drive bays, six are provided in two cages of three each, the top one of which can be removed along rails, allowing for increased airflow and longer graphics cards. Part of the fitting for this was broken in our sample, but as there was no sign of the snapped plastic in the case box we can only assume this happened prior to it being shipped to us, and it's thus not a sign that the case will fall apart in transit.
Each individual internal drive bay can hold both 3.5-inch and 2.5-inch drives, the latter requiring screws whereas the former does not. The bays simply slide in and out of the cages with a small squeeze, and clip into place rather securely. 3.5-inch drives are held in place with pins, and though we're normally dubious of this solution it actually works very well in this case.
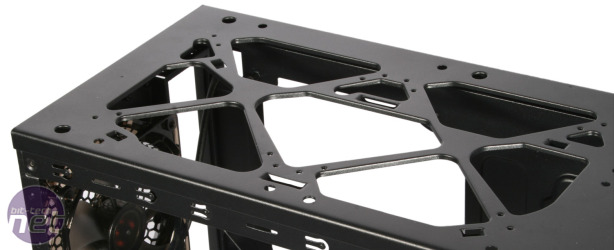
Any roof fans you choose to install can fit between the roof panel and the top of the chassis itself, but Thermaltake also provides offset mounting holes for 240mm radiators beneath this. These are indented so that the tops of any screws holding the radiator in place won't interfere with any fans in the roof section. As the mounting holes are offset, we had no issue installing a half height radiator here. However, with our motherboard and low profile RAM at least, we could have installed a full height radiator with fans beneath it without being impeded. Such a setup would block much of the rear 120mm fan and prevent the use of large CPU coolers, however, but it's still impressive to see support for it in a relatively small case.
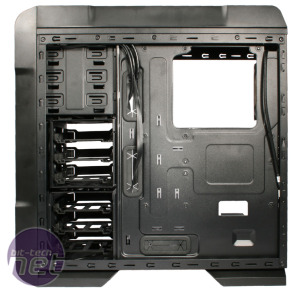
The extruded side panel gives you a healthy amount of room to play with when it comes to cable management. Thermaltake only provides two cable ties, which is a little stingy, but they are reusable and we found it easier to tuck most of our cabling into unused drive bays anyway. Three holes around the motherboard are covered with very secure rubber grommets, but the holes themselves are on the small side and quickly become crowded with power cables. The 8-pin power connector has its own hole too, but one issue we did encounter is that the HD Audio cable from the front panel was rather short and required a bit of a stretch to reach its pins.

MSI MPG Velox 100R Chassis Review
October 14 2021 | 15:04



Want to comment? Please log in.