
Xigmatek Midgard II - Interior
With a pair of thumbscrews on each panel (as well as on all the expansion slots), gaining access to the Midgard II takes mere seconds. Sliding them off reveals that the left panel with its meshing is a little wobblier than the plain right one which is nice and sturdy, but both panels feel robustly built and fit on nice and flat without issue.As the front I/O panel and hot swap bay are both screwed independently to the chassis, the roof and front covers both come completely off the case with a firm tug, which is always handy. You'll then have full access to the roof and front fan mounts, both of which are recessed into the case and easy to screw fans into.
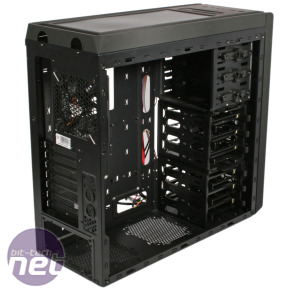
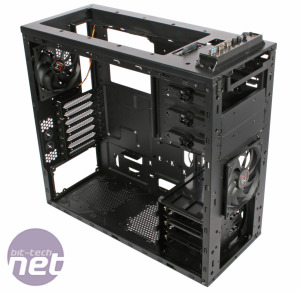
Click to enlarge - The Midgard II with its side panels removed (left) and its roof and front panels stripped (right)
The roof claims support for 240mm and 280mm radiators. However, there's only 50mm of clearance between the mount bay and the top of the installed roof panel, and none beneath it, which won't be enough even for a standard slimline radiator (at least 30mm) and fans (25mm). You're therefore essentially limited to all-in-one coolers like the Corsair H100 (with one set of fans), and even that requires that you use flat head screws so that you may squeeze it in, as the default screws have rounded tops which make the height of it slightly too big.
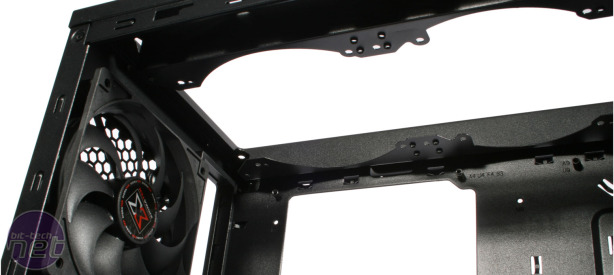
Click to enlarge - With no space beneath the roof mount, radiators and fans must be secured on top of it
The roomy interior means getting your components into the case is met with minimal resistance. Where the PSU sits you'll find some rubber feet and foam lining where the power supply meets the rear of the case so as to keep noise and vibrations as low as possible, which demonstrates excellent attention to detail. A large cutout behind the CPU ensures ease of access for the backplates that accompany larger coolers.
The six internal drive bays are split into cages of three each, the top one of which slides out with ease to make room for longer graphics cards and increase airflow. Each bay locks into place securely without the need for tools and supports both 3.5-inch drives and SSDs.
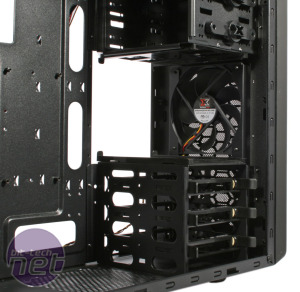
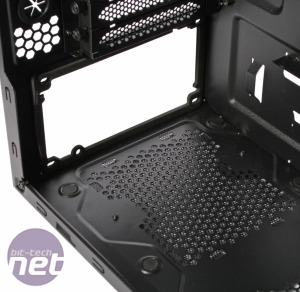
Click to enlarge - The top drive cage is removable (left) and the PSU area has anti-vibration features (right)
Whereas SSDs simply screw into the slide out bays, the bays themselves are designed to bend around larger hard drives and lock them into place with metal pins, and also sport anti-vibration rubber pads. However, it's difficult to do this without dislodging at least one of the pins, although they do push back into place with ease. Meanwhile, optical drives makes use of a pair of plastic clips to lock them in place. This isn't the best solution but it does the job without much fuss.
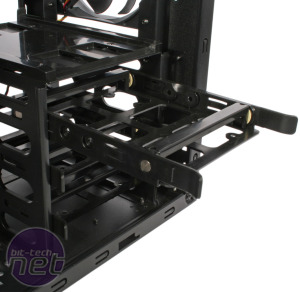
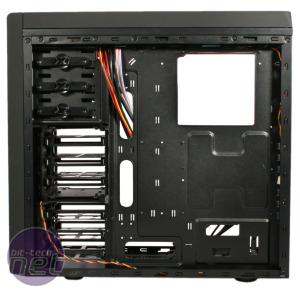
Click to enlarge - The Midgard II has removable drive bays (left) and plenty of room, holes and hooks for tidying away cables (right)
As well as the CPU cutout, smaller holes are provided around the motherboard area for cable management. Though these feature nice rounded edges, there are sadly no rubber grommets covering them. However, they're well placed for most of the cables you'll need to route, and with 20mm of space behind the motherboard tray and plenty of zip ties and hooks, stashing your cables out of sight is pleasingly simple in the Midgard II. The hardest part is getting the EPS cable over the top of the motherboard, as only a very small hole is provided, but it's doable with a bit of a fiddling.

MSI MPG Velox 100R Chassis Review
October 14 2021 | 15:04


Want to comment? Please log in.