Cooler Master Hyper TX2 & 212
November 19, 2007 | 11:20
Companies: #amd #coolermaster #cooler-master #intel

Hyper 212 Installation
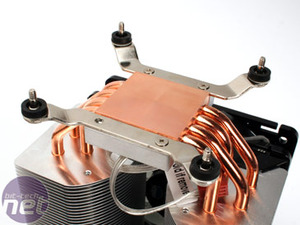
Let's be right up front here: the Cooler Master Hyper 212 takes significantly more effort to install than the cheaper Hyper TX2. If you're installing the heatsink on an LGA775 socket, we first had to screw on the adapters to make it fit.Like the ever capable man that I am, I tipped the contents of the bag onto the desk and promptly lost one of the tiny screws needed to hold the legs to the heatsink. As Tony the Tiger would say, but in a somewhat less sarcastic tone, Grrrrrrrrreat.
After several minutes of impersonating Gollum, scurrying about on my hands and knees looking for my precious screw, I still couldn't find it so I had to make do without. It still worked perfectly fine but, unlike me, it's worth taking some care because even though most of the bits are large enough to keep an eye on, the screws are only about the size of a pen-tip at best.
Murphy can take his law, and quite frankly shove it.
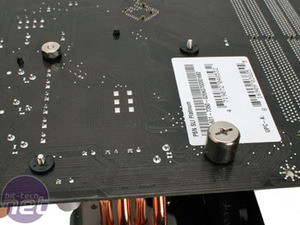
Next you need to remove the motherboard from your case, screw in the bolts then make sure the fan is facing the right way before you flip it over. Make sure you use the plastic grommets before tightening the nuts, otherwise you'll scratch the board and possibly take off some traces.
It's all a bit of a palava, but for a heavy heatsink it's necessary to hold it all on securely: push-pins just don't cut it here. It is certainly less fiddly than the Noctua install, that's for sure, but if you're into swapping out your CPU regularly then look for another thermal solution.
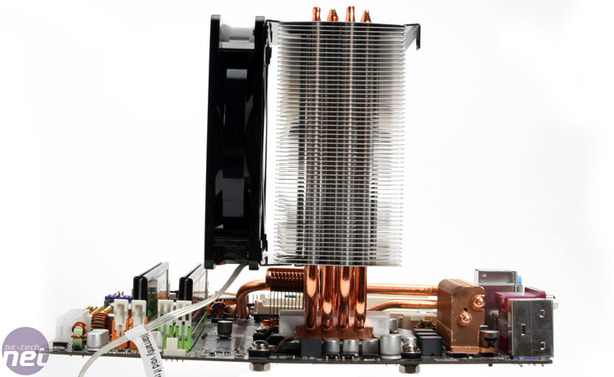
One final note that's worth making about the Hyper 212's install is that the heatsink is tall enough not to have issues with any current motherboard, even the 38mm-high heatpipes on the Asus Striker Extreme won't get in the way. However, it is a lot wider than most heatsinks so if your northbridge heatsink is particularly tall or awkwardly shaped it might conflict.

MSI MPG Velox 100R Chassis Review
October 14 2021 | 15:04


Want to comment? Please log in.