How to Overclock the Intel Core i5-2500K
January 7, 2011 | 12:26

How to Overclock the Gigabyte GA-P67A-UD4
Manufacturer: GigabyteGigabyte is one of a few companies eschewing the new EFI route in favour of an old-style BIOS, but with hacked in 2.2TB hard disk support. Gigabyte's
So, despite the fact we don't get a spangley new interface to play with, we have a very familiar BIOS layout to work with.
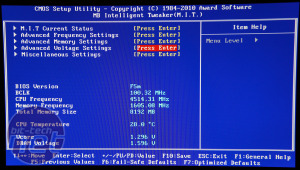
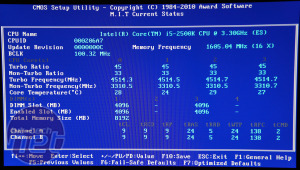
Inside the MB Intelligent Tweaker M.I.T. section you'll be presented with the screen above. In the M.I.T. Current Status sub-menu you can check all the current settings of the entire PC - this helps greatly when you're trying to debug an overclock. All present and correct? Carry on!
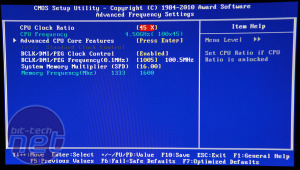
In the Advanced Frequency Settings sub-menu crank the CPU Ratio to 45x so the frequency reading underneath shows 4.50GHz. Then push the BCLK/DMI/PEG Frequency to 1005-1010 in order to nudge it firmly over the 100MHz mark. Then at the bottom on System Memory Multiplier (SPD) set your desired memory frequency: here we've used 16.00 for 1,600MHz.
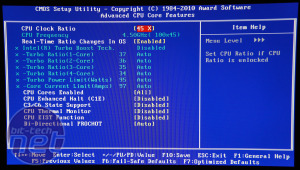
In the Advanced CPU Core Feature sub-menu, enable Real-Time Ratio Changes in OS and disable everything else except for CPU Cores Enabled; we left Bi-Directional PROCHOT on Auto. Then we backed out by using the escape key twice.
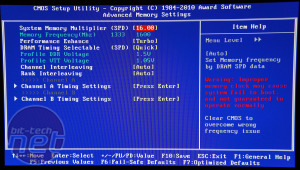
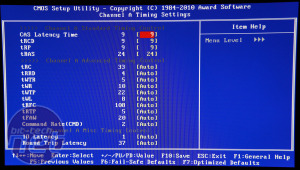
In the Advanced Memory Settings menu, the System Memory Multiplier should already read to the same value you selected above, while you can leave the Performance Enhance on Turbo. Drop it down to Standard if you're having trouble getting stability though. Putting the DRAM Timing Selectable on Quick means you have access to the memory timings, while Expert means you can change each channel timing independently - good if you're running mixed DIMM kits but bad for overclocked stability in general. Exit here, then go into Advanced Voltage Settings.
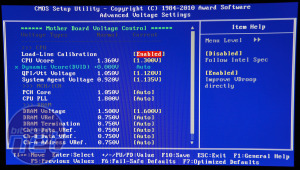
Load-Line Calibration gets enabled, then plug in your voltages: a CPU VCore of 1.3V, a QPI/VTT (otherwise known as the VCCIO) of 1.12V, a System Agent Voltage (aka VCCSA) of 1.135V and a the usual 1.65V of DRAM Voltage. You can type these values in directly, but Gigabyte jumps between 0.01V and 0.02V increments on different settings, so you might need a bit of cursor-key fine-tuning.
We also found different BIOS revisions required different voltages for our CPU (the earlier F2 only needed a 1.28V vcore, while the later F5 required 1.3V for stability at 4.5GHz). This may change again in future updates, so remember to double-check your your overclock if you update your BIOS or receive a board with a different revision. A bit of smallfft crunching in Prime95 and three loops of our Media Benchmarks should do.
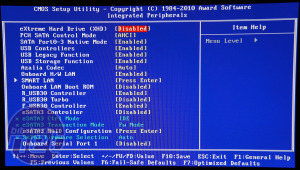
Quit the voltage menu all the way to the main menu where you should next select Integrated Peripherals. Set the PCH SATA Control Mode to ACHI (or RAID if you're making an array) and leave the options alone. We've disabled the the eSATA 3 Controller and Onboard Serial Port 1 because we're not going to use either.
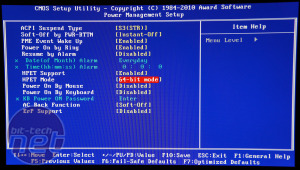
Come back out again to the main menu and select Power Management Setup. Here we put the ACPI Suspend Type into S3 to allow for the hibernation mode, and we changed the HPET Mode to 64-bit to match our OS. If you run a 32-bit OS, leave this at 32-bit.
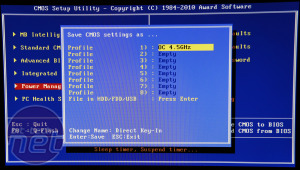
Lastly you might want to check your fan control and current temperatures in the PC Health Status and also remember to save your BIOS settings as a reference using the F12 key at the main menu. Select a profile and type in something you'll remember - bit-tech FTW would be our humble suggestion!

MSI MPG Velox 100R Chassis Review
October 14 2021 | 15:04



Want to comment? Please log in.